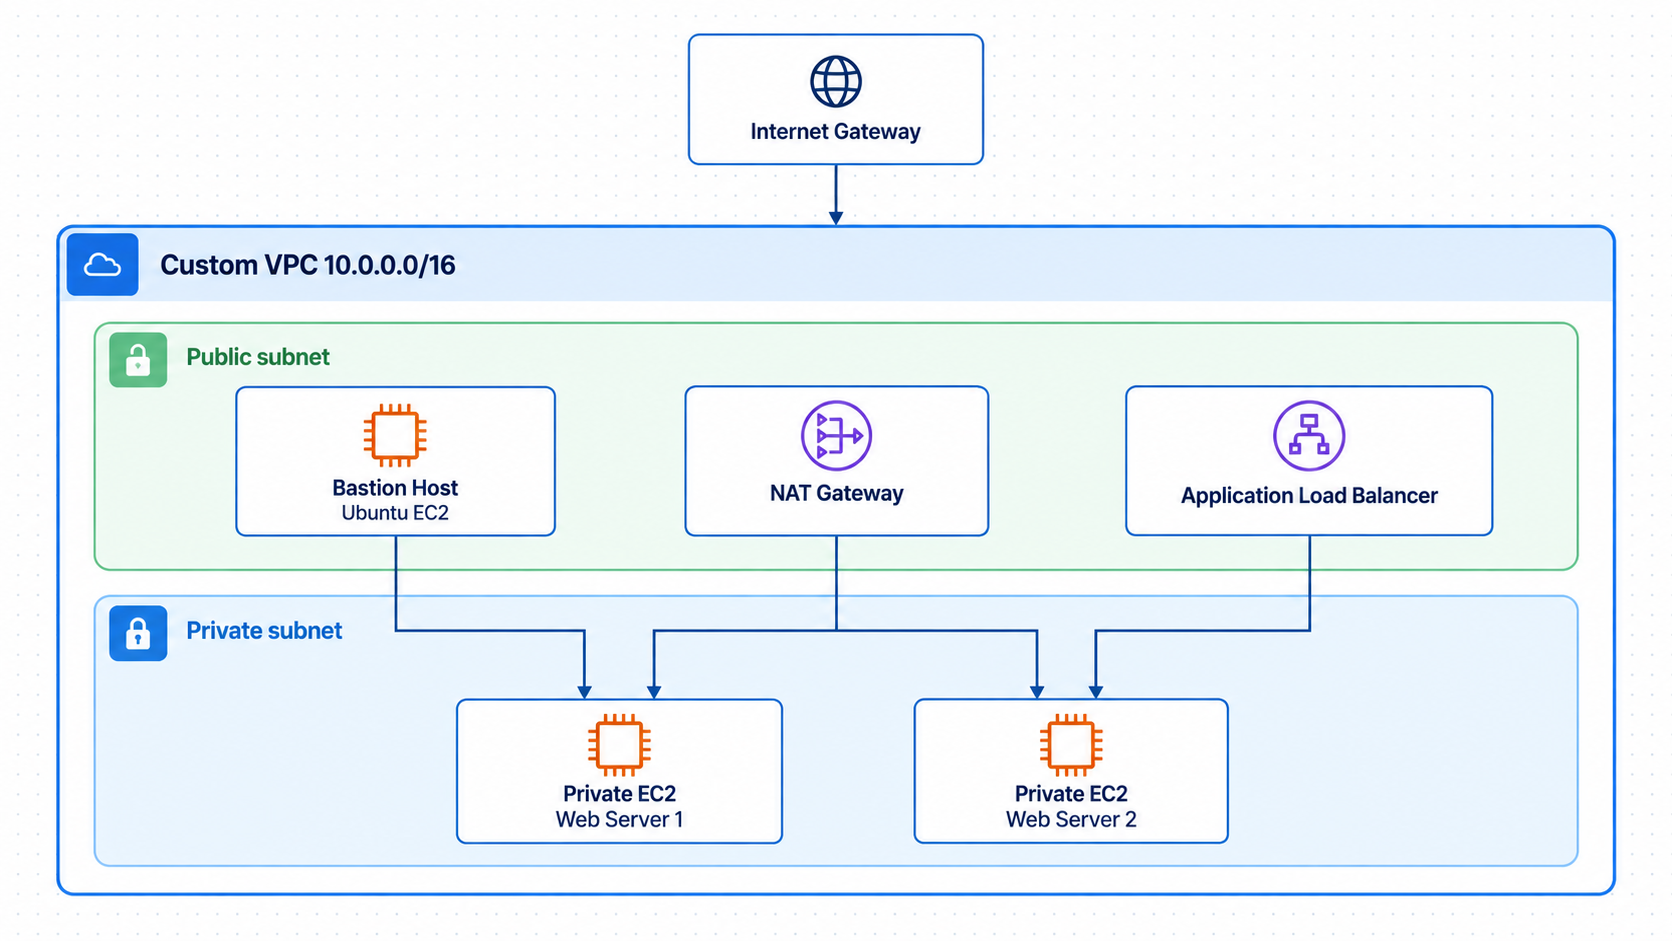
I built a segmented AWS environment that keeps the app servers off the public internet. A bastion host is the only way in for admin work. A NAT Gateway gives outbound access. Ansible configures two Nginx servers. An Application Load Balancer (ALB) serves the app.
The architecture I built.
What I built
The main pieces:
- A custom VPC using
10.0.0.0/16 - Public and private subnets
- An Internet Gateway and NAT Gateway
- Separate public and private route tables
- One Ubuntu bastion host
- Two private Ubuntu EC2 web servers
- Ansible running from the bastion host
- An HTTP target group and an internet-facing ALB
I kept the environment small. An internet-facing ALB needs subnets in at least two Availability Zones, which you can see in the ALB screenshots. One of those subnets, in us-east-1c, isn’t shown being created. For a resilient production design I’d put the ALB in two public subnets and the app servers in private subnets across the same two zones.
1. Creating the VPC and subnets
I started with a custom VPC called Custom-Bastion-VPC using 10.0.0.0/16. DNS resolution stayed on. I left DNS hostnames off.
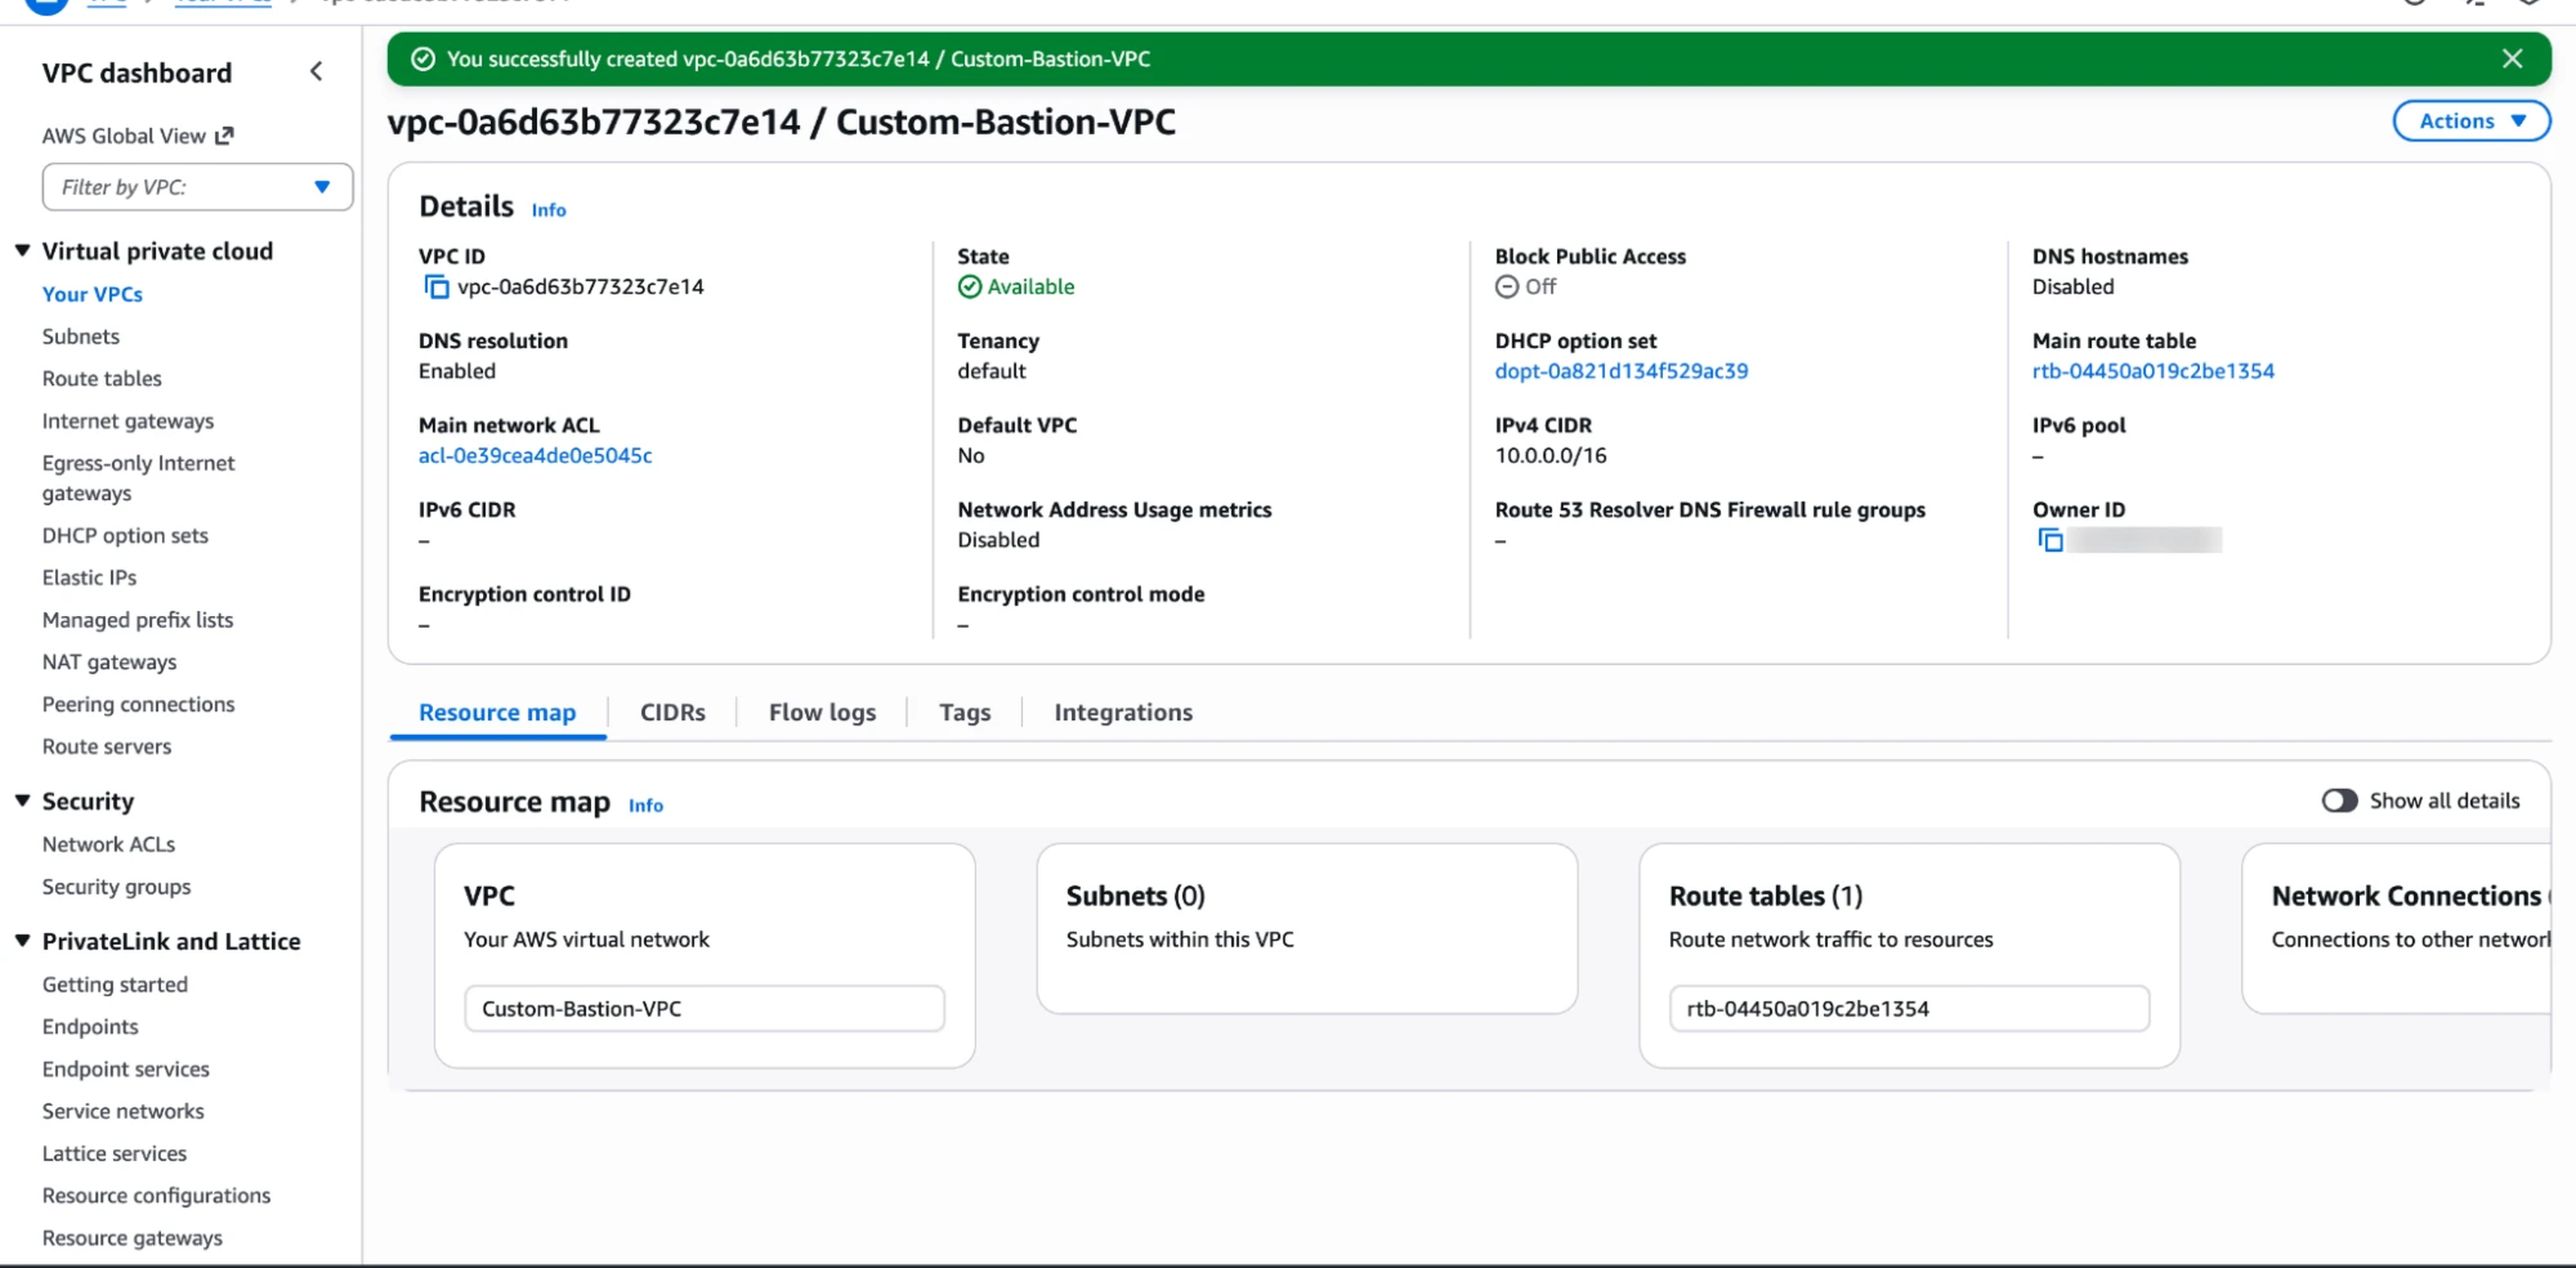
Creating the custom VPC.
Then I made a public subnet with 10.0.1.0/24 and a private one with 10.0.2.0/24.
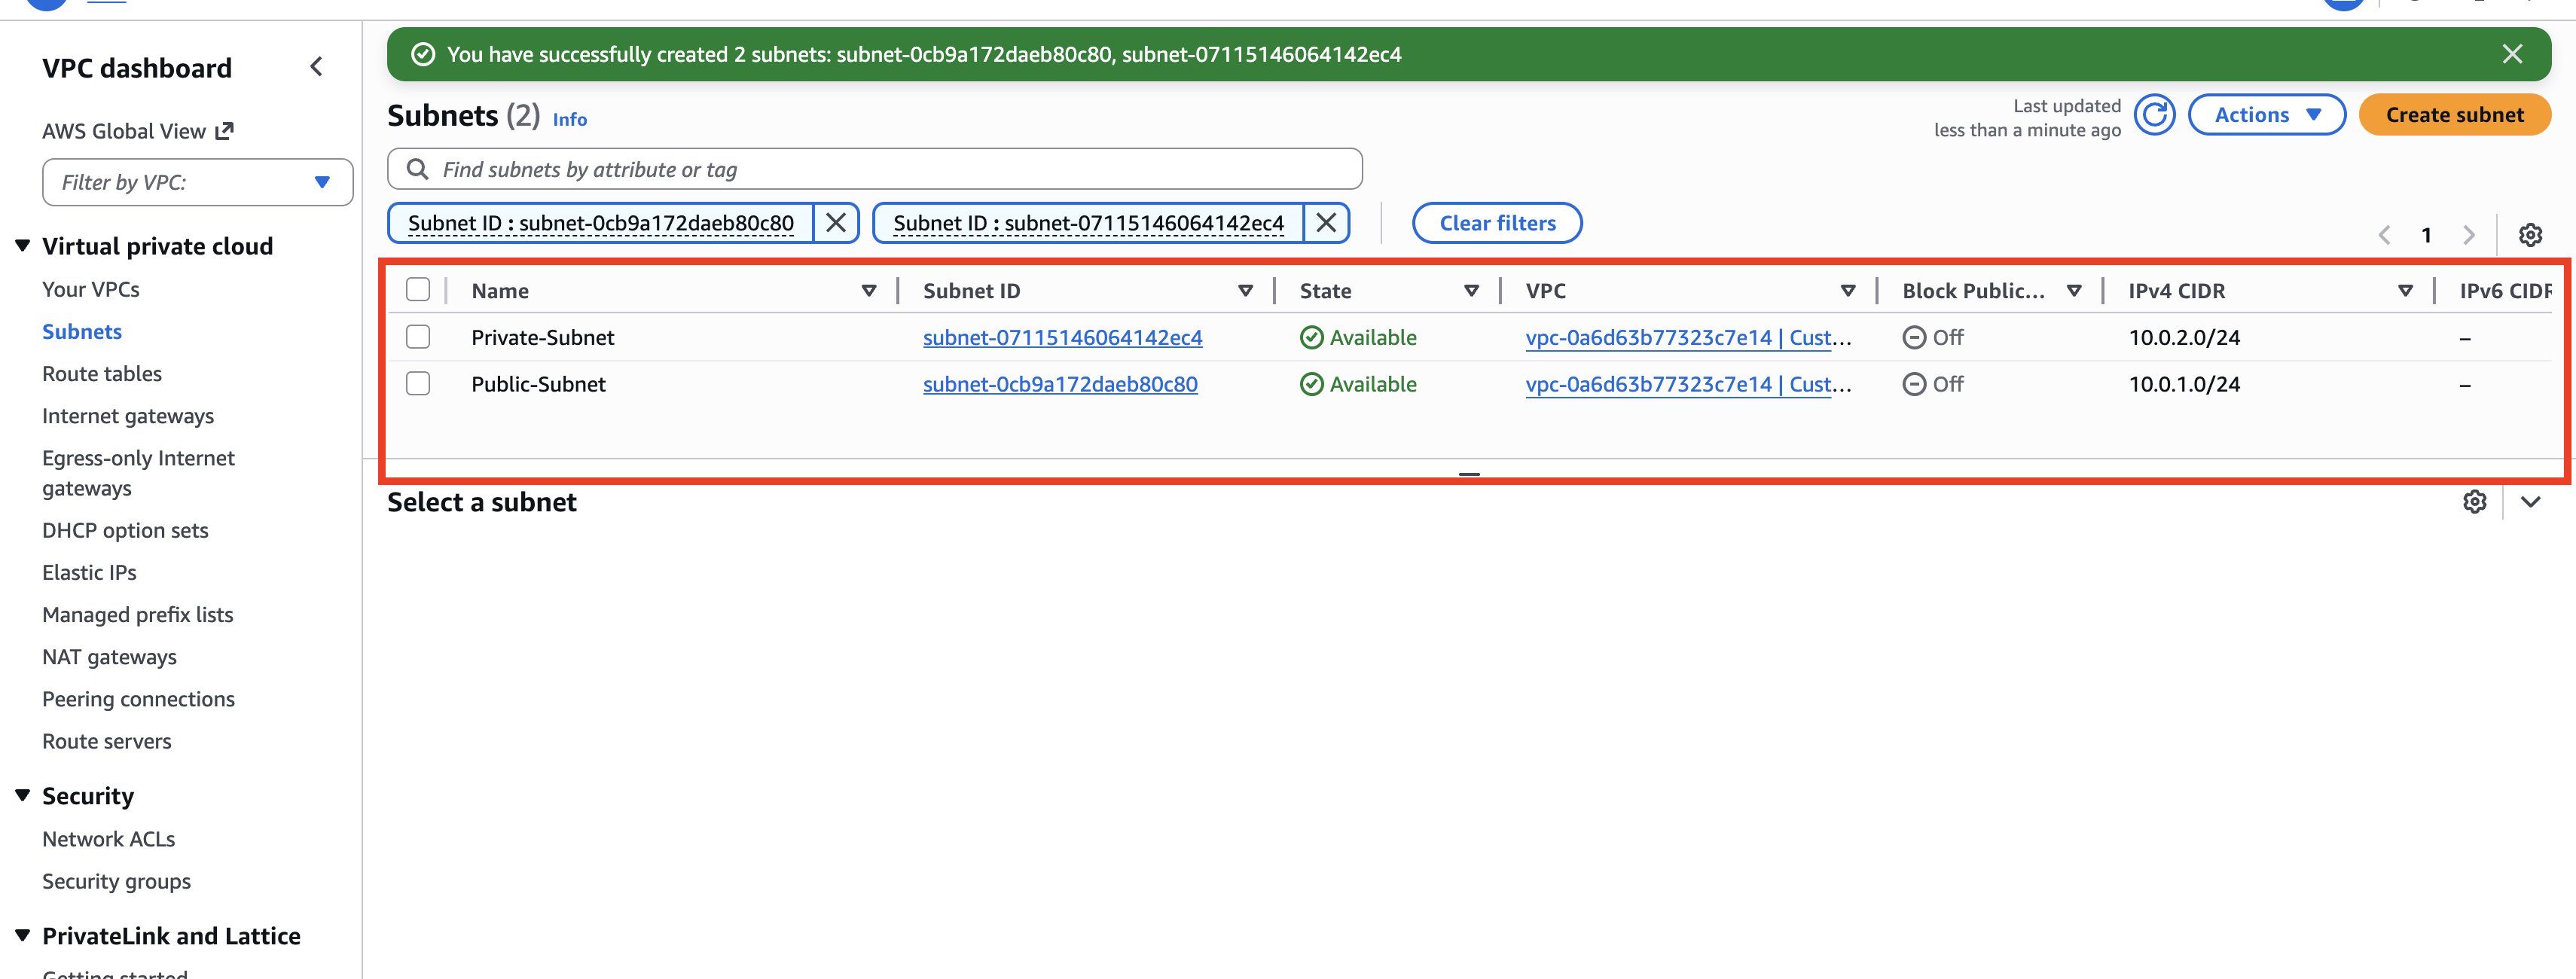
The public and private subnet configuration.
The bastion host lives in the public subnet. A Regional NAT Gateway isn’t tied to one subnet. The web servers stay in the private subnet with no public IPs.
2. Adding internet and outbound access
I created an Internet Gateway and attached it to the VPC. Any subnet whose route table points to it gets an internet path.
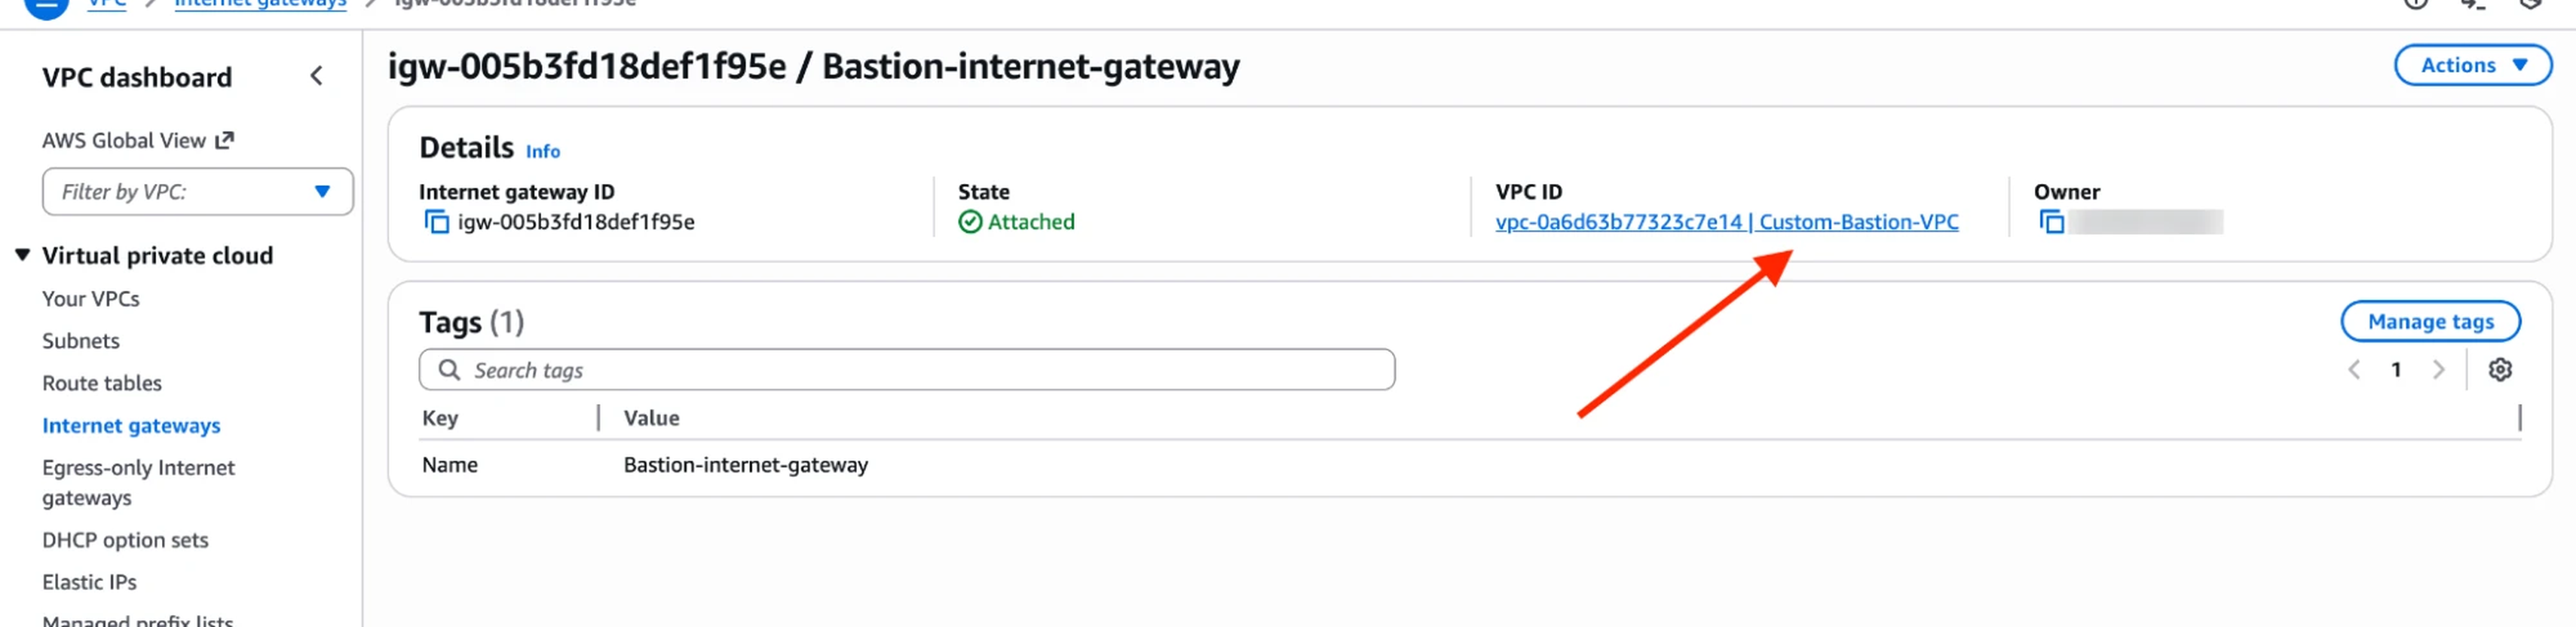
The Internet Gateway attached to my VPC.
The private servers still needed outbound access for OS updates and packages. I allocated an Elastic IP and created a Regional NAT Gateway that uses it.
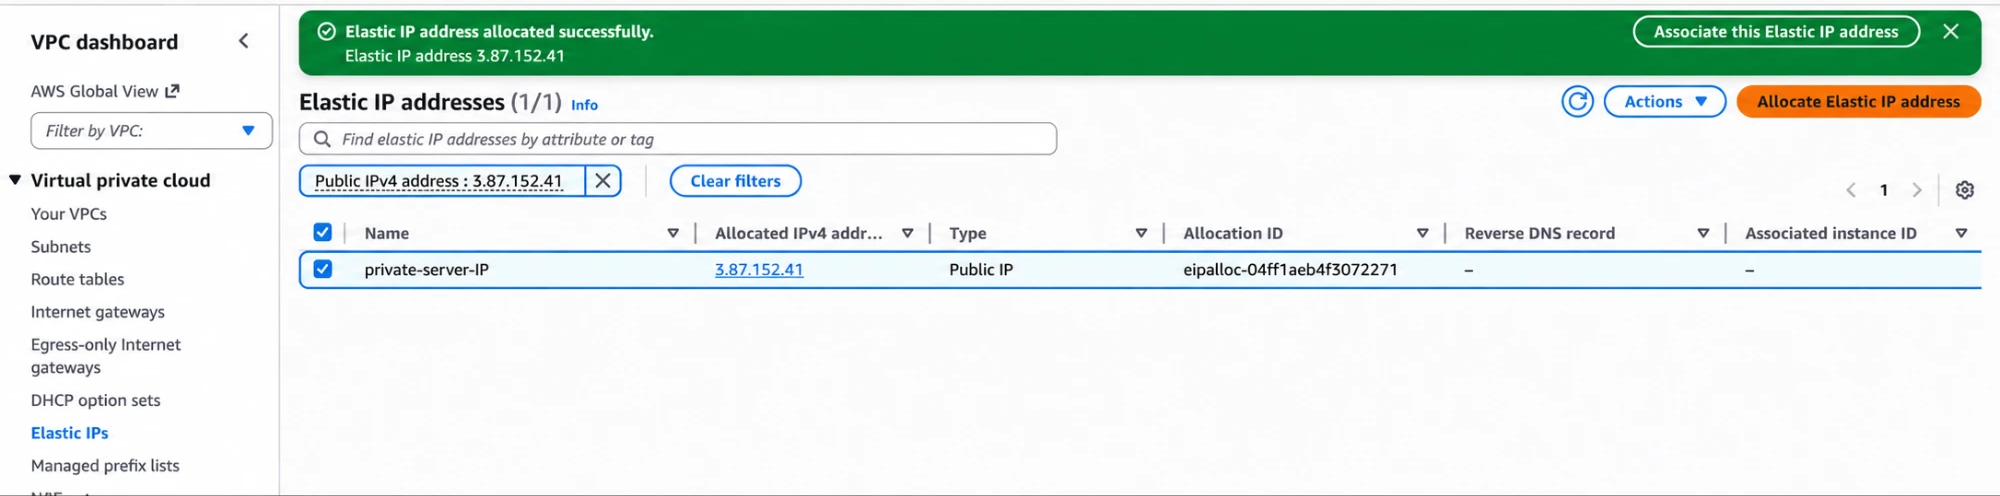
Allocating an Elastic IP for the NAT Gateway.
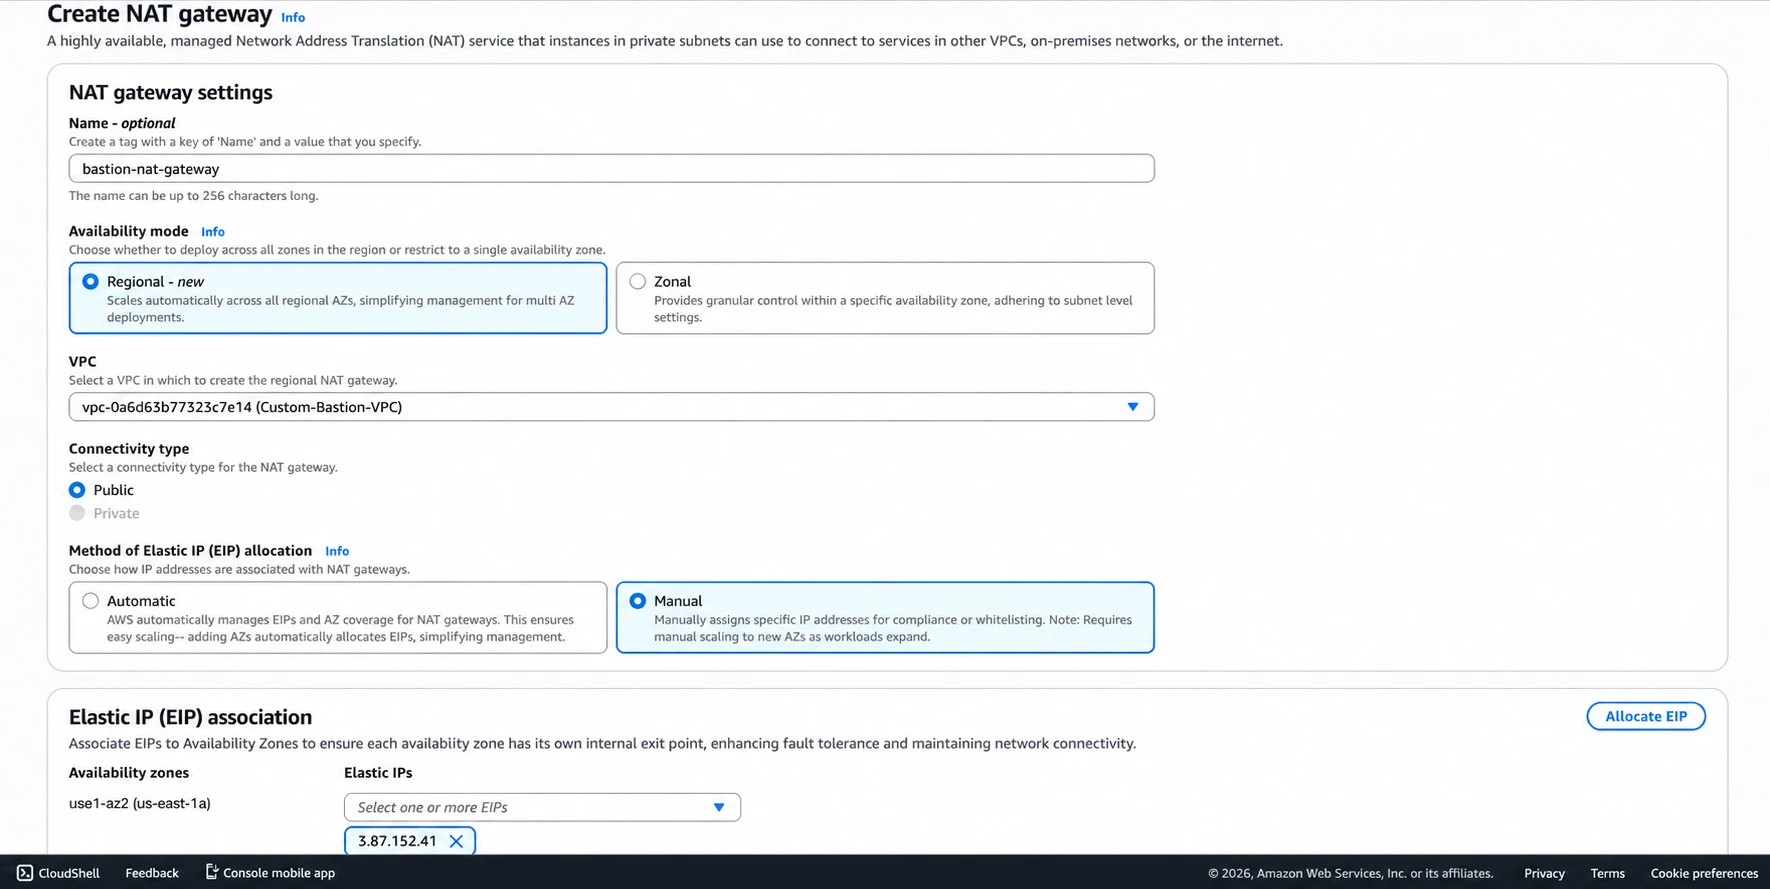
Creating the Regional NAT Gateway.
I waited for it to show Available before using it in a route table.
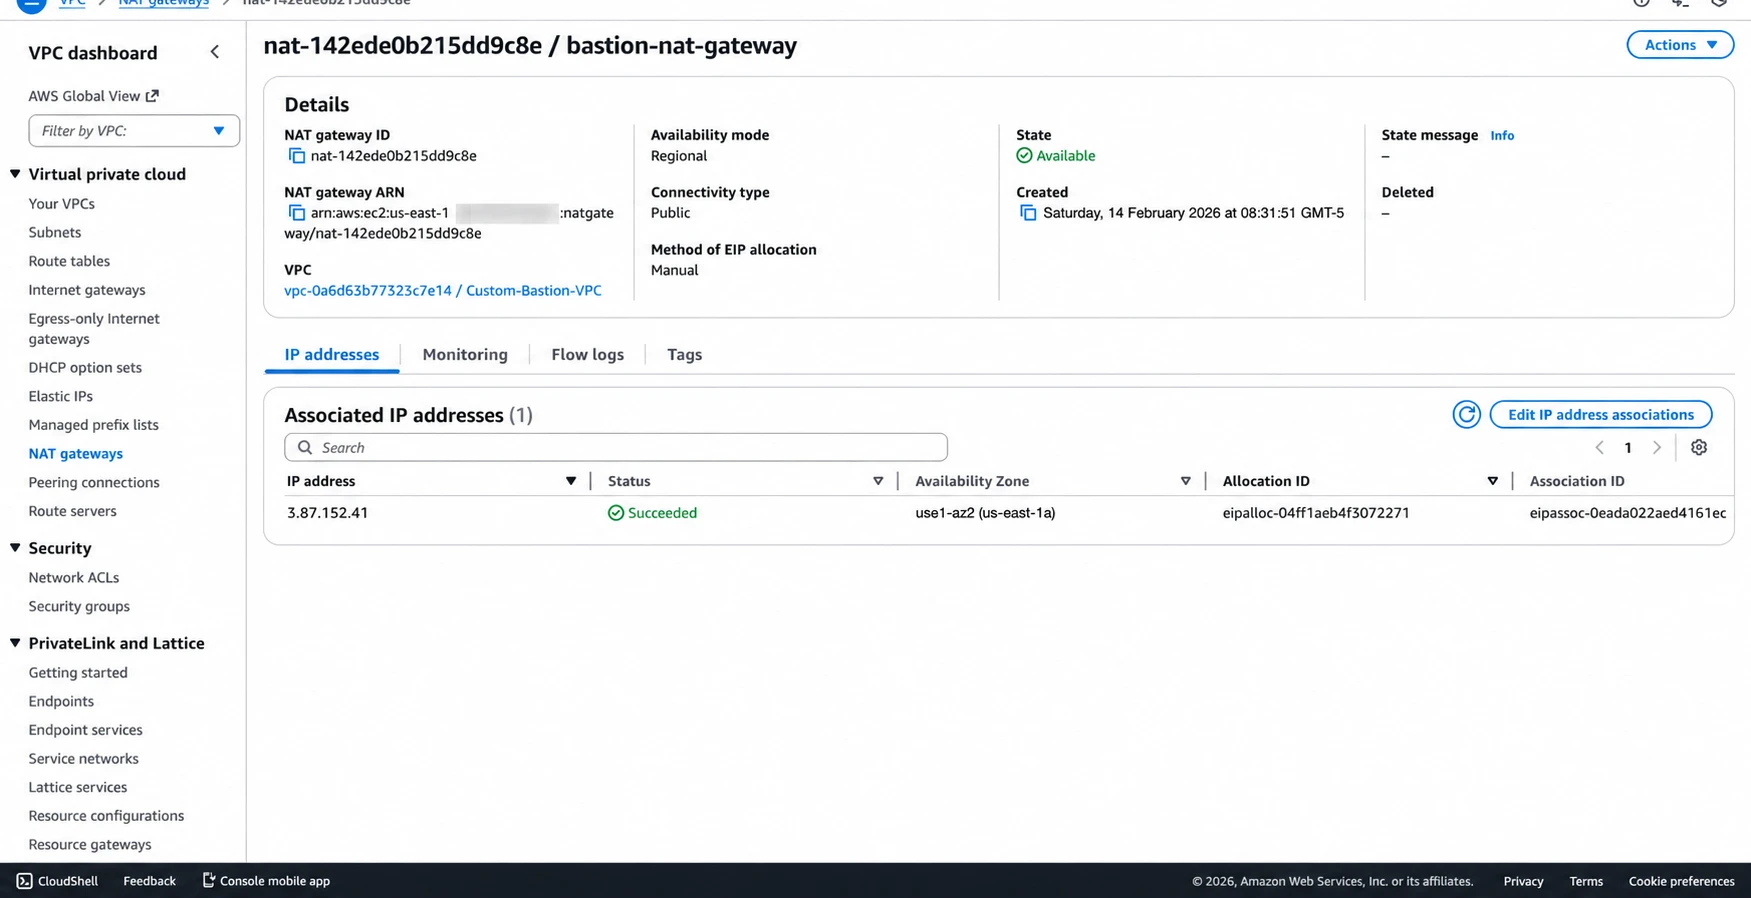
The NAT Gateway is available.
Now the private instances can reach out, but nothing on the internet can reach in:
Private EC2 -> NAT Gateway -> Internet Gateway -> Internet
3. Setting up the route tables
For the public subnet I added a default route to the Internet Gateway:
0.0.0.0/0 -> Internet Gateway
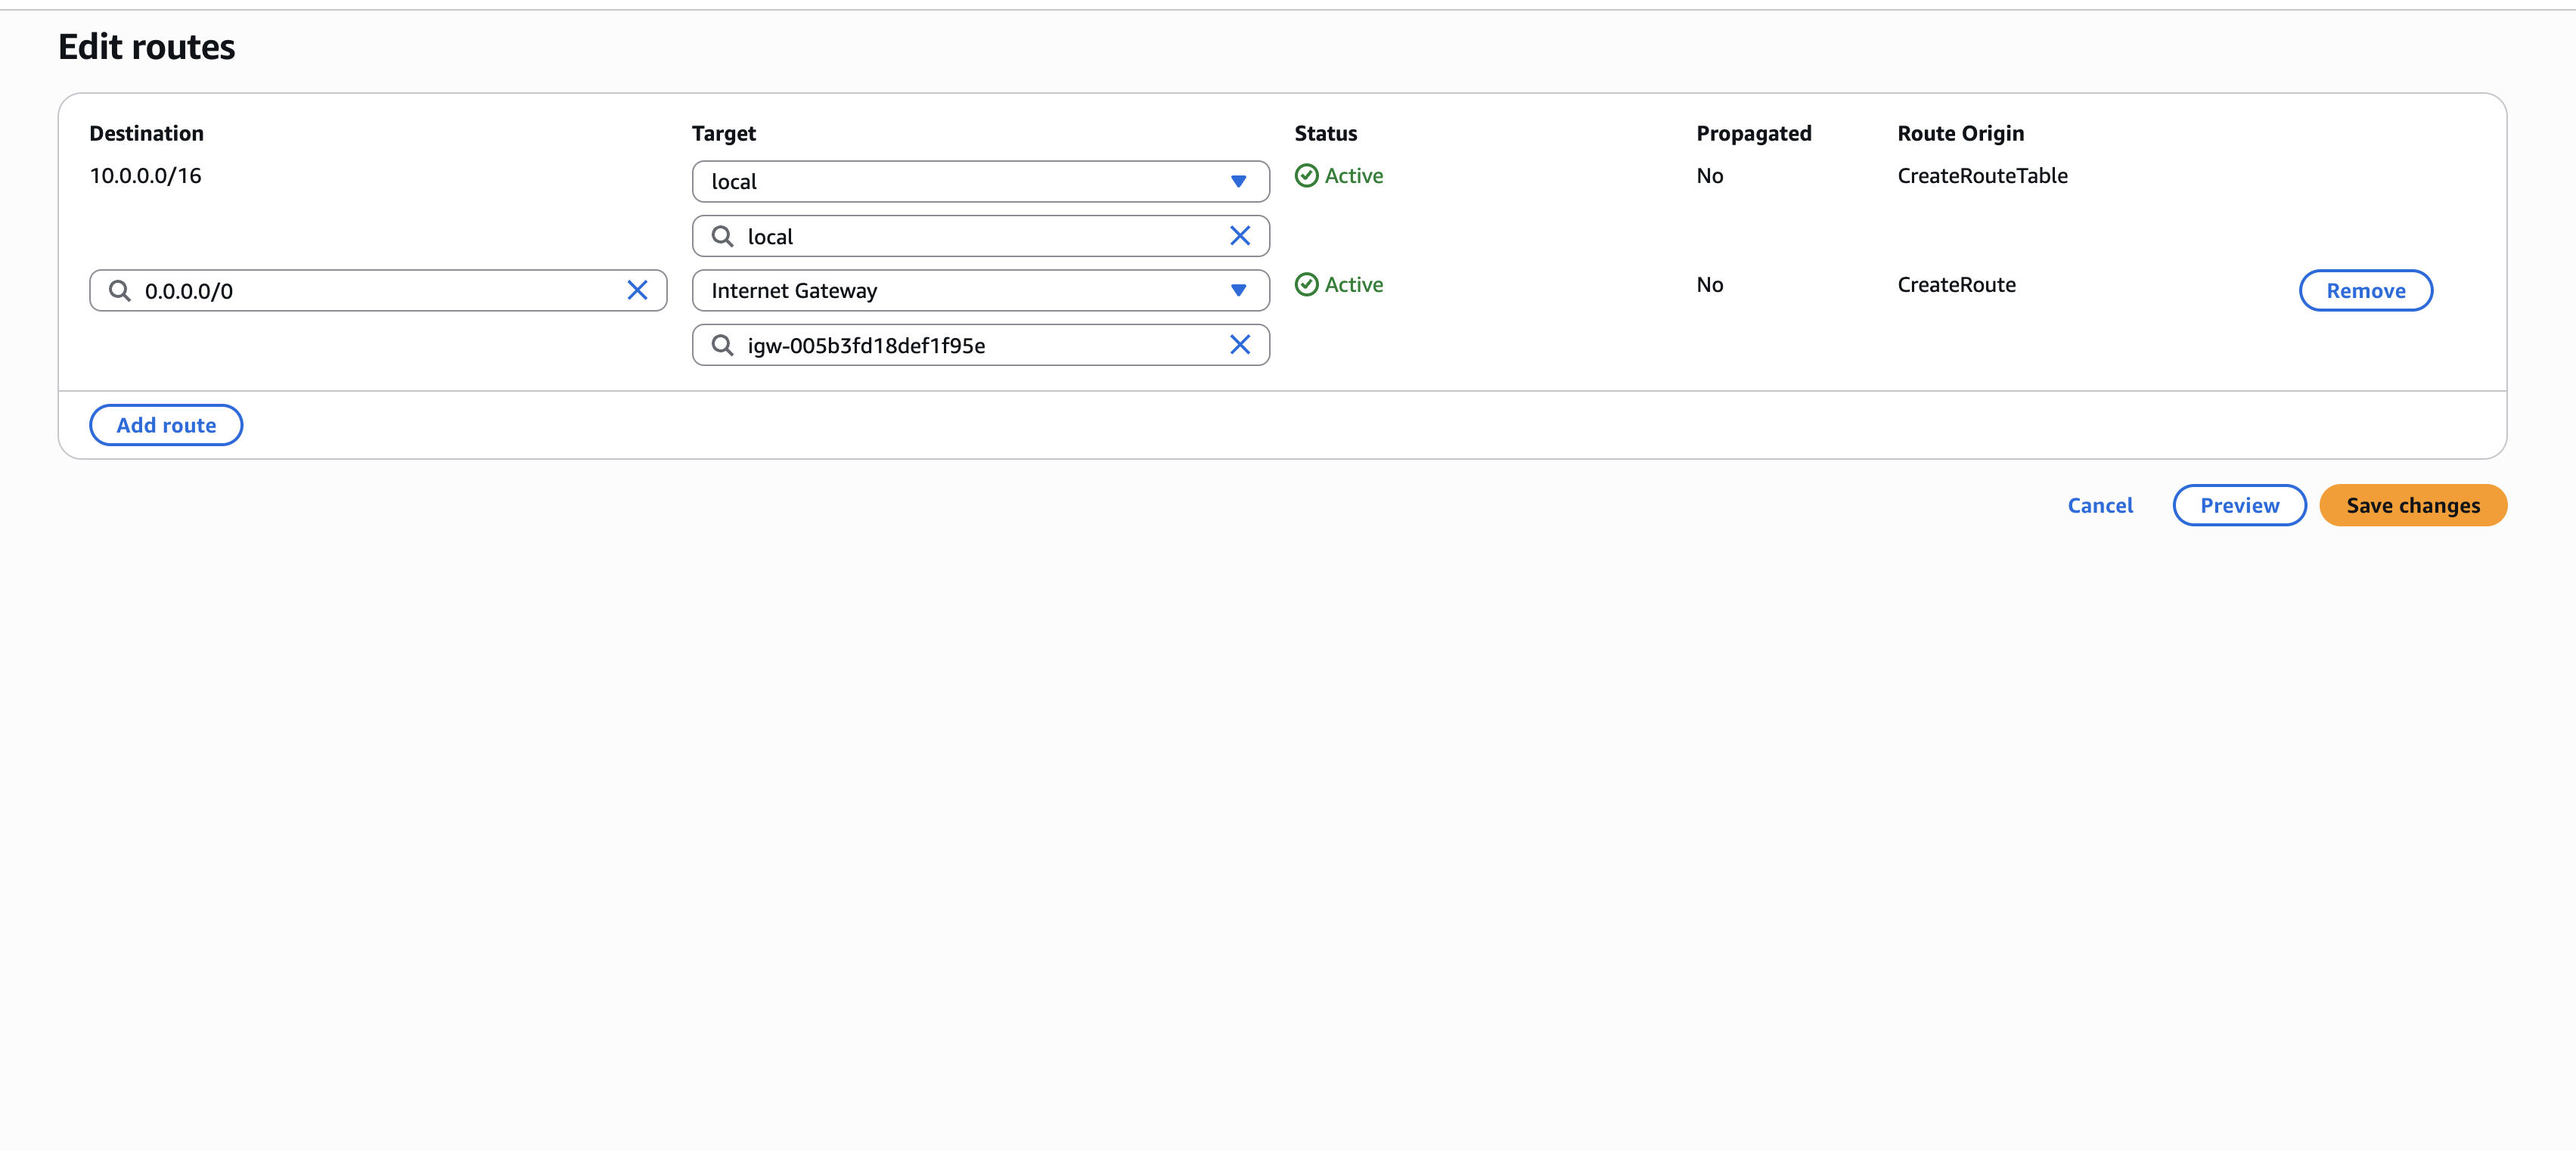
The public route table sends internet traffic to the Internet Gateway.
I linked that table to the public subnet.
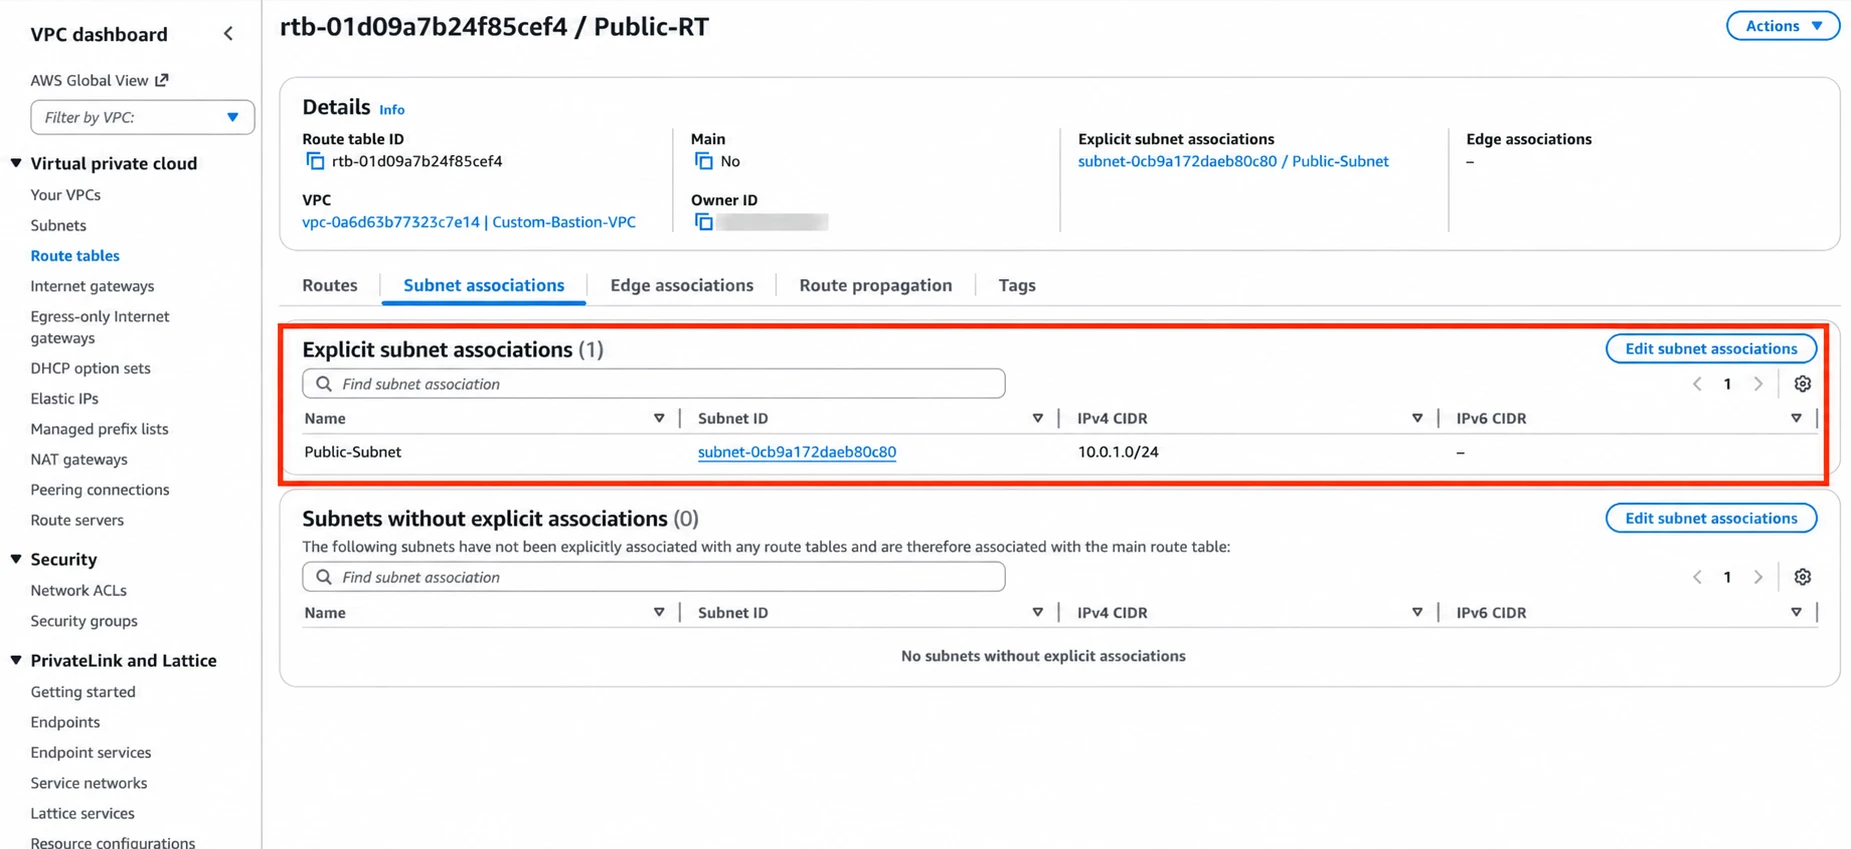
Associating the public subnet with its route table.
The private route table sends its default route to the NAT Gateway:
0.0.0.0/0 -> NAT Gateway
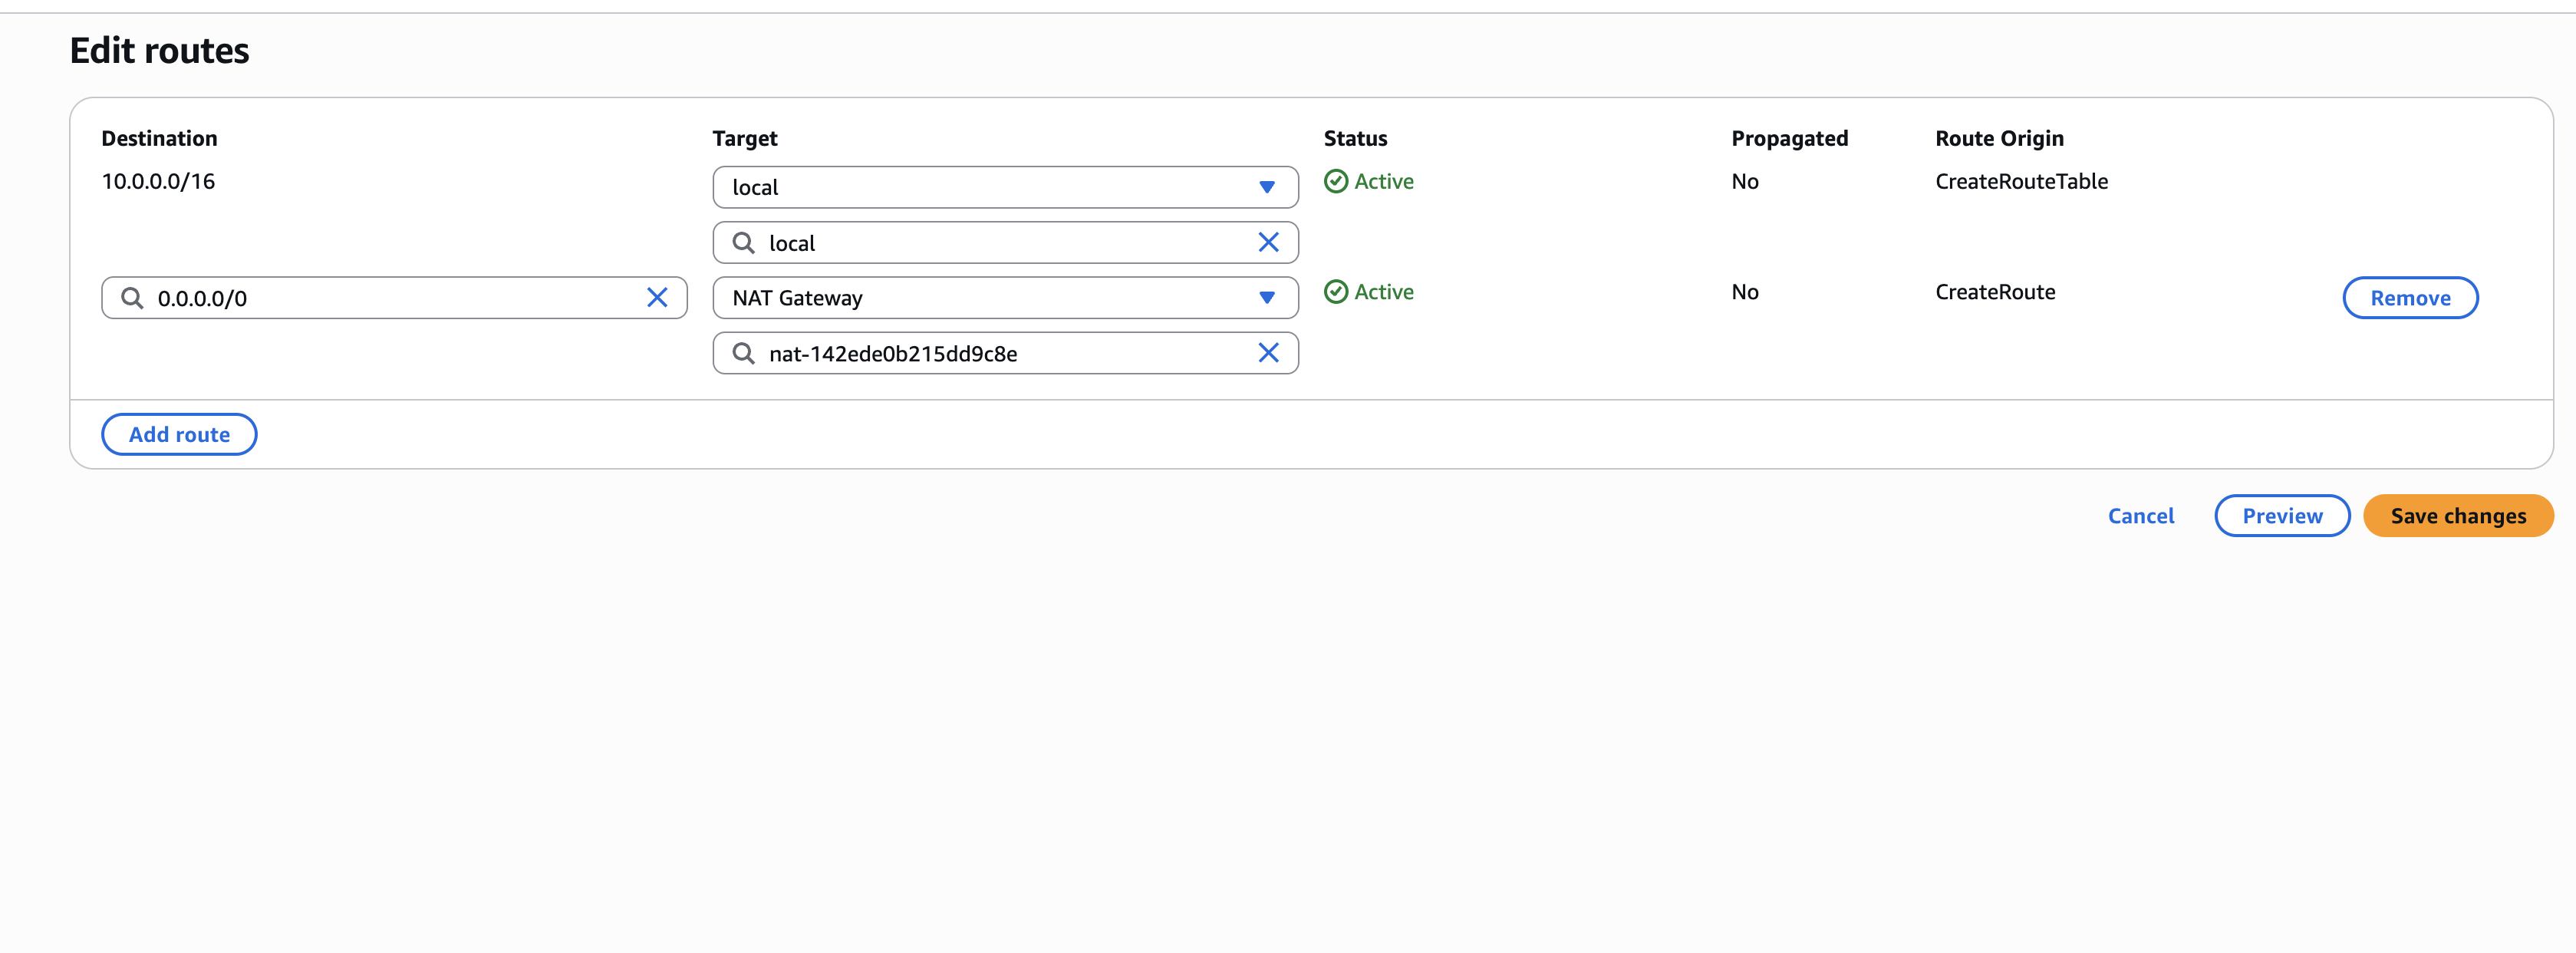
The private route table sends outbound traffic to the NAT Gateway.
And I linked it to the private subnet.
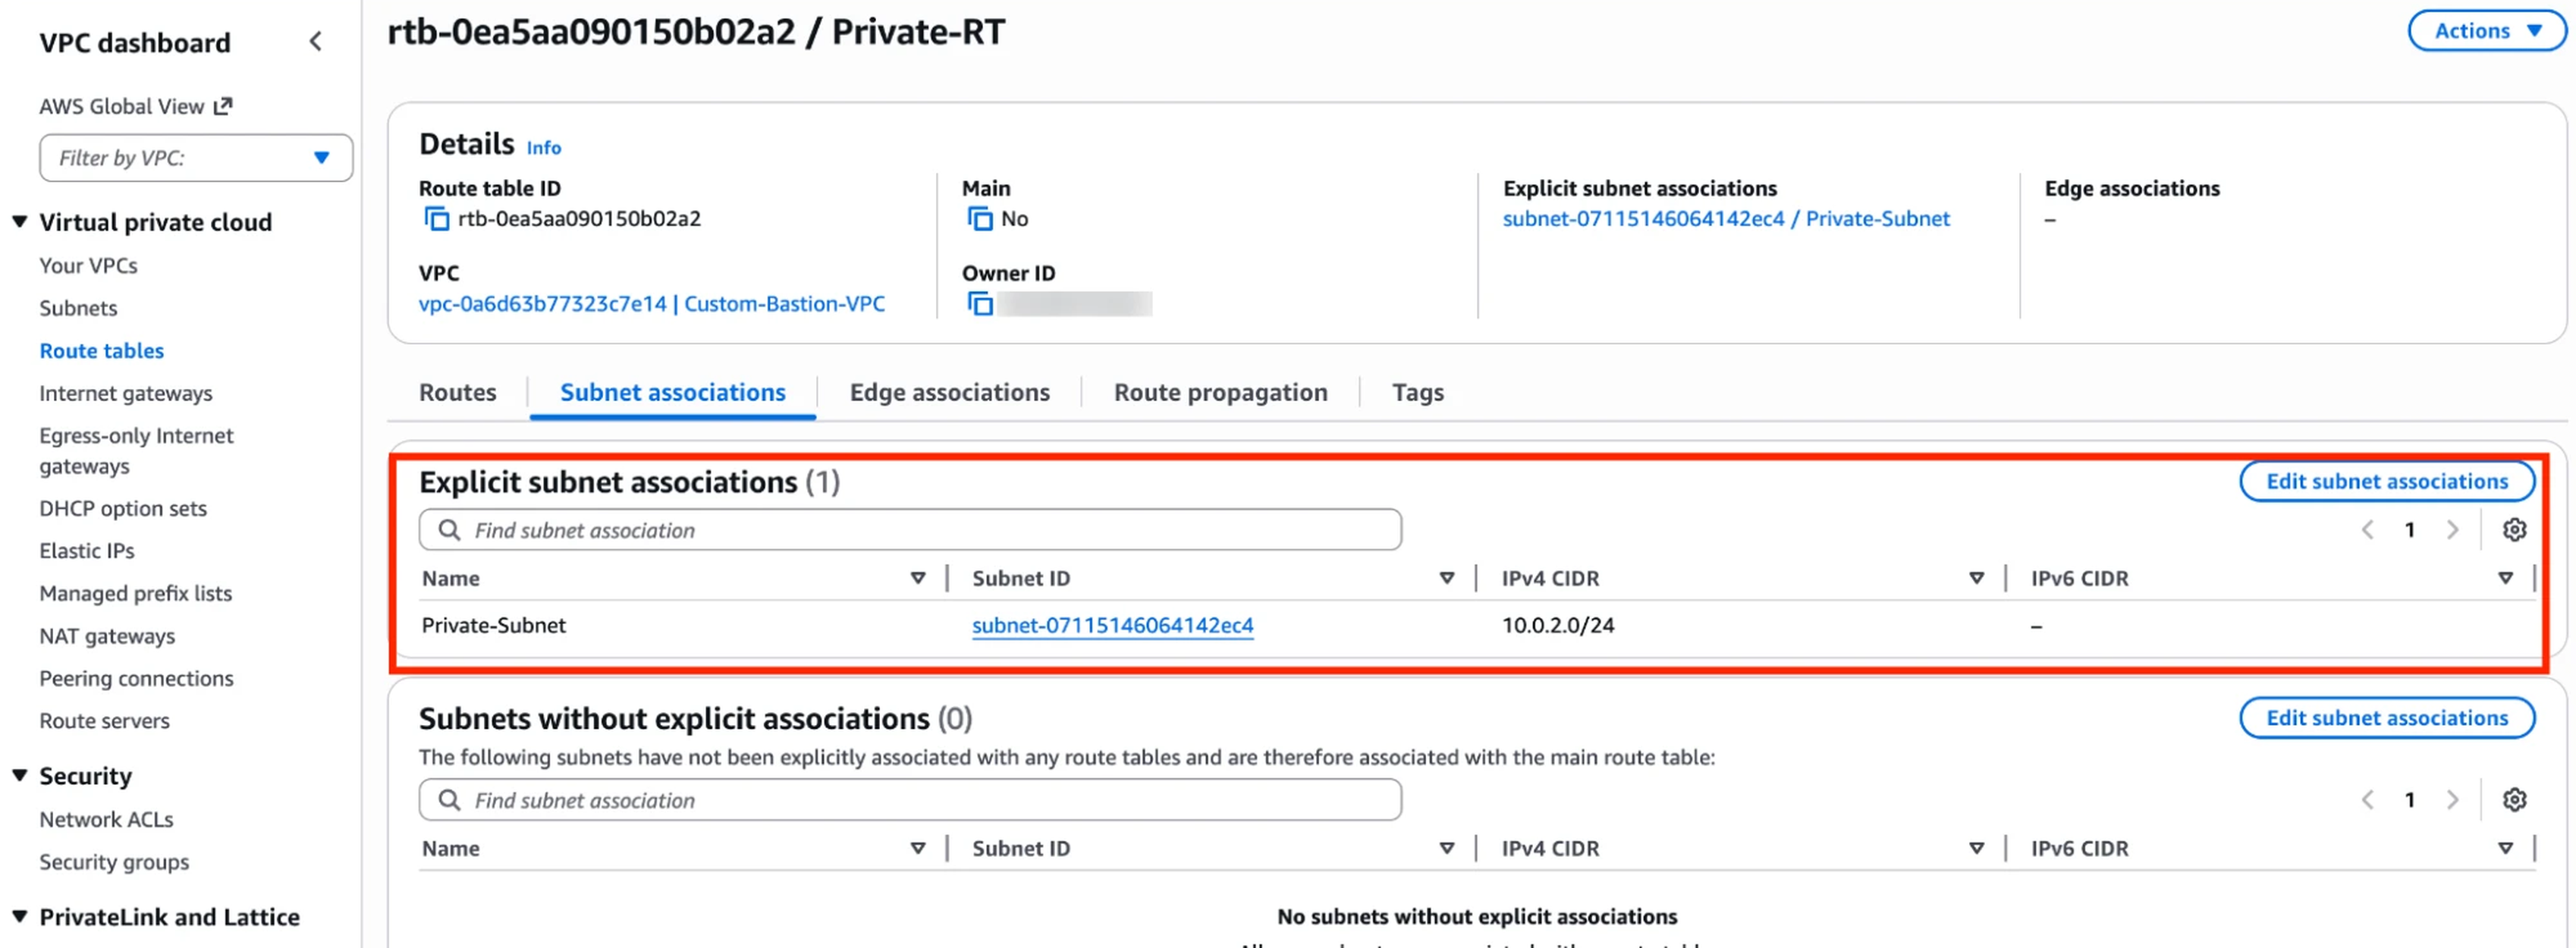
Associating the private subnet with its route table.
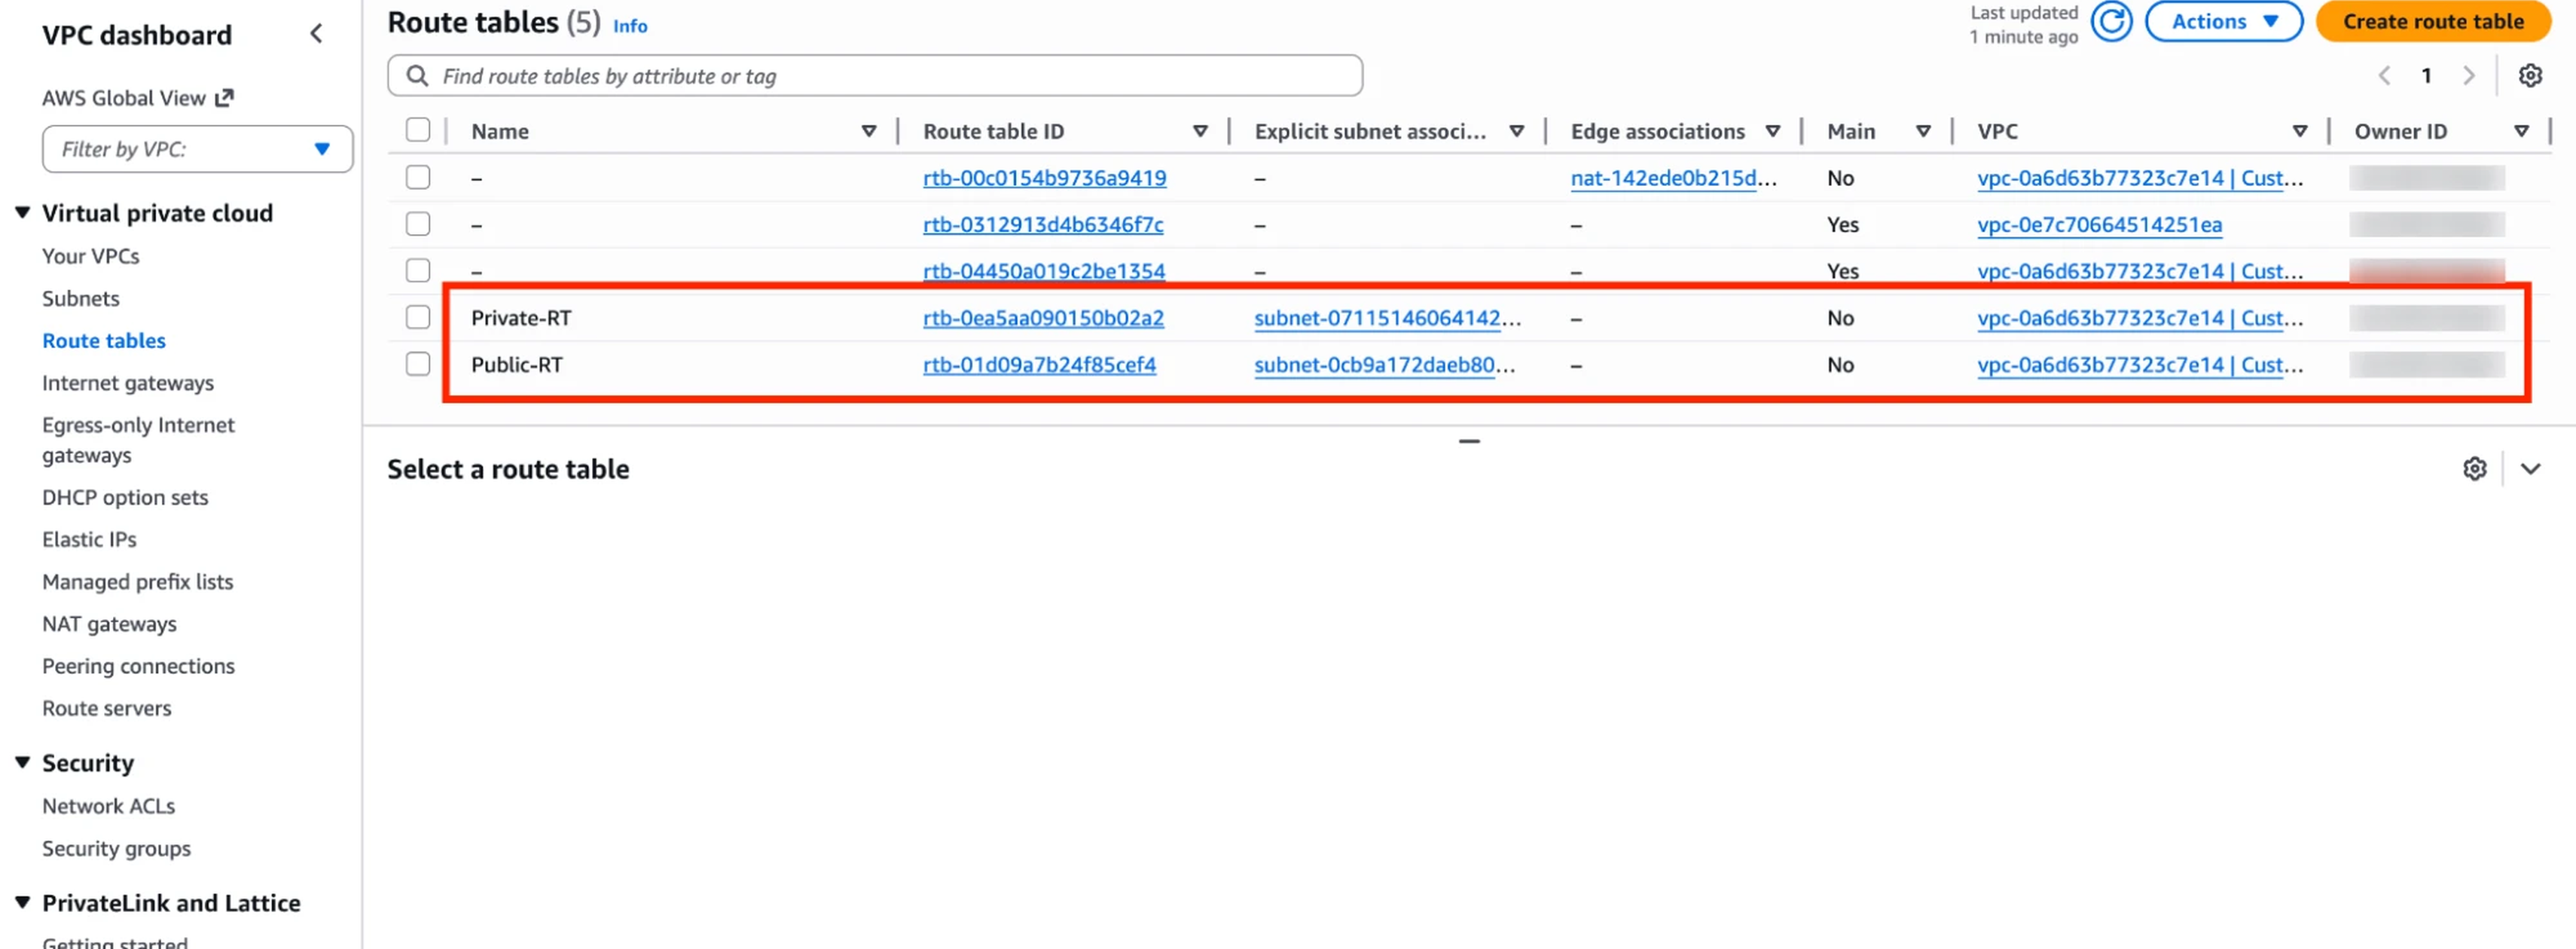
The completed subnet and route-table setup.
4. Launching the bastion and private servers
I launched an Ubuntu bastion host in the public subnet with a public IP. Its security group only allows SSH on port 22 from my own IP.
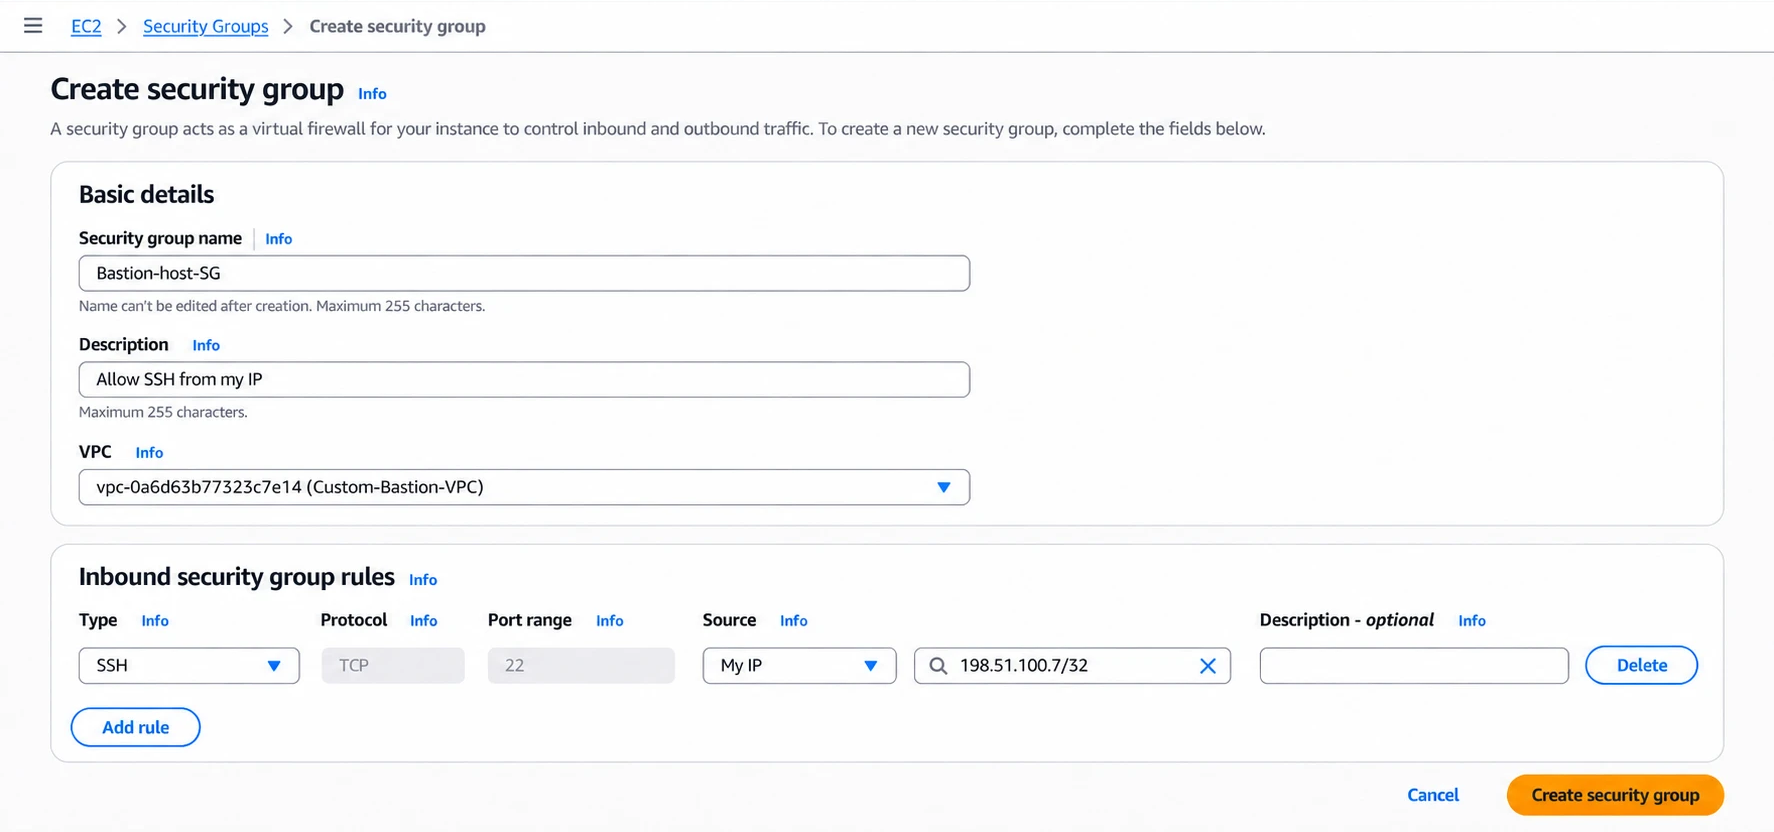
Creating the bastion host security group.
Next I launched two Ubuntu web servers in the private subnet with auto public IP turned off. Their security group only accepts SSH from the bastion’s security group. For app traffic, port 80 should only accept traffic from the ALB’s security group.
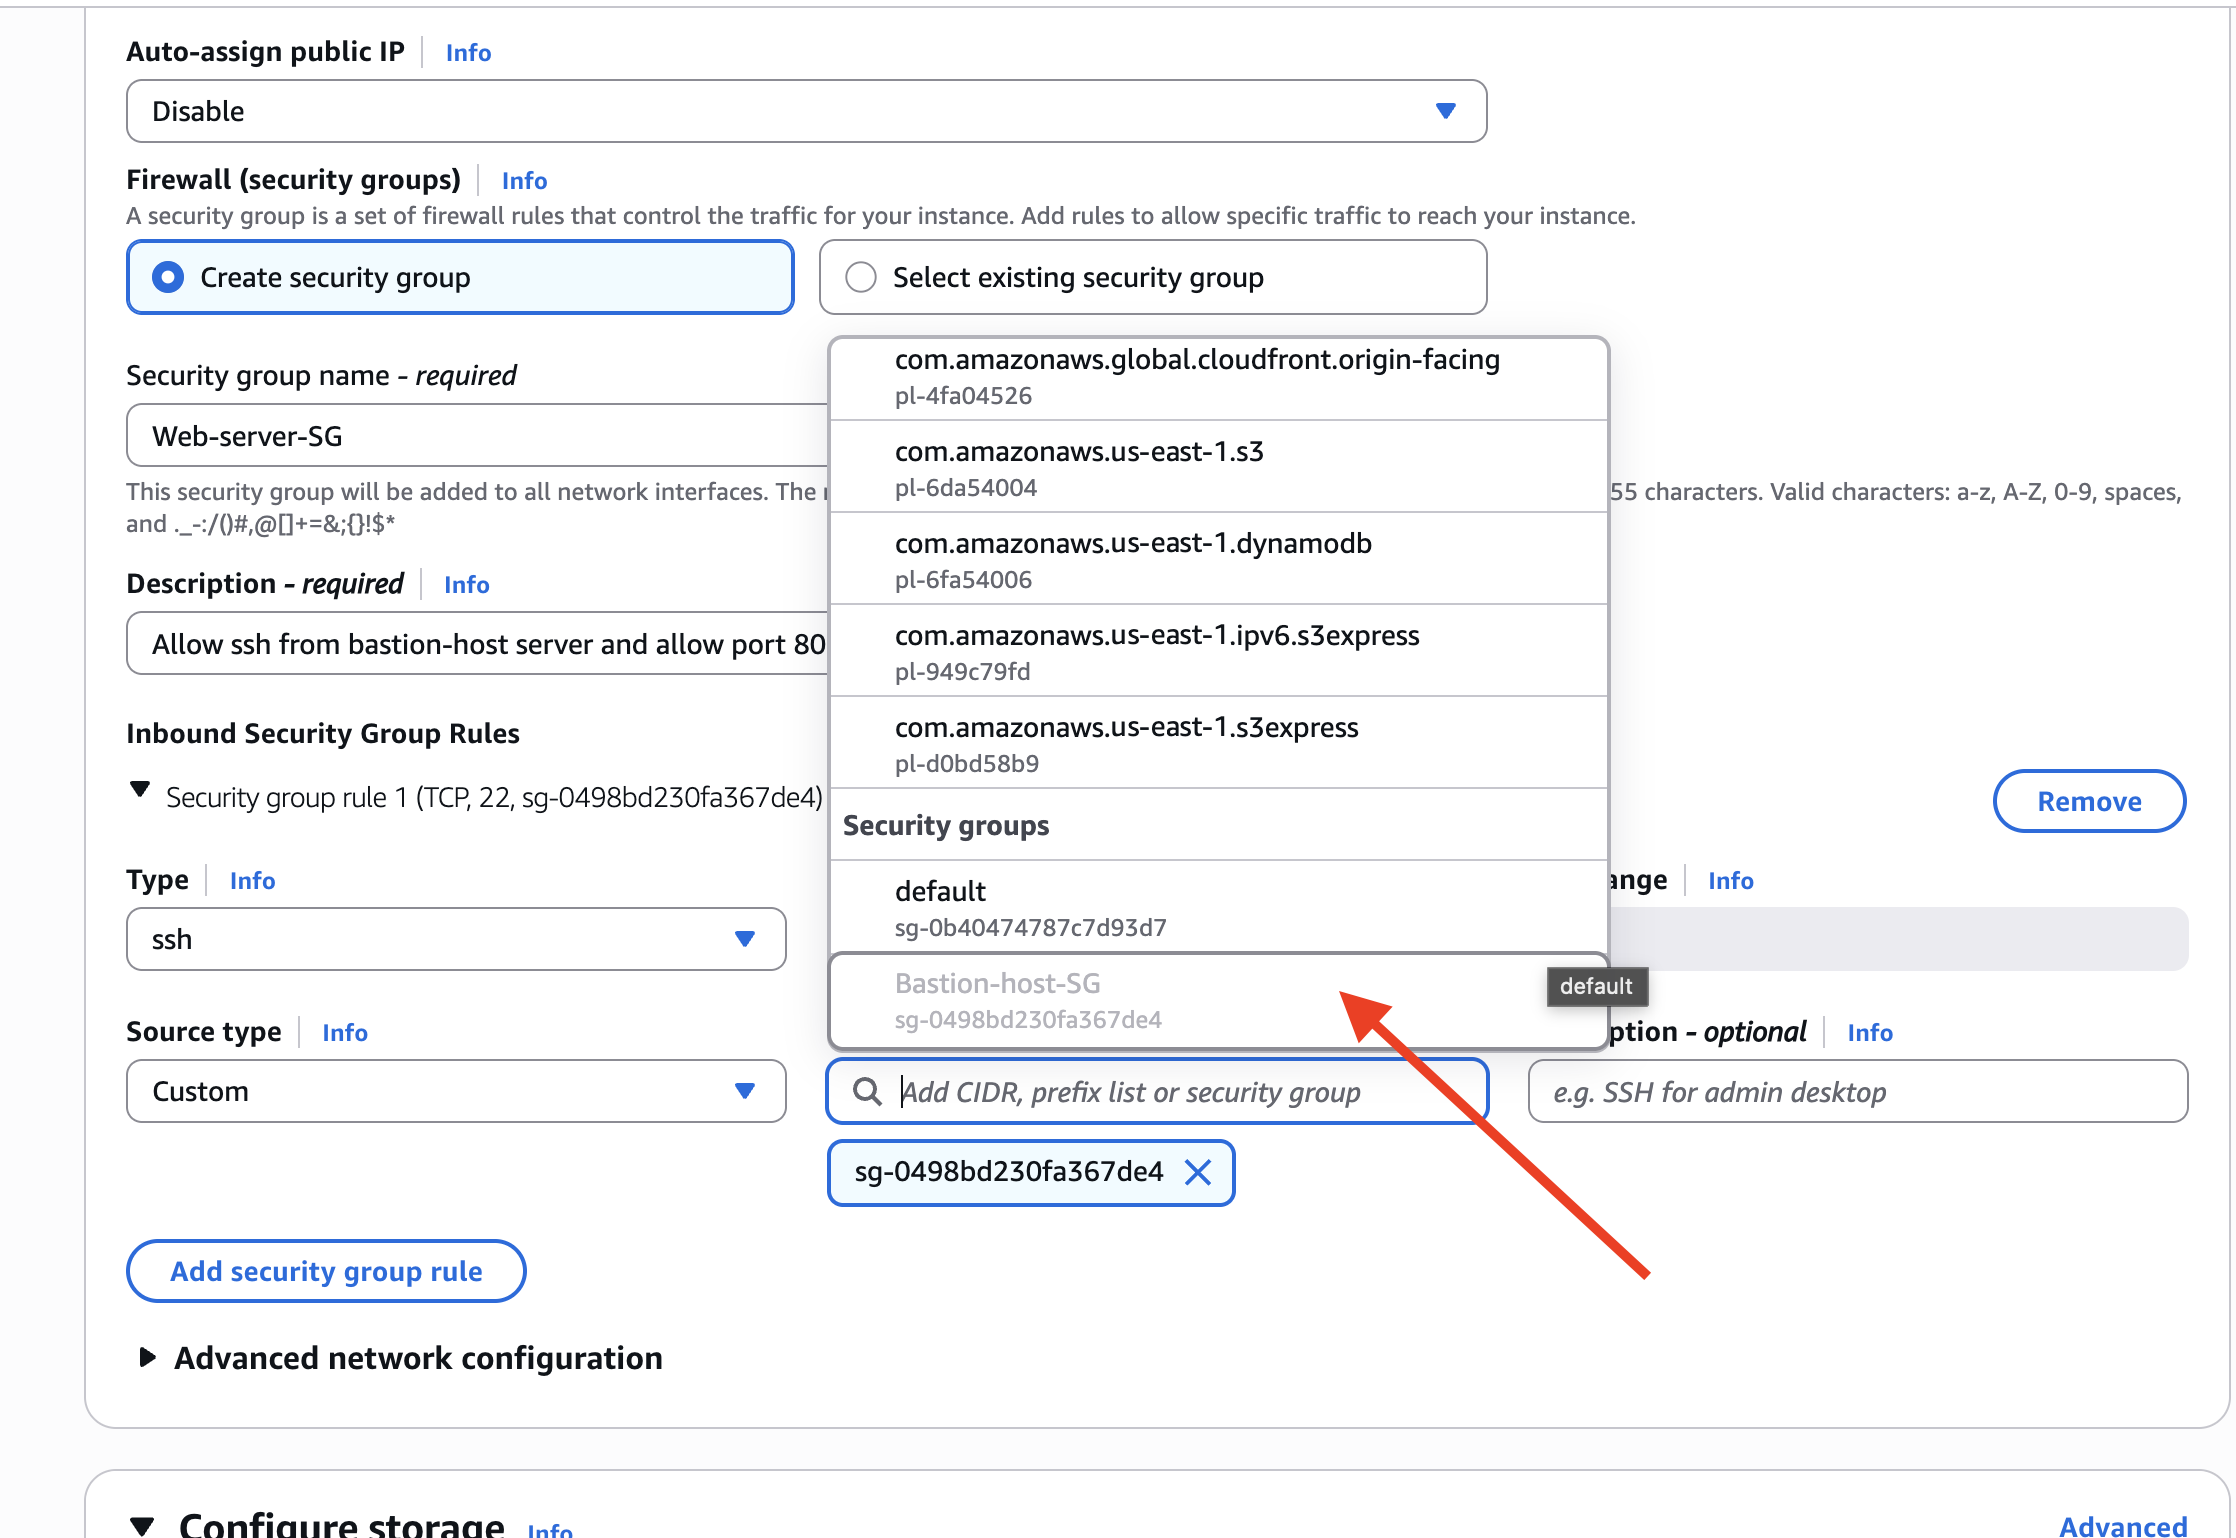
Creating the private-server security group and allowing SSH from the bastion security group.
Referencing security groups matters here. SSH isn’t open to a whole network range, and the web tier stays behind the load balancer.
5. Connecting through the bastion host
First I locked down the private key and connected to the bastion:
chmod 400 david-key.pem
ssh -i david-key.pem ubuntu@<BASTION-PUBLIC-IP>
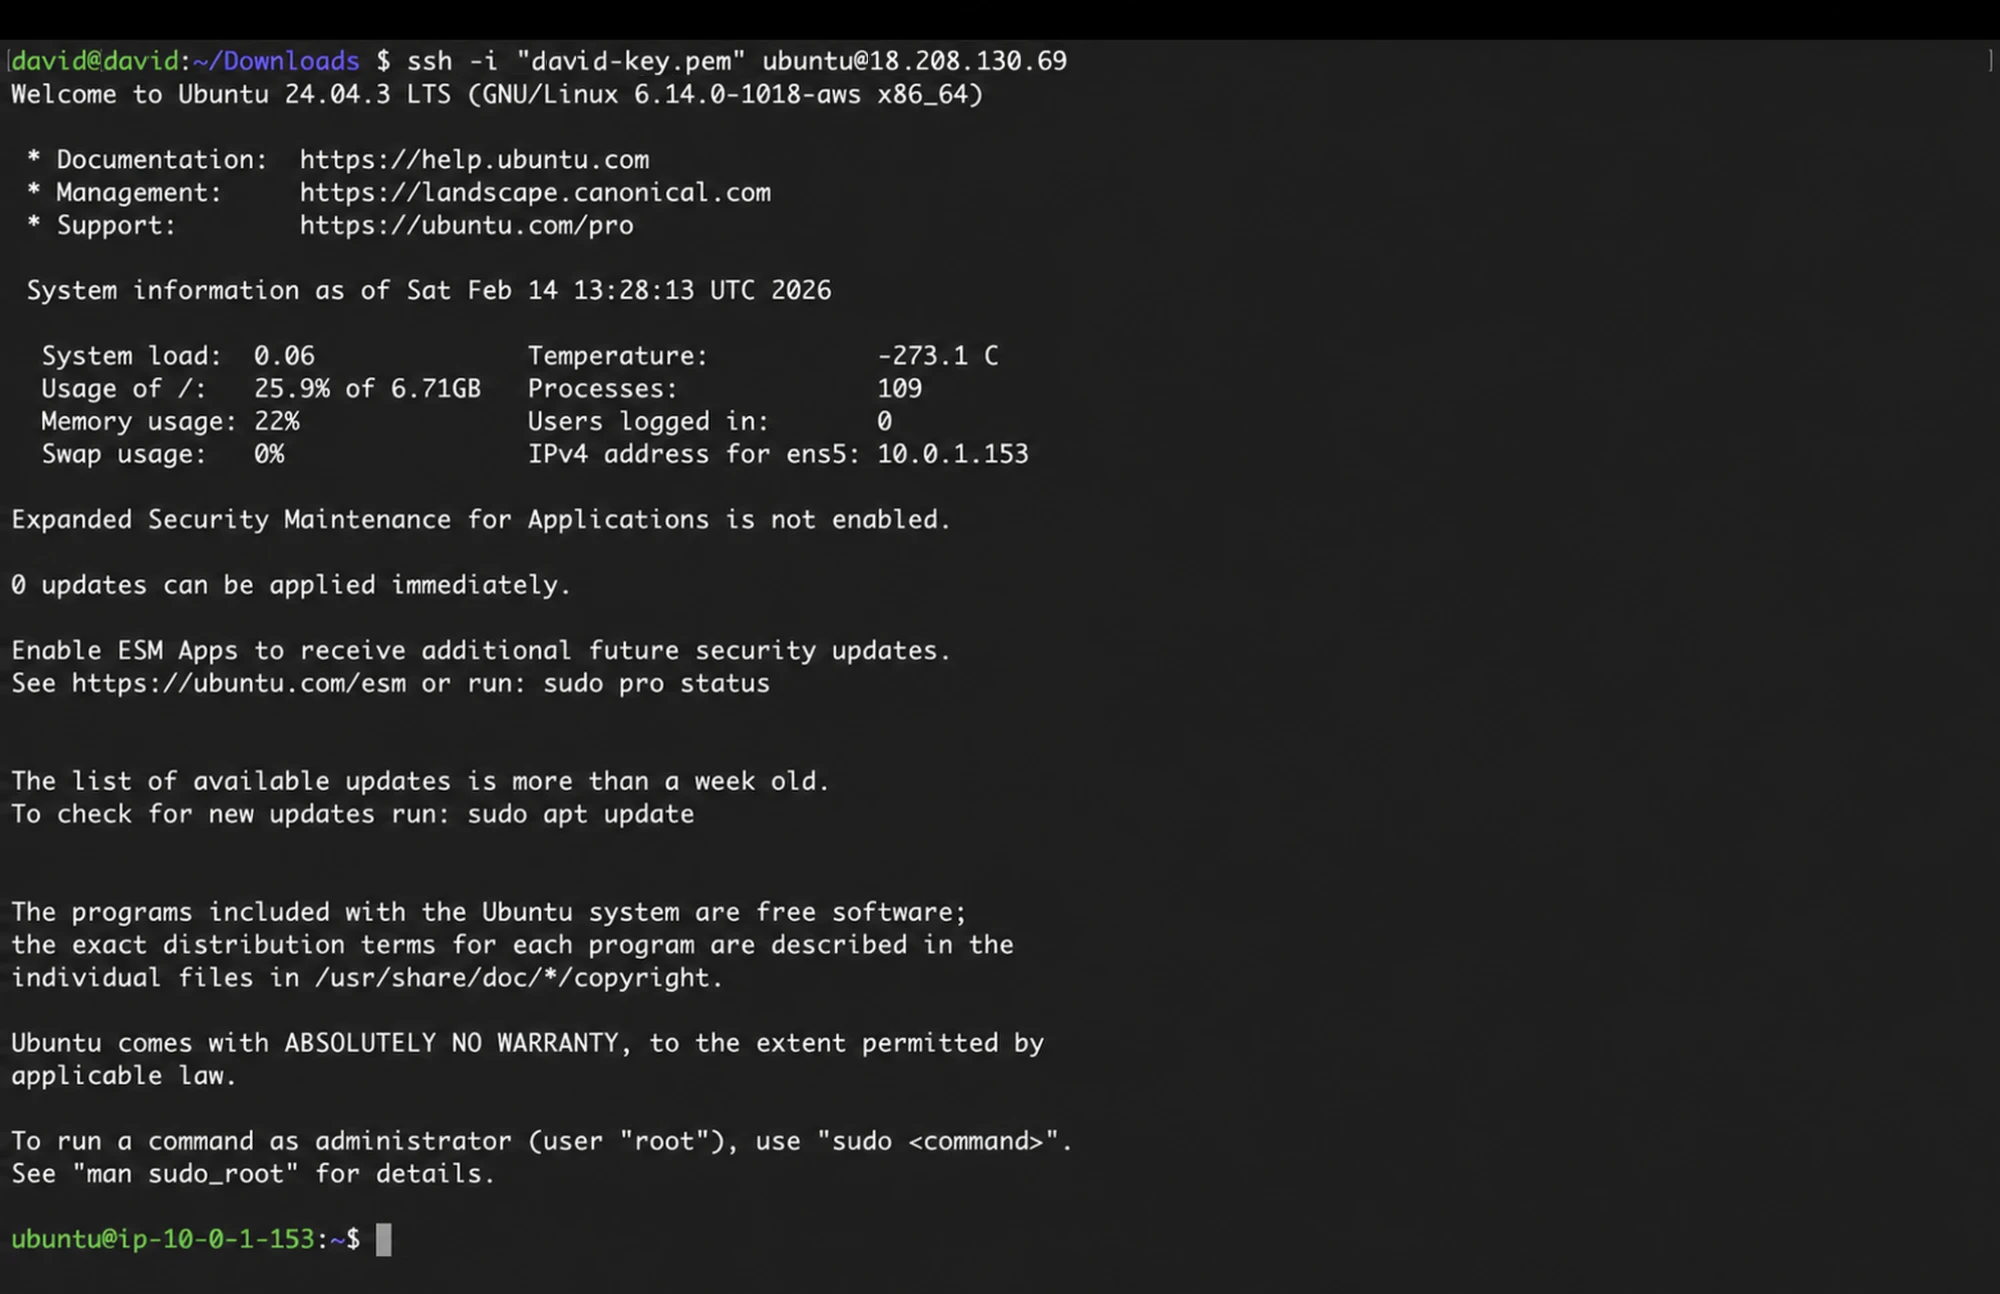
Connecting to the bastion host over SSH.

My shell session on the bastion host.
From there I used each server’s private IP to make sure both were reachable.
ssh -i david-key.pem ubuntu@10.0.2.199
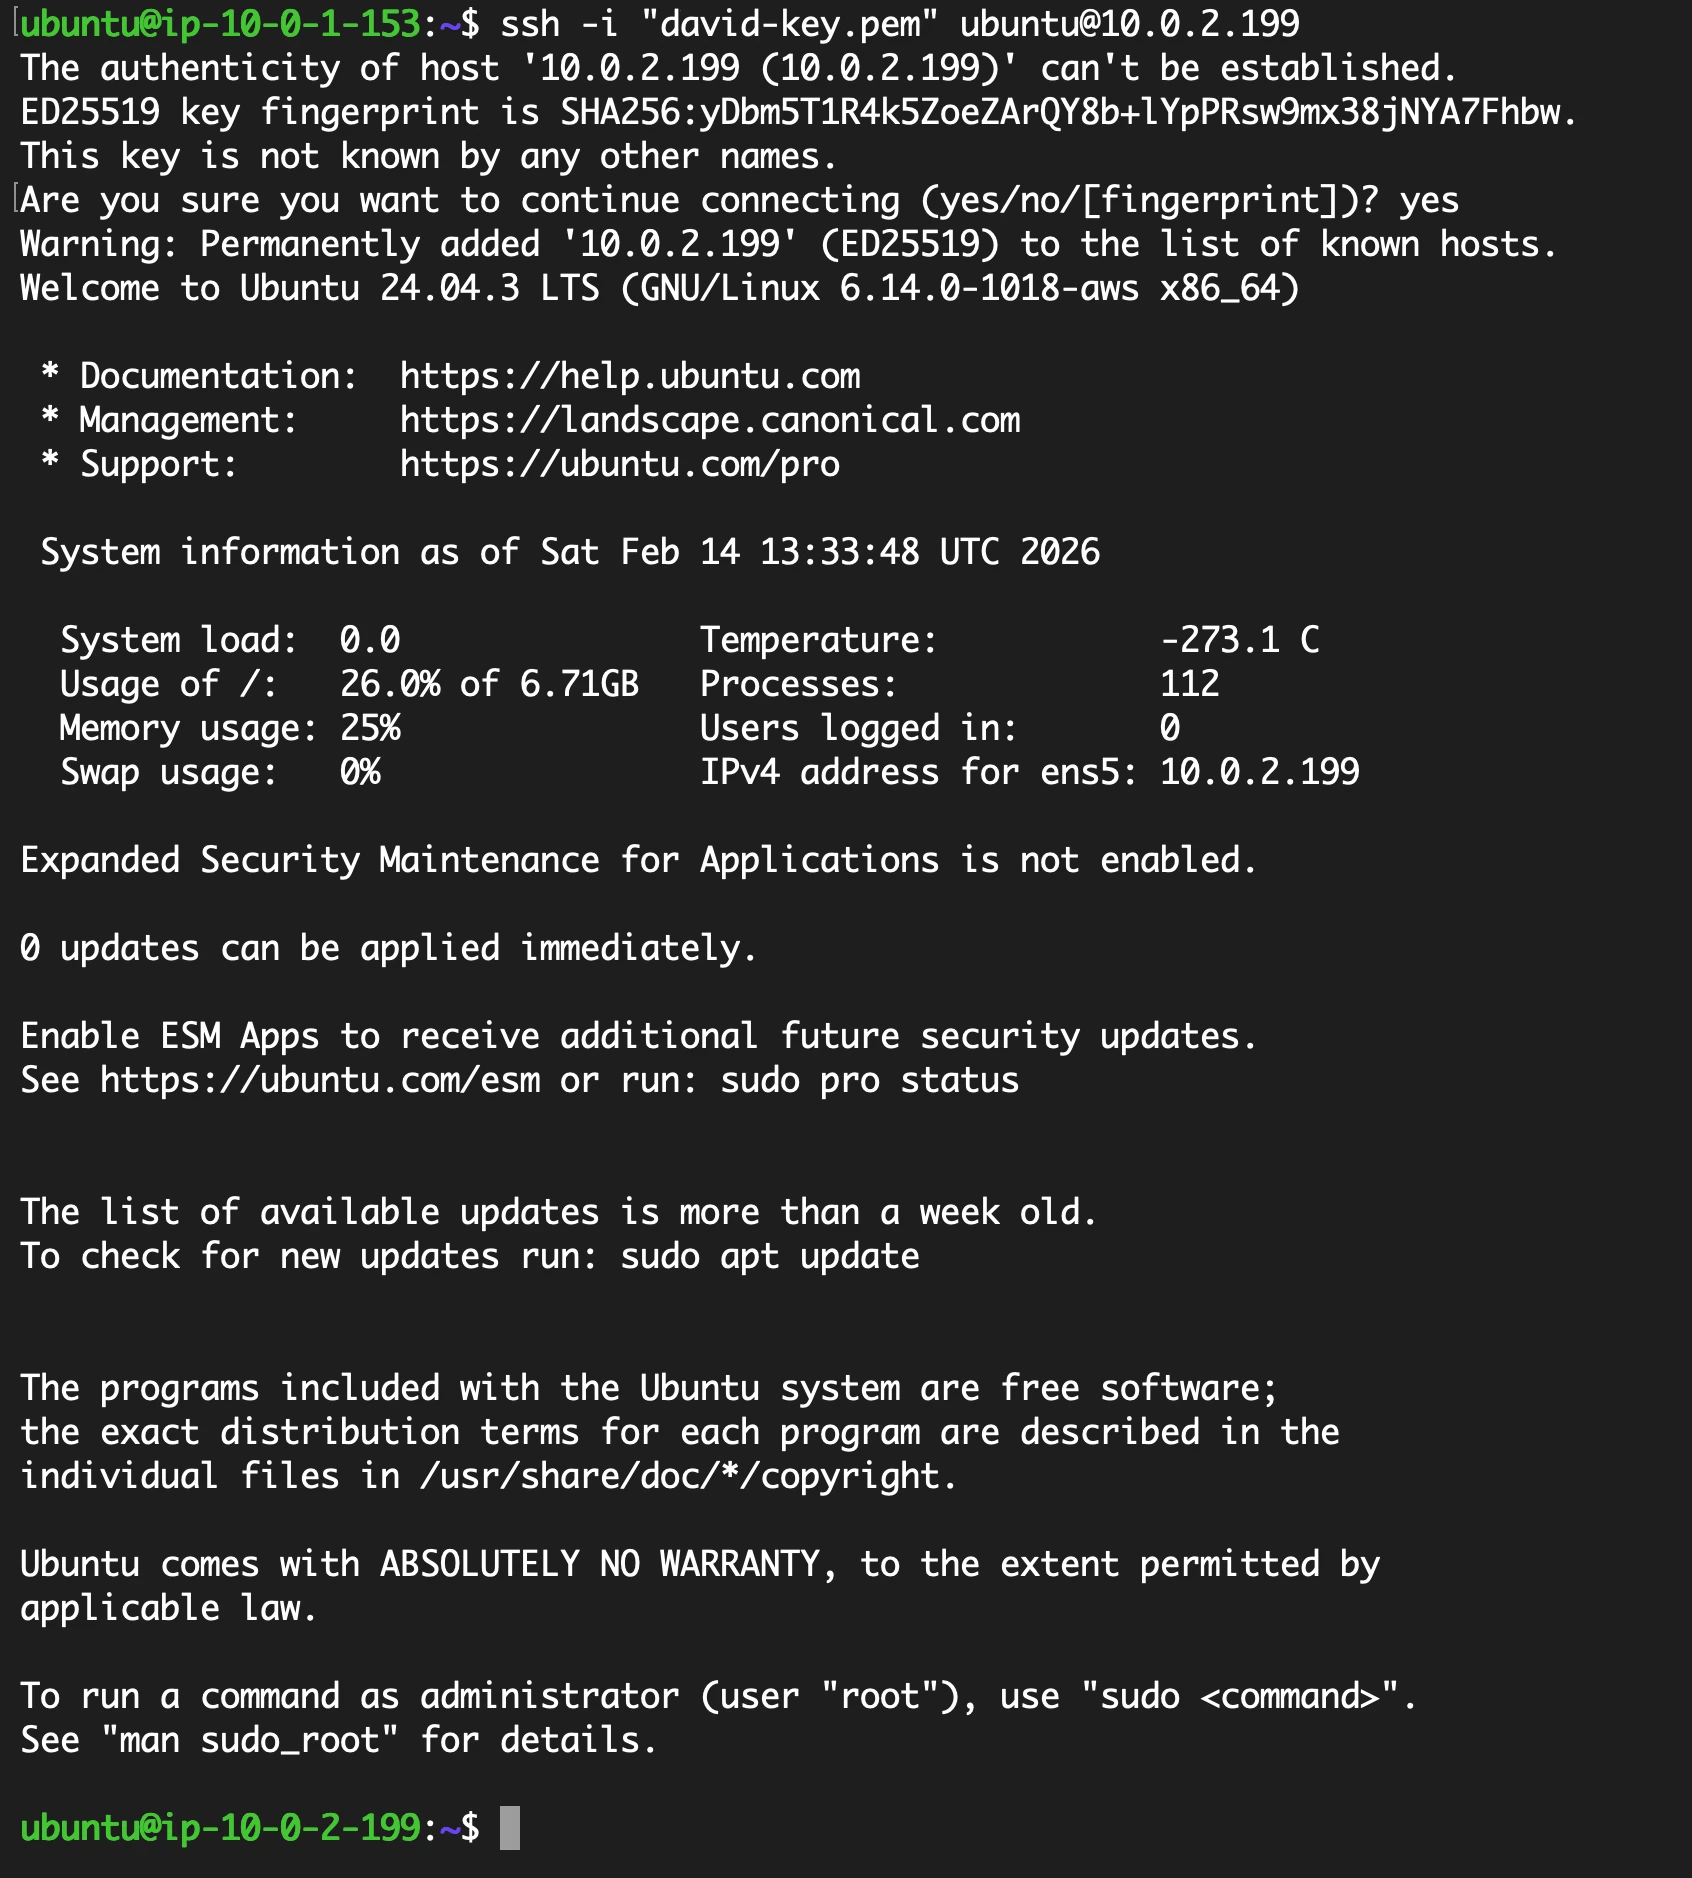
Connecting from the bastion host to the first private server.
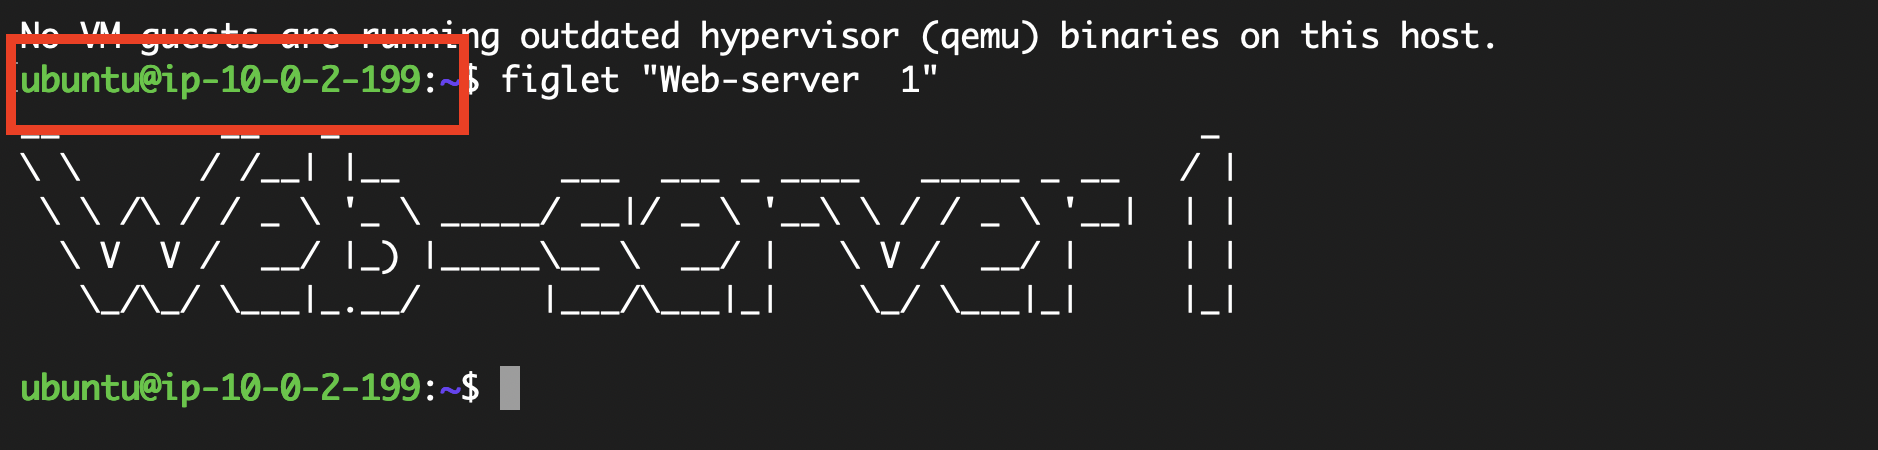
The first private web server session.
Then the same for the second server at 10.0.2.153.
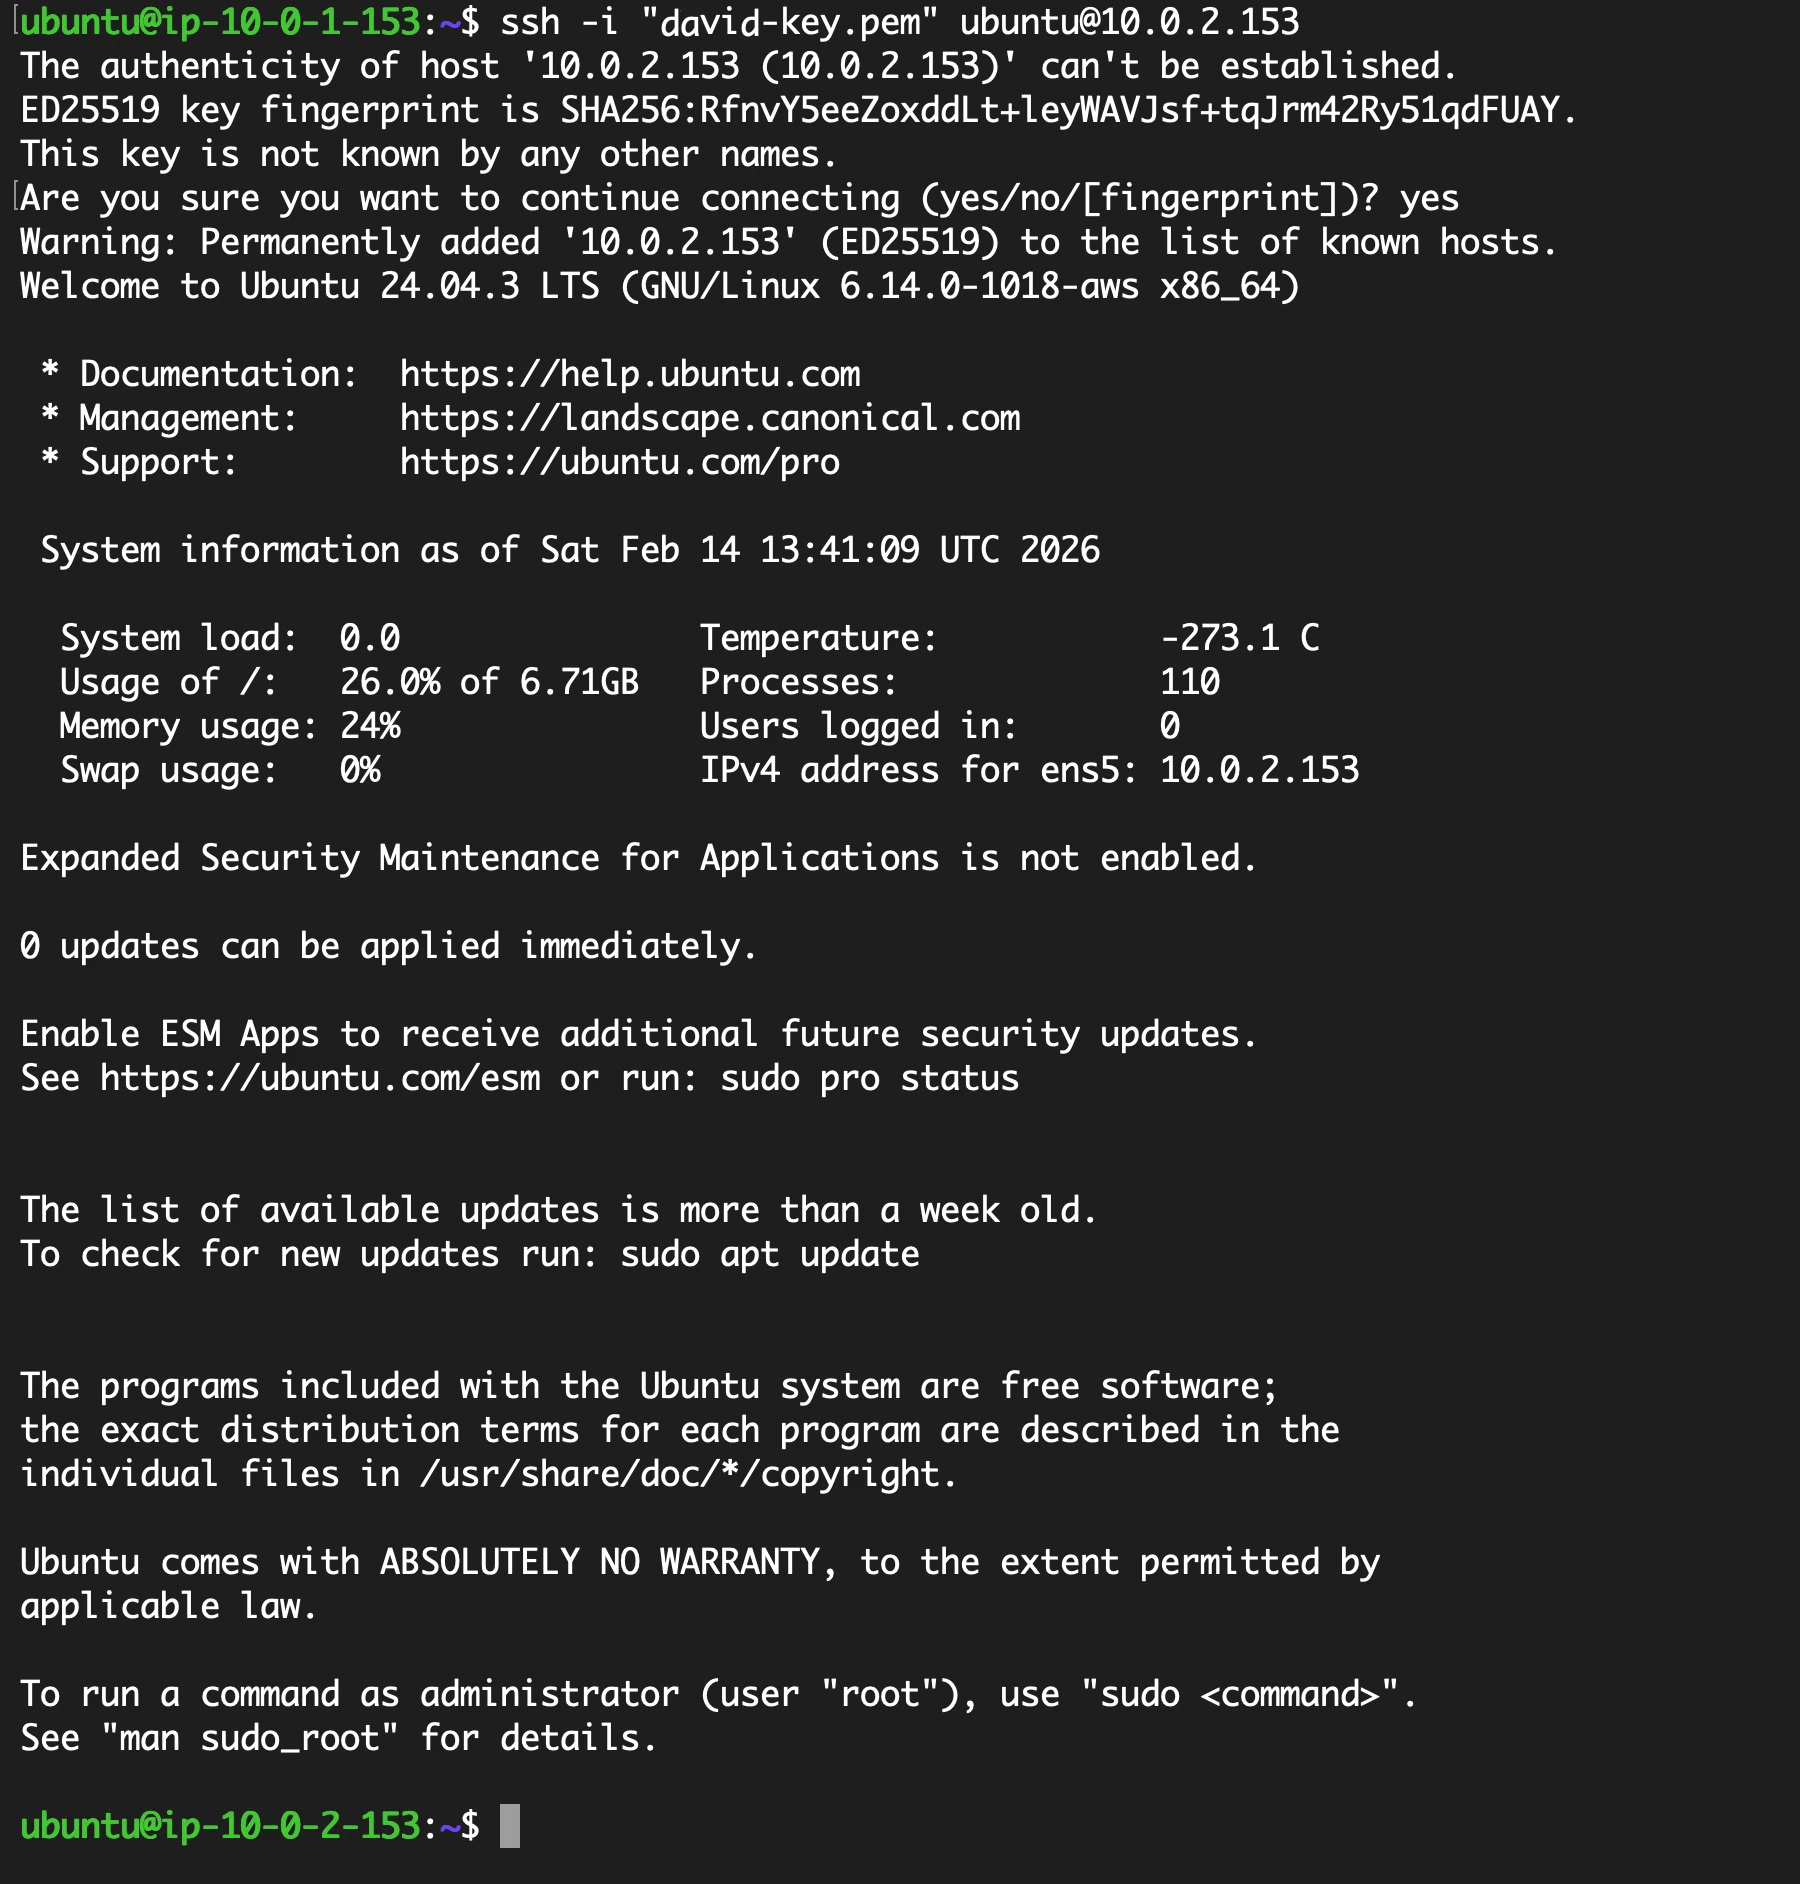
Connecting to the second private server.
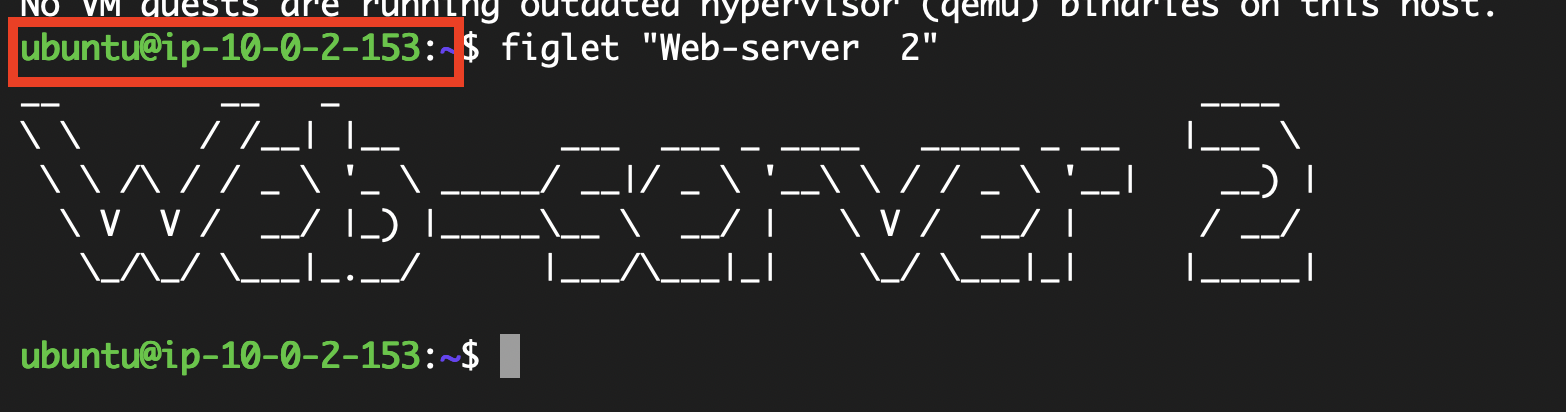
The second private web server session.
In production I’d rather use Session Manager so there’s no exposed SSH and no private key sitting on the bastion. I used a bastion here because practicing jump host access was one of my goals.
6. Configuring both servers with Ansible
I installed Ansible on the bastion and checked it:
sudo apt update
sudo apt install ansible -y
ansible --version

Verifying Ansible on the bastion host.
I wrote this inventory with the servers’ private IPs:
[webservers]
web1 ansible_host=10.0.2.199
web2 ansible_host=10.0.2.153

[all:vars]
ansible_user=ubuntu
ansible_ssh_private_key_file=/home/ubuntu/david-key.pem
ansible_python_interpreter=/usr/bin/python3
Then an idempotent playbook to install and start Nginx:
---
- name: Install and configure web servers
  hosts: webservers
  become: true

  tasks:
    - name: Update apt cache
      ansible.builtin.apt:
        update_cache: true

    - name: Install Nginx
      ansible.builtin.apt:
        name: nginx
        state: present

    - name: Start and enable Nginx
      ansible.builtin.service:
        name: nginx
        state: started
        enabled: true
I ran it with:
ansible-playbook -i inventory.ini install-nginx.yml
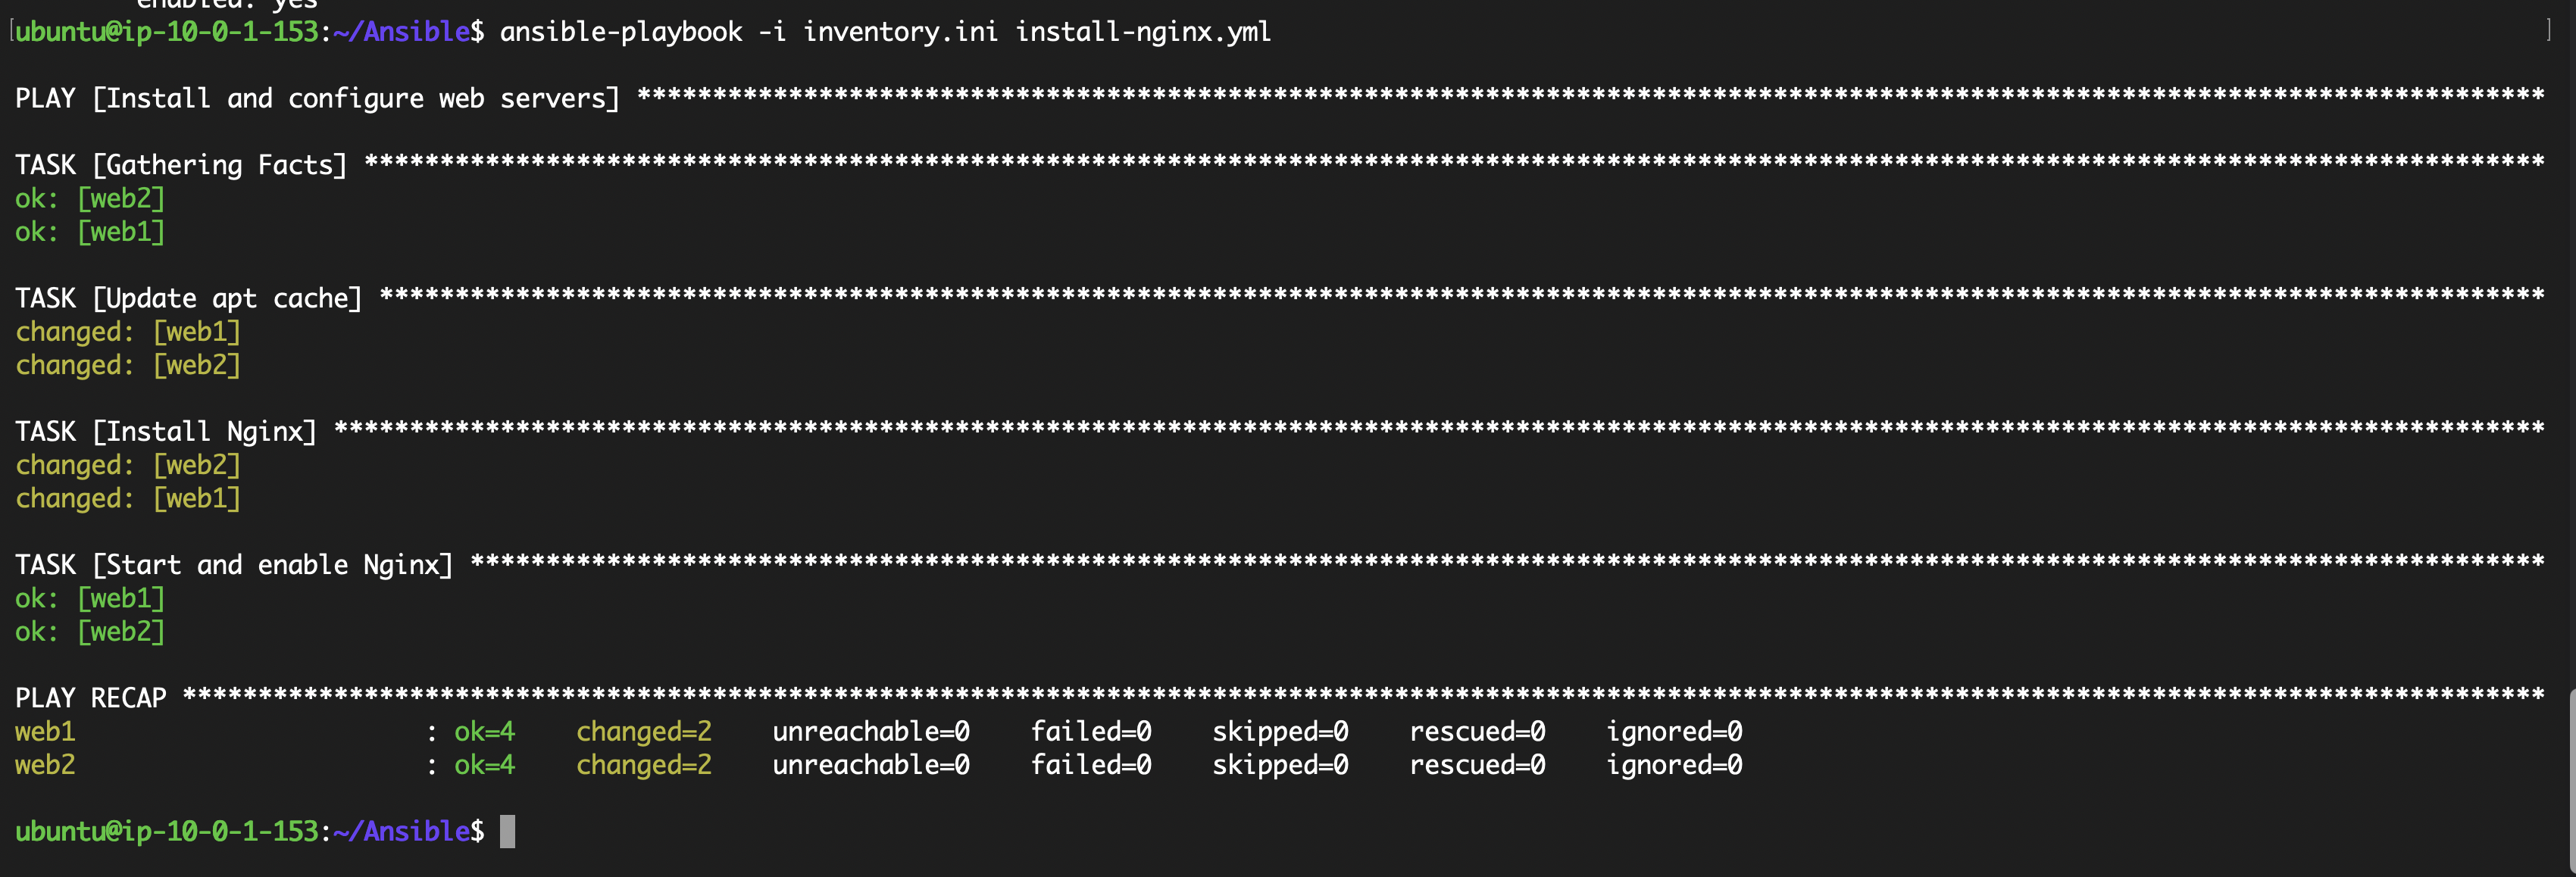
Ansible completed successfully against both web servers.
The recap showed no unreachable hosts and no failed tasks. The bastion could manage both private servers.
7. Giving each Nginx server a distinct page
I edited /var/www/html/index.nginx-debian.html on each server. I gave each a different label so I could tell which one answered through the load balancer.
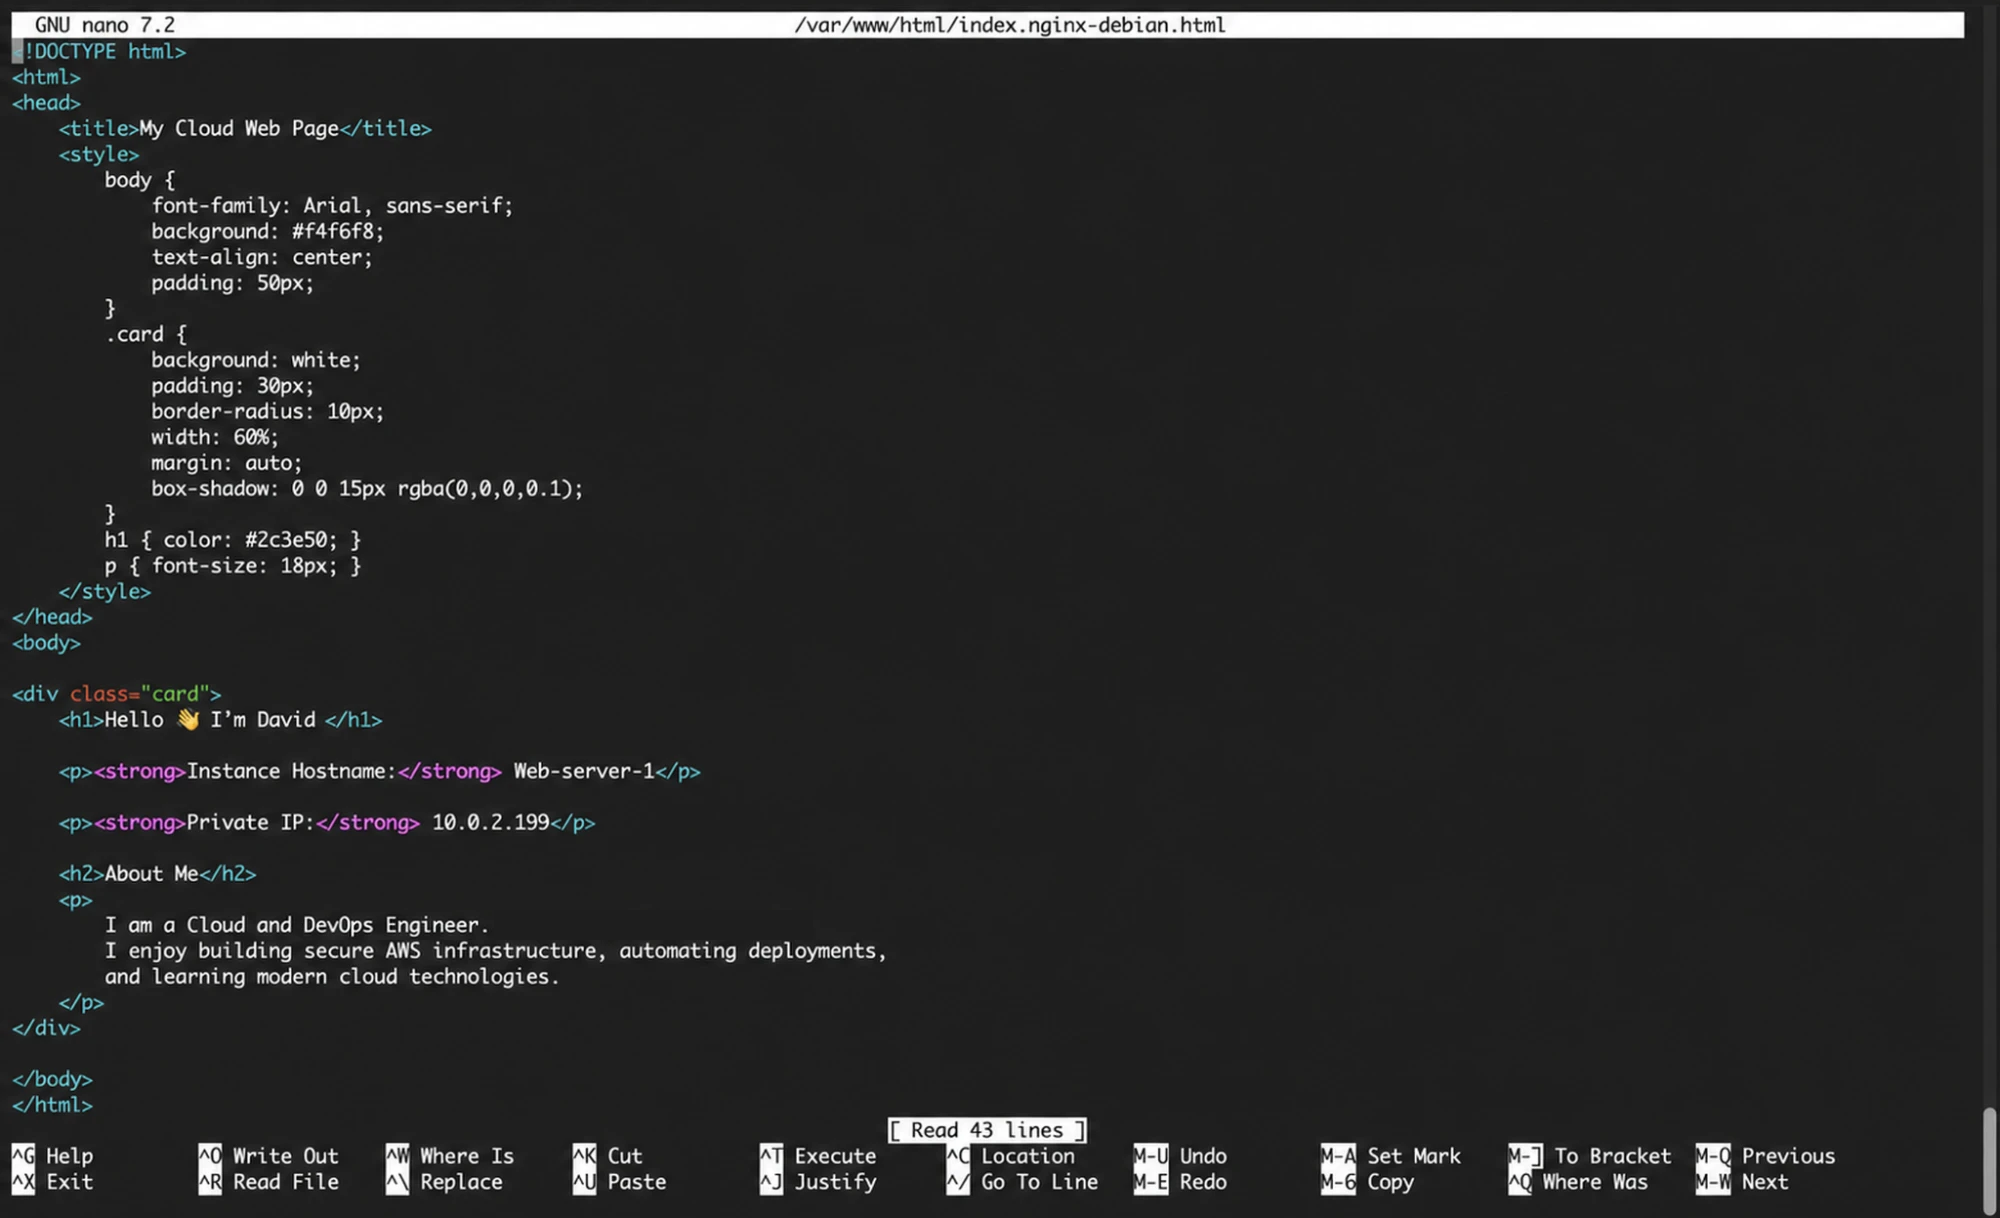
Editing the custom Nginx page on one backend server.
Showing a hostname is handy for testing. On a real public page, don’t show private IPs or other infrastructure details.
8. Creating the target group
I created an instance target group on HTTP port 80 and registered both private servers.
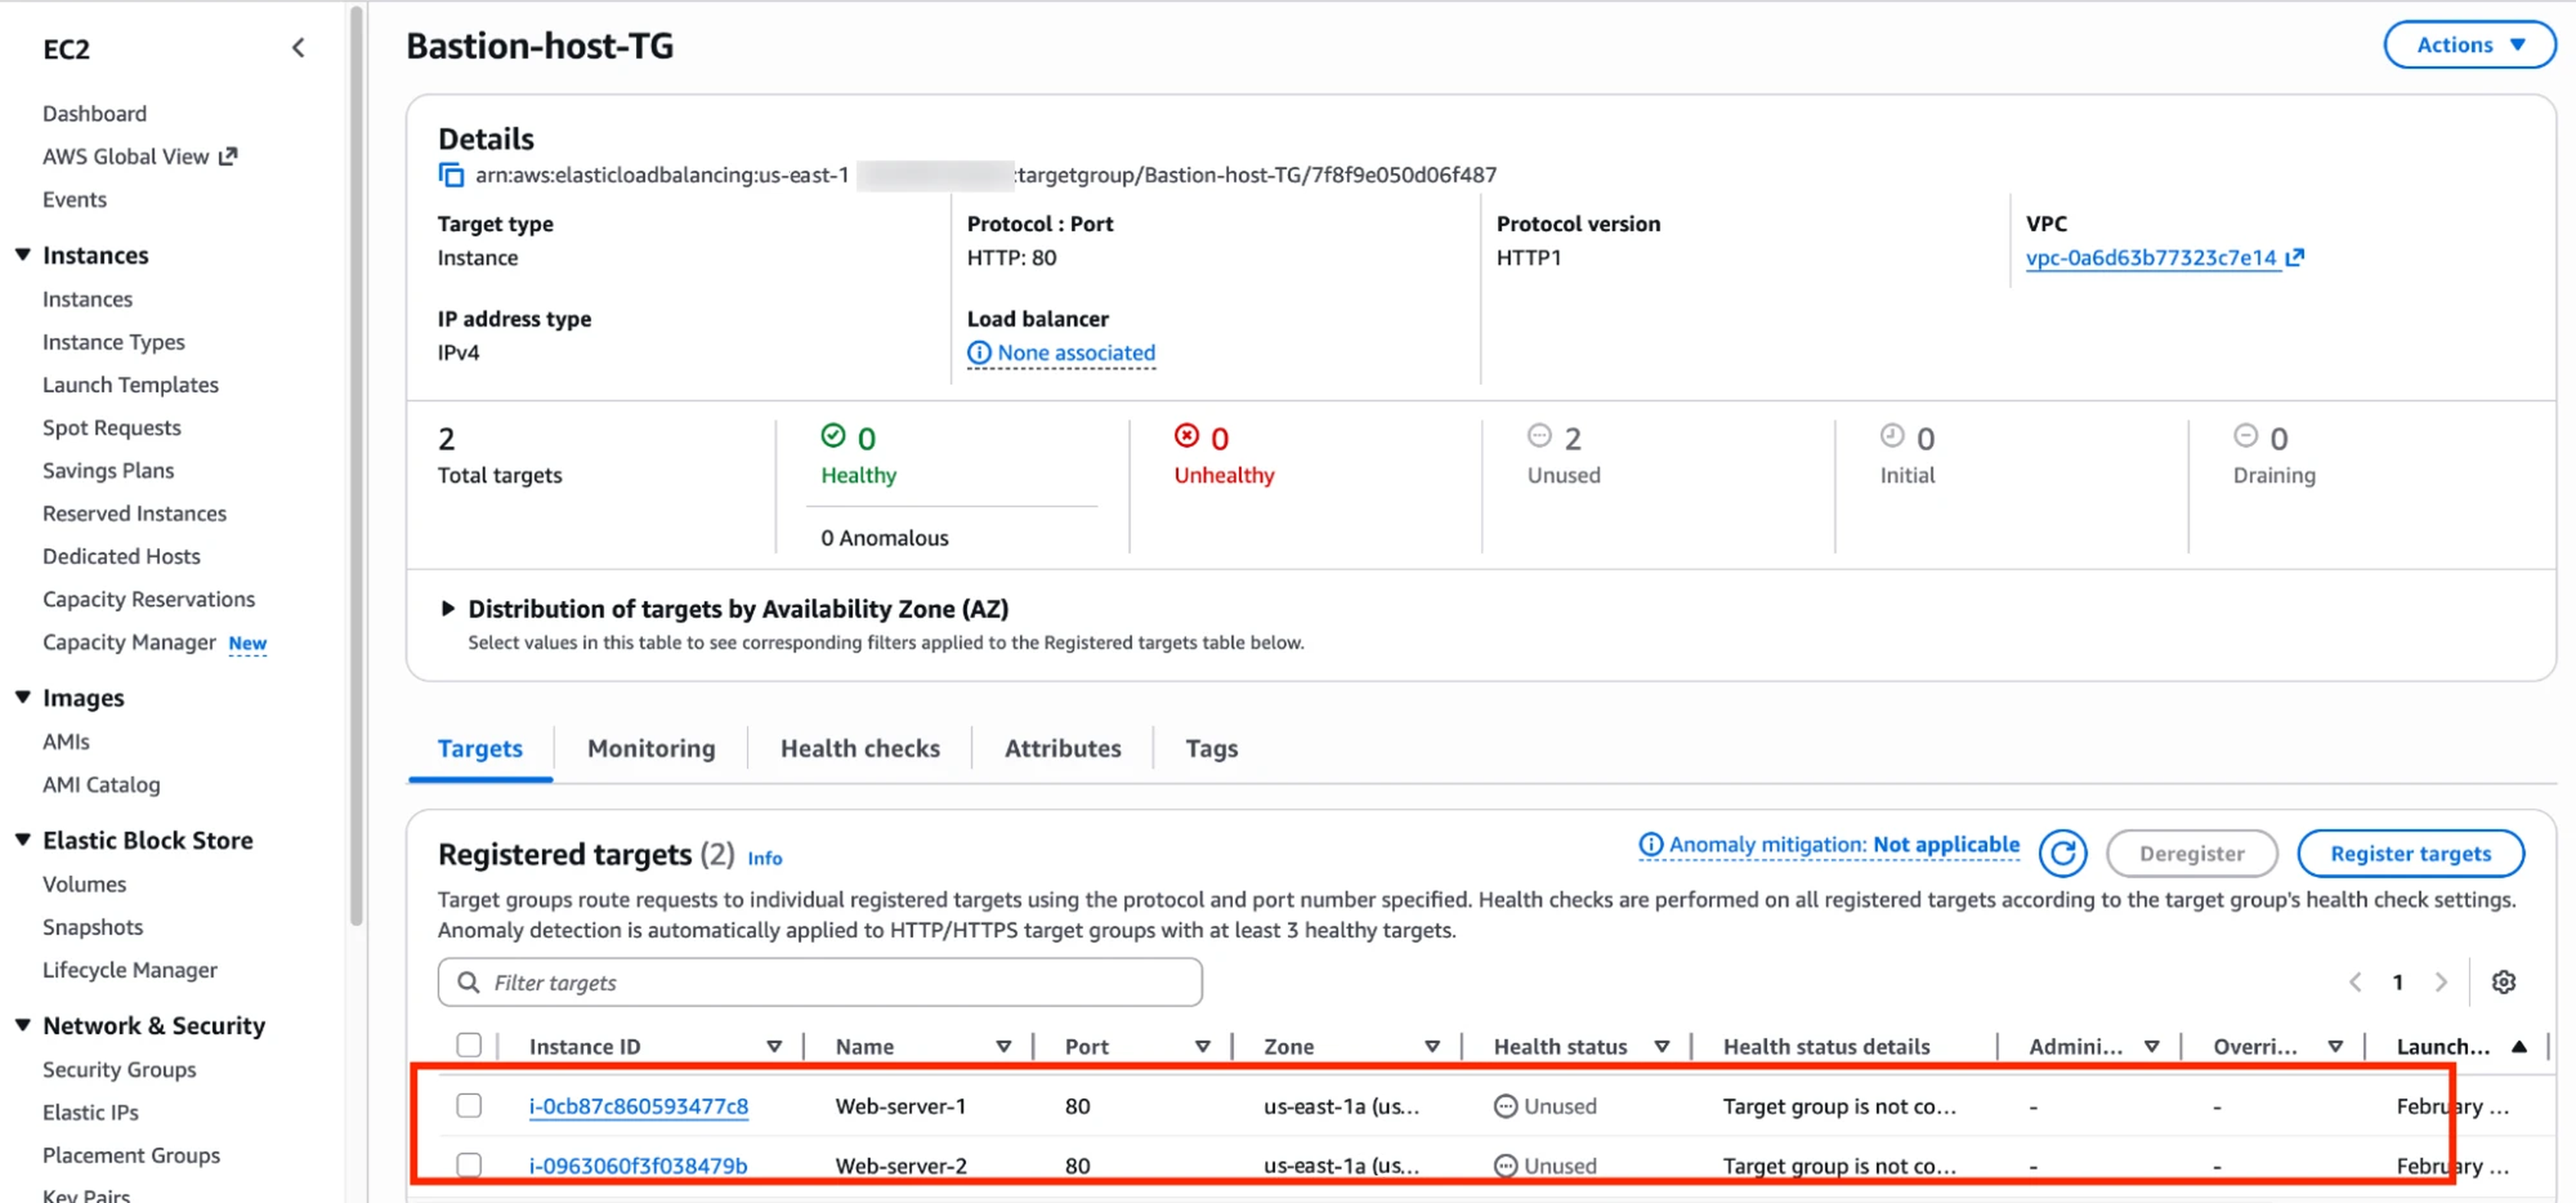
Both private instances registered in the HTTP target group.
The targets show Unused because no load balancer was attached yet. The target group is named Bastion-host-TG in my screenshots even though it holds the two web servers. After adding the ALB, I waited for both to go Healthy before testing.
9. Creating the Application Load Balancer
I created an internet-facing ALB with an HTTP listener on port 80 and public subnets in two zones. The listener forwards requests to the target group with my two private servers.
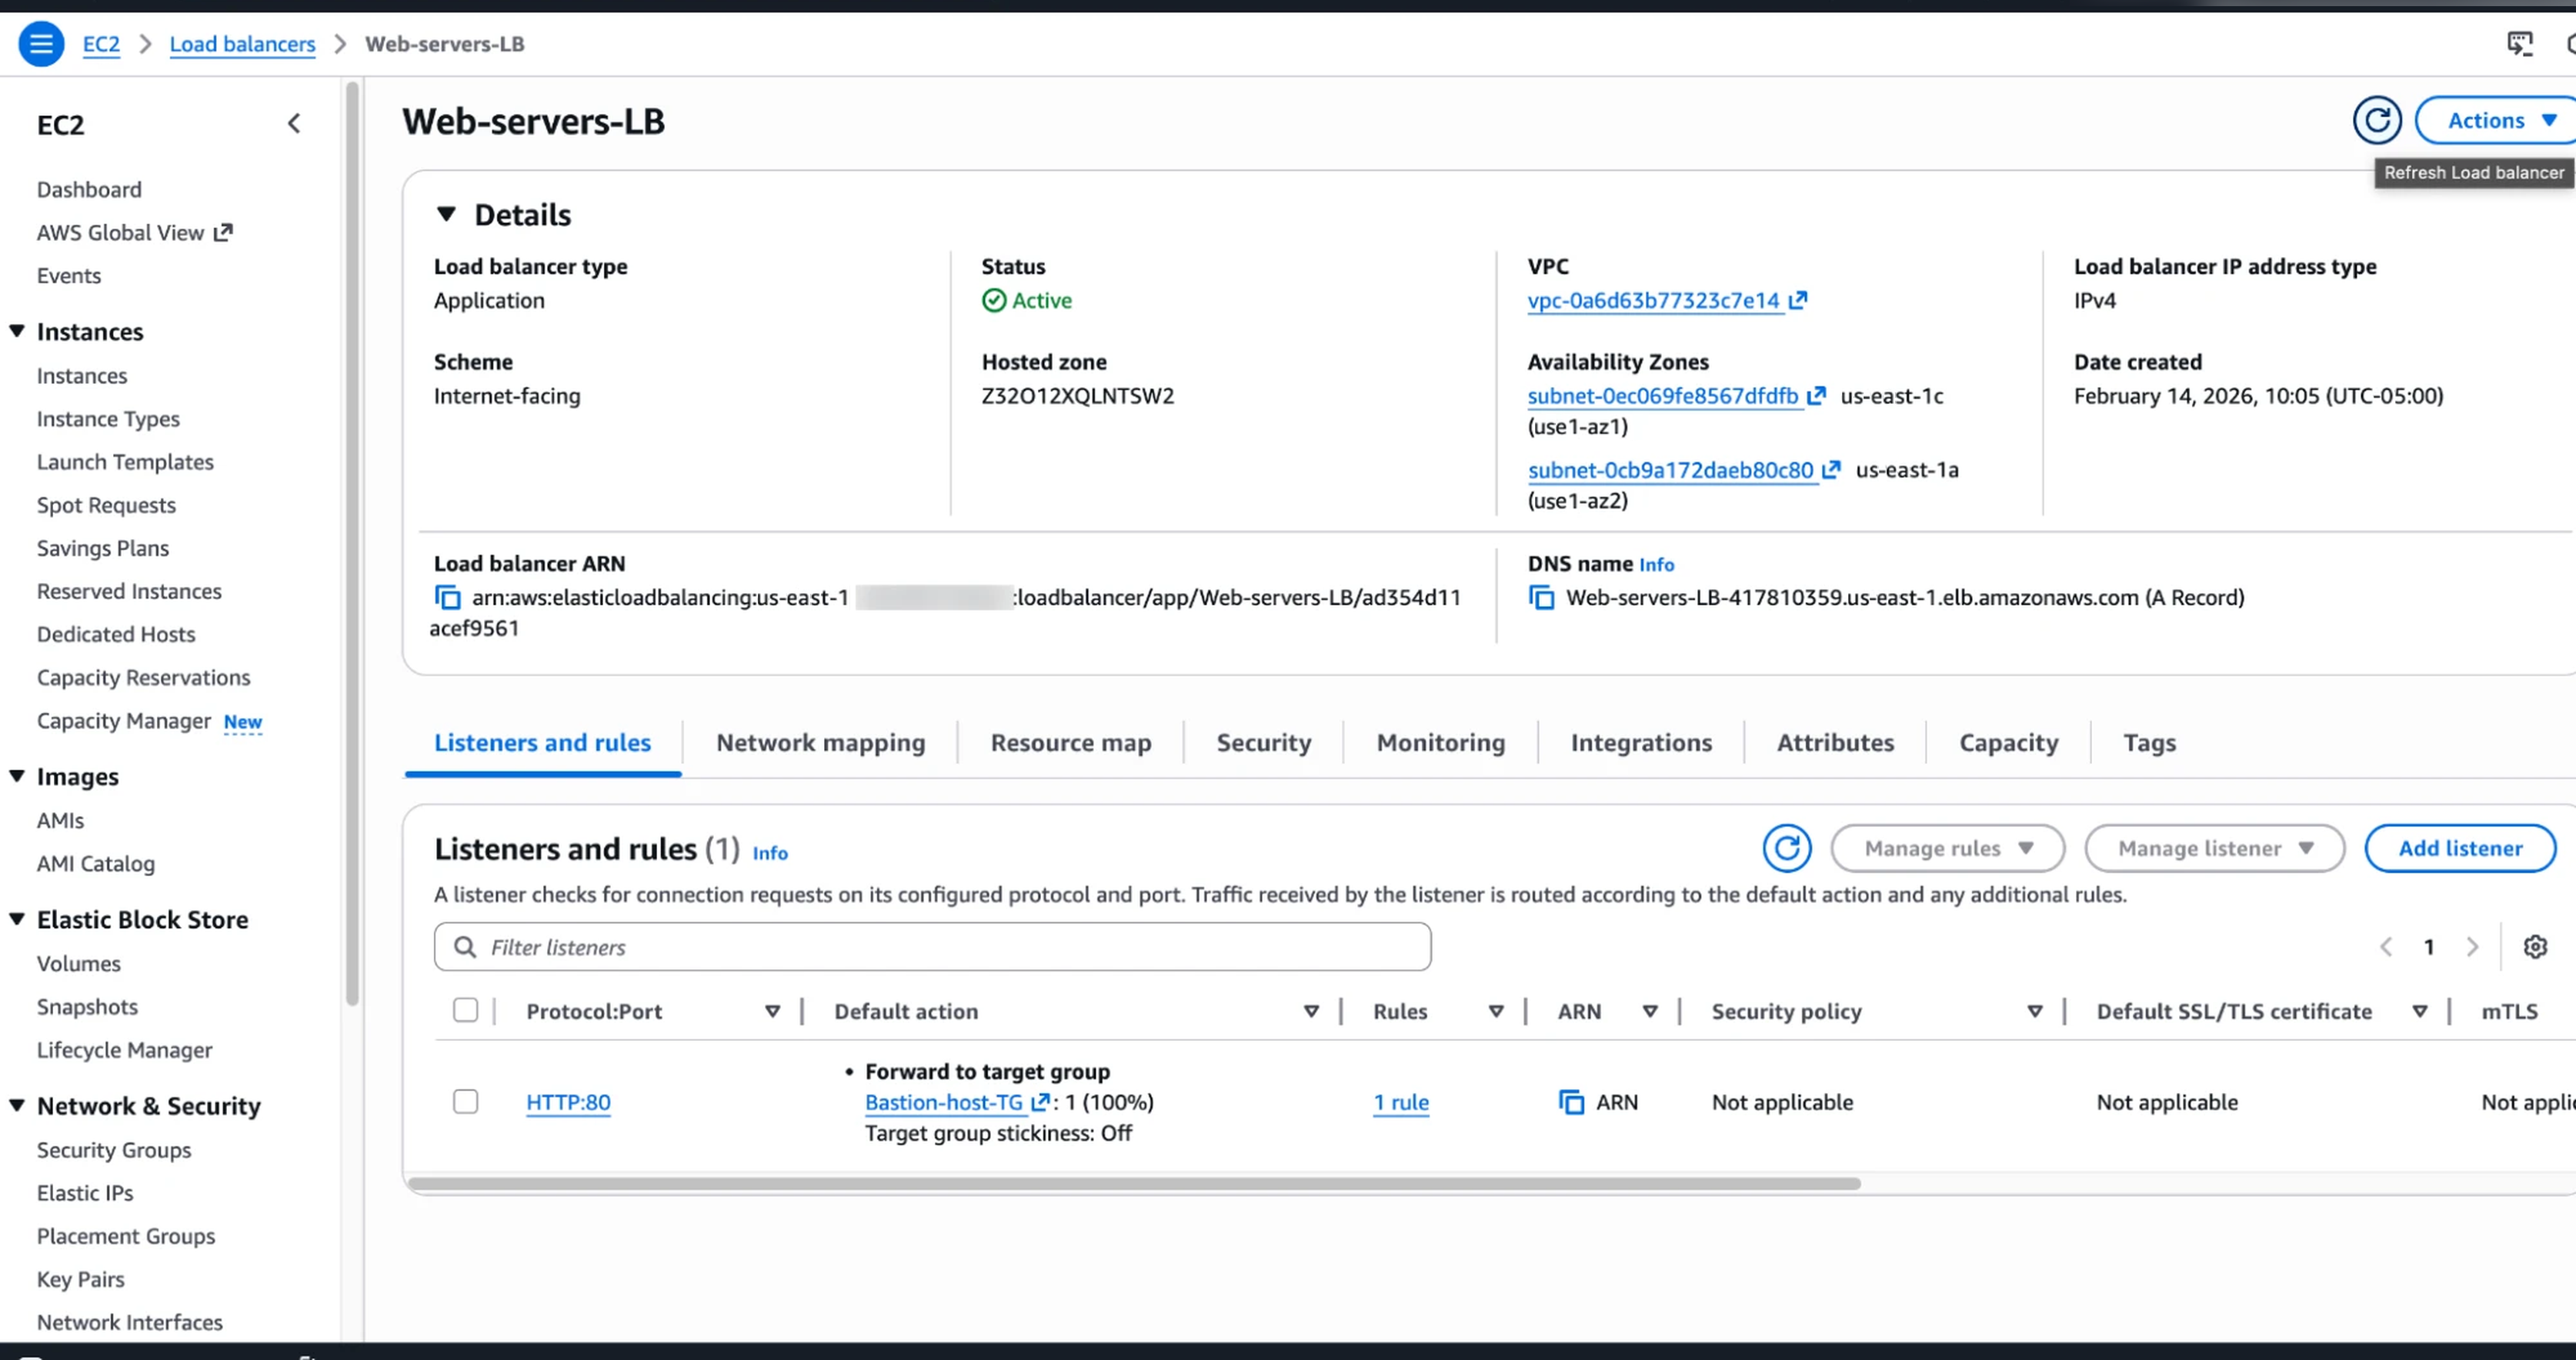
The active ALB, its two Availability Zones, and the HTTP listener.
The ALB’s security group accepts public web traffic. The web servers only accept port 80 from the ALB’s security group. Nobody can skip the load balancer.
For a real public app I’d add an HTTPS listener with an ACM certificate and redirect HTTP to HTTPS. Plain port 80 was fine for a short test.
10. Testing the application
Once the ALB was active and health checks passed, I opened its DNS name in a browser:
http://<ALB-DNS-NAME>
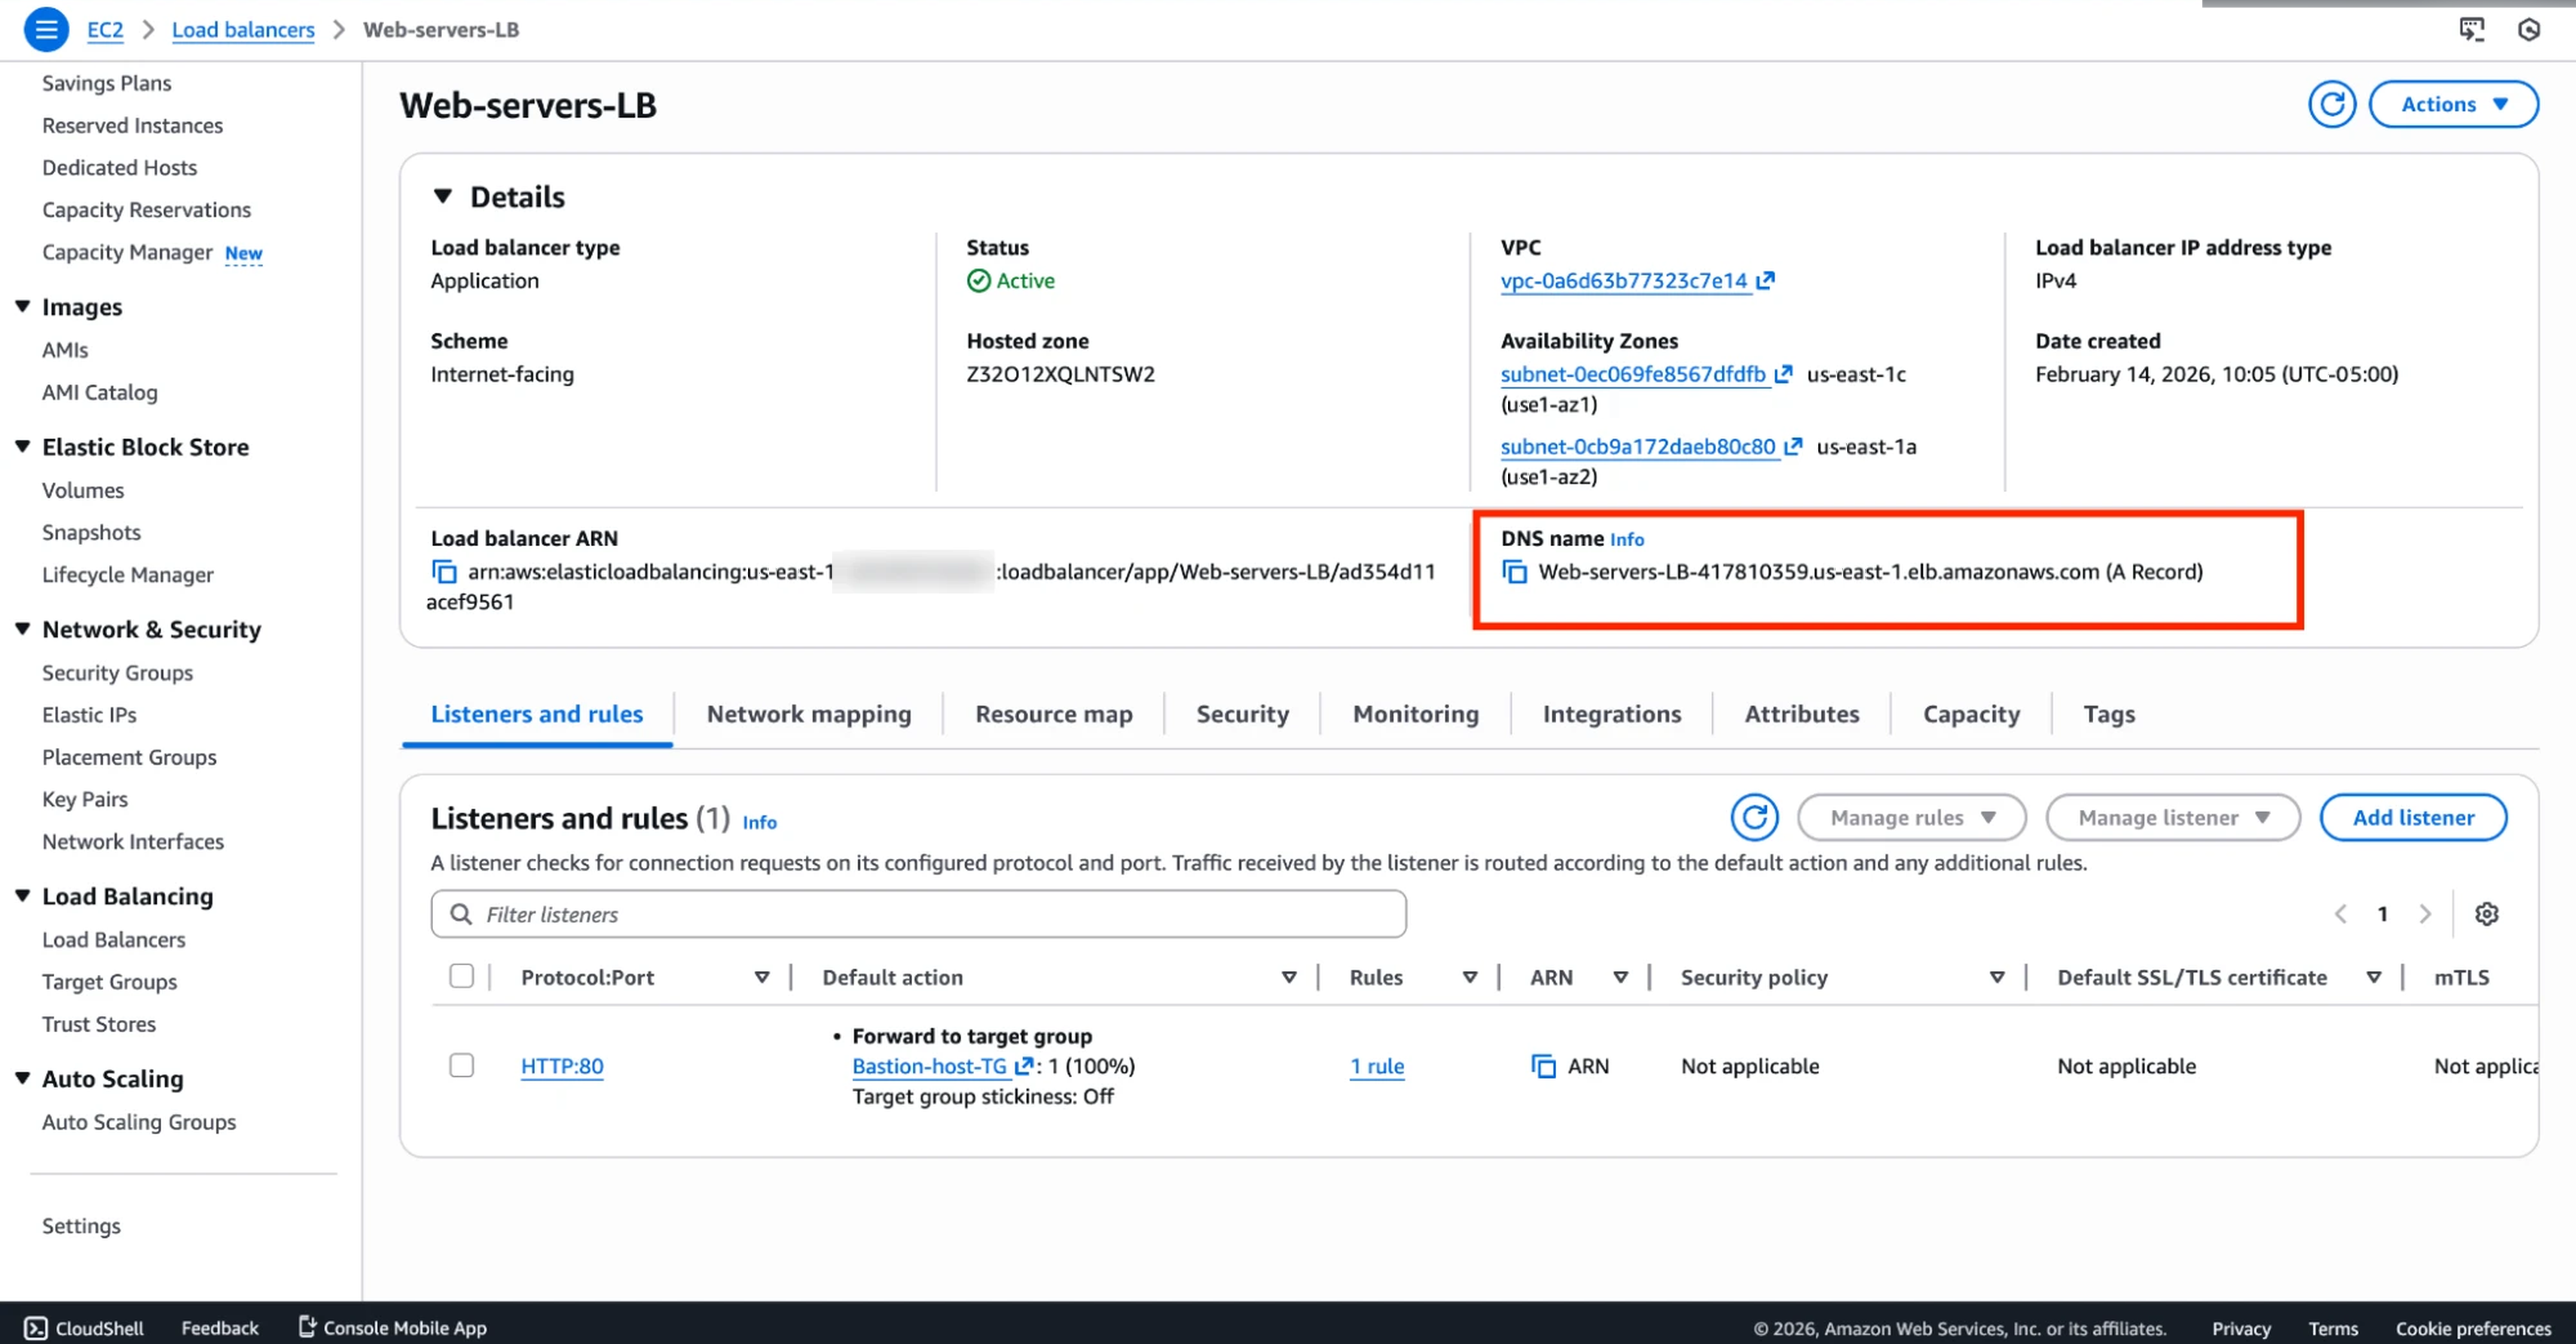
The ALB DNS name in the console.
The path looked like this:
Internet -> Application Load Balancer -> Private EC2 web servers
The servers answered public requests without having public IPs of their own.
What I learned
This pulled a lot of AWS networking and admin ideas into one working setup. The bastion gave me a controlled way in. The NAT Gateway gave the private servers outbound access. Ansible kept their config the same. The ALB gave both Nginx servers one public endpoint.
The biggest lesson: a server doesn’t need a public IP just because it serves a public app. The ALB can face the public while the servers stay private.
For production I’d spread private subnets across multiple zones. I’d swap bastion SSH for Session Manager where I can. I’d terminate TLS at the ALB and manage everything as code. NAT Gateways, ALBs, Elastic IPs, and EC2 instances all cost money, so I deleted everything when I was done.