Real enterprise networks aren’t flat. They use segmentation, firewalls, and isolated zones to protect important systems and control traffic. For this lab I used pfSense as the router and firewall. I added three Ubuntu Server VMs to act like a multi-tier setup. It all runs in VirtualBox, so I don’t need any physical hardware.
Here’s what I did:
- Installed pfSense in VirtualBox
- Set the LAN IP and ran the setup wizard
- Created five VLANs with DHCP
- Wrote firewall rules for the LAB and GUEST VLANs
- Built three Ubuntu Server VMs from one base image
- Installed a web, database, and app service on them
- Tested that the VMs can talk to each other
The VLANs ended up not carrying the VM traffic. VirtualBox’s Host-Only adapter doesn’t handle VLAN tags the way a managed switch does. I explain what I did instead in section 7.
1. Installing pfSense
I went to the pfSense download page and picked:
- Architecture: AMD64
- Installer: DVD Image (ISO)
It came down as a .gz file. I installed 7-Zip and used it to pull the ISO out.
Creating the VM
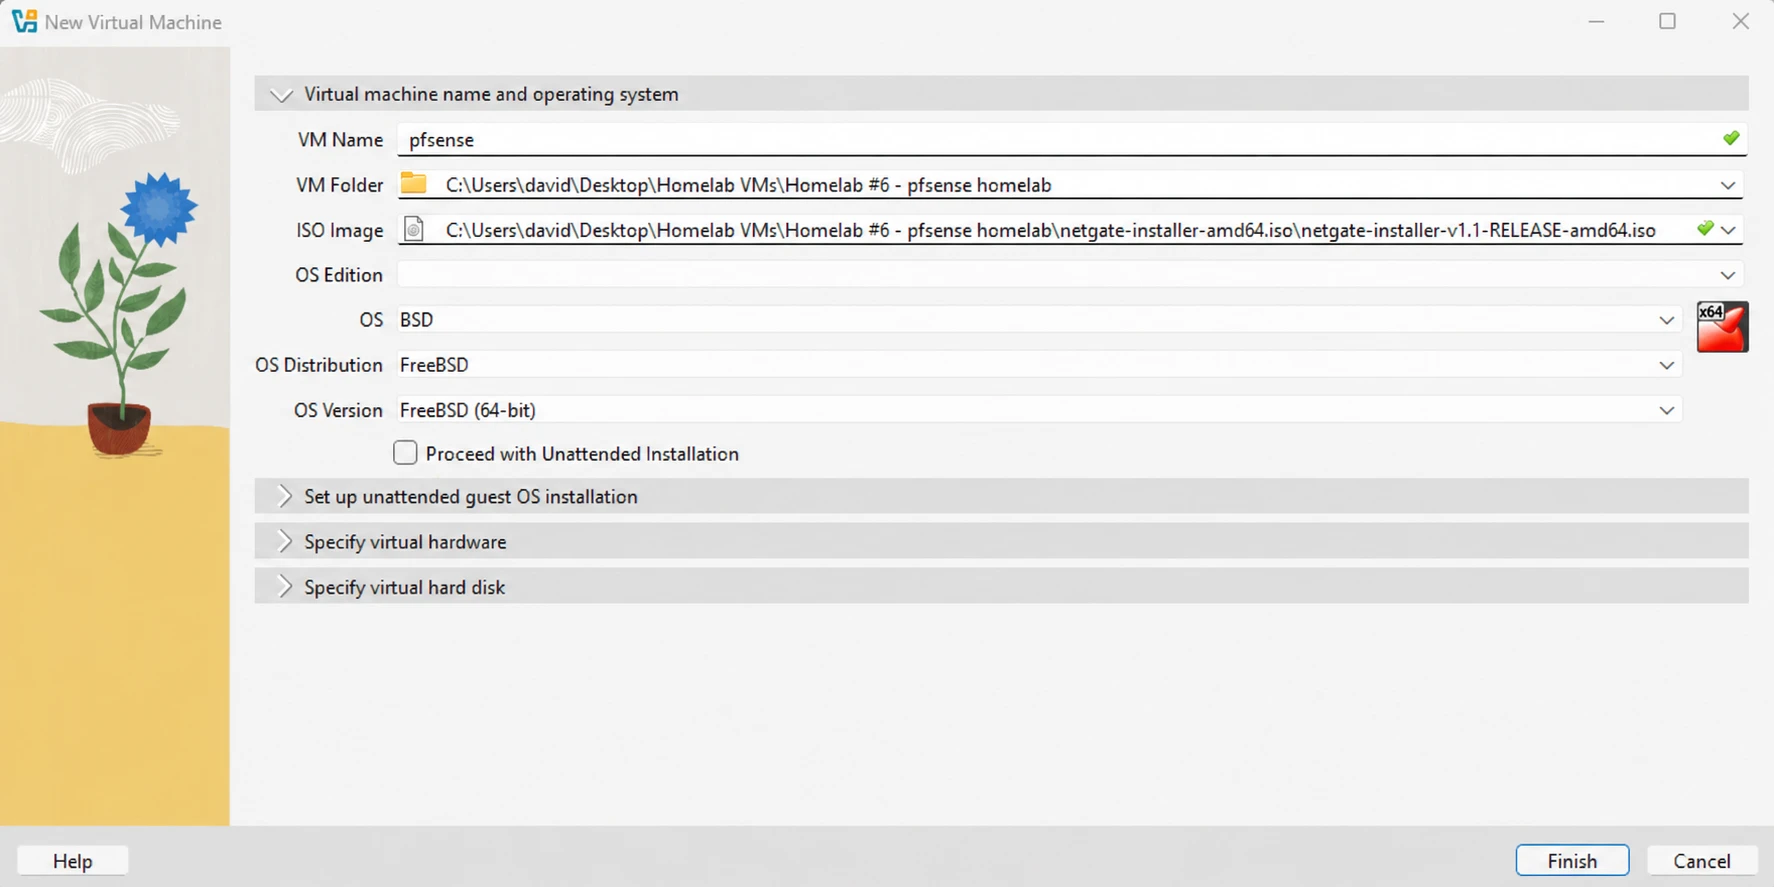
In VirtualBox I clicked New and used these settings:
- Name:
pfSense - Type: BSD
- Version: FreeBSD (64-bit)
- Memory: 2048 MB
- Processors: 2
- Hard disk: 20 GB, VDI, dynamically allocated
Naming the pfSense VM
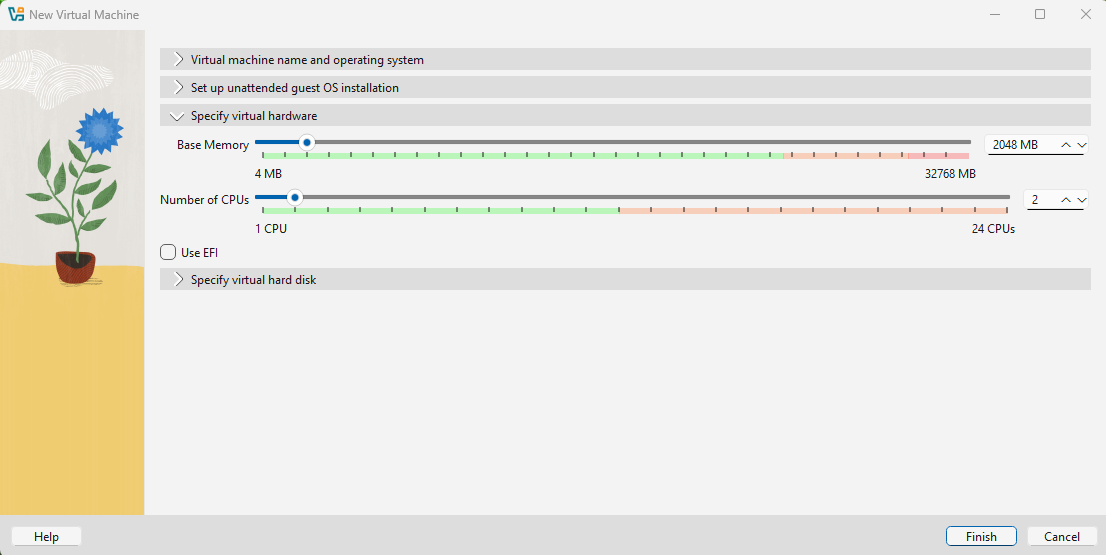
Setting memory and processors
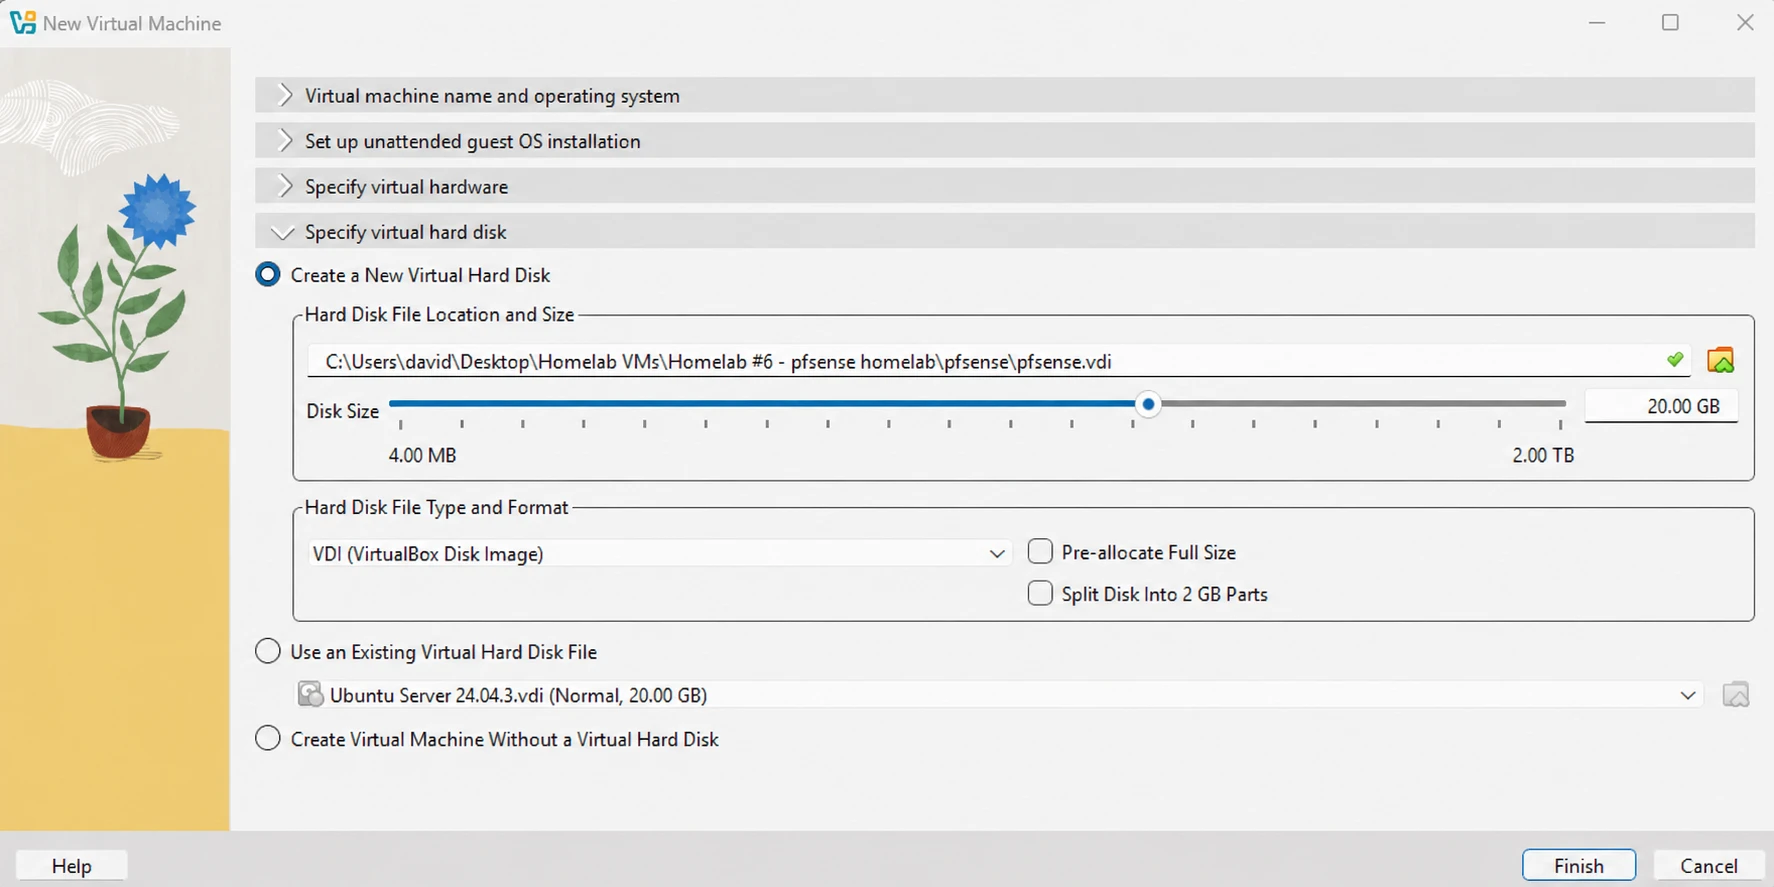
Creating the virtual hard disk
Network adapters
Under Settings → Network I set up two adapters.
Adapter 1 (WAN):
- Attached to: NAT
- Adapter type: Intel PRO/1000 MT Desktop
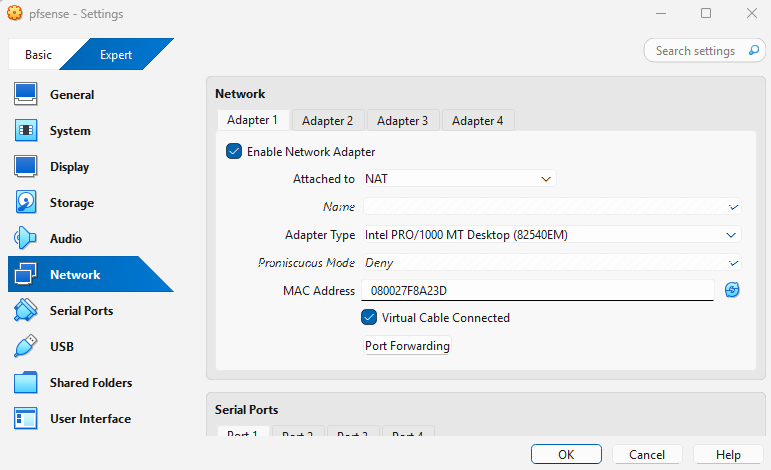
Adapter 1 set to NAT for the WAN
Adapter 2 (LAN):
- Attached to: Internal Network named
Homelab6Network - Adapter type: Intel PRO/1000 MT Desktop
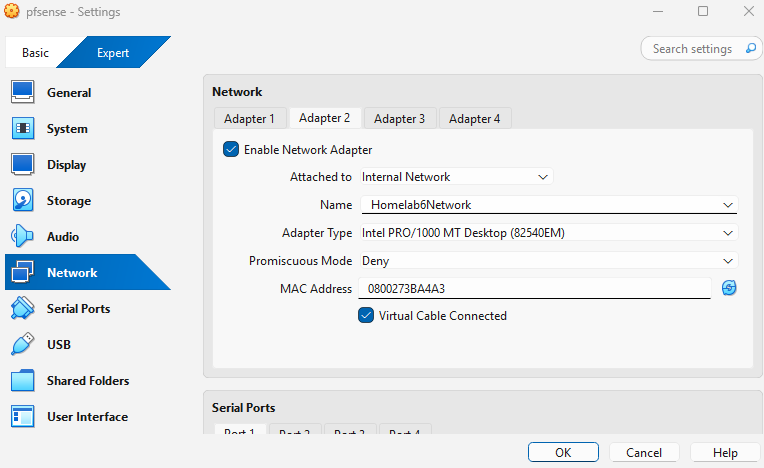
Adapter 2 on an internal network for the LAN
Running the installer
I started the VM. The pfSense installer came up and I pressed Enter to accept the copyright notice.
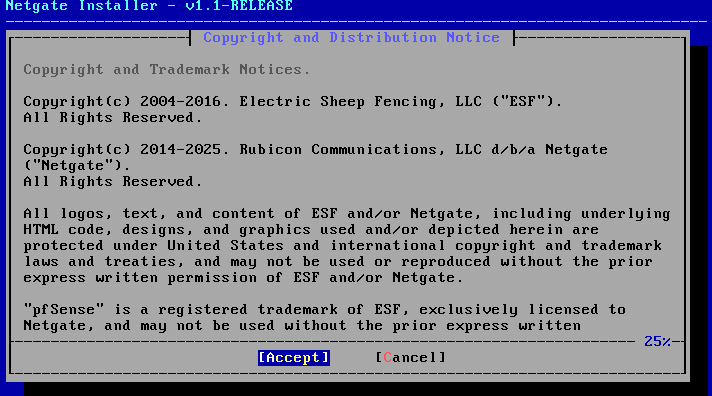
Accepting the copyright notice
Then I selected Install.
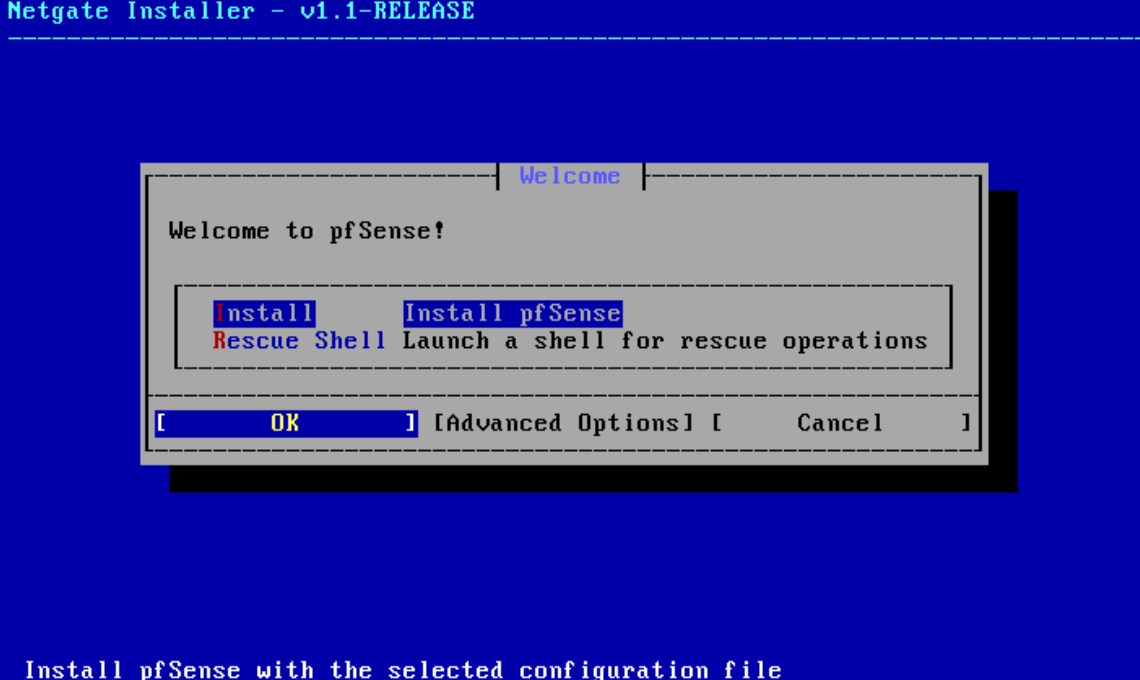
Selecting Install
I clicked OK to continue with the network installation.
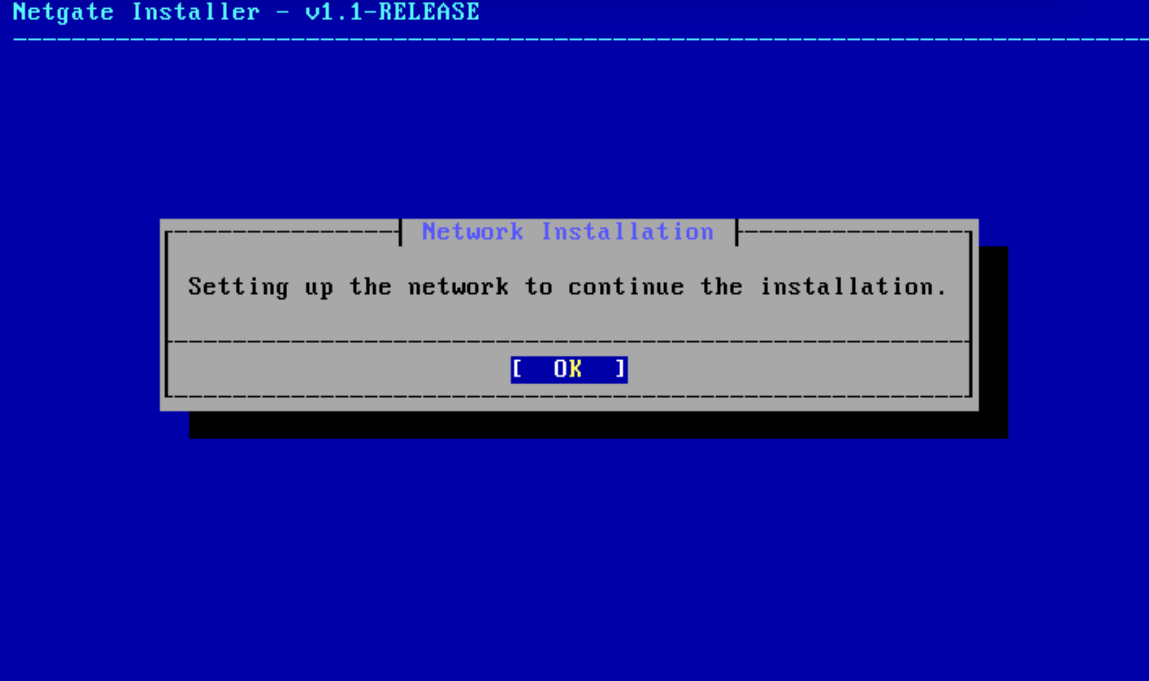
Continuing with the network installation
It asked for the WAN interface. I picked em0, which is adapter 1.
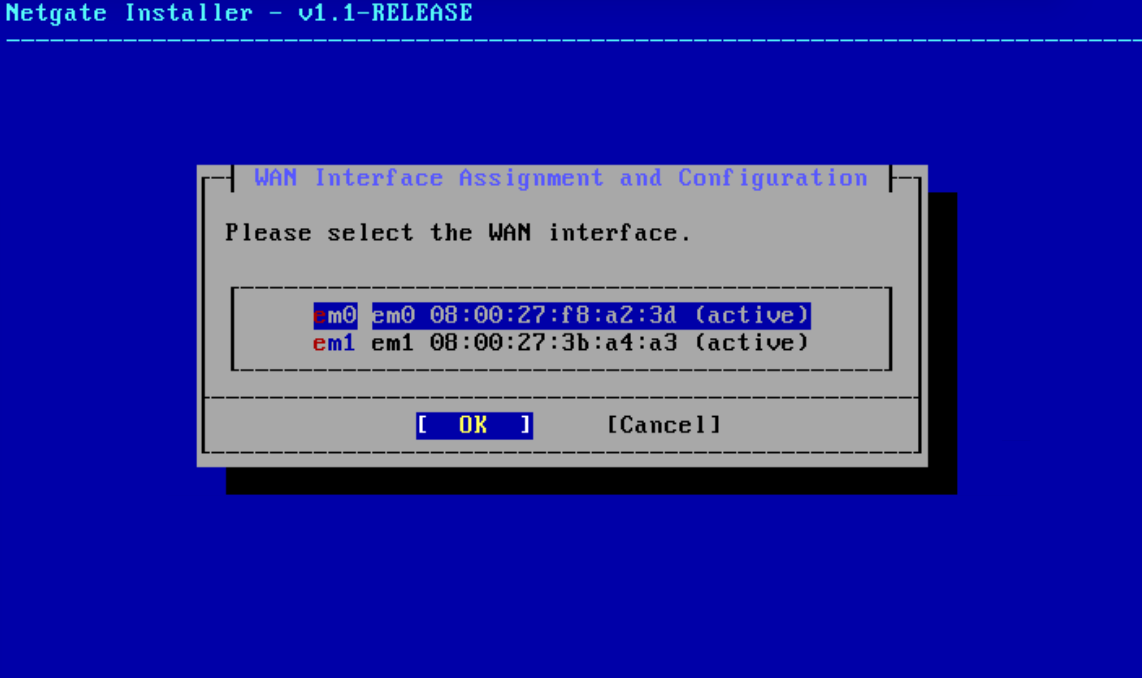
Selecting em0 as the WAN interface
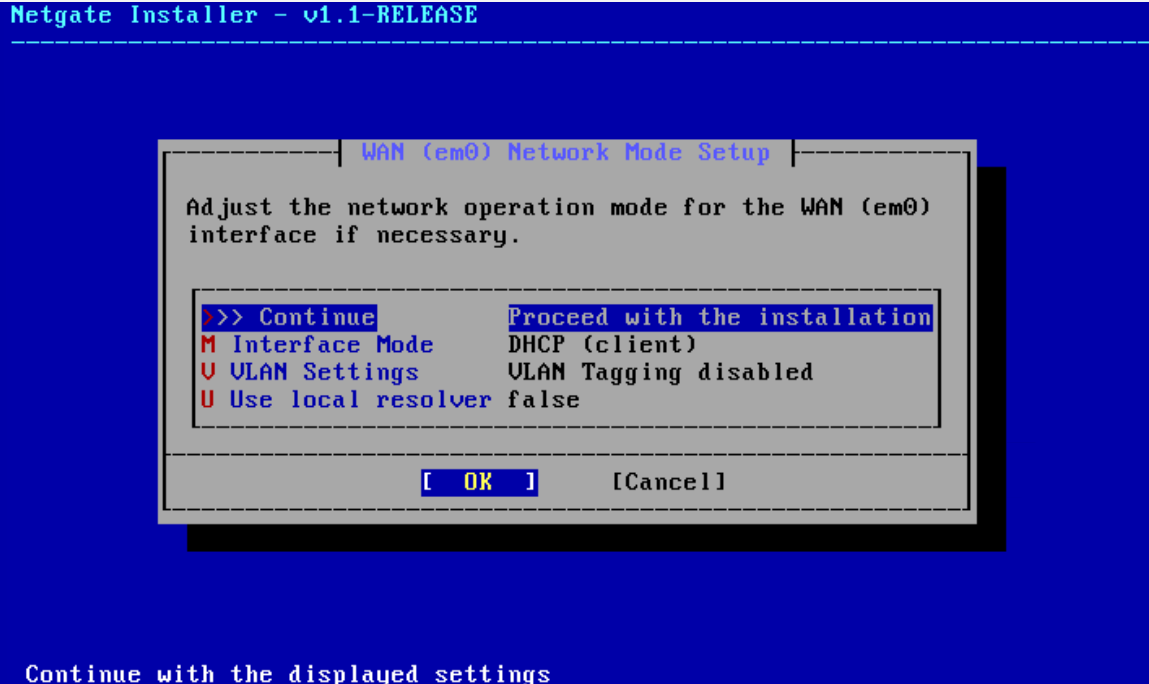
Confirming the WAN interface
Then it asked for the LAN interface. I picked em1, which is adapter 2.
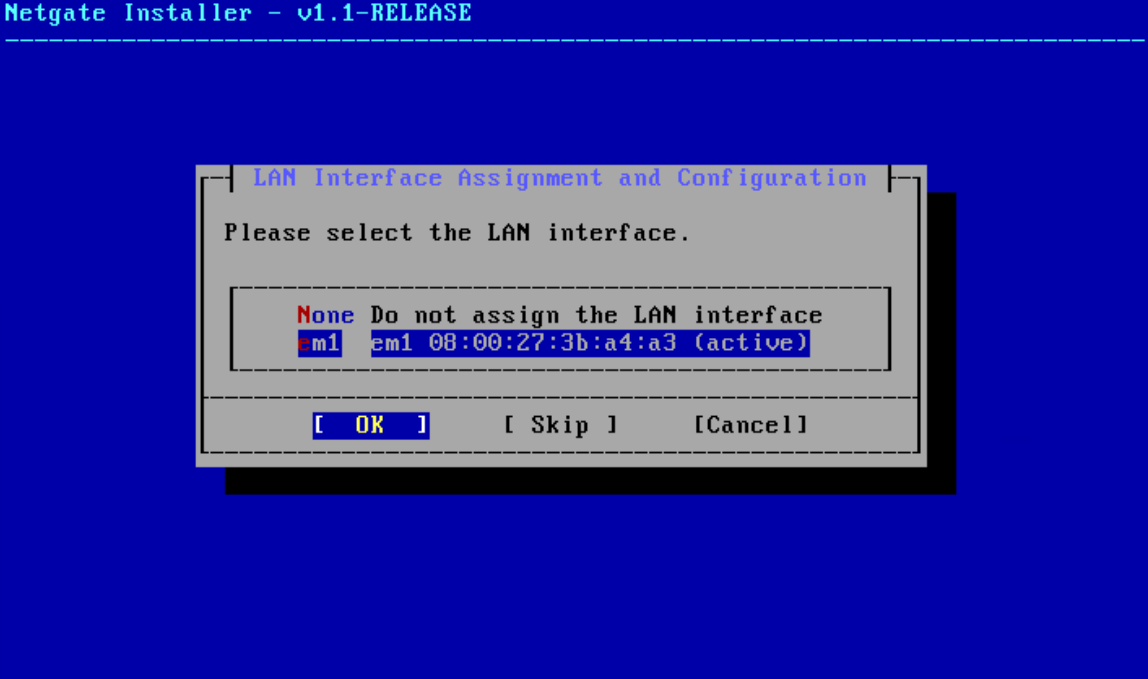
Selecting em1 as the LAN interface
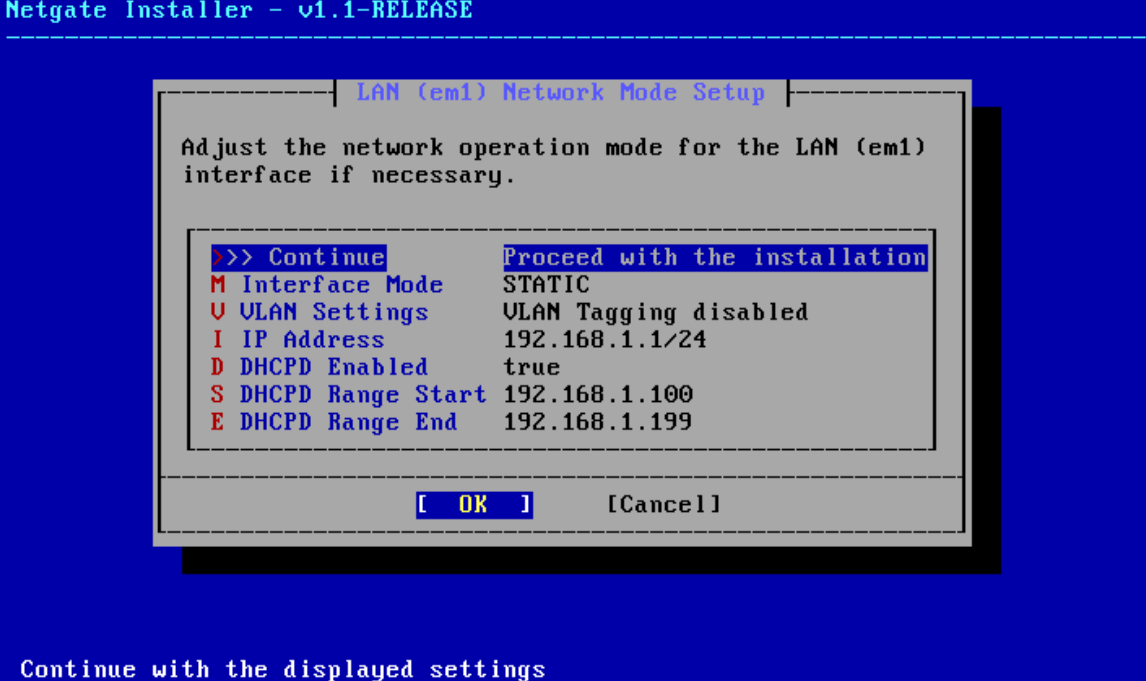
Confirming the LAN interface
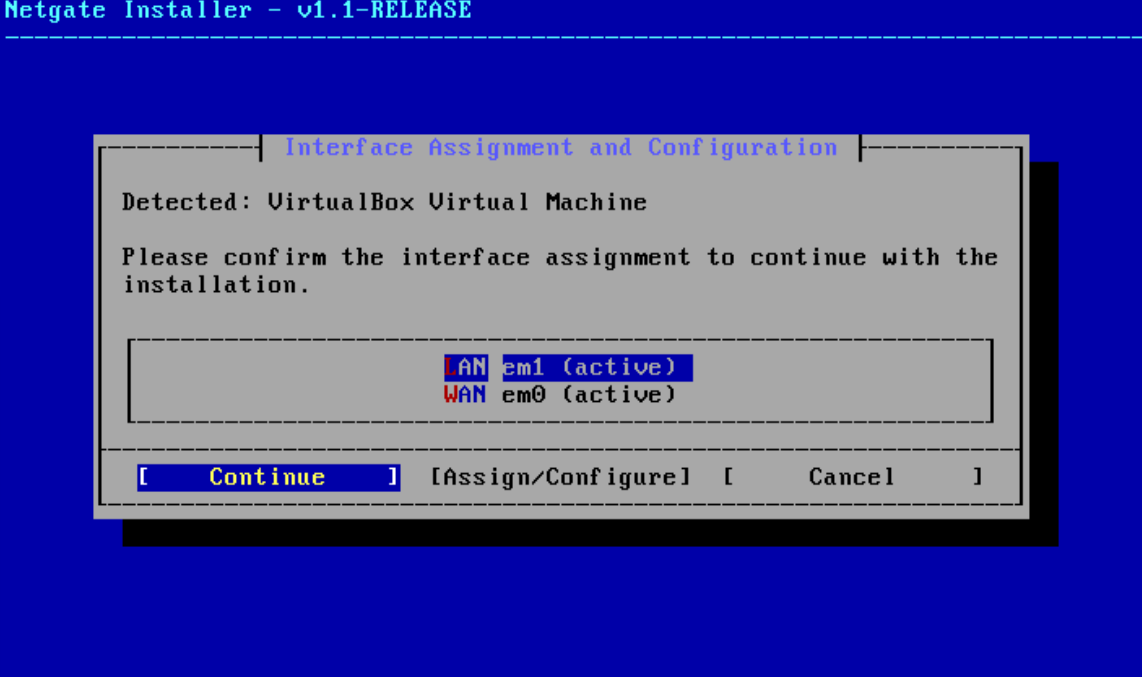
Confirming the interface assignments
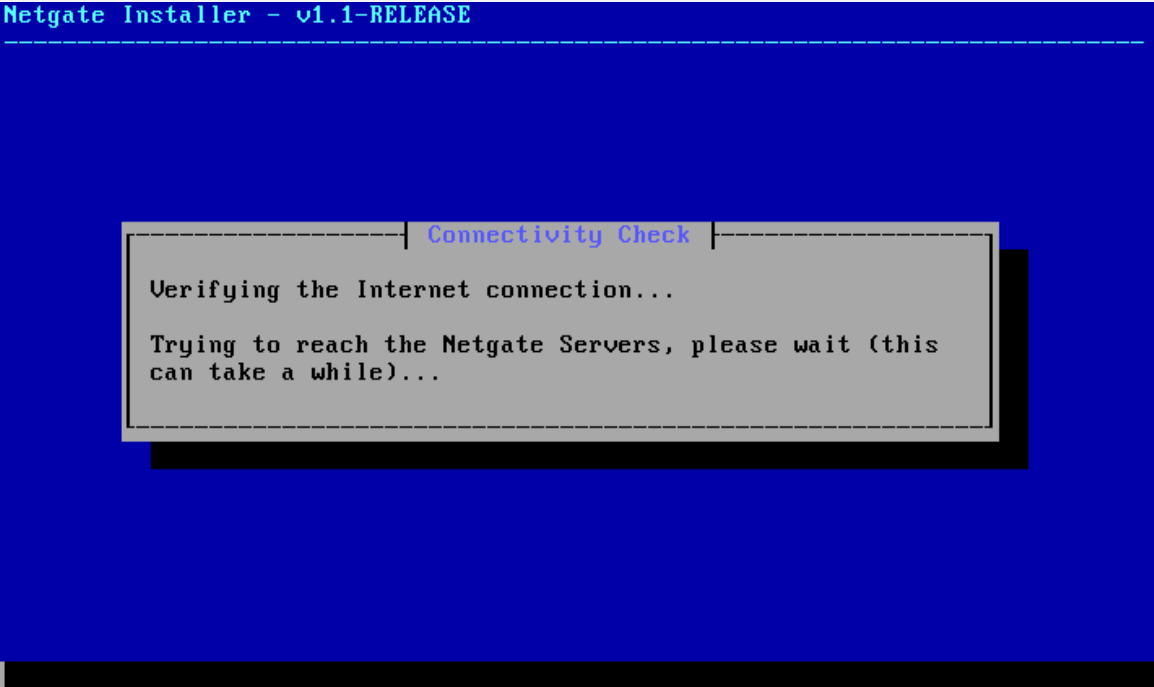
Interface assignment summary
I chose Install CE. That’s the free community edition.
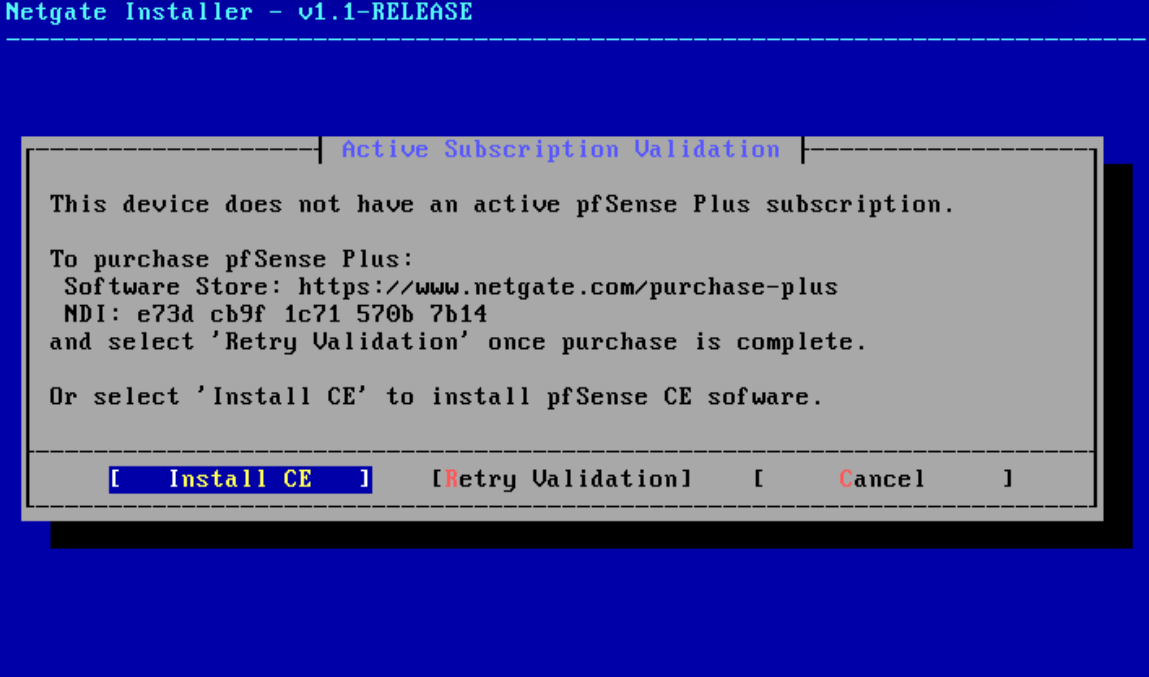
Choosing pfSense CE
I kept the defaults for file system and partitioning. That’s ZFS and GPT.
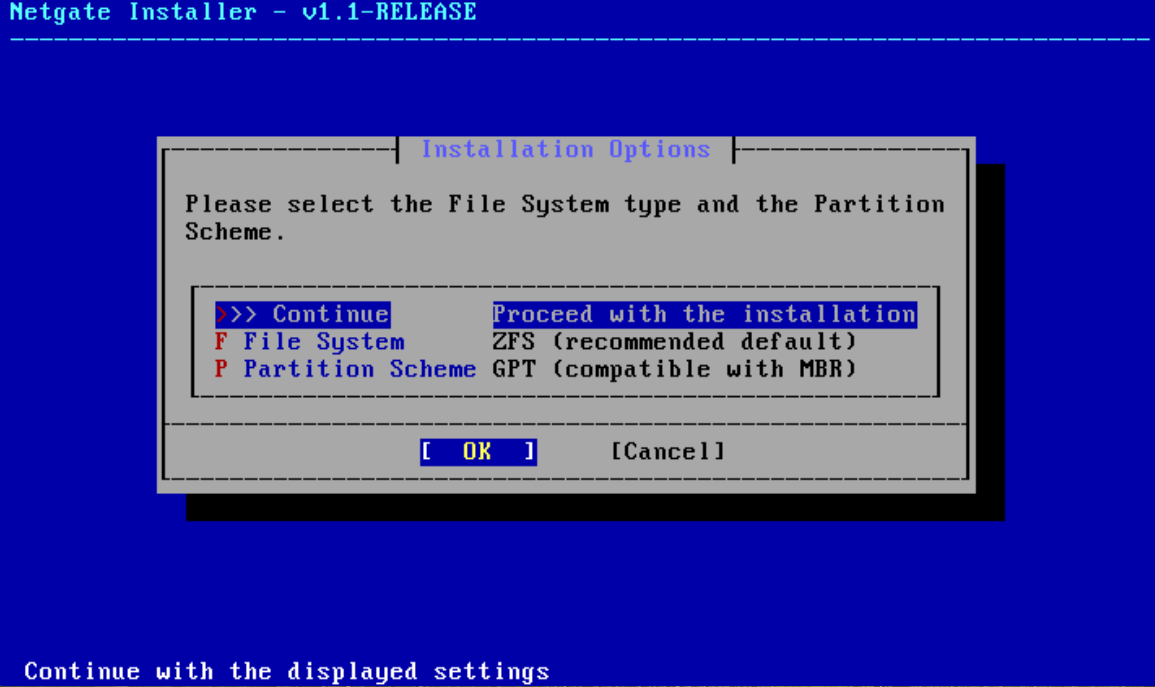
Default file system and partition scheme
I clicked OK on the ZFS virtual device setup. ZFS protects the pfSense config data from corruption. “Stripe” just means one disk with no RAID, which is right for a single-disk VM.
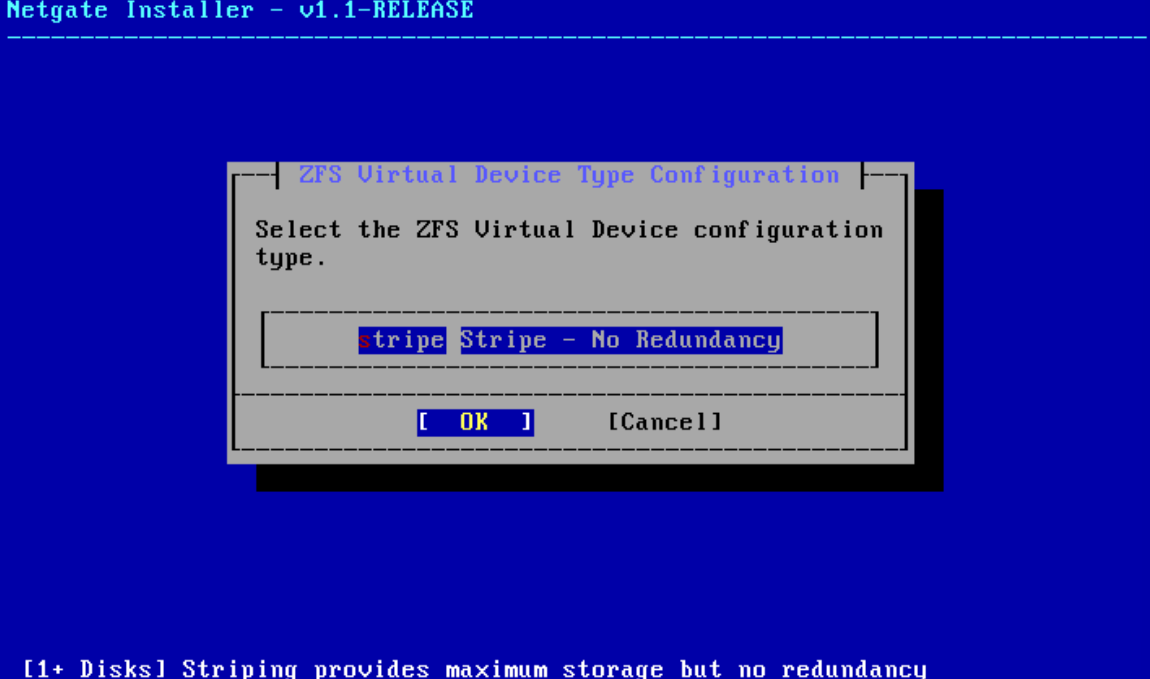
ZFS stripe configuration
I confirmed the disk to install on.
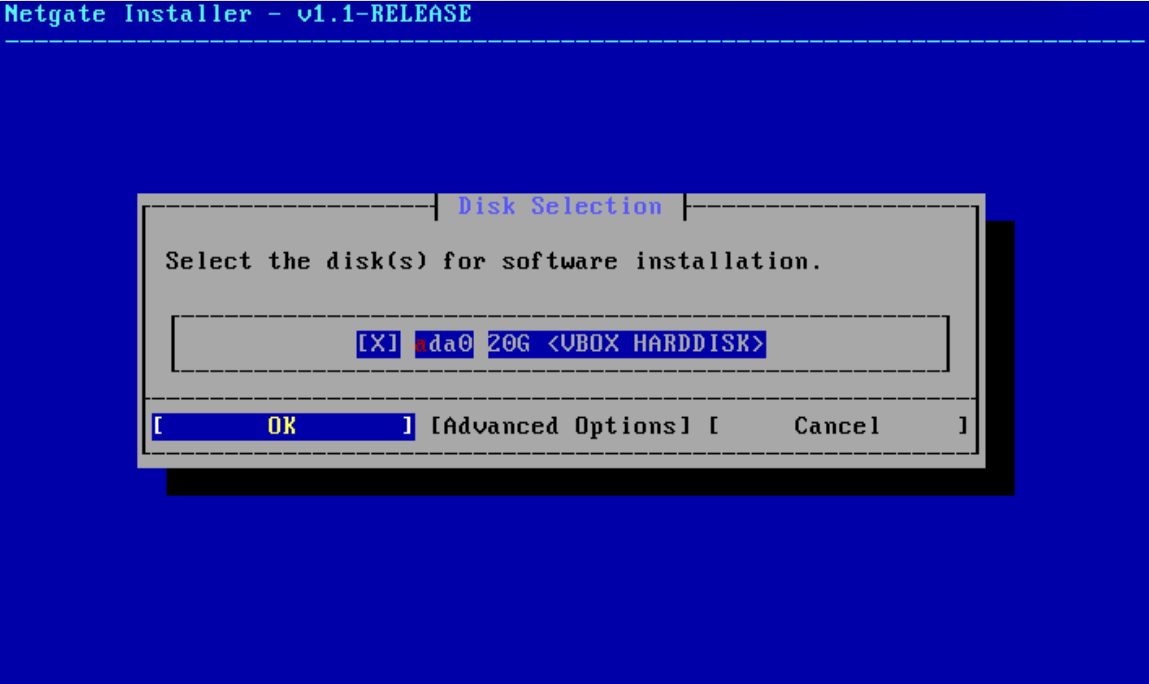
Choosing the install disk
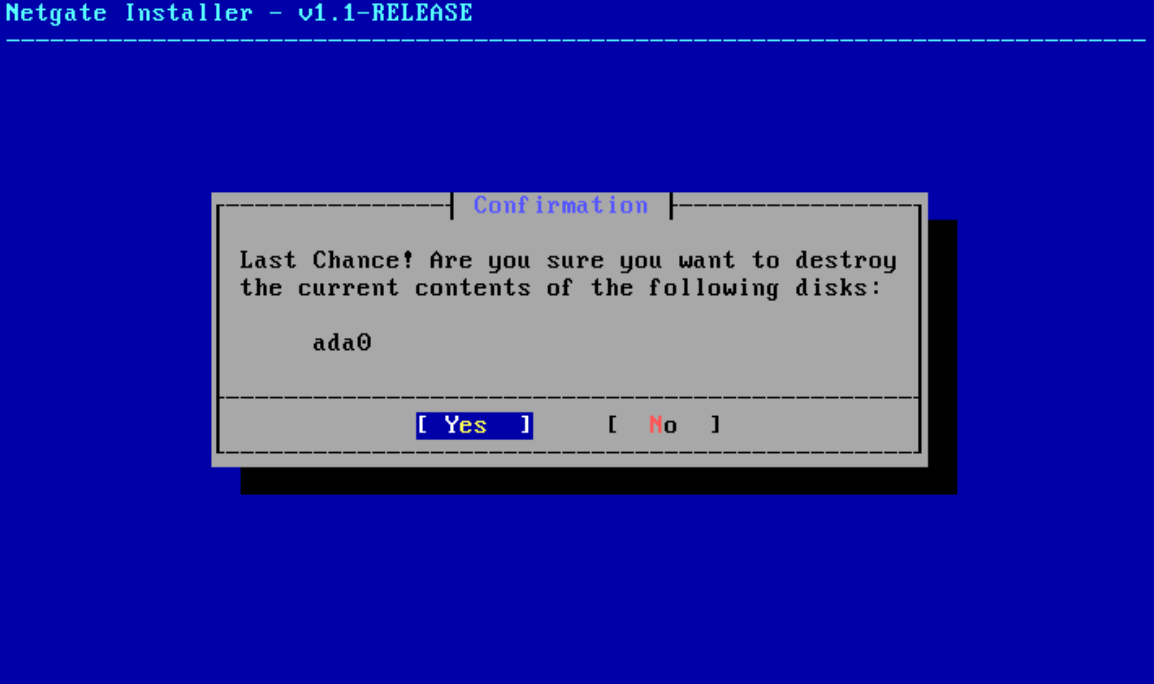
Confirming the disk
I picked the current stable version, 2.8.1.
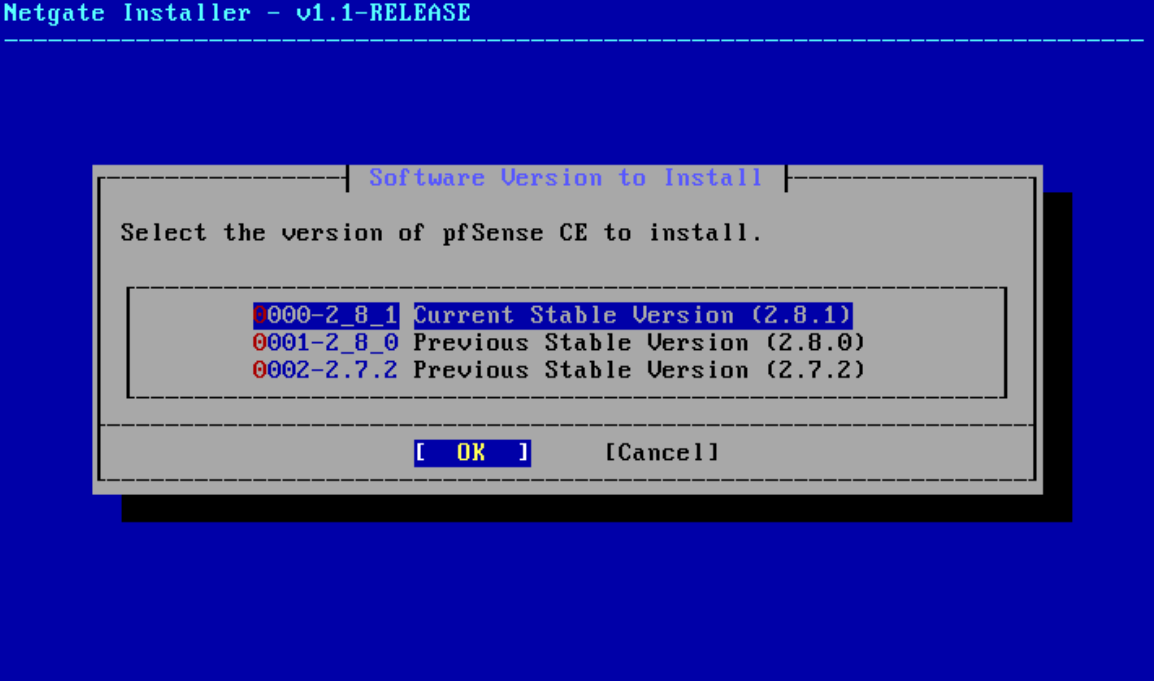
Selecting pfSense 2.8.1
Then I started the install.
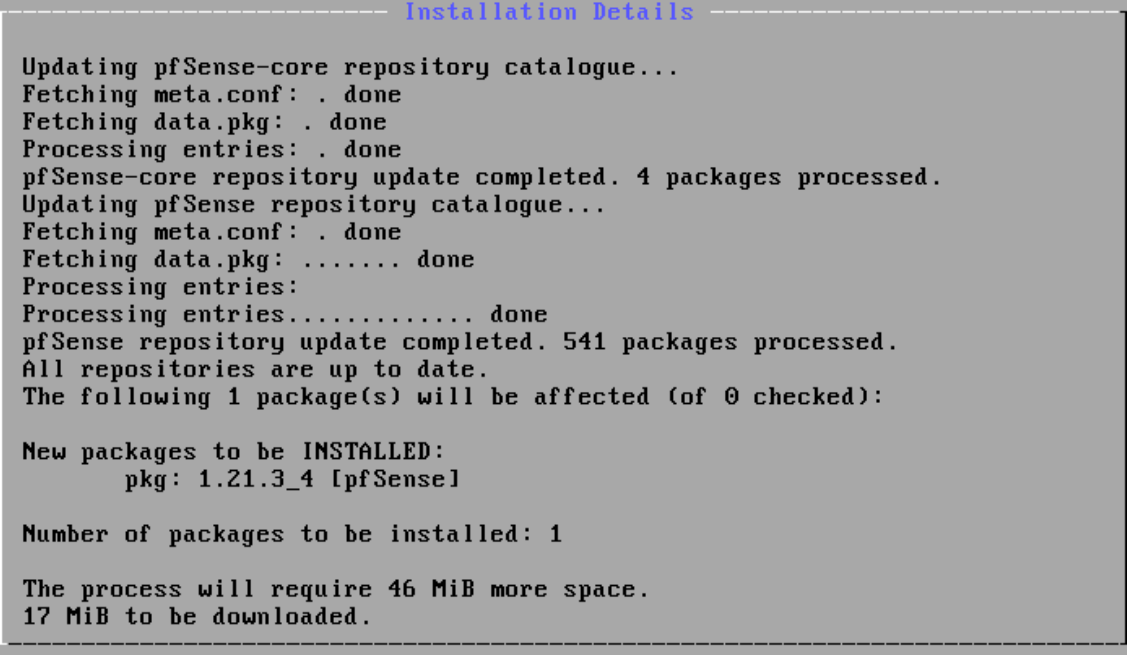
The installation running
When it finished I selected Reboot.
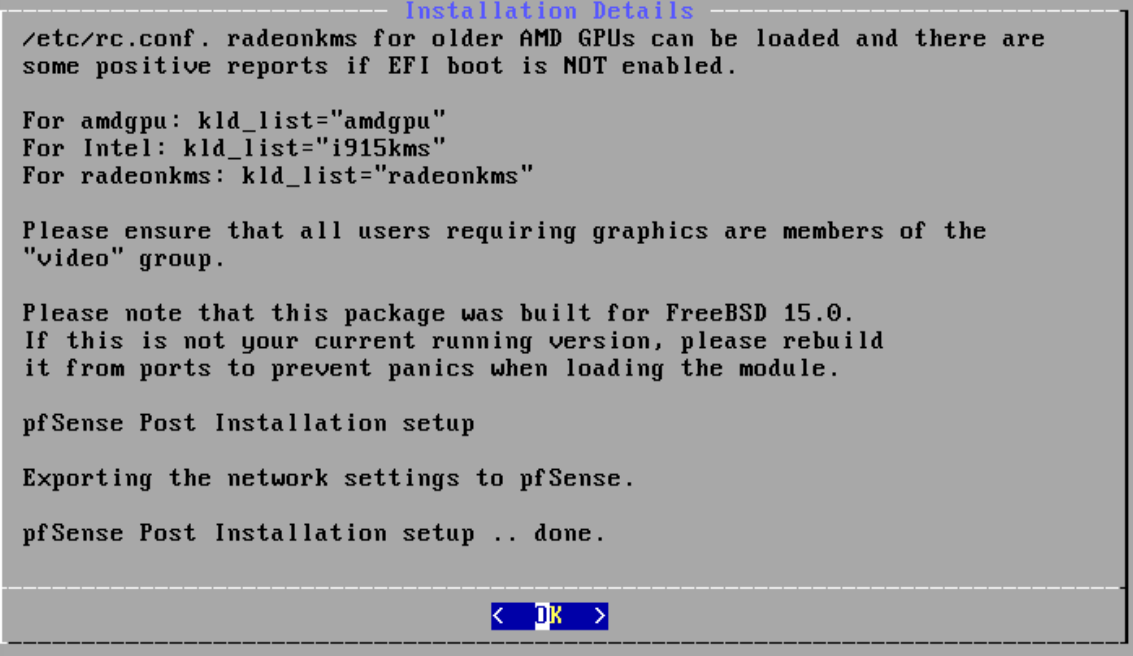
Rebooting after the install
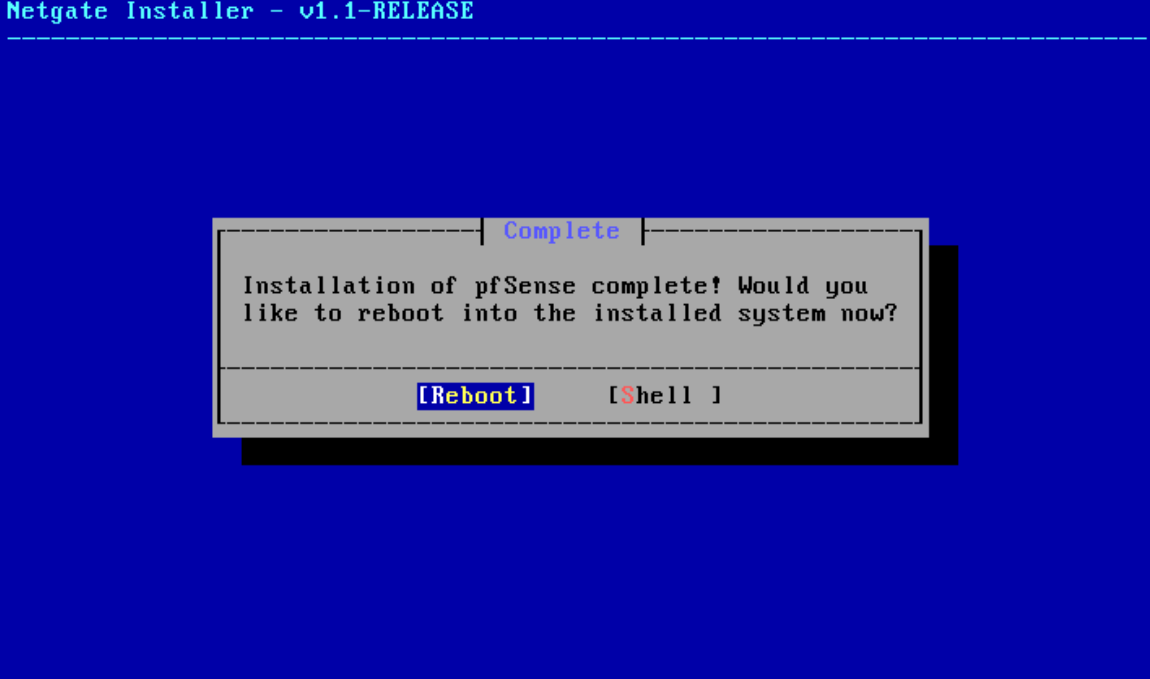
The boot menu
The installer came back
The boot menu had a few choices, including Boot Multi User and Boot Single User. I picked Boot Multi User. The installer menu showed up again. That’s not supposed to happen.
I powered the VM off and checked its settings. The installer ISO was still attached. pfSense was installed but the VM kept booting from the ISO.
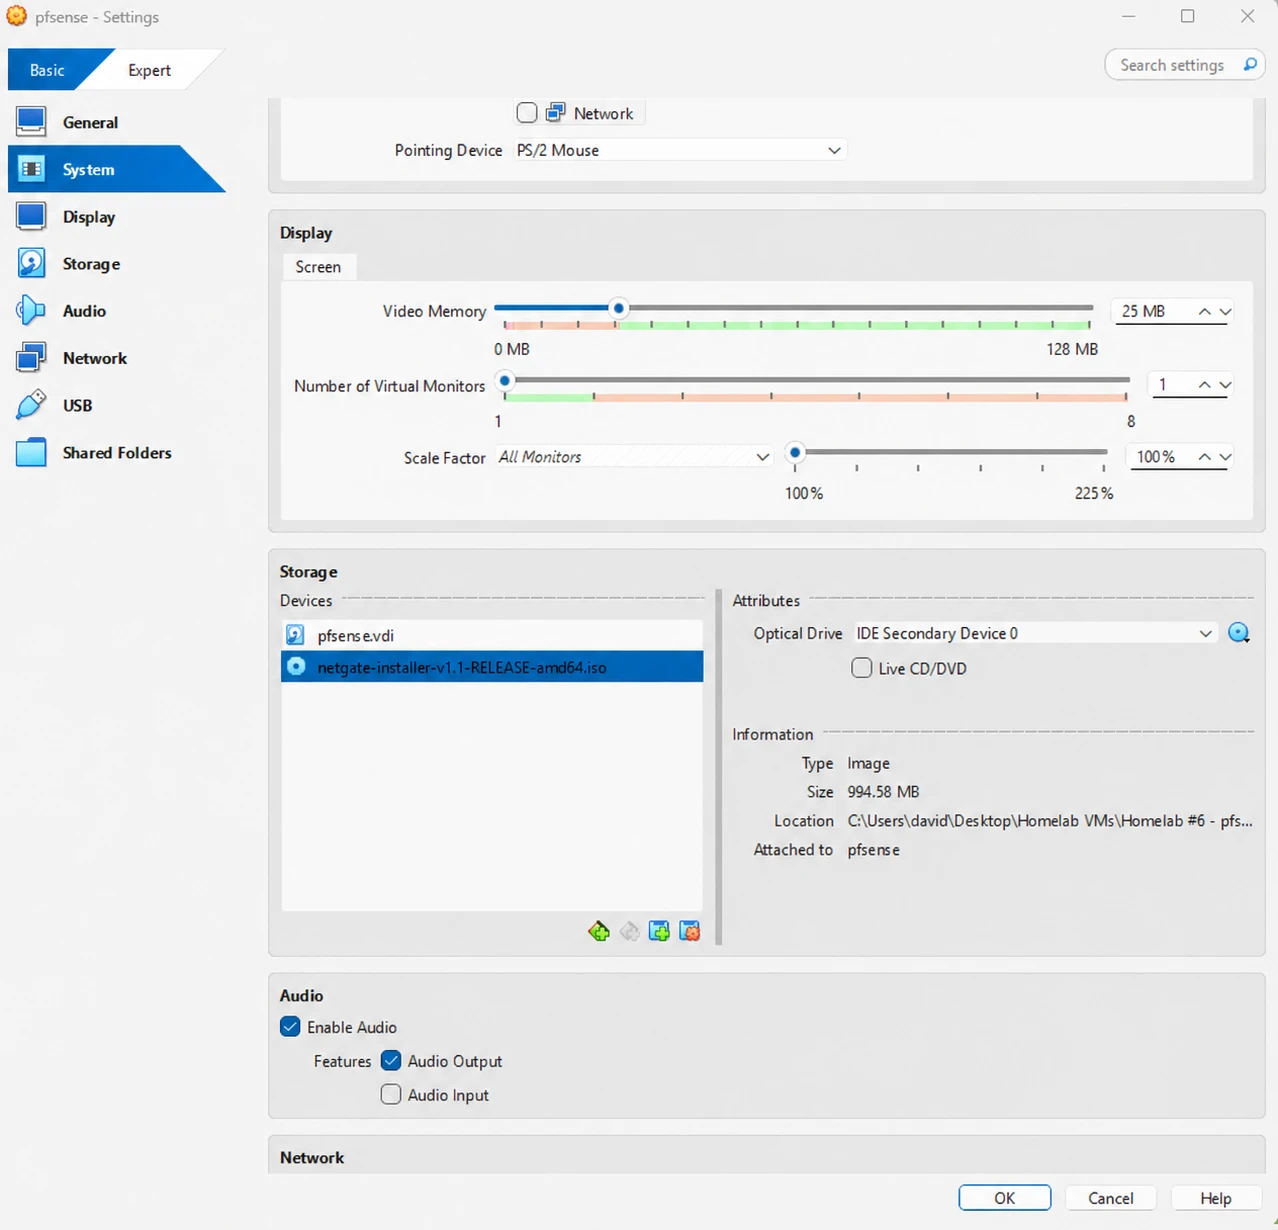
The installer ISO still attached to the VM
I removed the ISO and booted again. This time it was the right screen.
WAN (wan) is em0 and LAN (lan) is em1.
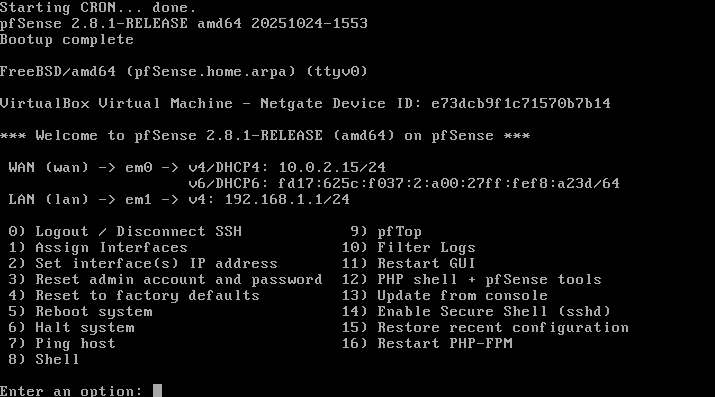
pfSense booted with WAN and LAN assigned
2. Initial configuration
The LAN IP started as 192.168.1.1/24. I wanted a different one, so I used the console menu.
I entered option 2 for Set interface(s) IP address.
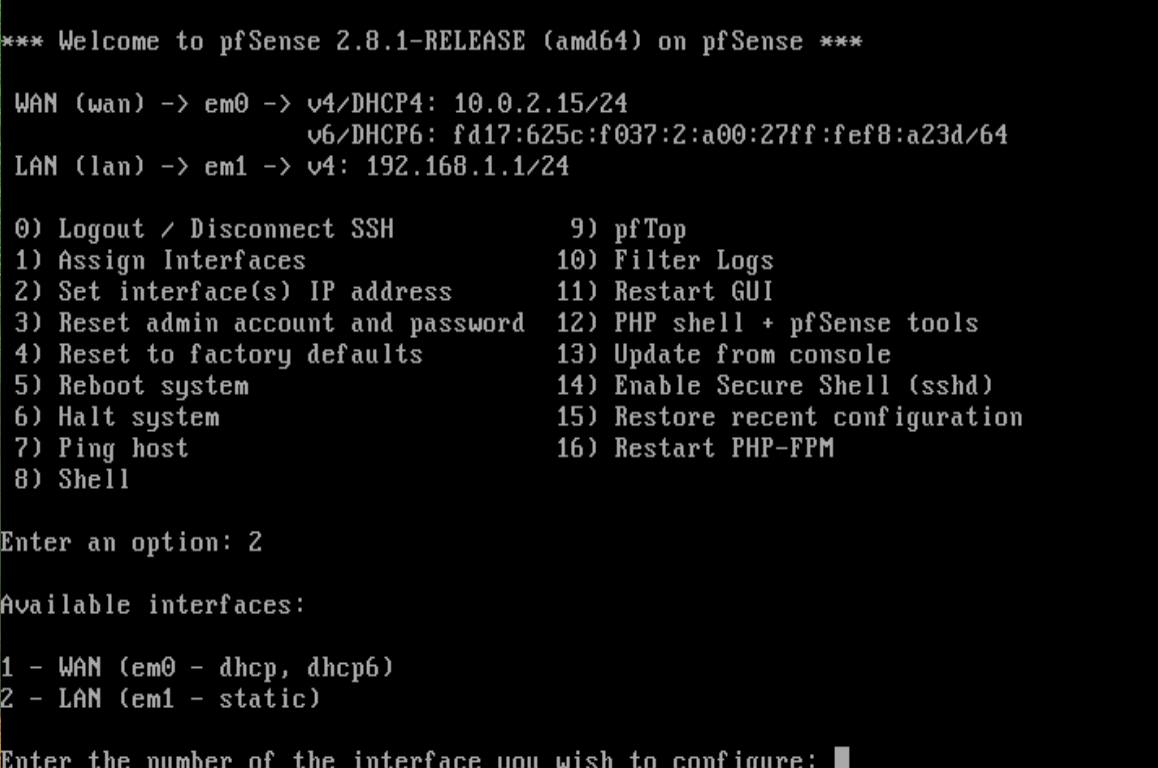
Choosing option 2 to set the interface IP
Then option 2 again for the LAN interface (em1, static).
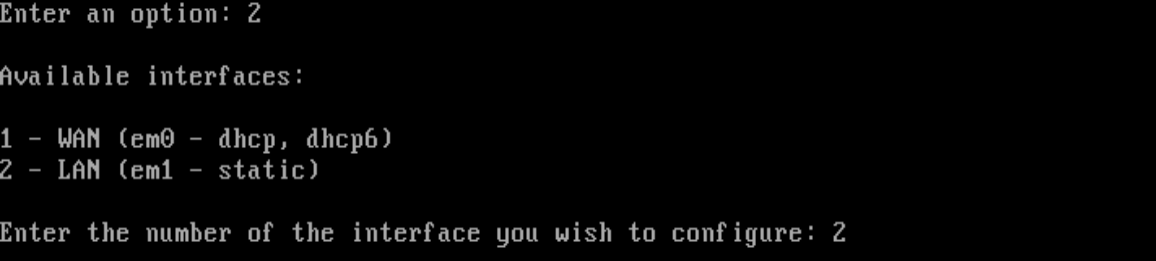
Selecting the LAN interface
I said no to configuring the LAN IPv4 address through DHCP.

Declining DHCP for the LAN
I entered 192.168.100.1 with a 24 bit subnet.
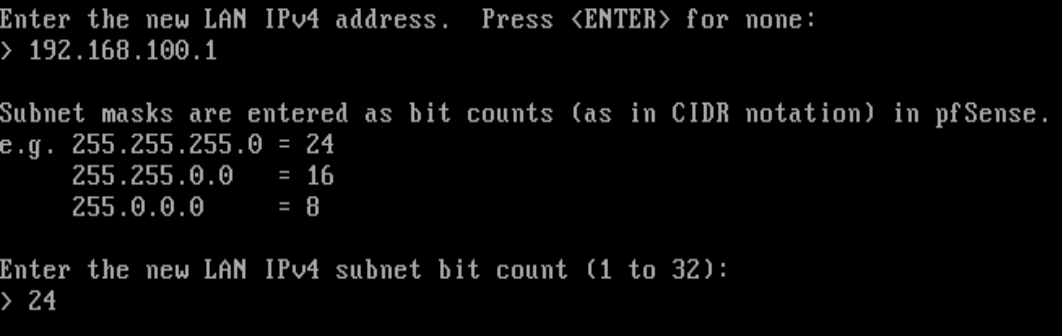
Entering the new LAN IP and subnet
I pressed Enter to skip an upstream gateway. I entered n to skip IPv6 on the LAN. Then Enter again for no IPv6 address.
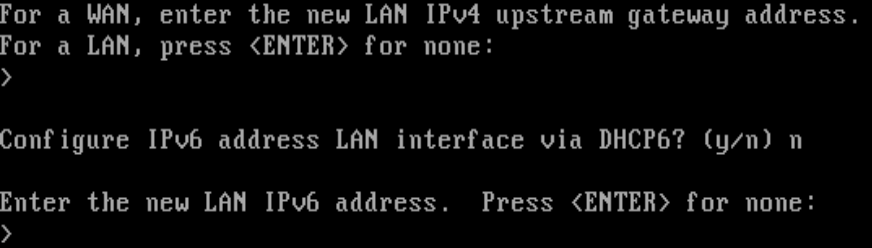
Skipping the gateway and IPv6
I said y to enable DHCP on the LAN. The range is 192.168.100.100 to 192.168.100.200.

Enabling DHCP on the LAN
I entered n when it asked about going back to HTTP for the web configurator.
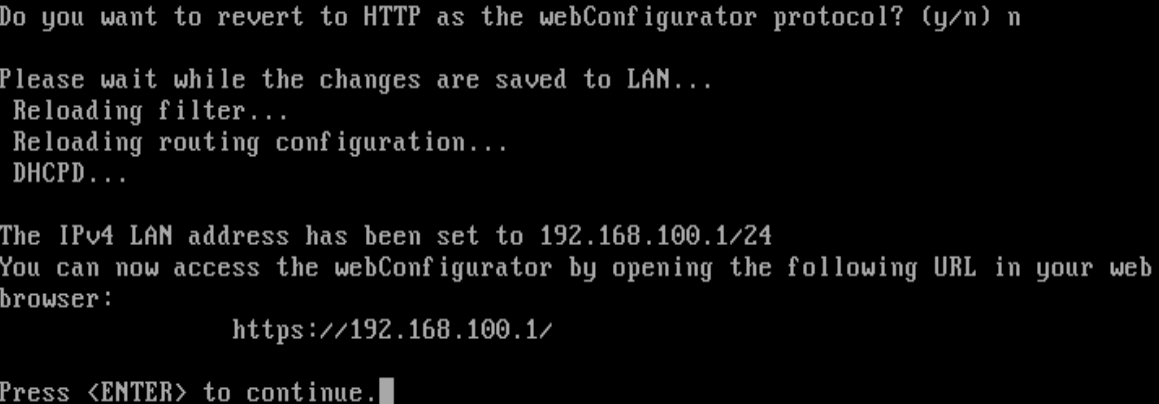
Keeping HTTPS for the web configurator
Fixing access to the web interface
I tried https://192.168.100.1 in a browser and it didn’t load.
To fix it I shut the VM down. I changed pfSense’s second adapter from Internal Network to Host-Only Adapter. I used VirtualBox Host-Only Ethernet Adapter. Now my computer can reach the web interface directly, and the lab is still isolated from my home network.
Then I had a connectivity problem. The VirtualBox Host-Only adapter’s default IP is 192.168.56.1/24. That doesn’t match pfSense’s LAN of 192.168.100.1/24. I changed the host-only adapter to 192.168.100.254 so it’s in the same range. After that I could reach https://192.168.100.1.
The host-only adapter set to 192.168.100.254
The setup wizard
In the pfSense web interface I logged in with the default admin login. Then I clicked Next through the wizard.
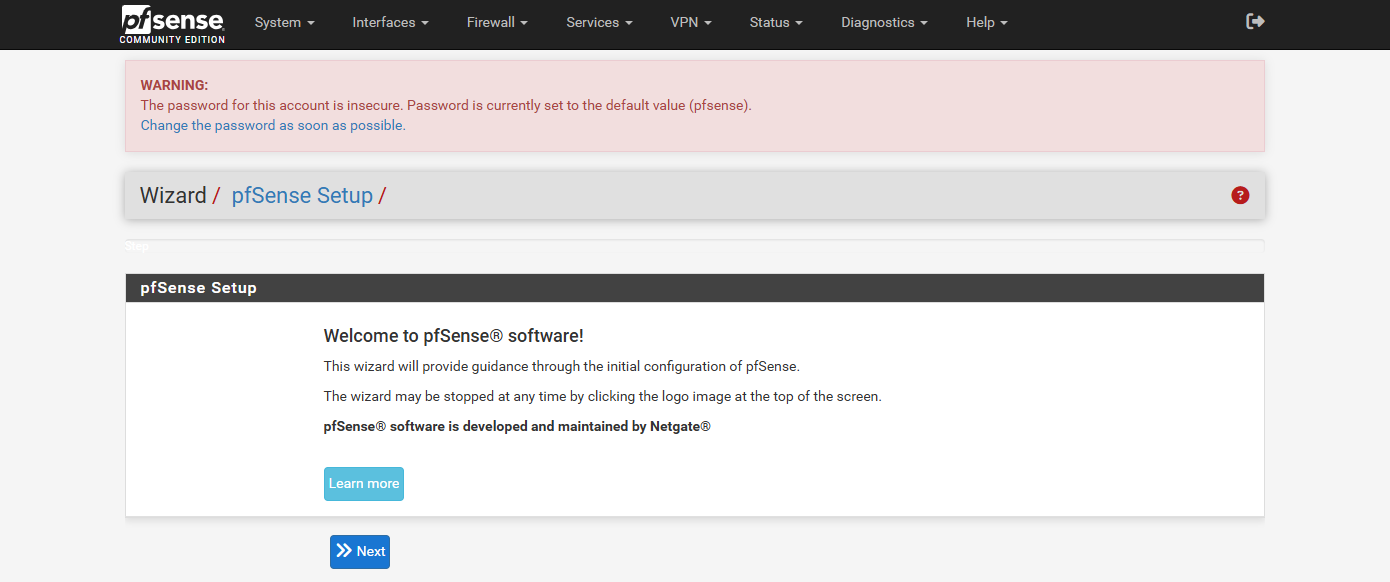
The pfSense login page
I set:
- Hostname:
pfsense - Domain:
home.lab - Primary DNS:
8.8.8.8 - Secondary DNS:
8.8.4.4
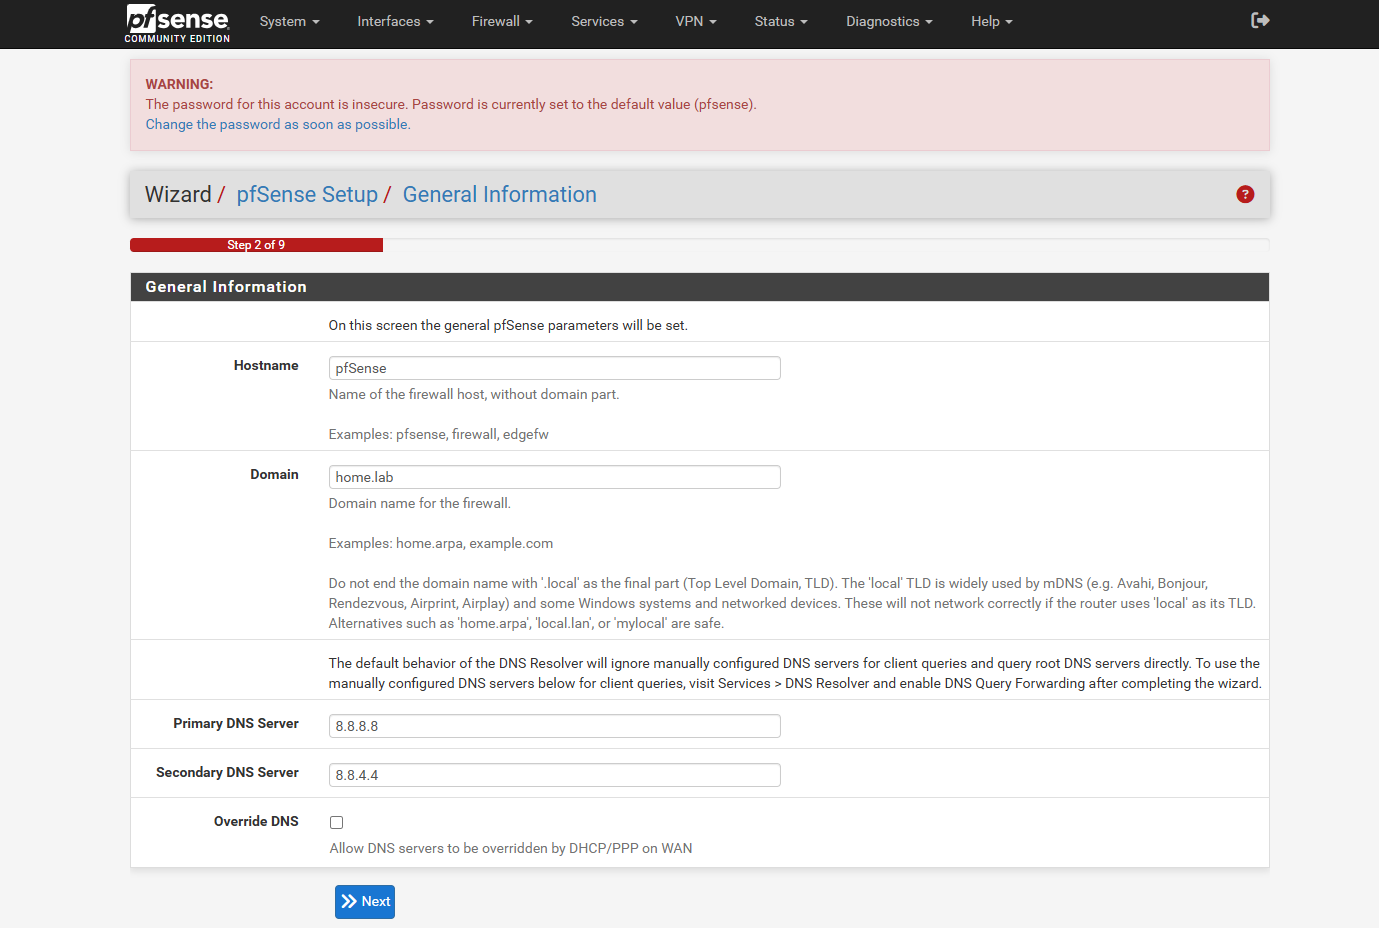
Hostname, domain, and DNS servers
I picked the America/New_York timezone.
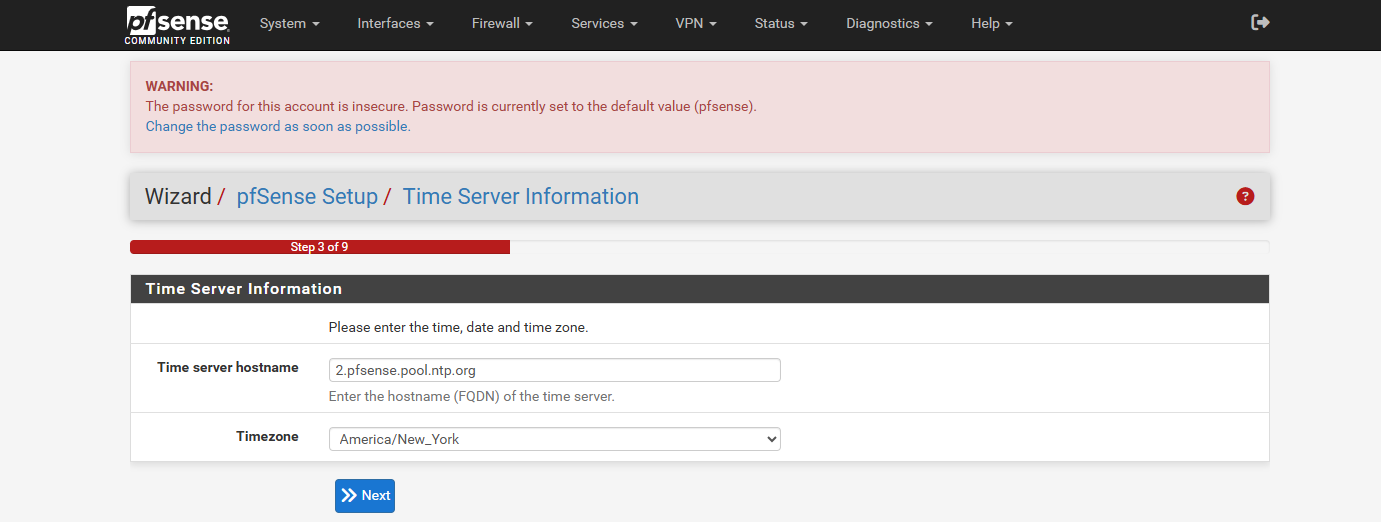
Selecting the timezone
I set the WAN configuration type to DHCP.
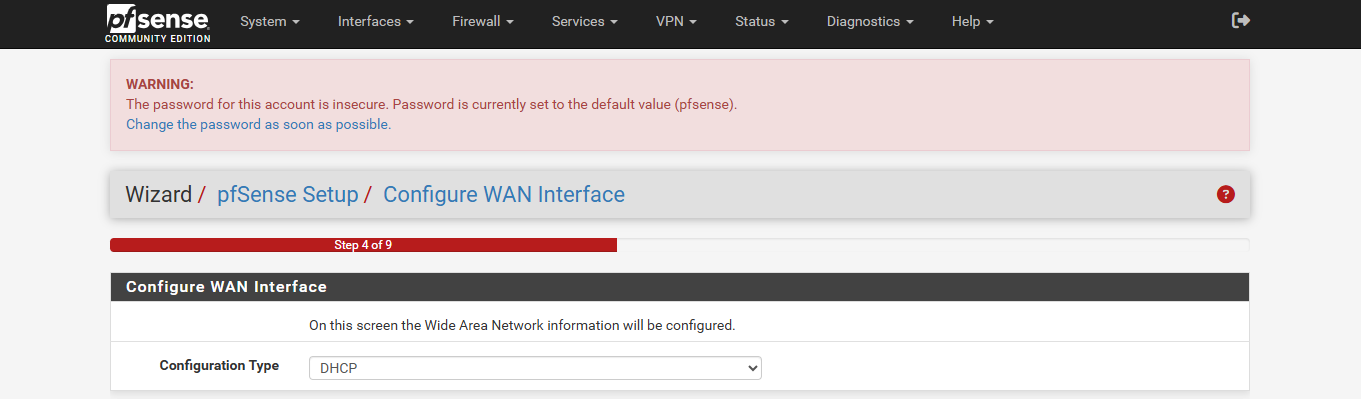
WAN configuration set to DHCP
For the LAN I used:
- LAN IP:
192.168.100.1 - Subnet mask:
24
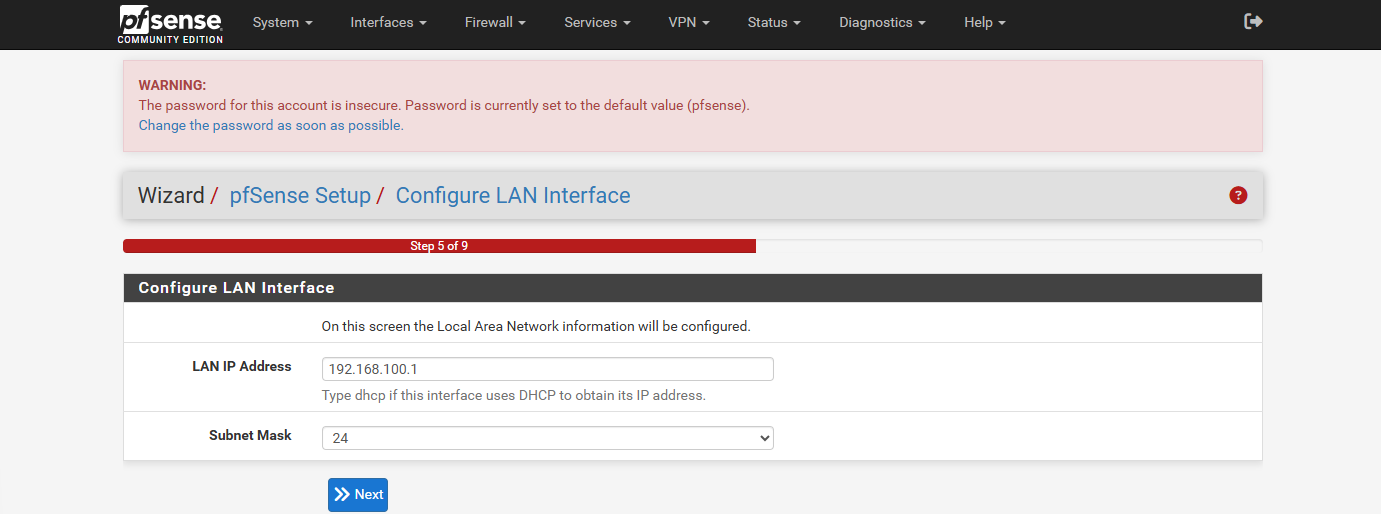
LAN IP and subnet mask in the wizard
I set a new admin password instead of the default.
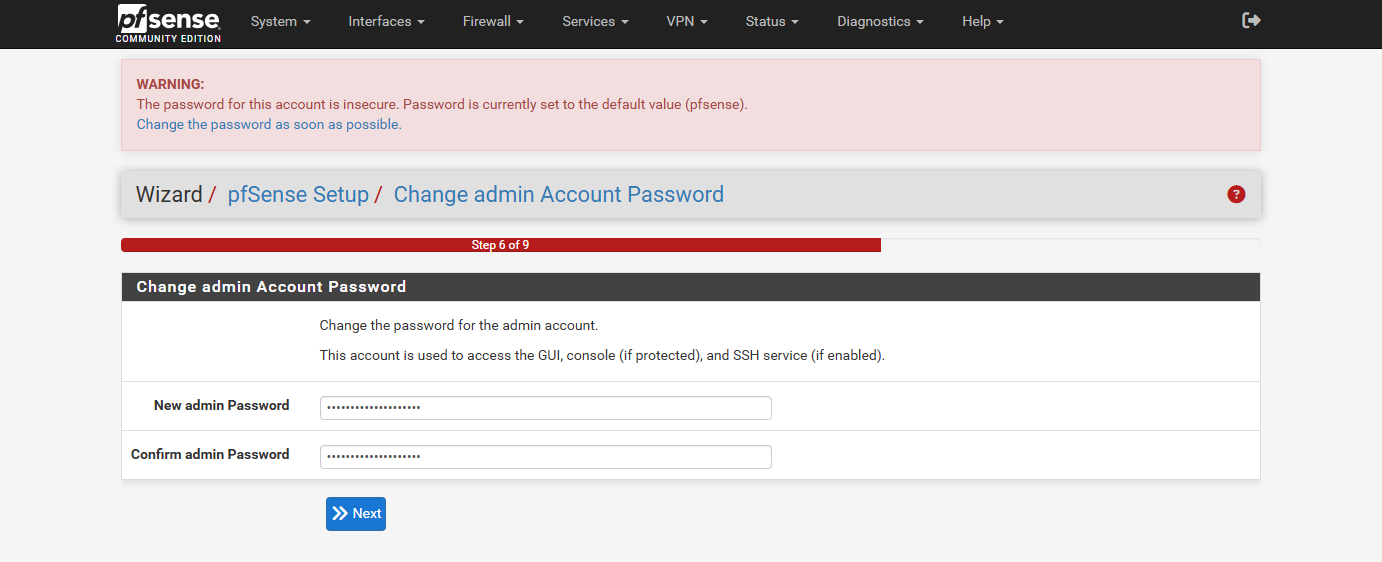
Setting a new admin password
Then I clicked Reload and Finish.
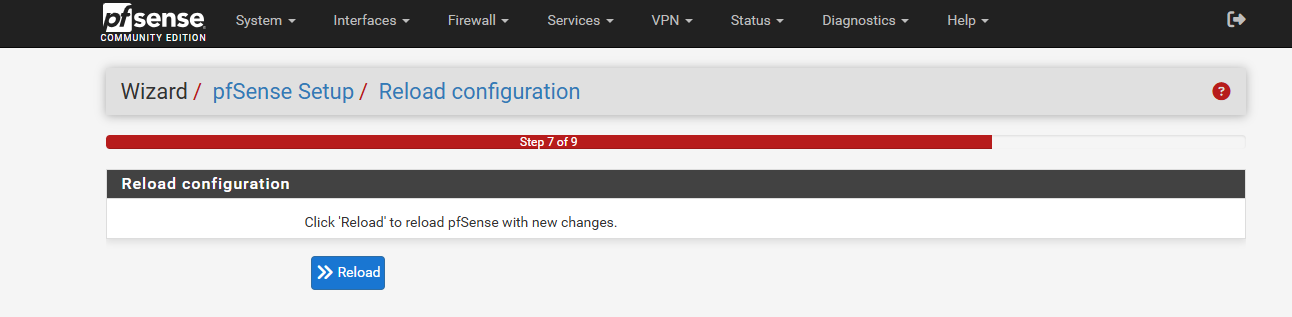
Reloading the configuration
pfSense was fully set up.
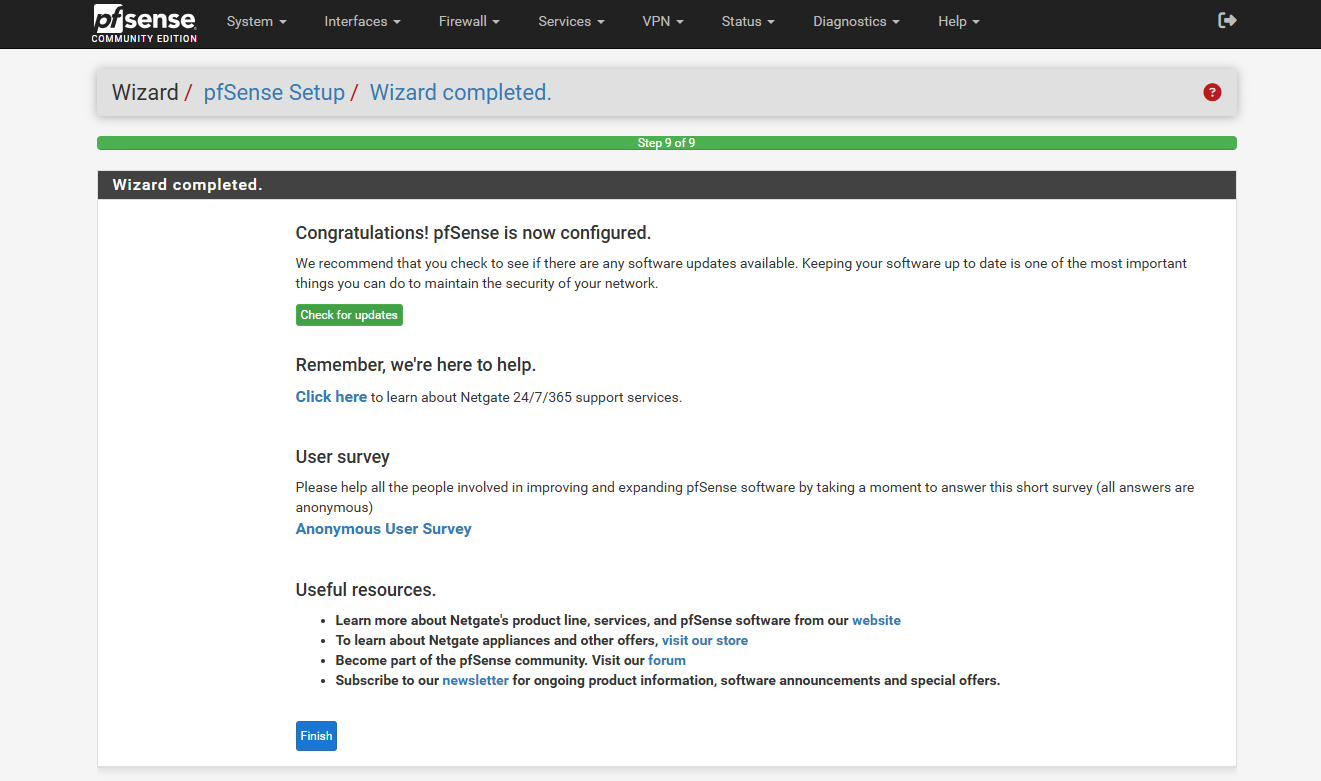
The pfSense dashboard
3. Creating VLANs
Next I made five VLANs to segment the network:
- VLAN 10 (Management): admin of the infrastructure
- VLAN 20 (Trusted): personal devices
- VLAN 30 (Guest): visitors, isolated
- VLAN 40 (IoT): smart devices
- VLAN 50 (Lab): my three Ubuntu Server VMs
To make VLAN 20 I went to Interfaces → Assignments → VLANs and clicked + Add.
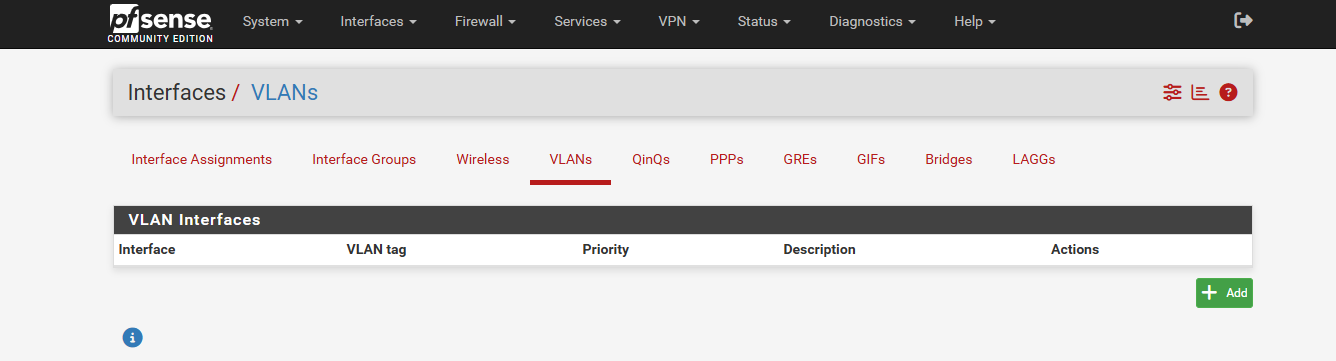
Adding a VLAN in pfSense
I used:
- Parent interface:
em1 (LAN) - VLAN tag:
20 - VLAN priority:
0 - Description:
VLAN20-Trusted
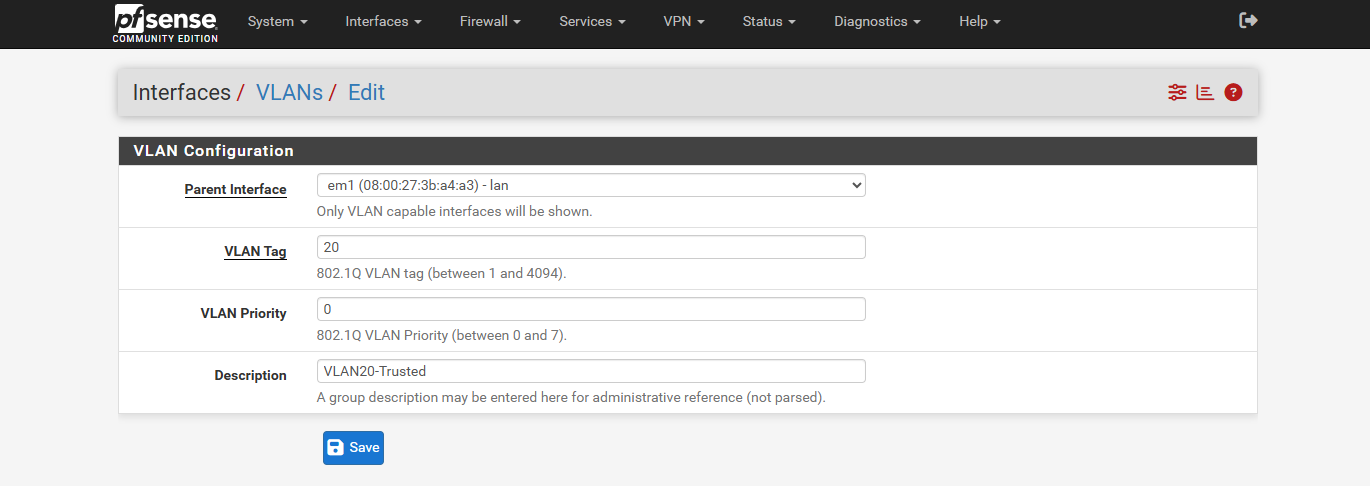
The VLAN 20 settings
Then I clicked Save. I repeated it for the others, all on em1 (LAN) with priority 0:
- VLAN 30:
VLAN30-Guest - VLAN 40:
VLAN40-IoT - VLAN 50:
VLAN50-Lab
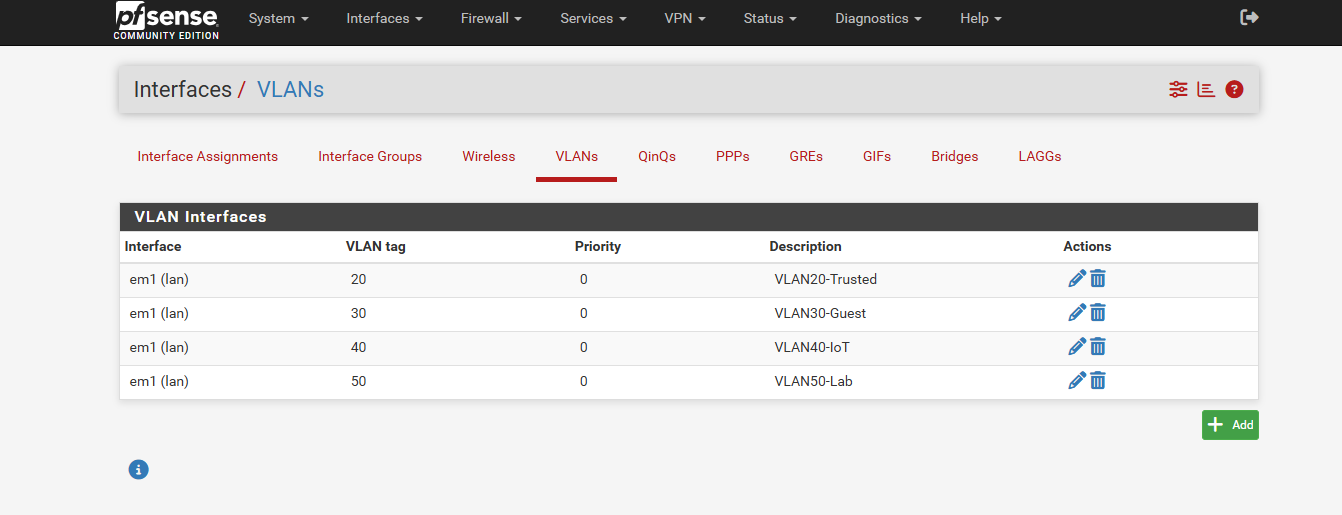
The VLAN list
Assigning the interfaces
Next I gave each VLAN an interface. I went to Interfaces → Assignments.
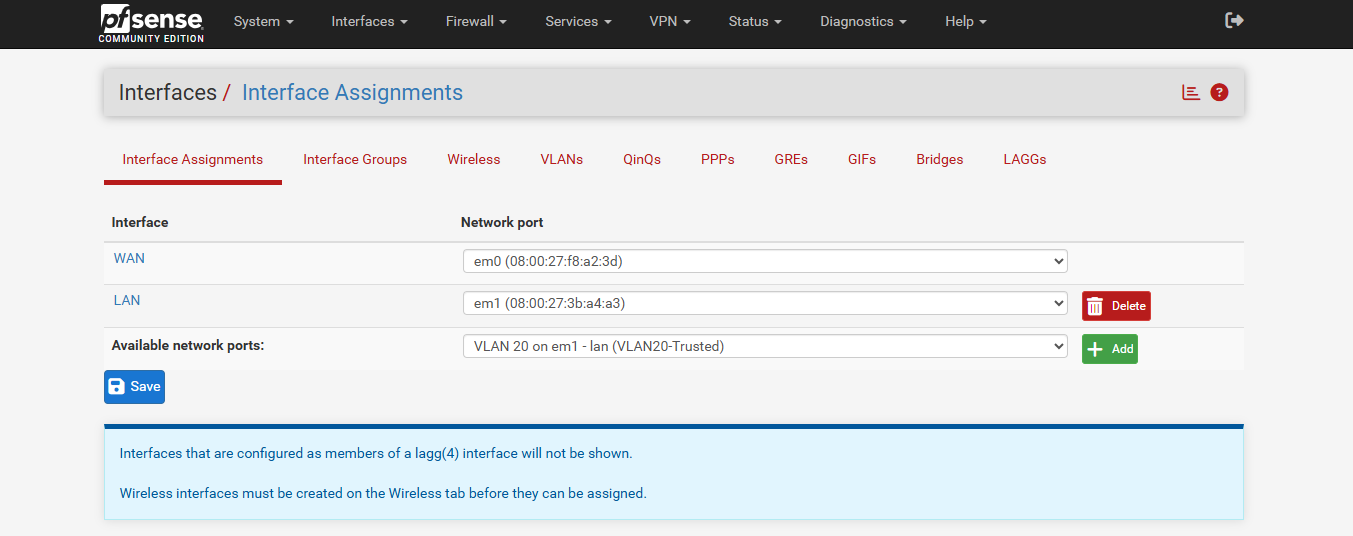
The Interface Assignments page
The Available network ports dropdown listed the VLANs I created.
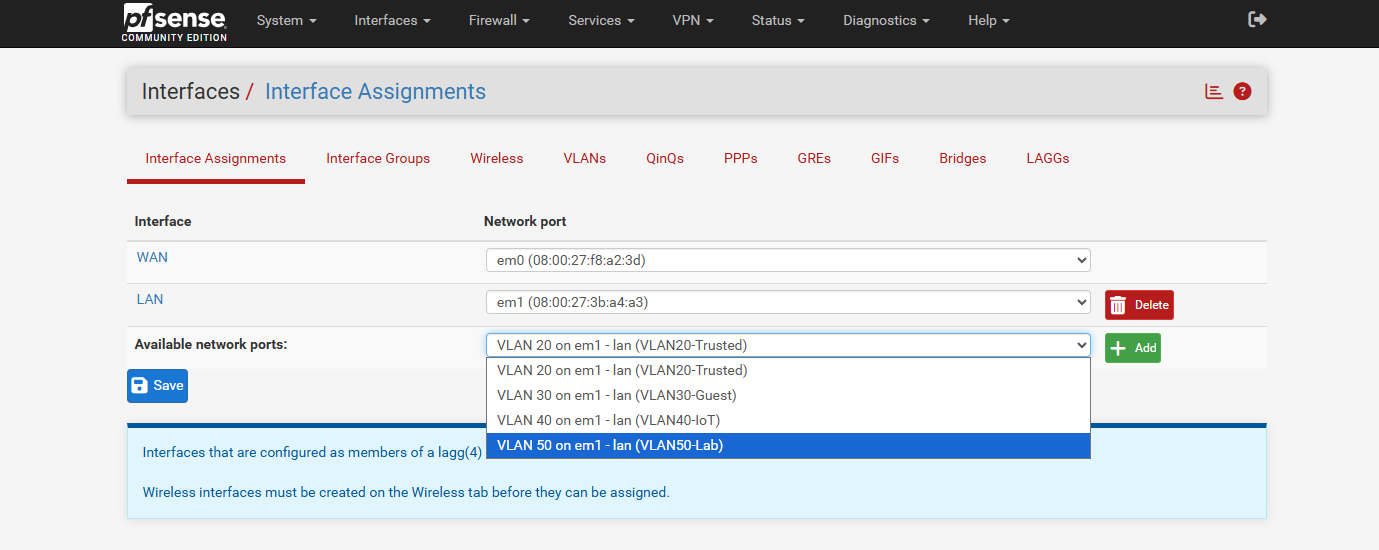
The VLANs in the available ports list
I picked each VLAN and clicked + Add. Each one made a new interface named OPT1 through OPT4. I clicked each OPT link to configure it. First was OPT1 for VLAN 20.
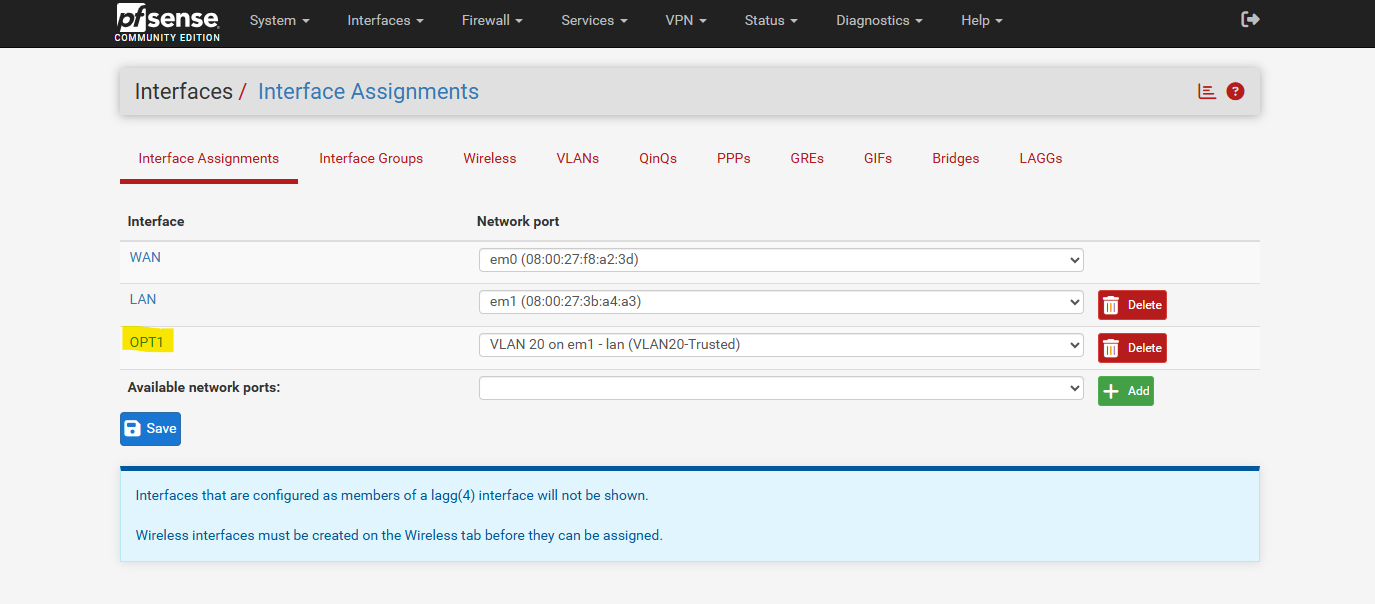
Opening the OPT1 interface
I used:
- Enable interface: checked
- Description:
TRUSTED - IPv4 configuration type: Static IPv4
- IPv4 address:
192.168.20.1 / 24
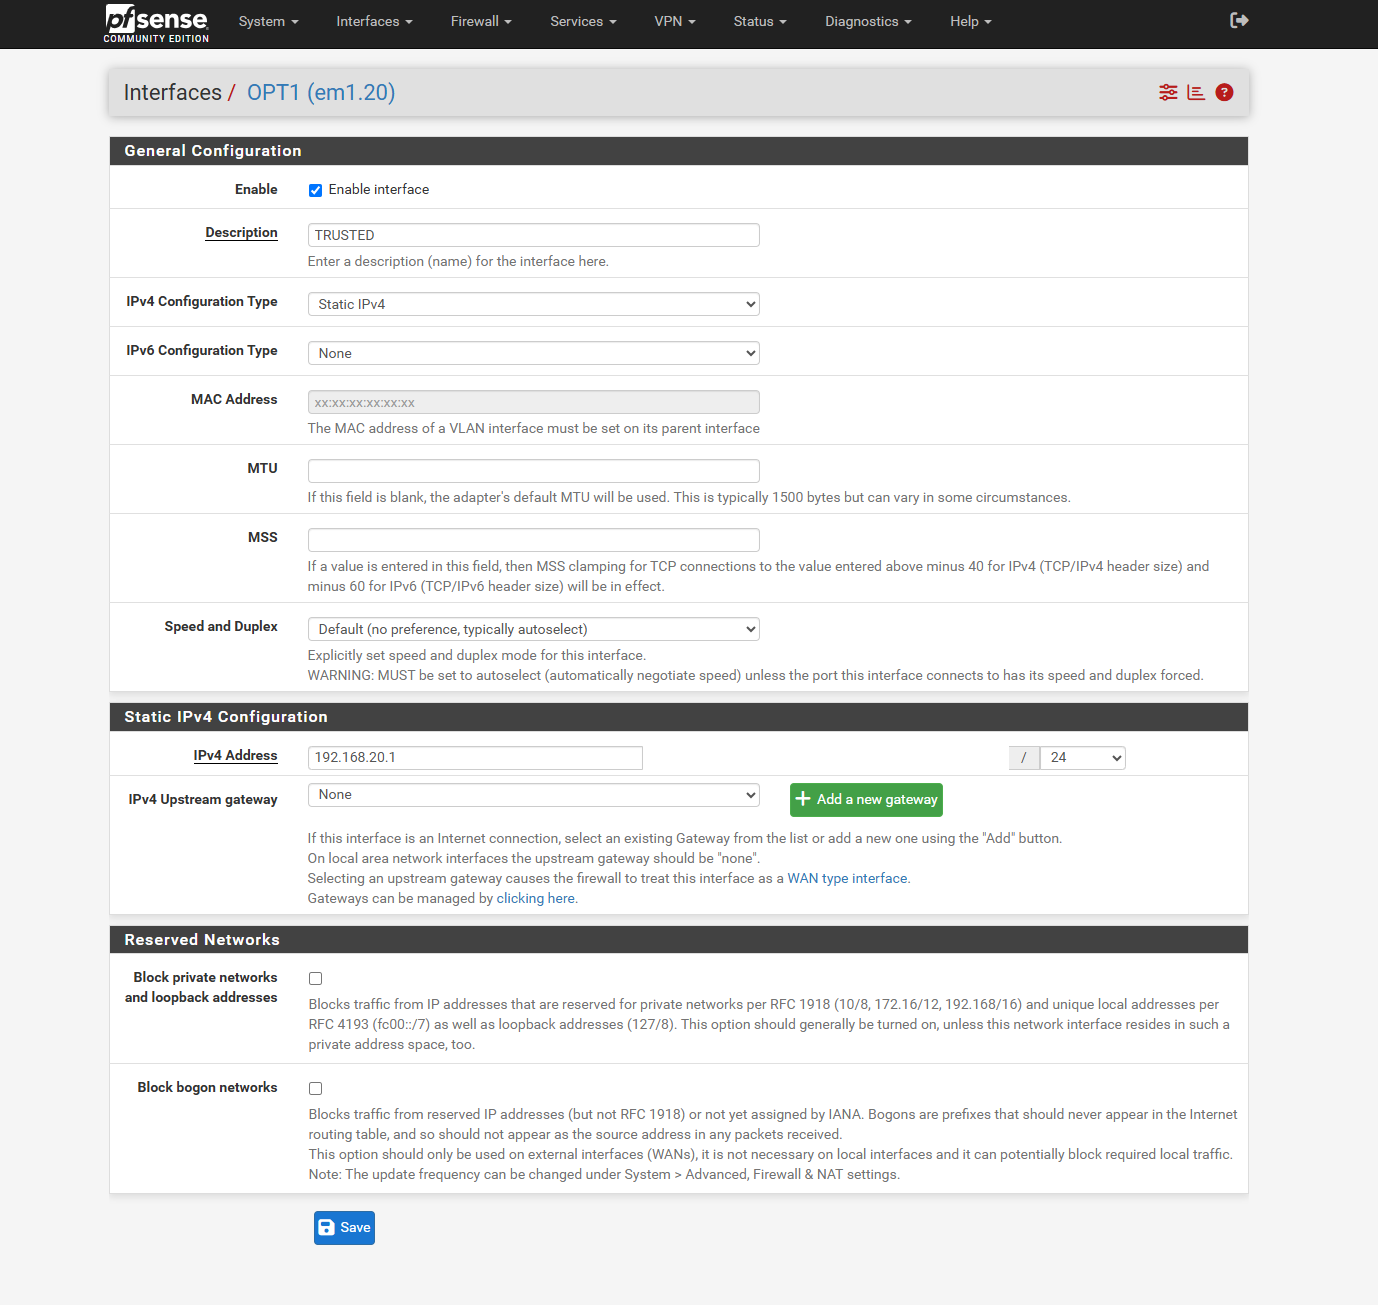
Configuring the TRUSTED interface
Then Save and Apply Changes.

Applying the interface changes
I did the same for the rest:
OPT2(VLAN 30):GUEST,192.168.30.1 / 24OPT3(VLAN 40):IOT,192.168.40.1 / 24OPT4(VLAN 50):LAB,192.168.50.1 / 24
DHCP for each VLAN
I went to Services → DHCP Server.
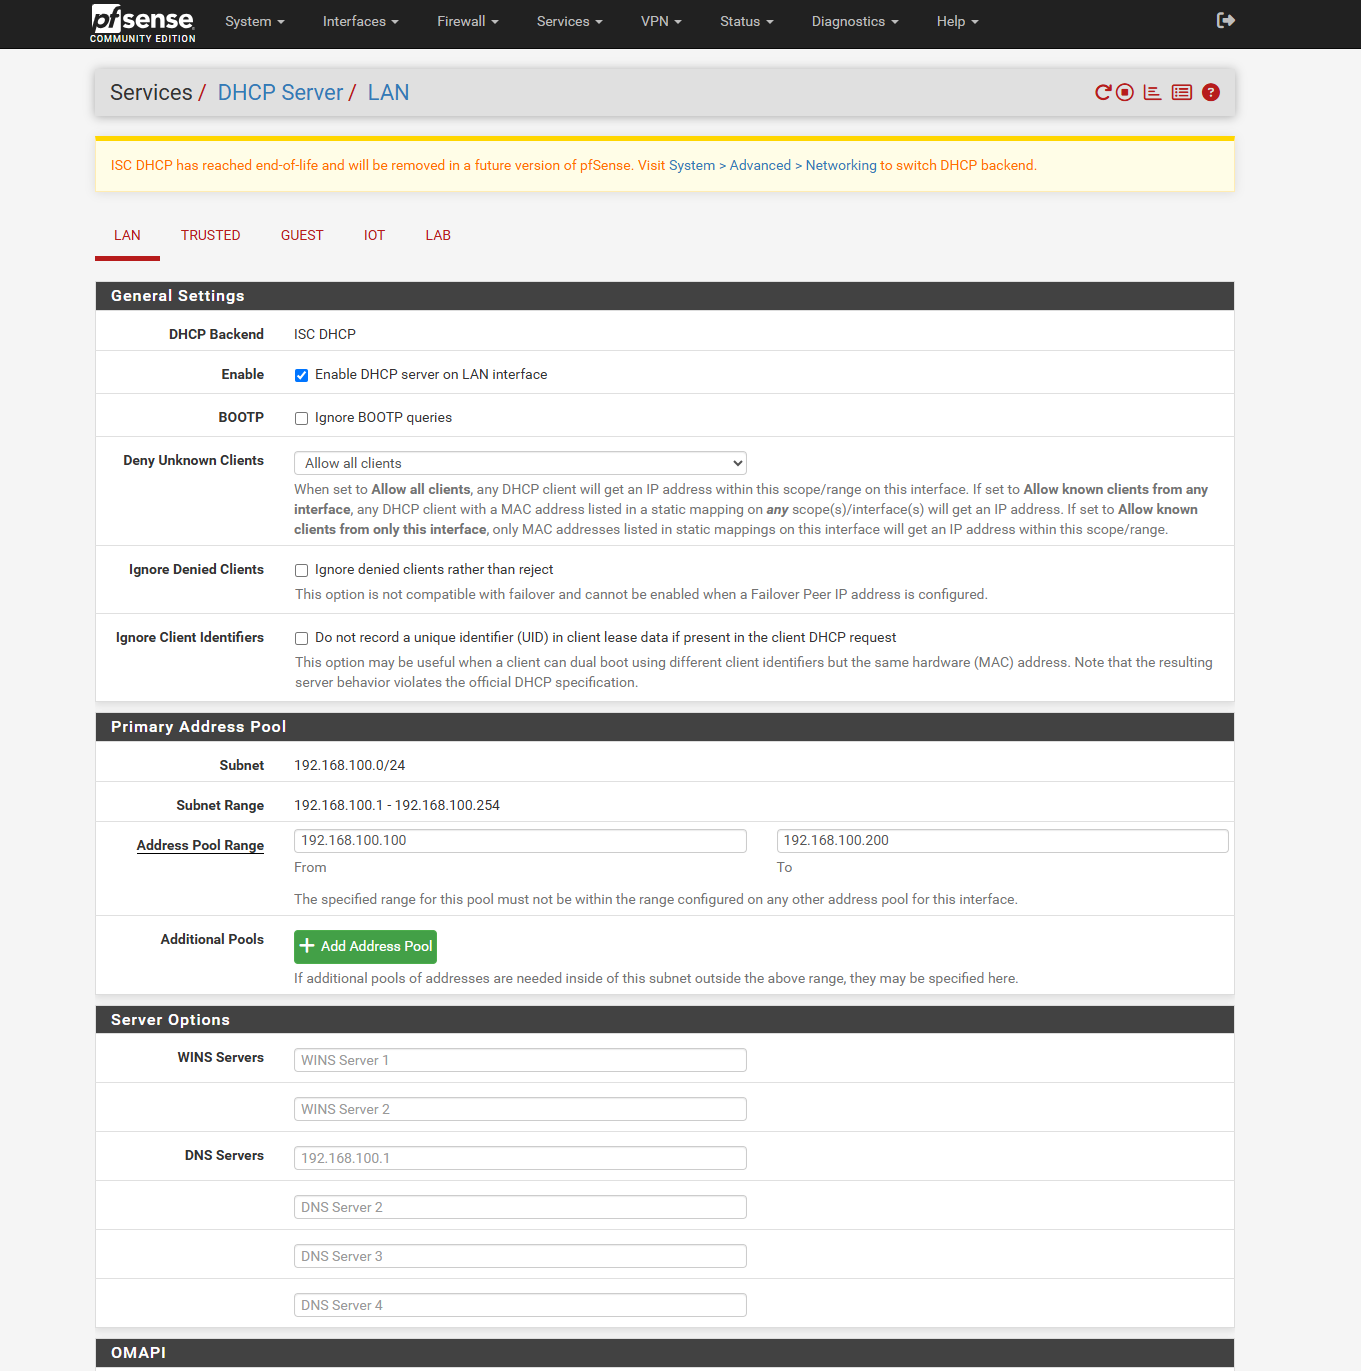
The DHCP Server page
On the TRUSTED tab I used:
- Enable DHCP server on TRUSTED interface: checked
- Range:
192.168.20.100to192.168.20.200 - DNS server:
192.168.20.1(pfSense)
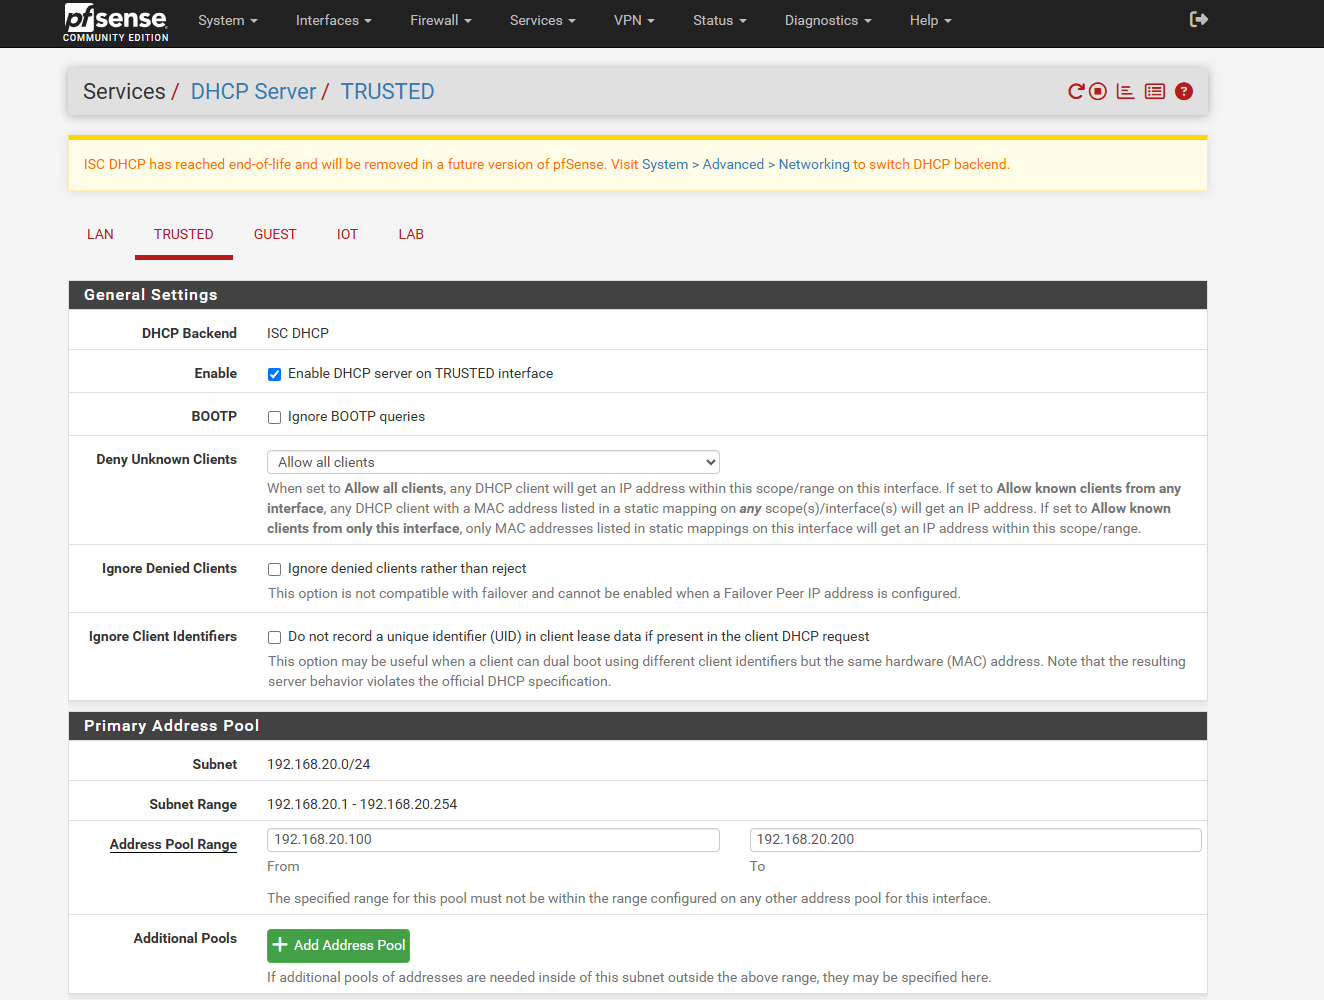
DHCP for the TRUSTED VLAN
Then Save and Apply Changes. Same for the others:
- GUEST:
192.168.30.100to192.168.30.200, DNS192.168.30.1 - IOT:
192.168.40.100to192.168.40.200, DNS192.168.40.1 - LAB:
192.168.50.100to192.168.50.200, DNS192.168.50.1
4. Firewall rules
Now I needed rules to control which VLANs can reach each other and the internet. pfSense blocks traffic between VLANs by default. So I had to write rules to let the LAB VMs get to the internet and each other. And I wanted the GUEST network kept away from the private networks.
I didn’t make rules for TRUSTED or IoT. No devices connect to those in this lab. I only cared about the LAB VLAN for the three servers. And the GUEST VLAN to show isolation. Guests get the internet but nothing internal.
I went to Firewall → Rules.
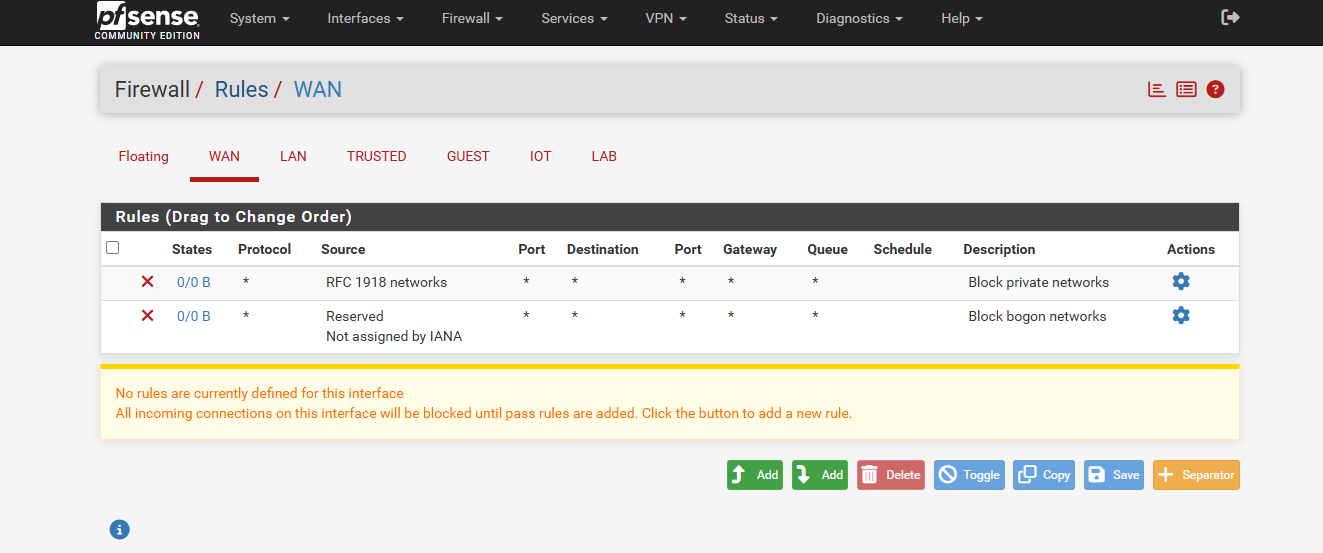
The Firewall Rules page
LAB VLAN
On the LAB tab I clicked Add with the up arrow so the rule goes to the top. Then I used:
- Action: Pass
- Interface: LAB
- Address family: IPv4
- Protocol: Any
- Source: LAB subnets
- Destination: any
- Description:
Allow LAB to anywhere
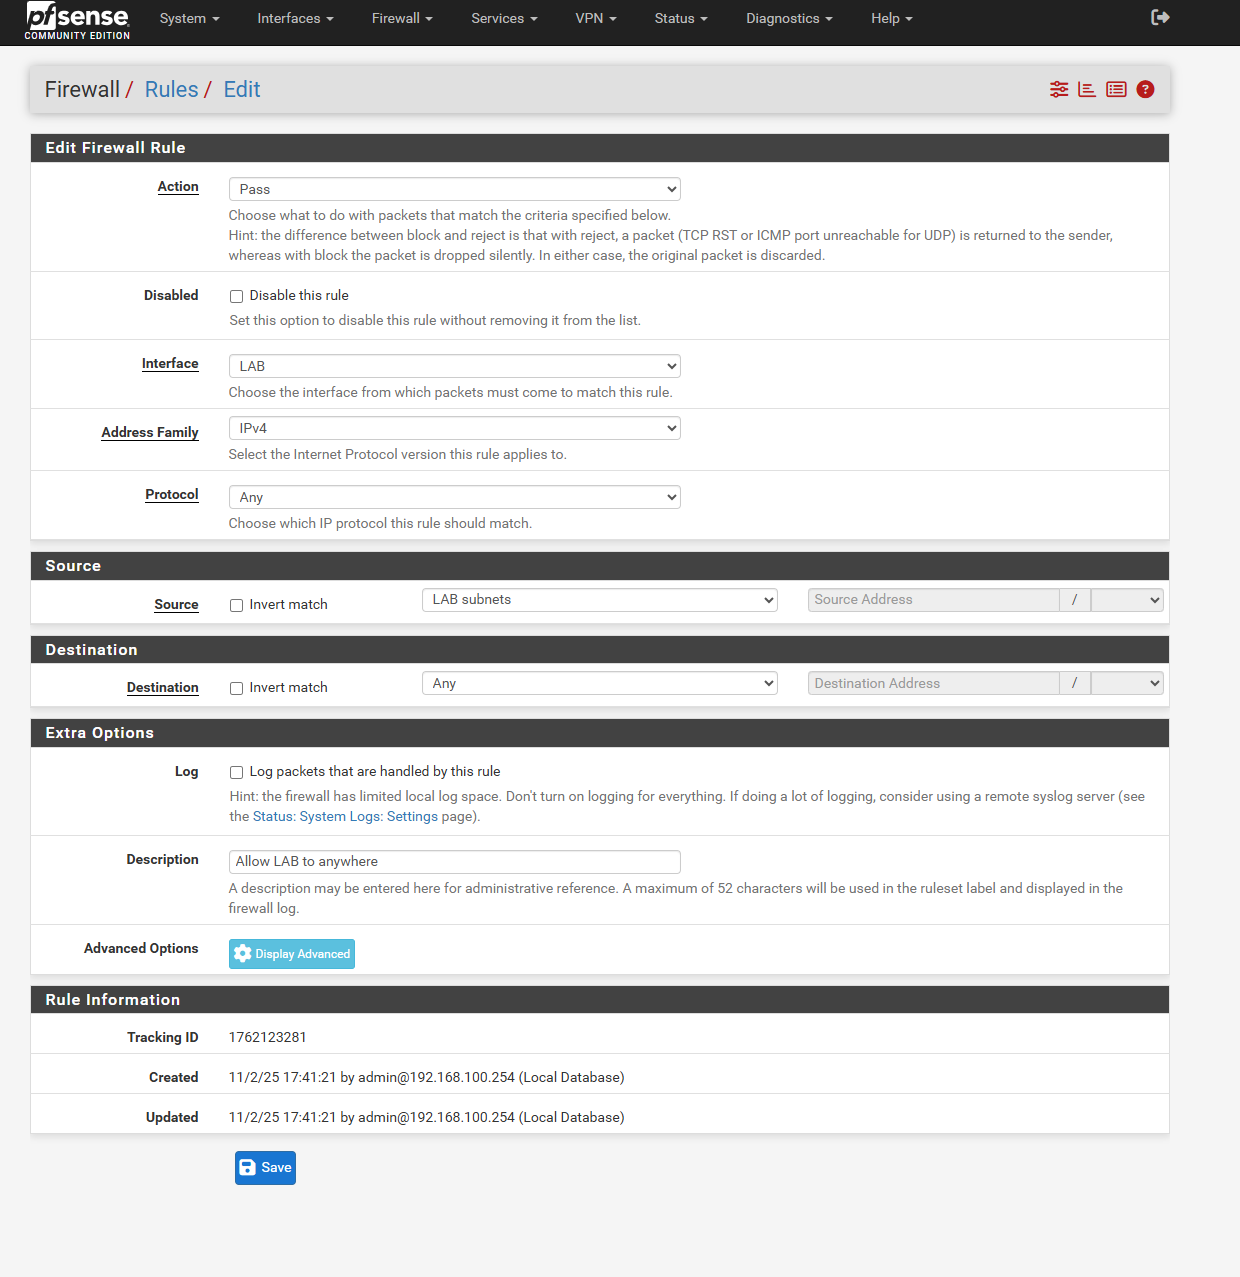
The LAB allow rule
Then Save and Apply Changes.
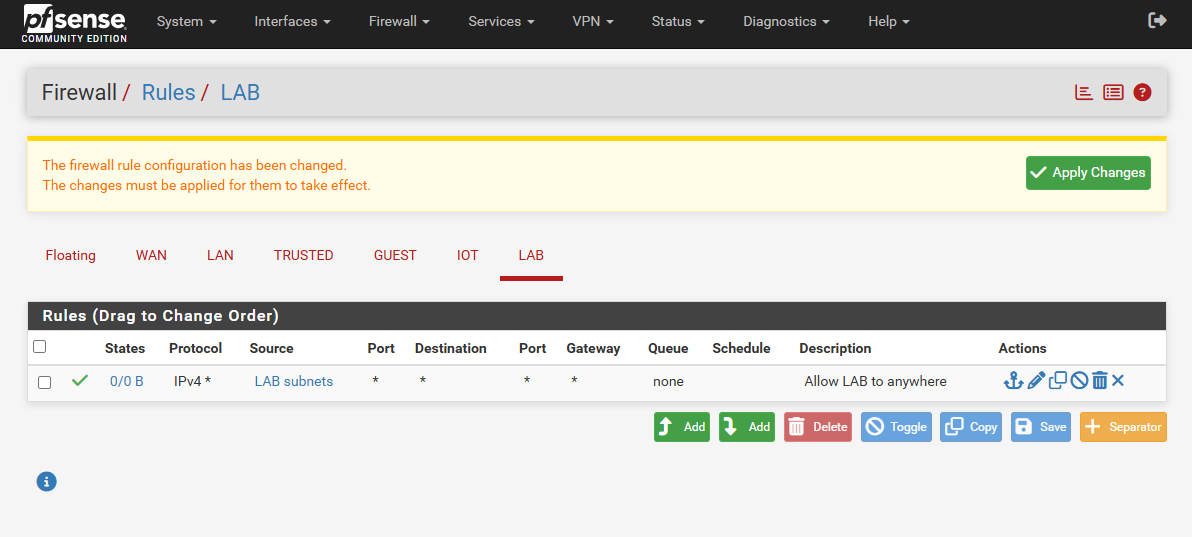
The LAB rule in the rule list
GUEST VLAN
Guests should only reach the internet. They shouldn’t reach any private network behind this firewall.
When I opened the rule editor for GUEST, I didn’t see an RFC 1918 option for the source or destination. So I made an alias for the private address ranges first.
I went to Firewall → Aliases → IP and clicked + Add.
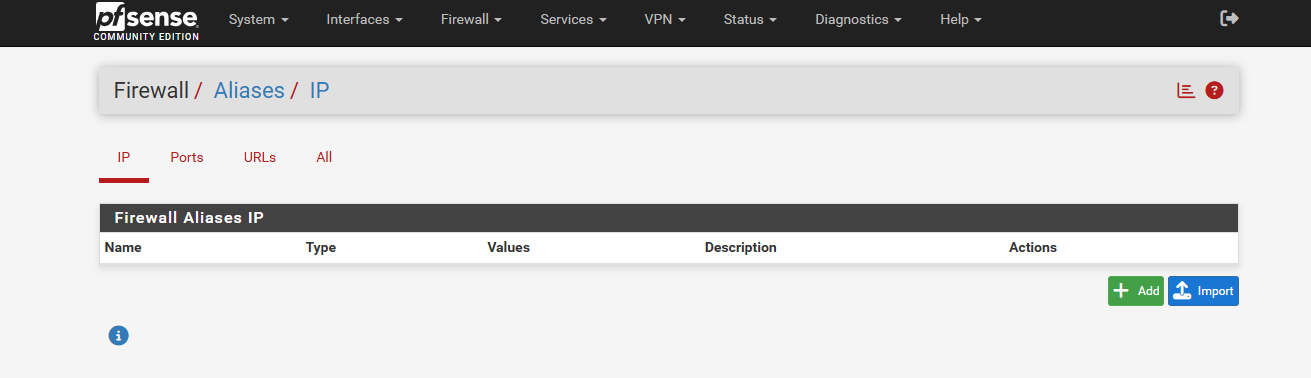
Adding a firewall alias
I used:
- Name:
RFC1918_Private_Networks - Description:
Alias for RFC 1918 Private Networks IP addresses - Type: Network(s)
- Networks:
10.0.0.0/8,172.16.0.0/12,192.168.0.0/16
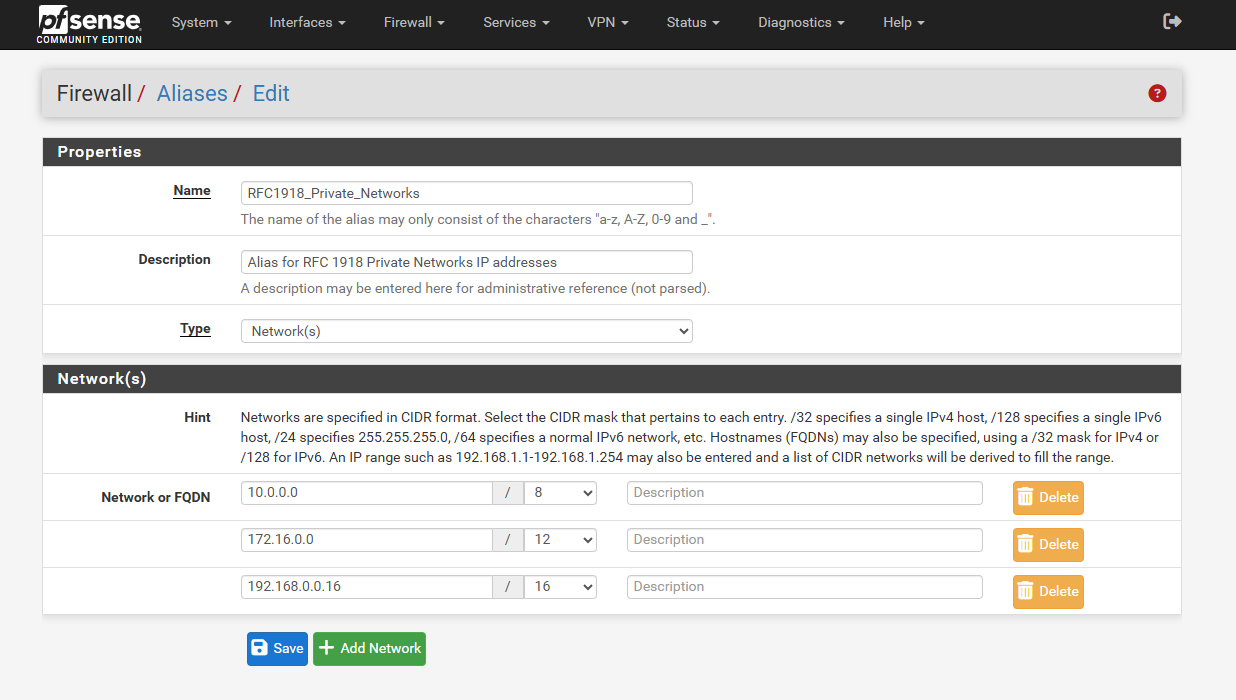
The RFC 1918 alias
Then Save and Apply Changes. After that I went to the GUEST tab and made two rules.
Rule 1: block private networks
- Action: Block
- Protocol: Any
- Source: GUEST subnets
- Destination: the
RFC1918_Private_Networksalias - Description:
Block GUEST from private networks
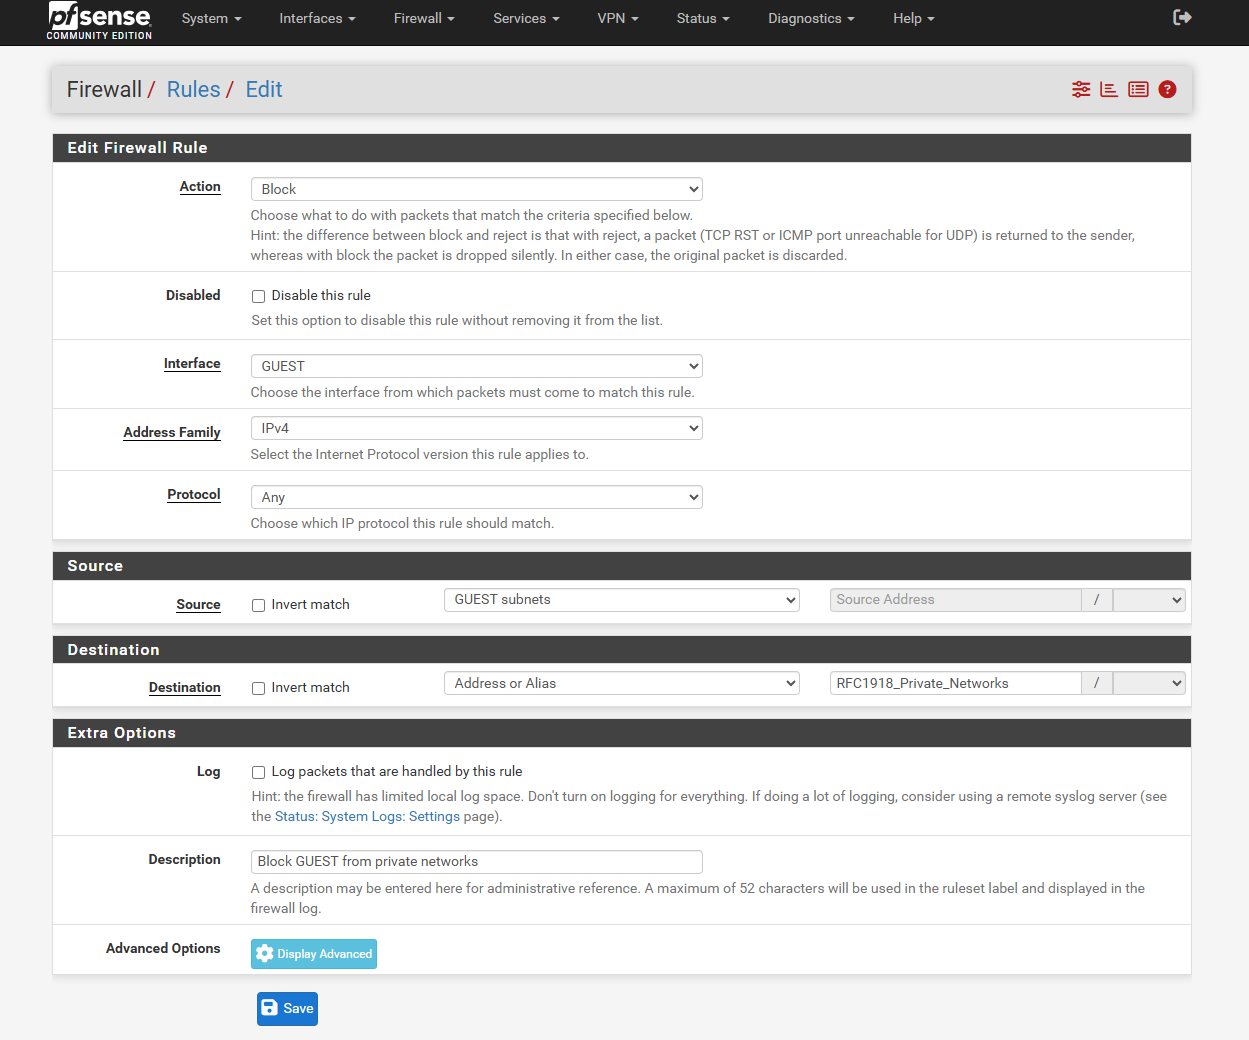
The rule that blocks GUEST from private networks
Rule 2: allow the internet
- Action: Pass
- Protocol: Any
- Source: GUEST subnets
- Destination: any
- Description:
Allow GUEST to Internet
Order matters here. The block rule has to come first. Then I clicked Apply Changes.
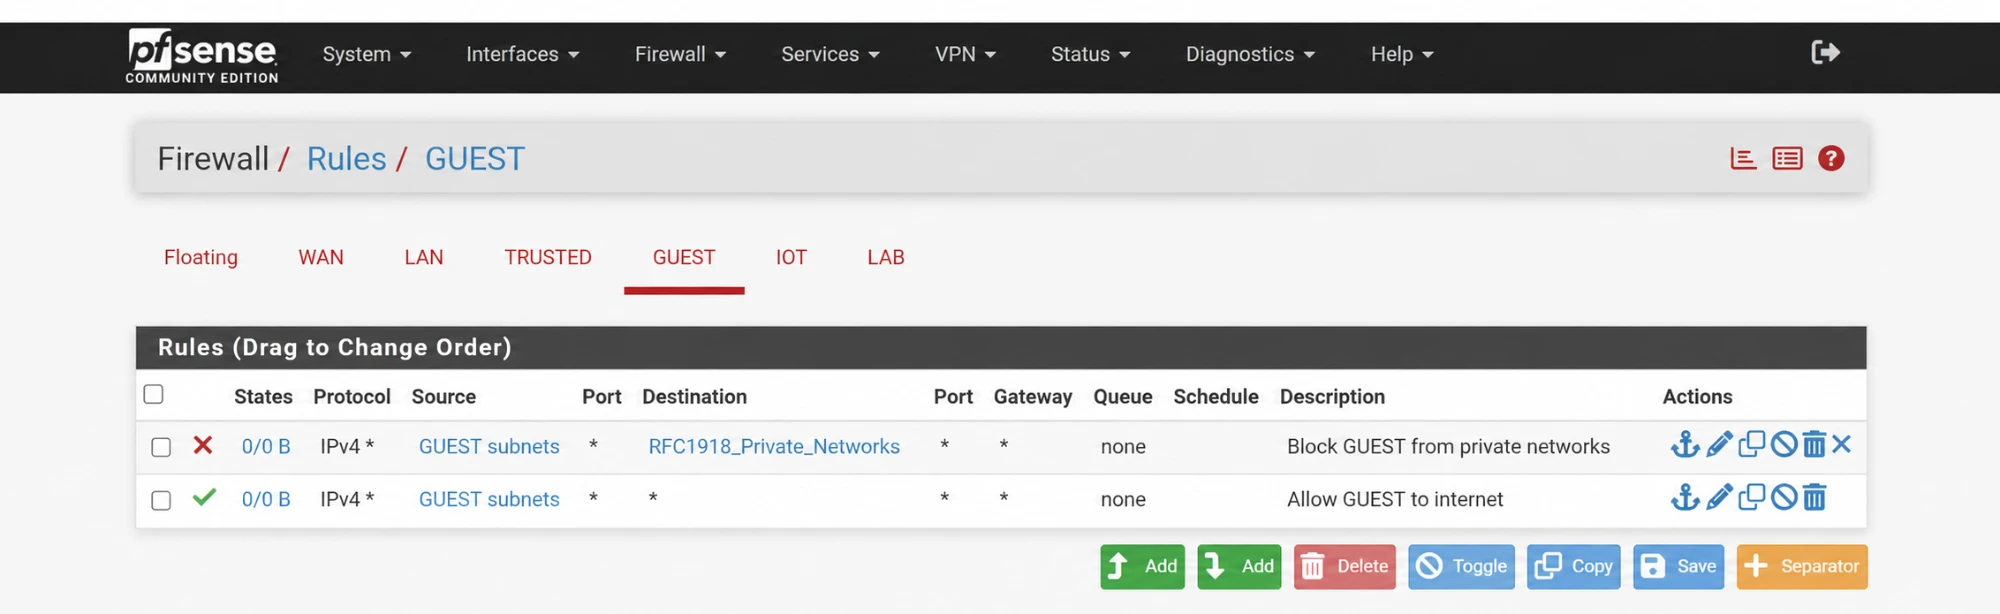
The GUEST rules in order
5. Building the lab VMs
Next were the three Ubuntu Server VMs for the LAB subnet. I made one base server and cloned it twice. Then I set up a different service on each.
I’ve built Ubuntu Server VMs before, so there aren’t many screenshots in this part.
I downloaded Ubuntu Server 24.04.3 LTS from ubuntu.com. In VirtualBox I made a VM with:
- Name:
ubuntu-server-base - Type: Linux
- Version: Ubuntu (64-bit)
- User:
admin - Memory: 2048 MB
- CPUs: 2
- Disk: 25 GB
- The ISO attached
I set the network adapters to:
- Adapter 1: NAT
- Adapter 2: Internal Network named
Homelab6Network
I booted it and let the installer finish. Then I logged in and ran:
sudo apt update
sudo apt upgrade -y
sudo apt install -y net-tools curl wget vim htop
The last line installs a few tools I’ll probably want later.
Then I powered it off and cloned it into web-server. I used a Full Clone and set the MAC address policy to Generate new MAC addresses for all network adapters.
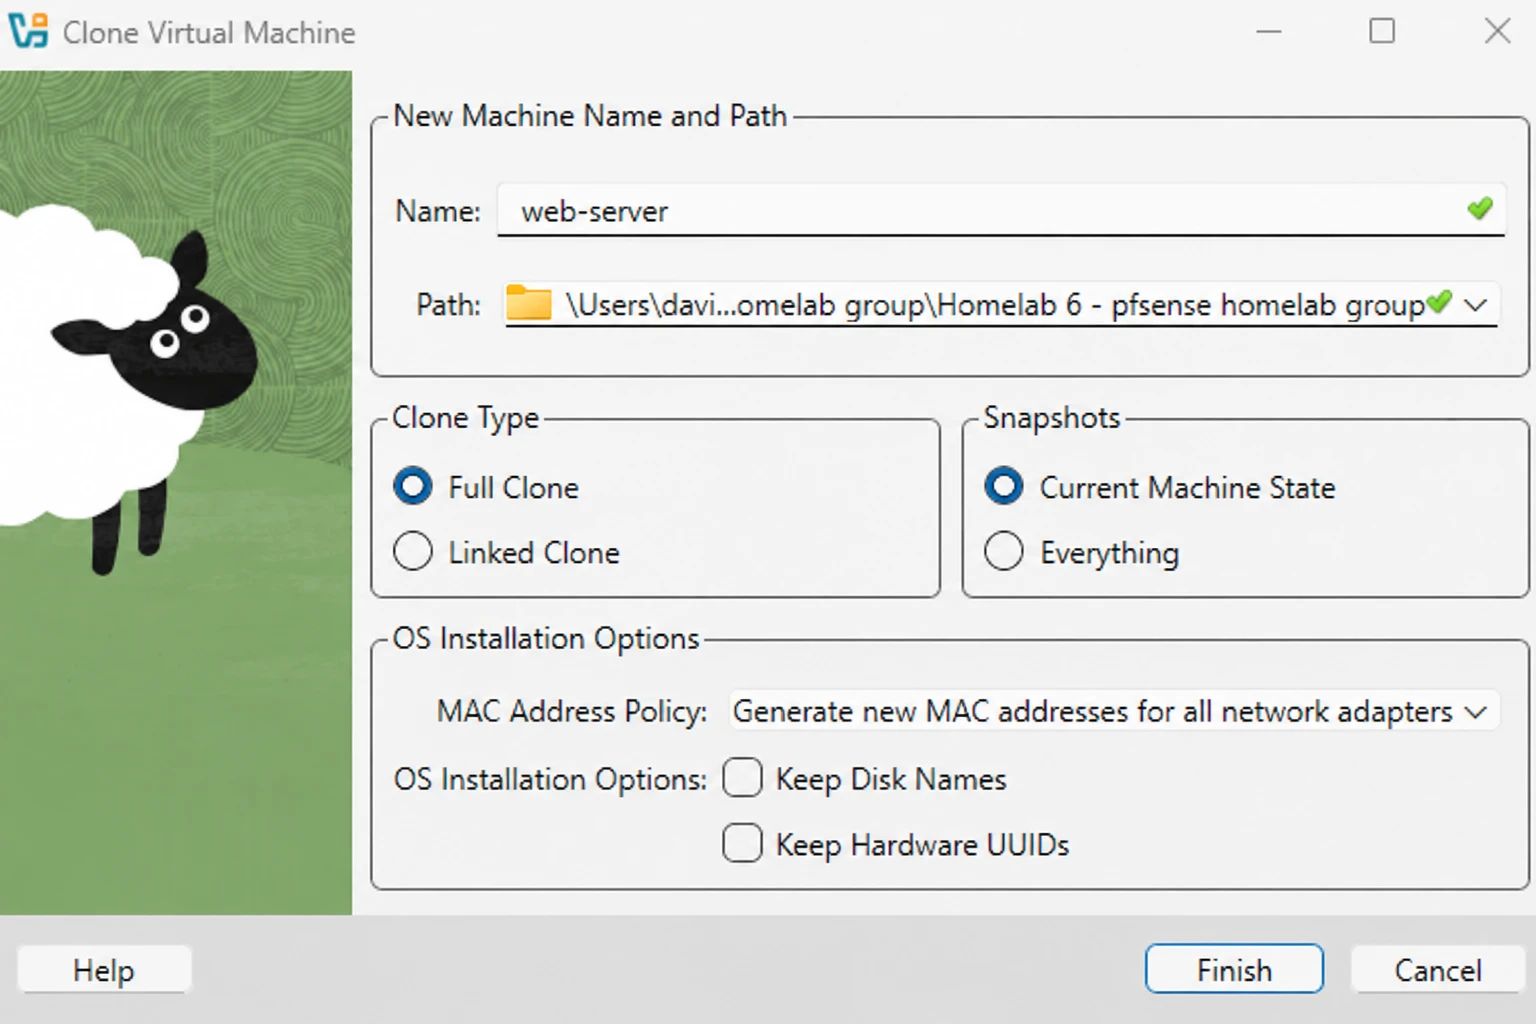
Cloning the base server into web-server
I made two more clones the same way for db-server and app-server.
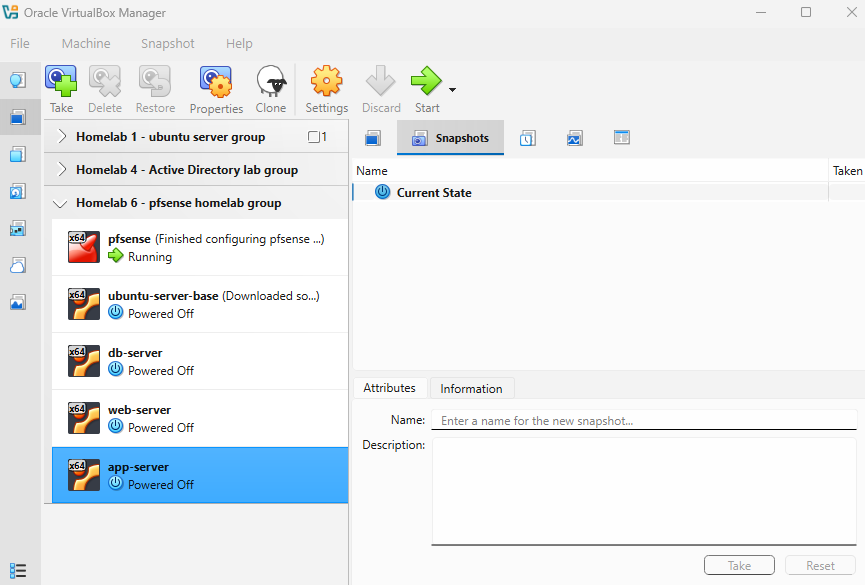
The three cloned VMs
Fixing each clone
I powered on web-server and logged in. First I changed the hostname:
sudo hostnamectl set-hostname web-server
I checked /etc/hosts and it was empty. So I edited it with sudo nano /etc/hosts and confirmed the hostname change took.
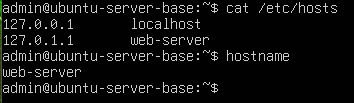
Confirming the hostname and hosts file
Then I regenerated the machine ID:
sudo rm /etc/machine-id
sudo systemd-machine-id-setup
I set a static IP of 192.168.50.10. I edited /etc/netplan/50-cloud-init.yaml:
sudo nano /etc/netplan/50-cloud-init.yaml
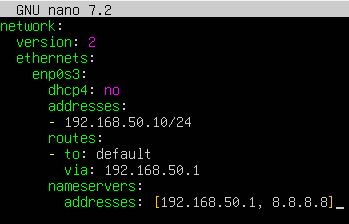
The netplan file with the static IP
Then I applied it and checked the address:
sudo netplan apply
ip addr show enp0s3
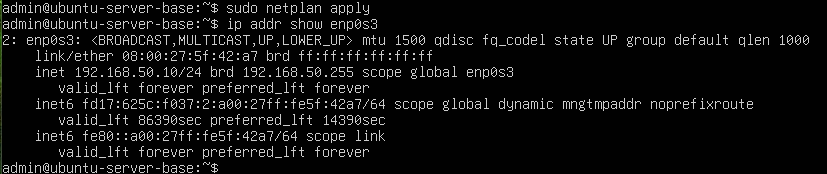
The static IP applied
I installed the SSH server, which also makes the server-specific SSH keys. Then I rebooted.
sudo apt install openssh-server
sudo reboot
I did the same on db-server and app-server. Only the hostnames are different. Their static IPs are 192.168.50.11 and 192.168.50.12.
6. Installing services
I set up one service on each VM.
Web server
On web-server I installed Apache and checked it was running:
sudo apt update && sudo apt install -y apache2
sudo systemctl status apache2

Installing Apache
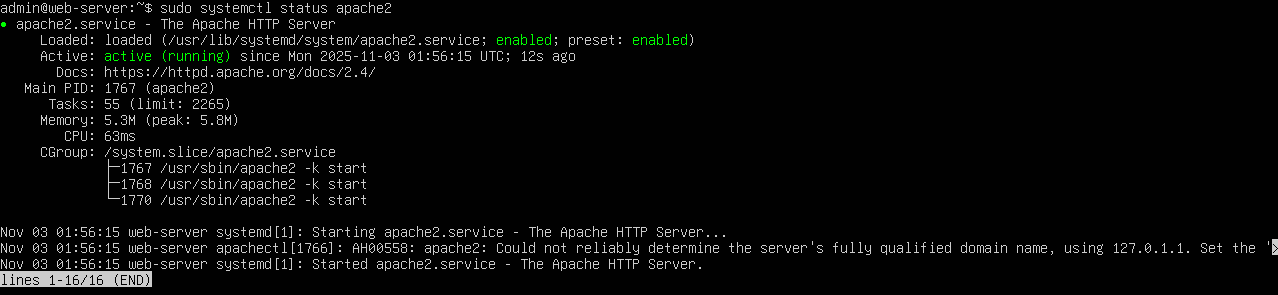
Apache running on the web server
Then I made a test page and checked it with curl:
echo "<h1>Web Server - 192.168.50.10</h1>" | sudo tee /var/www/html/index.html
curl localhost

The test page served by Apache
Database server
On db-server I updated packages and installed MySQL:
sudo apt update
sudo apt install -y mysql-server
Then I secured it:
sudo mysql_secure_installation
I answered Y to these:
- Remove anonymous users
- Disallow root login remotely
- Remove test database
- Reload privileges
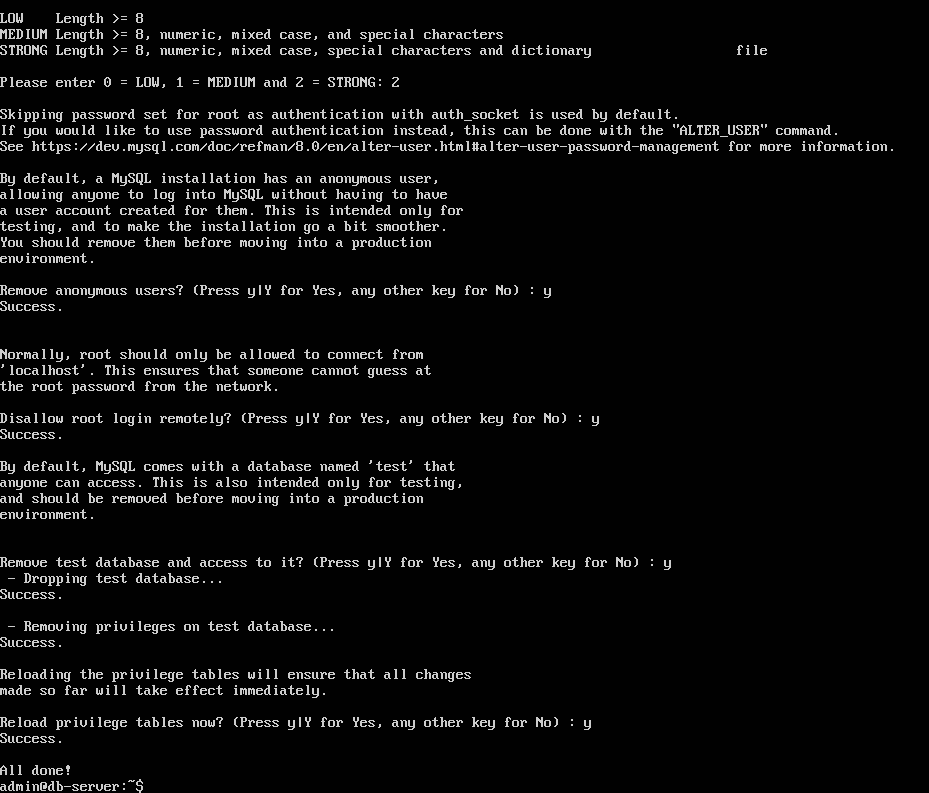
Running mysql_secure_installation
systemctl status mysql showed it running.
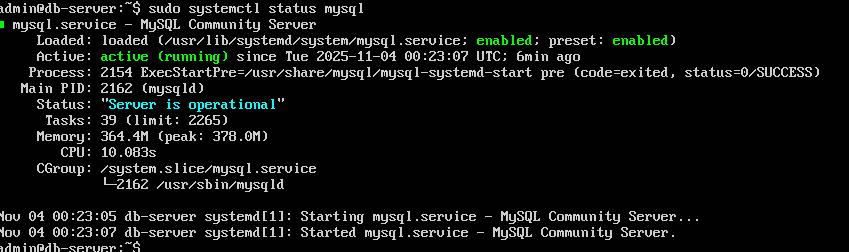
MySQL running on the database server
App server
On app-server I updated packages. Then I installed Python, pip, and the venv module:
sudo apt update
sudo apt install -y python3 python3-pip python3-venv
I made a simple app:
mkdir ~/myapp
cd ~/myapp
nano app.py
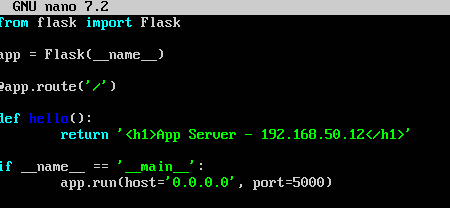
The Flask app code in app.py
Then I installed Flask.
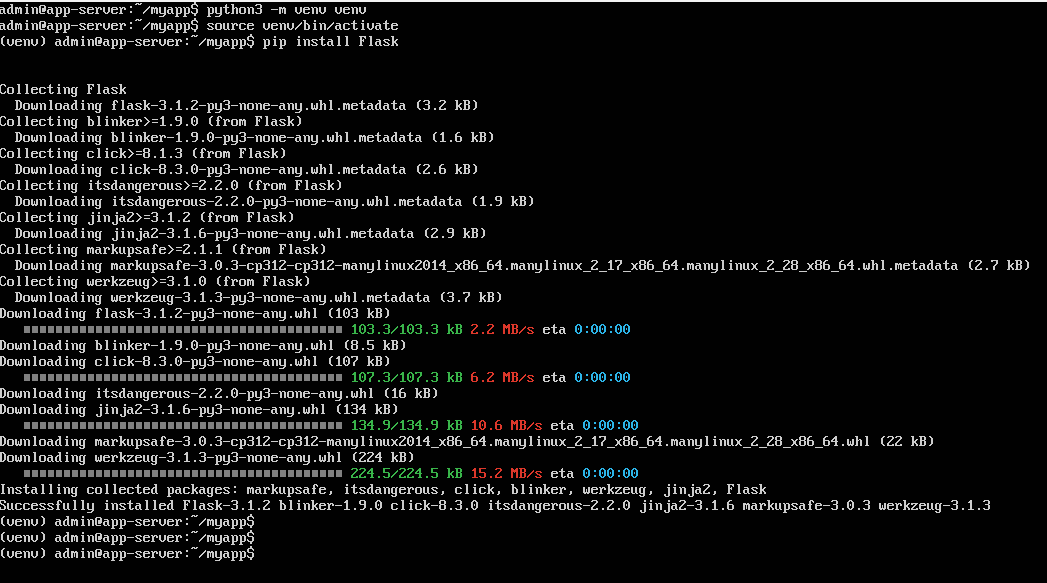
Installing Flask
I started the app in the background. The & lets me keep using the terminal. Then I checked it with curl:
python3 app.py &
curl localhost:5000
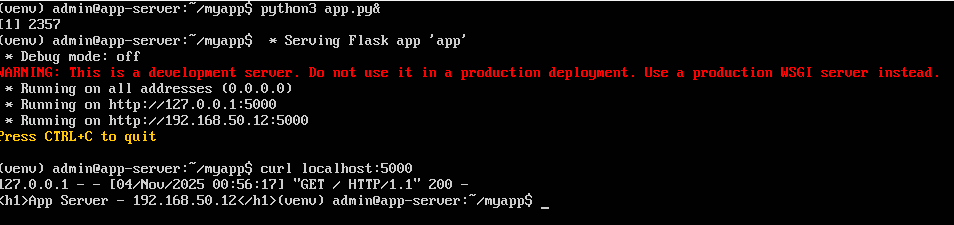
The Flask app responding on port 5000
It was up and running.
7. Testing communication between the VMs
After I set up the VLANs in pfSense, I put the Ubuntu VMs on VLAN 50 (192.168.50.x). But that means the VMs have to send 802.1Q VLAN-tagged traffic. VirtualBox’s Host-Only adapter doesn’t do that unless you configure it inside each guest.
I looked at two ways to handle it:
- Set up VLAN sub-interfaces on each Ubuntu VM with the
vlanpackage and netplan - Put the VMs on the base LAN (
192.168.100.x) and keep the VLAN setup in pfSense for later
I went with option 2. I wanted this lab to be about pfSense, firewall rules, and a multi-tier app. Not about tagging VLANs in the guest OS. And in real environments the switches and routers normally handle VLANs. The server admins don’t set up VLAN tagging on every host.
So I changed each VM’s network adapter in VirtualBox from Internal Network to Host-Only Adapter. That’s the same adapter pfSense’s LAN (em1) uses. Then I updated each VM’s static IP in netplan, with the gateway set to pfSense at 192.168.100.1:
web-server:192.168.100.10db-server:192.168.100.11app-server:192.168.100.12
Now the VMs can talk to each other and reach the internet through pfSense’s NAT. I tested with ping www.google.com on all three. I can also reach them from my host with SSH and a browser.
From web-server I pinged db-server at 192.168.100.11 and app-server at 192.168.100.12. Both worked. I also used SSH to get into db-server:
ssh admin@192.168.100.11
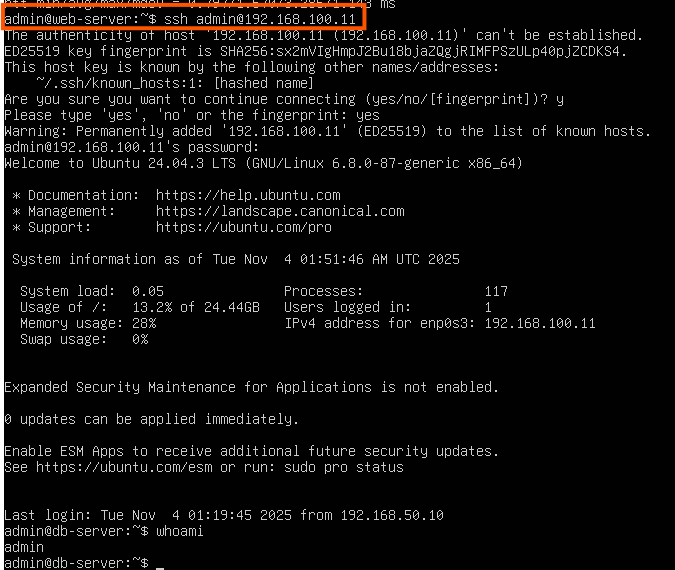
SSH from the web server to the database server
From app-server I got the web page:
curl http://192.168.100.10

The app server reaching the web server
My browser on the workstation could open the website too.
Result
I now have pfSense running with VLANs, DHCP, and firewall rules. Three Ubuntu servers sit behind it as a web, database, and app tier.
I ran into a few real networking problems along the way. They were IP conflicts, and the difference between tagged and untagged VLAN traffic. Fixing them helped me understand layer 2 and layer 3, default gateways, and why segmentation matters.
The VLANs exist in pfSense but VirtualBox didn’t carry them to the VMs. On a physical managed switch this would work the usual way. For this lab the simple setup was the right call.