Nutanix Move is the free appliance Nutanix gives you for moving VMs onto AHV. It handles disk seeding, guest OS prep, and the final cutover in one workflow. You don’t have to export and import things by hand.
I used Move to migrate a few VMs from VMware ESXi and vCenter to a Nutanix AOS cluster in my lab. This post covers how I deployed the appliance, how the migration plan comes together, and two real errors I hit.
If you want to follow along, Nutanix Community Edition is a free target cluster.
1. Deploying the Move appliance
Move ships as a virtual appliance. You can deploy it as an OVA in vCenter. I imported a disk image into the Nutanix AHV cluster through Prism Element instead.
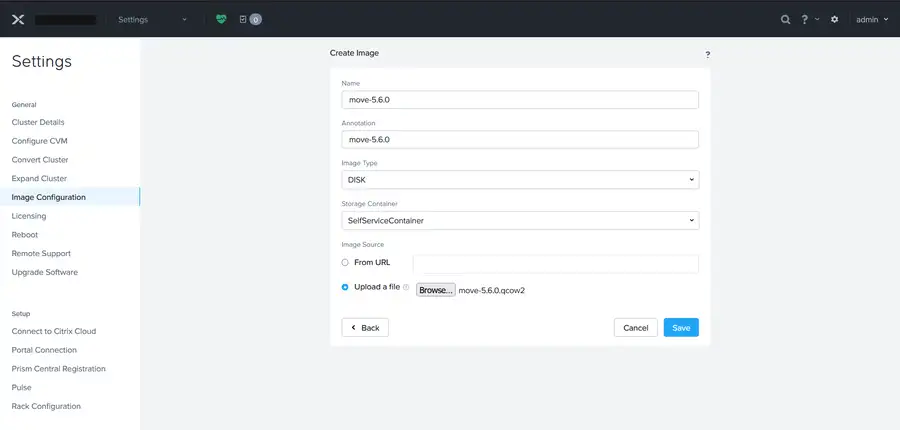
In Settings → Image Configuration I created a new DISK image. I uploaded the move-x.x.x.qcow2 file Nutanix publishes for each release and pointed it at a storage container. When the upload finished I created a VM from the image and powered it on.
Uploading the Move image in Prism Element
2. First login
The first time you open the Move web console, you have to accept the Nutanix EULA before anything else.
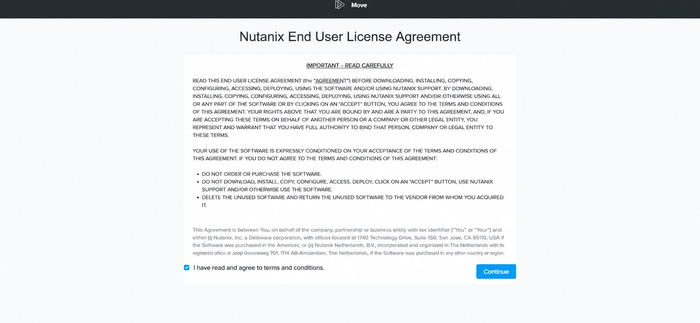
The Nutanix End User License Agreement
After that you land on the VM Migration Dashboard. On a new 5.6.x install there’s also a “What’s New” banner. Mine mentioned IPv6 retention on several migration paths, VirtIO 1.2.4 support, and Microsoft Graph API support for Azure migrations.
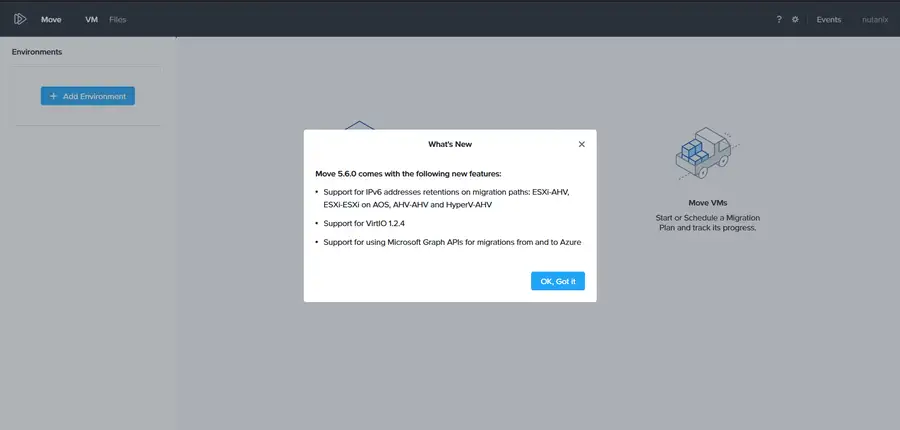
The VM Migration Dashboard
3. Moving settings from an older Move instance
If you’re replacing an older Move appliance, there’s a one-click Move Instance Migration. It brings over the migration plans, environments, appliance settings, and credentials. Then it stops services on the old one when it’s done.
A few things don’t come across. The SSH port, bandwidth cap policy, and snapshot interval settings need to be set again. VDDK also has to be uploaded again.
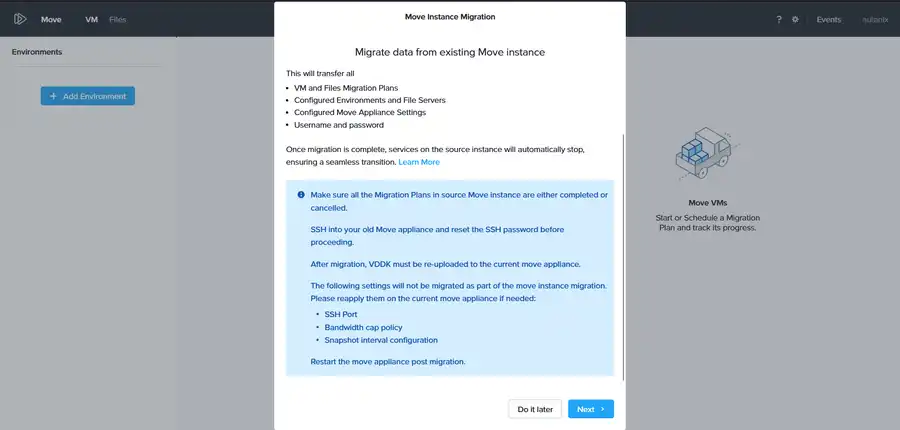
The Move Instance Migration option
4. Adding the source and target
The dashboard shows the three steps every migration follows. Pick a source and target. Add VMs to a plan. Run the migration.
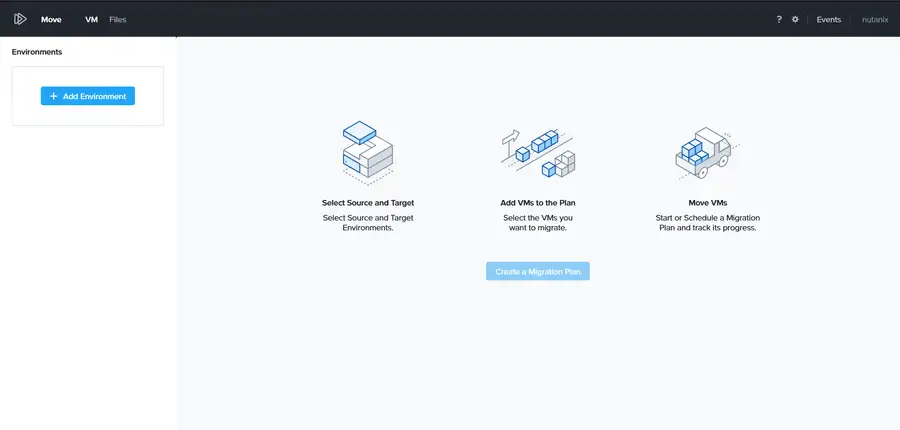
The three migration steps on the dashboard
I added the target first. It’s a Nutanix AOS environment. It can point at Prism Element or Prism Central, and it needs the admin credentials for that cluster.
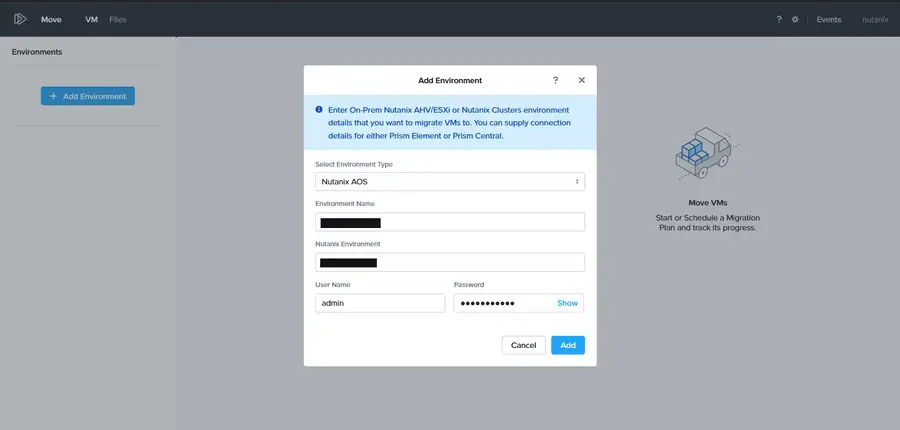
Adding the Nutanix AOS target
Then I added the source, my VMware vCenter, the same way. When both were registered, they showed up side by side in the Environments panel. Each one shows how many VMs it can see.
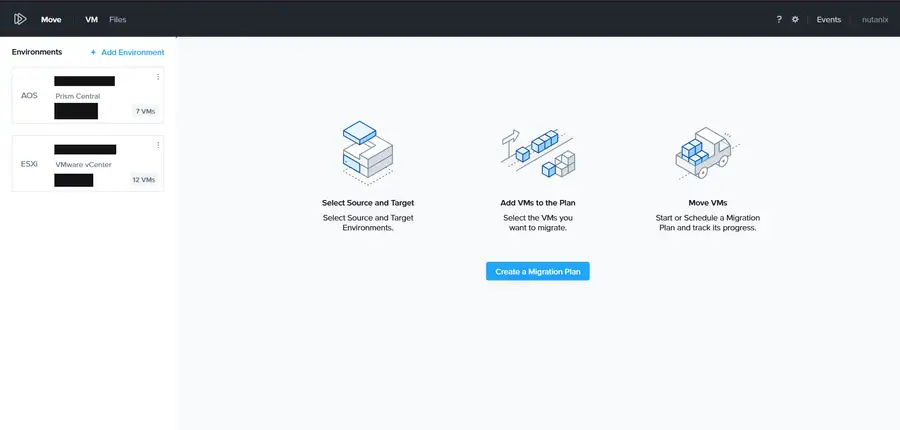
Source and target environments in Move
5. Uploading VDDK
Migrating from ESXi needs VMware’s Virtual Disk Development Kit (VDDK) in Move. Move uses it to read VMDKs when it seeds the disks.
It’s a one-time upload in Settings → VDDK Upload. I uploaded both 7.0.3.1 and 8.0.3.2. That covers VMs across different ESXi and hardware version combinations in the environment.
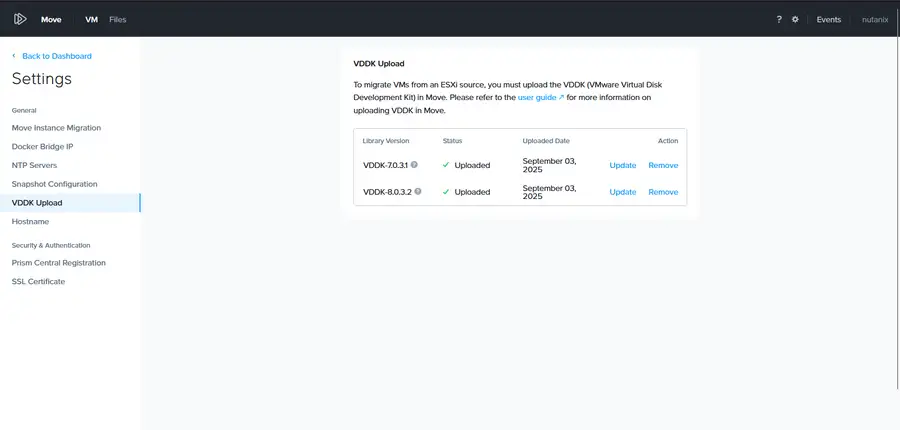
The VDDK upload page
6. Building a migration plan
The rest happens in the migration plan wizard. First I named the plan.
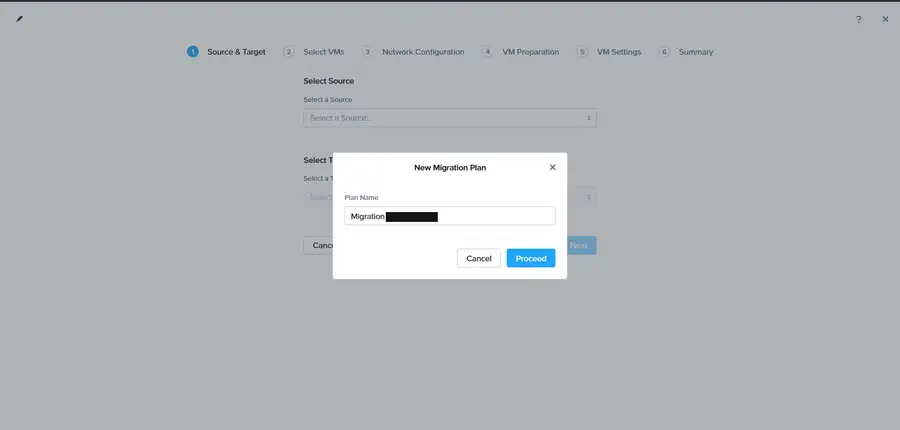
Naming the migration plan
Step 1 is source and target. I picked the source environment and the target cluster. Then I picked an optional target project and the storage container where the migrated disks land.
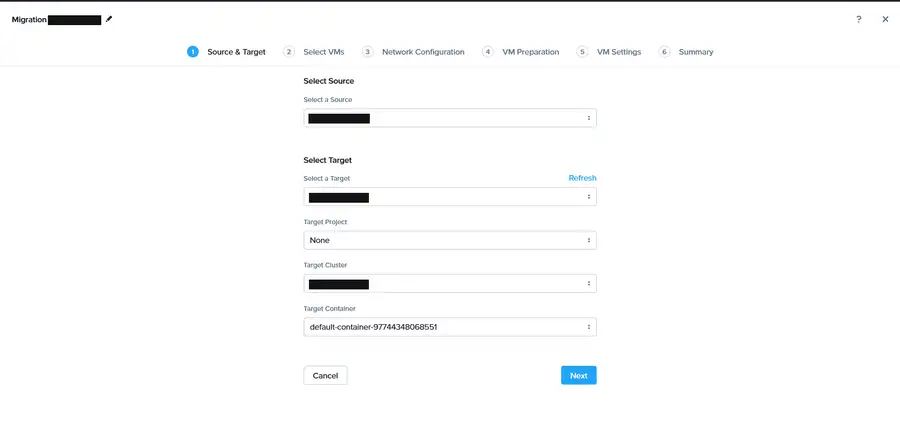
Selecting source, target, and storage container
Step 2 lists every VM Move can see in the source. It shows the datacenter, cluster, host, guest OS, power state, and source network. I picked the VMs for this batch. They collect in the Added VMs panel on the right, and any warnings show up there.
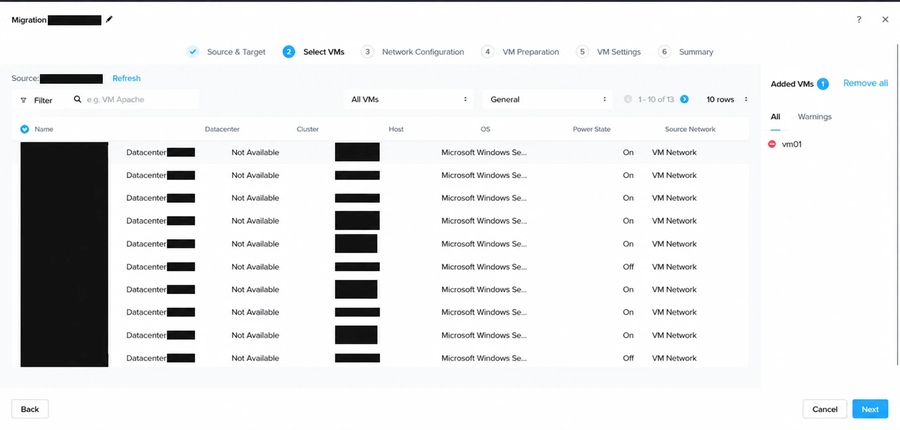
Selecting VMs for the plan
Step 3 maps source networks to target networks on AHV. There’s also an optional isolated test network. You can use it to test the migrated VM before cutover.
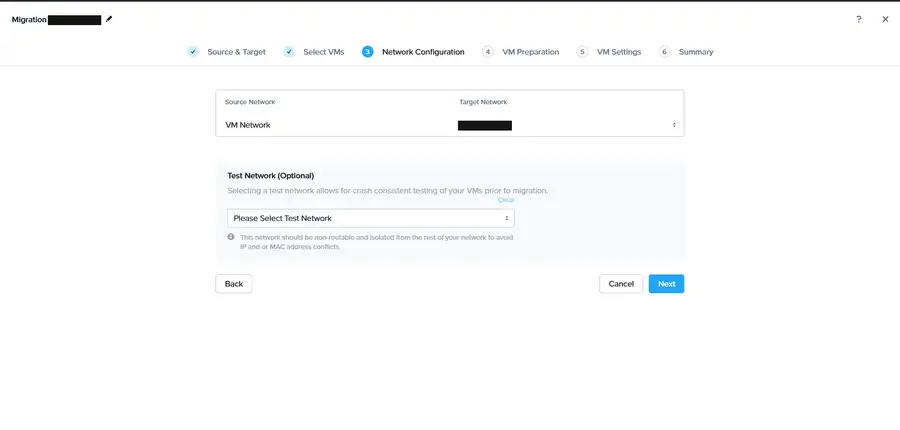
Mapping source networks to target networks
Step 4 controls how Move prepares the guest OS for AHV. I left it on Automatic. That uninstalls VMware Tools, installs Nutanix Guest Tools (NGT), and keeps the source IP configuration on the target VM.
This is also where I gave it credentials. It needs administrator on Windows or root on Linux, because Move logs in to the guest to run the prep steps.
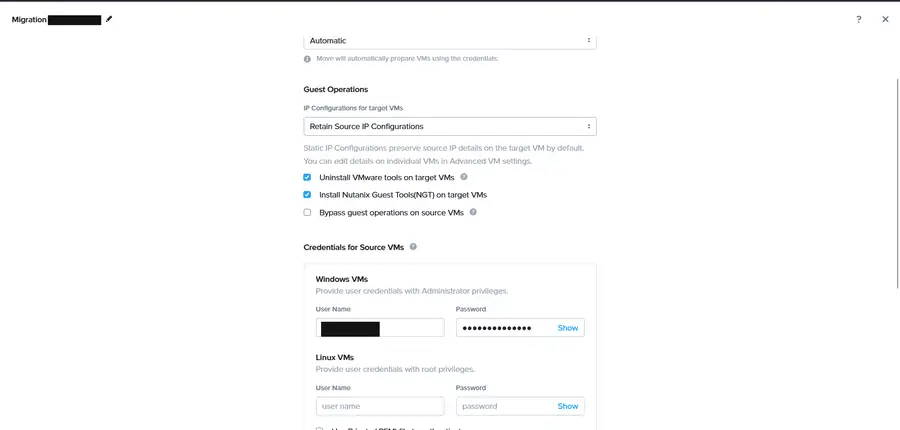
Guest preparation and credentials
The last screen sets the migration priority. That affects scheduling and bandwidth when several plans run at once. It also sets the timezone for the migrated VMs, whether to keep the source MAC addresses, and any target categories.
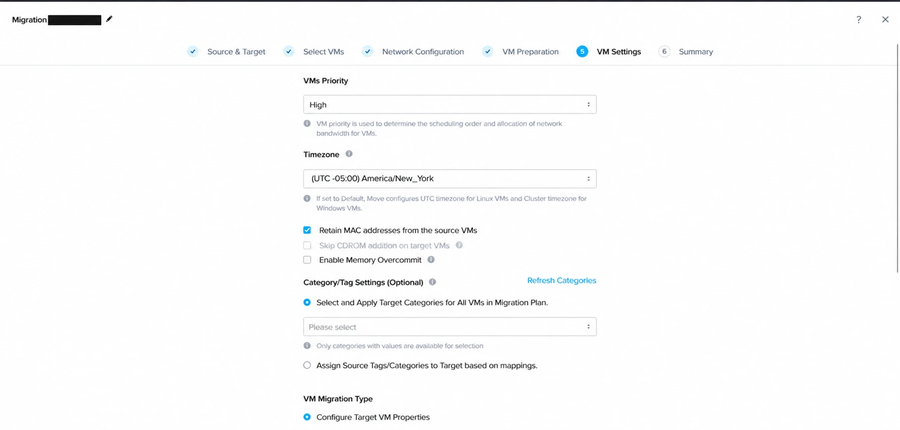
Priority, timezone, and MAC address settings
There’s one more choice here. You can set the target VM properties up front from what Move captured when you made the plan. Or Move can pick them up fresh from the source at cutover. There are per-VM overrides too, and an optional start time for data seeding.
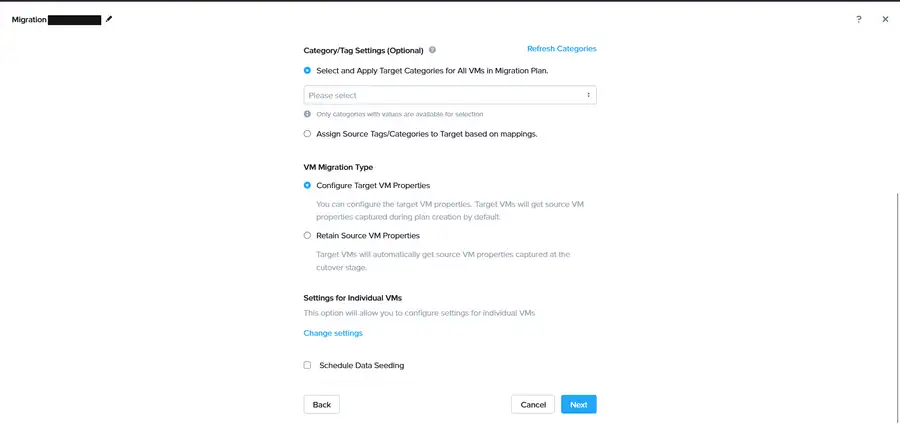
Target VM properties and the seeding schedule
7. Watching the migrations
Once a plan is running, the dashboard is what I watched. It shows how many VMs are In Progress, Ready to Cutover, Failed, Paused, and Completed across all plans. Each plan has its data size, migrated size, and elapsed time.
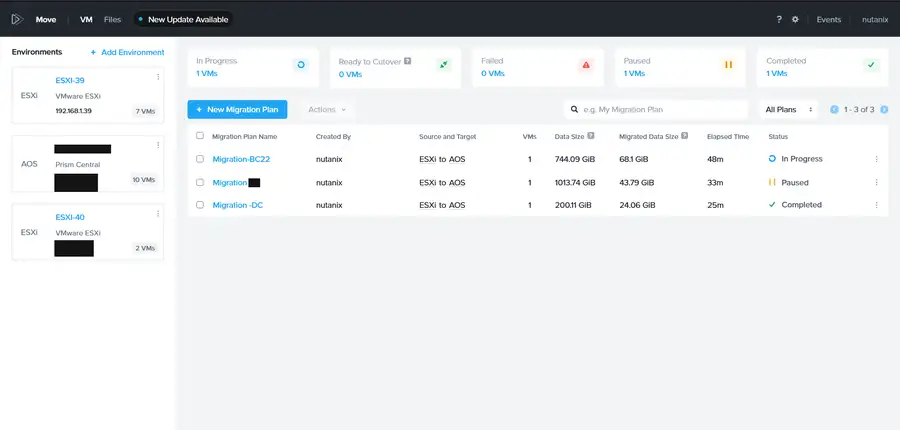
The dashboard with running migrations
When I opened a plan I could see each VM’s progress. This one was 10% through data seeding and had an estimated time remaining. For big disks over a WAN link that can be hours.
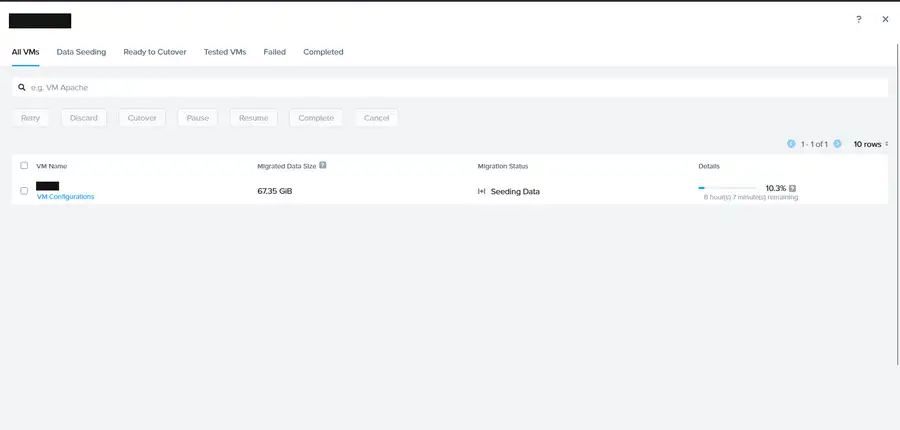
A VM in the middle of data seeding
As I added more environments and plans, the dashboard filled up. It shows more ESXi hosts and AHV and Prism Central targets on the left. The plan history grows on the right.
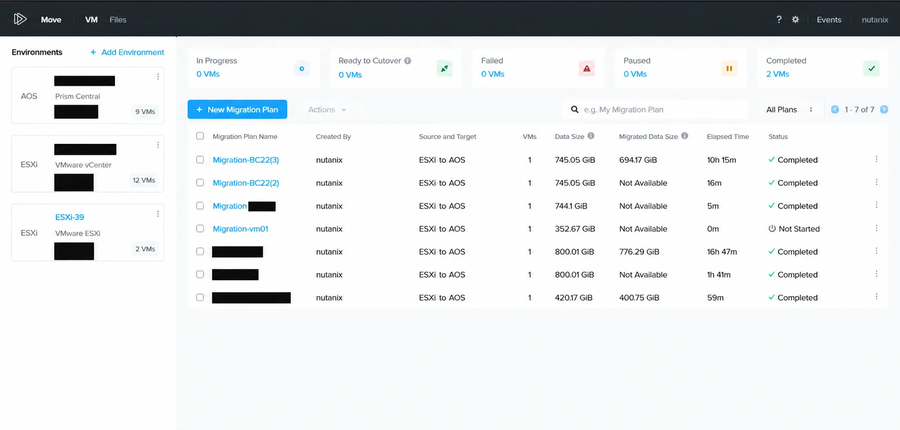
The dashboard with more environments
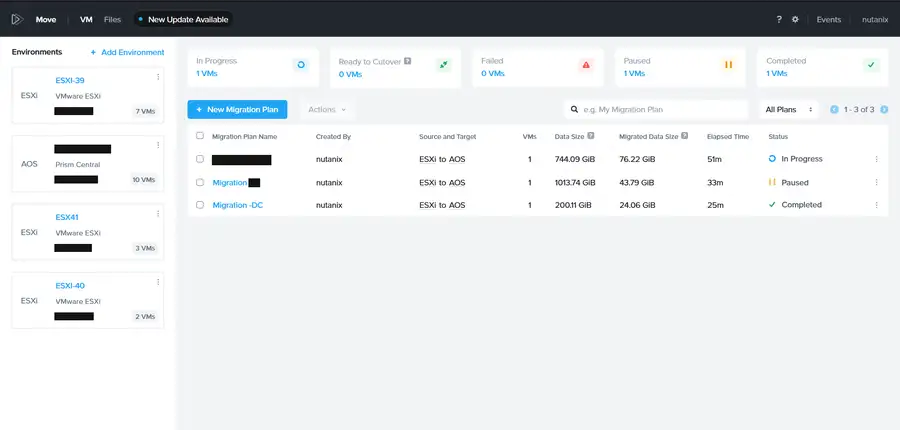
More plans in the history
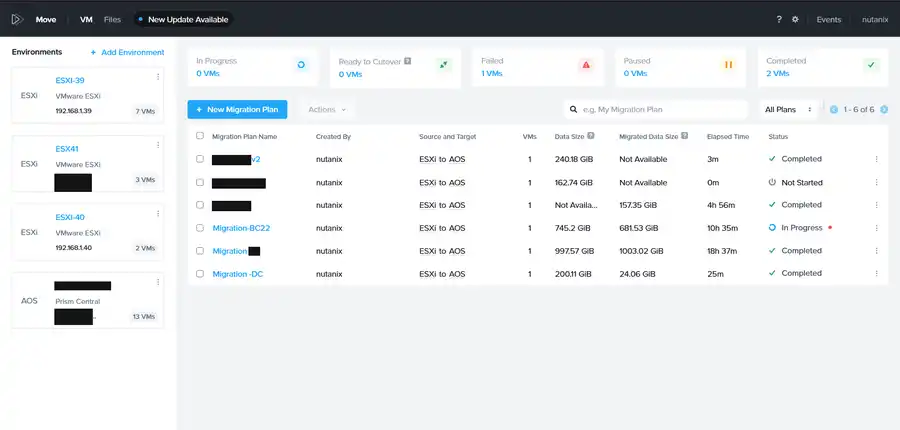
Plan progress across several VMs
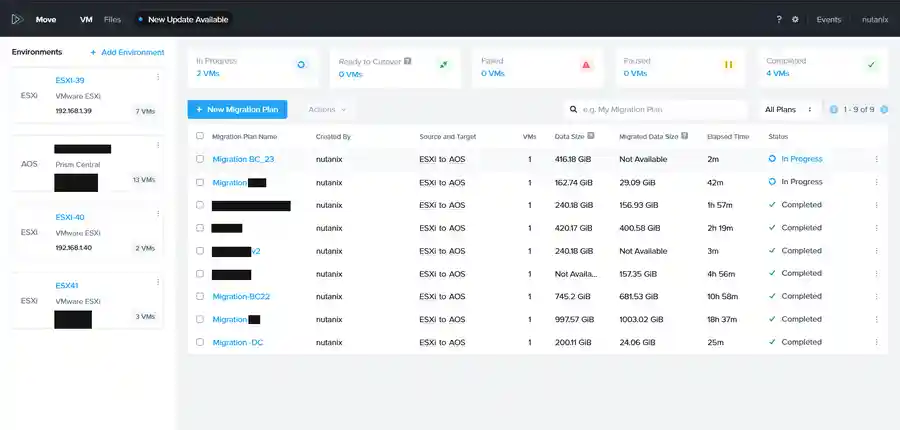
The dashboard later in the migration
8. Two errors I hit
Not every VM goes through on the first try. These two are worth writing down because they’re easy to misread.
“Not able to find File on VM… Got error while listing files at path”
One VM failed during preparation. It showed an authentication error and a file-not-found message for a path under AppData\Local\Temp\vmware.
The credentials were fine. The problem was the VMware Tools state on the guest. Move logs in to the VM and stages its prep files in a VMware Tools temp folder. If that folder is missing, or the VMware Tools service is in a bad state, the file operation fails.
I restarted the VMware Tools service on the source VM and retried. Where Tools was badly out of date, I reinstalled it.
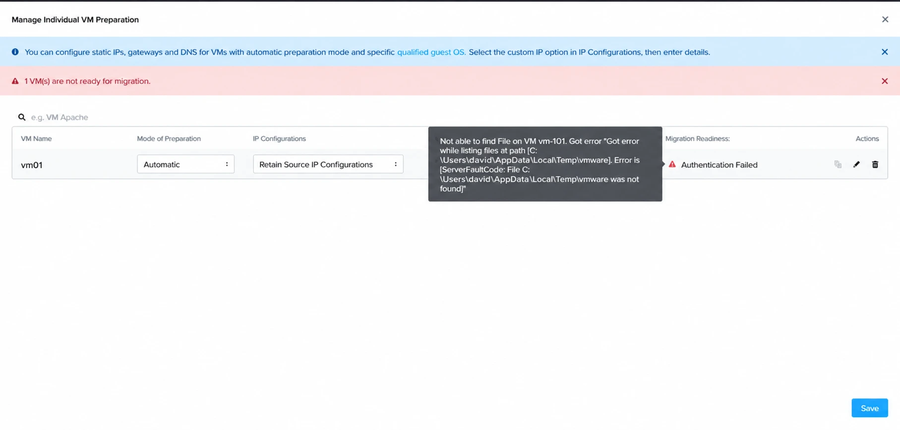
The file listing error during guest preparation
“vCenter Server timed out during operation ‘ListProcesses’”
A different VM failed later, while the migration was running. The error was a vCenter API timeout.
This one wasn’t the guest. vCenter was taking too long to answer a routine guest operations call that Move makes to track progress inside the VM. It’s usually temporary. It can come from vCenter load, a slow ESXi host, or network latency between Move and vCenter.
I just retried the migration and it went through. I didn’t change anything.
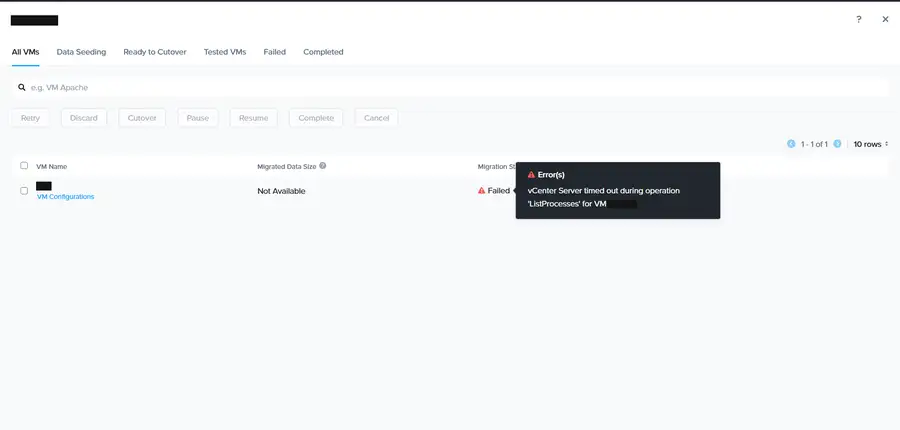
The vCenter ListProcesses timeout error
Result
Move turns a manual, error-prone P2V-style migration into something repeatable. I registered the environments once. I built a plan for each batch of VMs. I let the data seeding run in the background, then cut over when everything was ready.
Both failures were fixable without touching the plan. One was a guest-side hiccup. The other was a vCenter timeout. If a VM fails, I check VMware Tools on the guest first. And I retry a vCenter timeout before I assume something is really broken.