Configuring Legacy Microsoft LAPS in Active Directory
Using the same local admin password on every workstation is a real security problem. If it leaks on one machine, an attacker can use it to move across the rest of the network.
I fixed that with Microsoft Local Administrator Password Solution (LAPS). Each domain-joined computer gets its own managed local admin password. The password lives in Active Directory, and only certain people can read it.
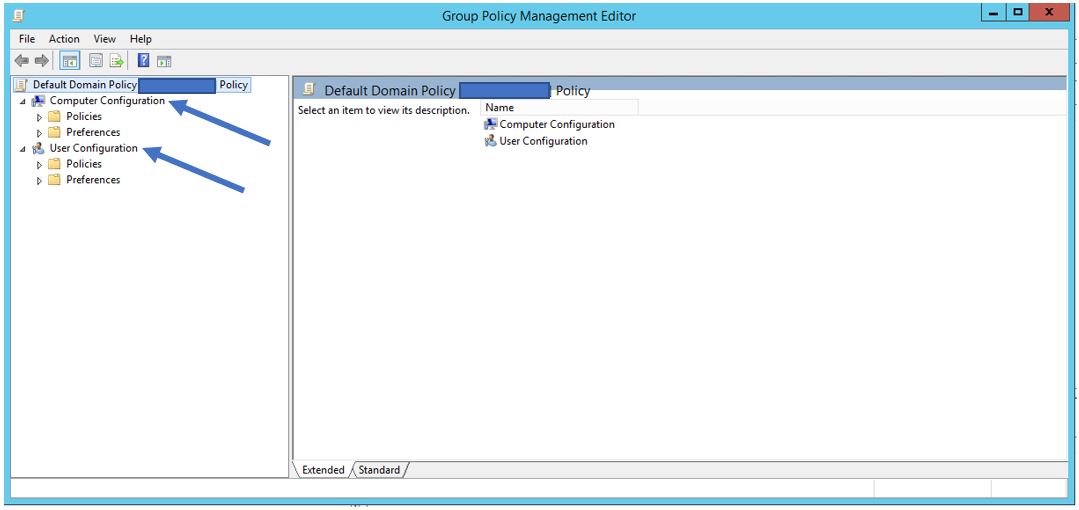
The Group Policy environment I used for LAPS
Important: I used the older, separately installed version now called legacy Microsoft LAPS. Microsoft now builds Windows LAPS into supported versions of Windows. For a new production deployment, use the current Windows LAPS docs. Only follow this legacy process if you’re maintaining an older environment.
What I configured
I set up the full legacy LAPS workflow:
- Installing the LAPS management tools on the domain controller
- Sharing the LAPS client installer with domain computers
- Deploying the client extension through Group Policy
- Extending the Active Directory schema
- Delegating password update and read permissions
- Creating and linking a LAPS configuration GPO
- Forcing a policy refresh on the client
- Retrieving the generated password with the LAPS management client
1. Installing the management tools
I started on the domain controller with the 64-bit legacy LAPS installer. I ran it from Downloads with admin rights.
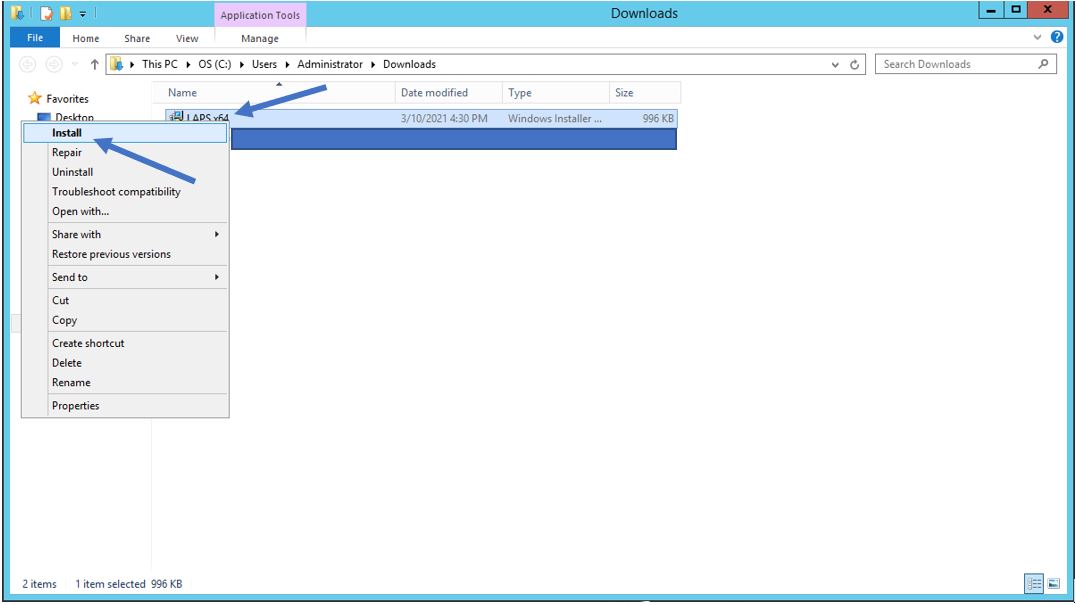
Opening the legacy LAPS installer
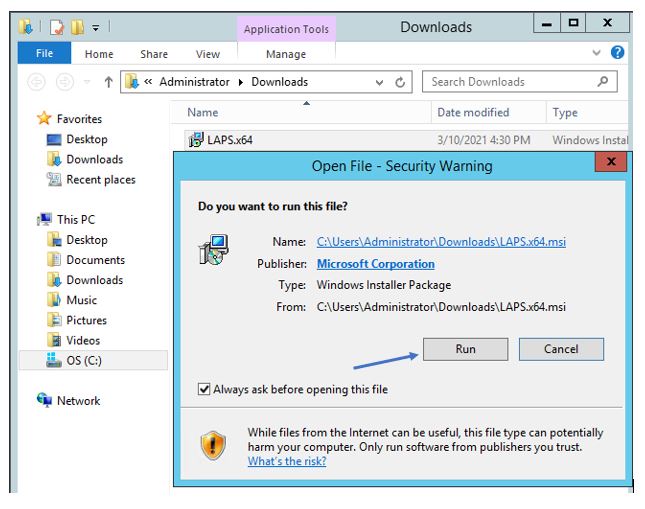
Confirming the installer launch
After accepting the license, I chose Custom Setup. The default only installs the client piece.
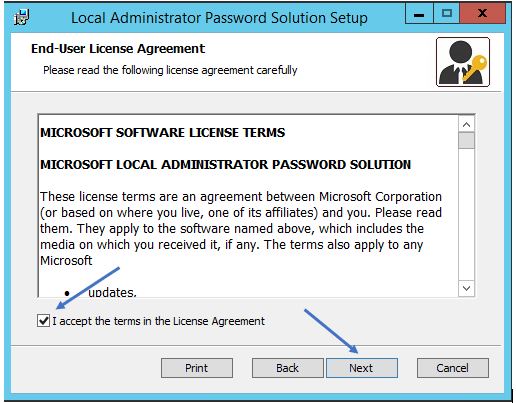
Accepting the Microsoft LAPS license terms
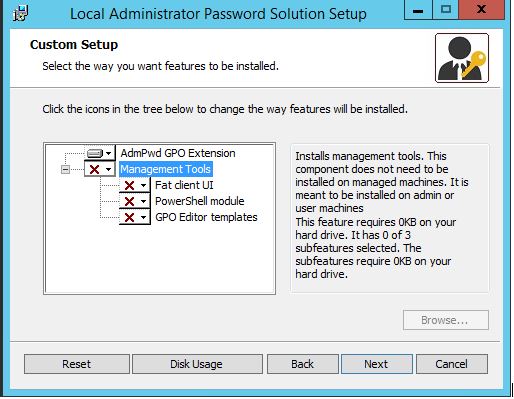
Reviewing the available LAPS components
On the domain controller I installed the management tools along with the Group Policy client-side extension. The tools add the PowerShell module, the Group Policy templates, and the password lookup app I used later.
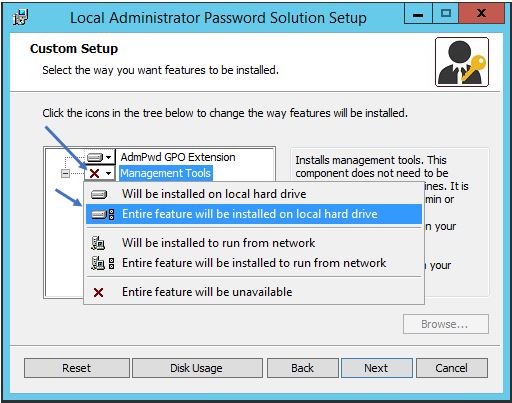
Selecting the LAPS management tools
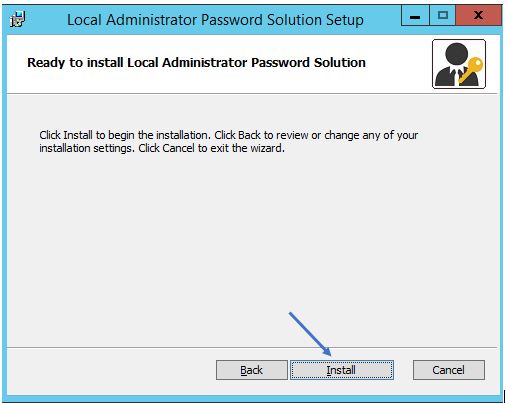
Ready to install Microsoft LAPS
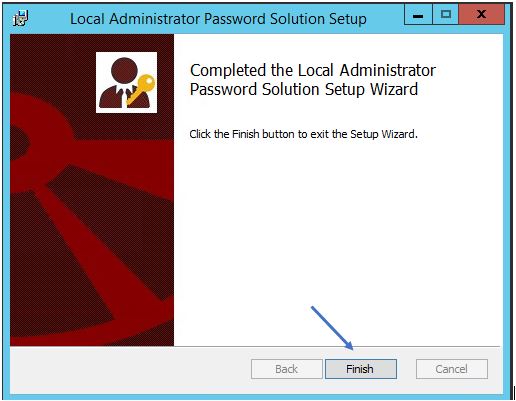
LAPS installation completed
2. Setting up a deployment share
To push the client extension to workstations through Group Policy, I made a folder on the domain controller and put the MSI in it. I called it LAPSTest.
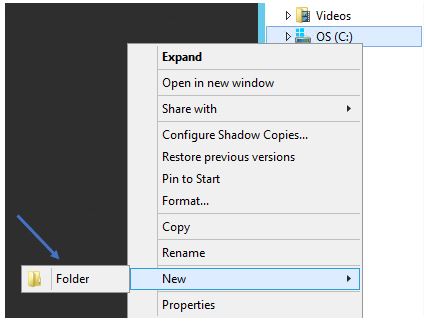
Opening the deployment folder properties
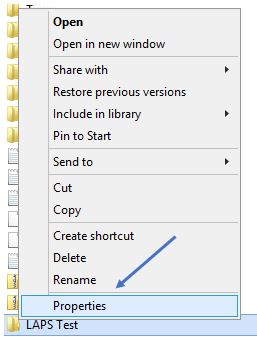
Opening the folder sharing options
In Advanced Sharing I turned on sharing and used a share name ending in $. The dollar sign hides it from normal network browsing. Anyone with the path and permission can still reach it.
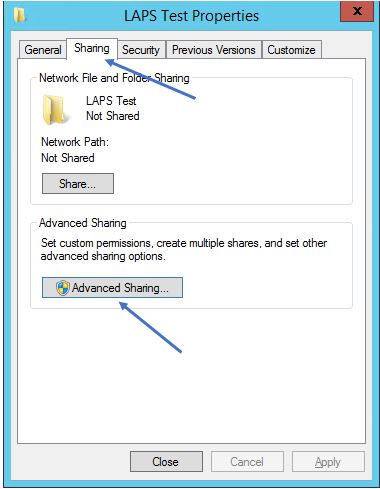
Opening Advanced Sharing
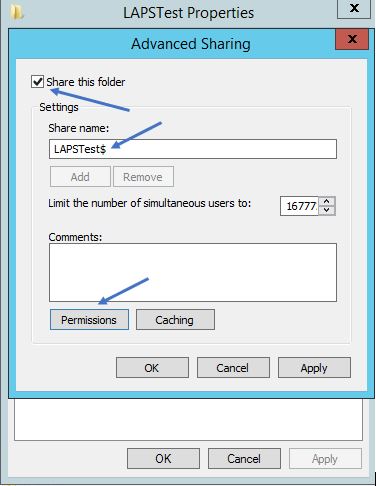
Sharing the LAPS deployment folder
The computers need read access to both the share and the NTFS folder. I added Domain Computers and gave only enough access to read the installer.
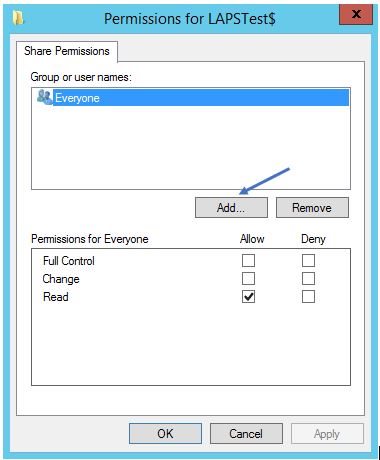
Reviewing the share permissions
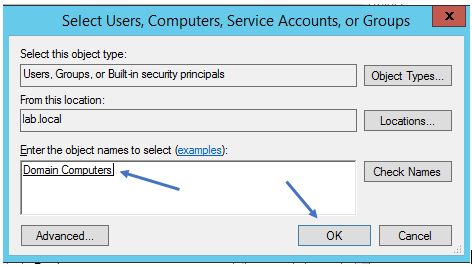
Adding Domain Computers
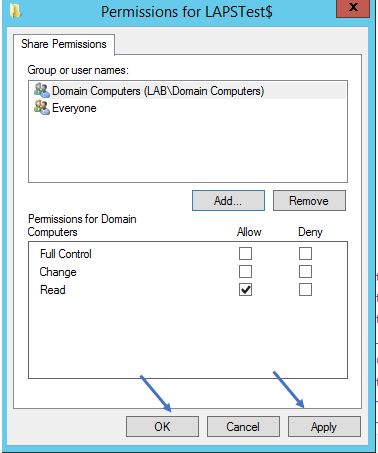
Granting Domain Computers access to the share
I did the same on the folder’s Security tab so share and NTFS permissions matched.
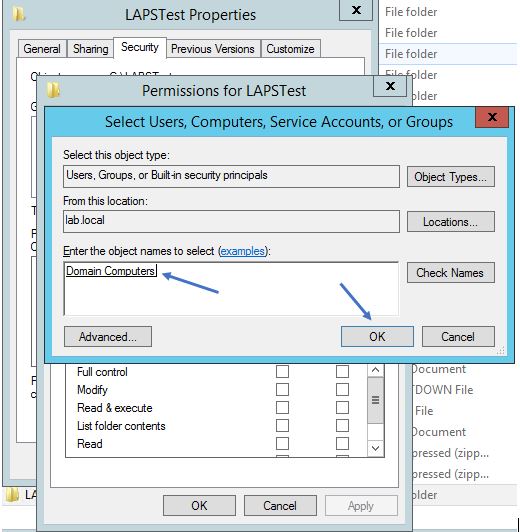
Configuring the folder security permissions
Then I checked the installer was reachable at the share path.
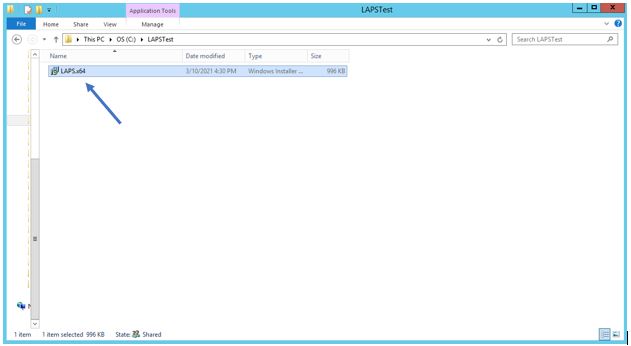
The shared LAPS installer package
3. Deploying the client with Group Policy
In Group Policy Management I created a GPO called Deploy-LAPS.
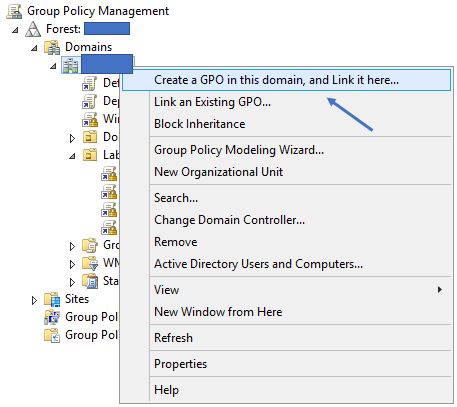
Creating a new Group Policy Object
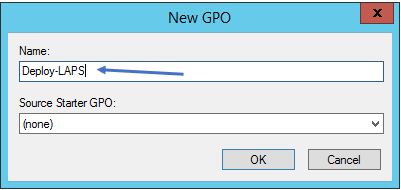
Naming the Deploy-LAPS GPO
I linked it to the OU with the target computers and opened it in the editor.
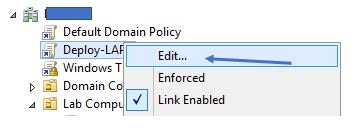
The new deployment GPO linked to the computer OU
The package goes under:
Computer Configuration
  > Policies
    > Software Settings
      > Software Installation
I added the MSI by its UNC network path. A local path like C:\LAPSTest\LAPS.x64.msi only works on the domain controller. Clients can’t reach it.
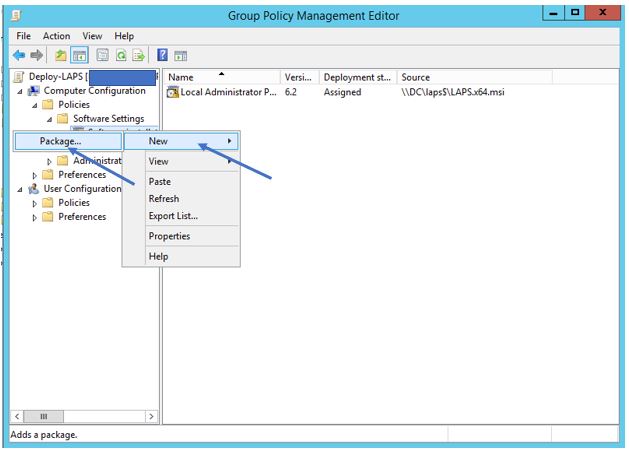
The LAPS MSI added to Software Installation
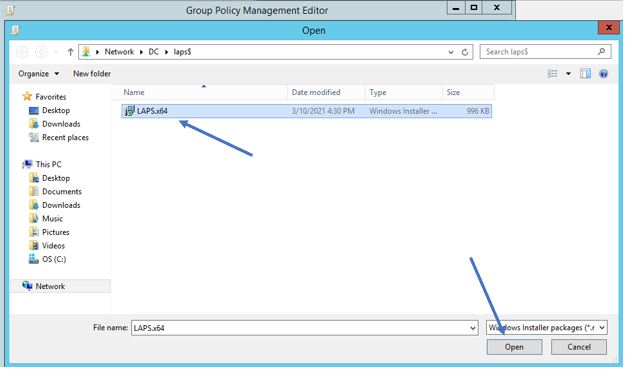
Selecting the MSI through the shared network path
I picked the advanced deployment method so I could review the package properties first.
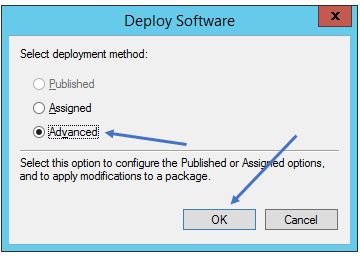
Choosing the advanced deployment method
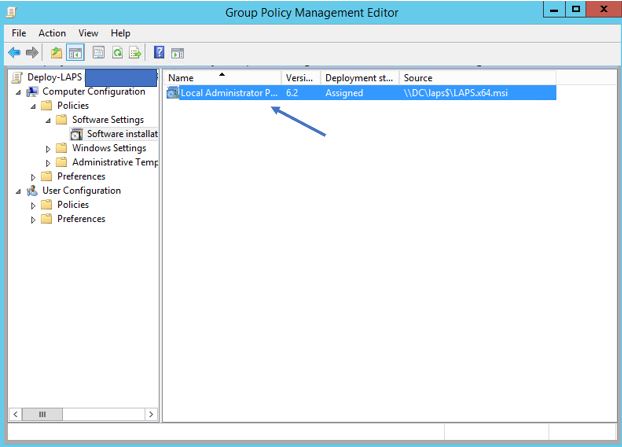
Opening the software package properties
I made sure Domain Computers could read and apply the package.
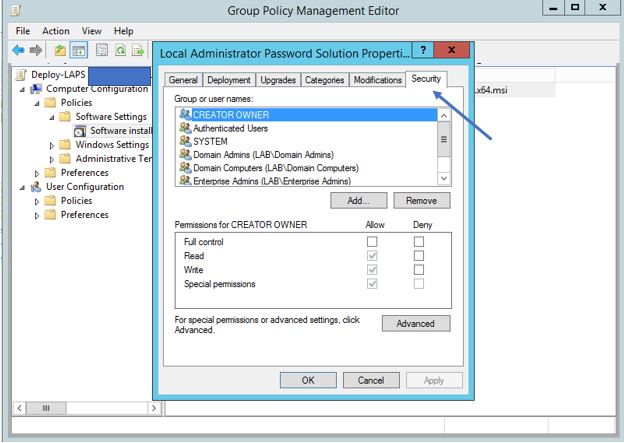
Reviewing package security permissions
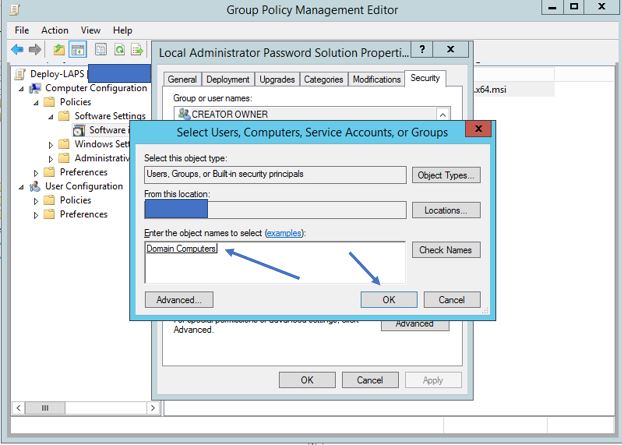
Adding the required computer access
4. Checking the client install
On a test workstation I refreshed Group Policy and restarted so the software could install:
gpupdate /force
After the restart, Local Administrator Password Solution showed up in Programs and Features.
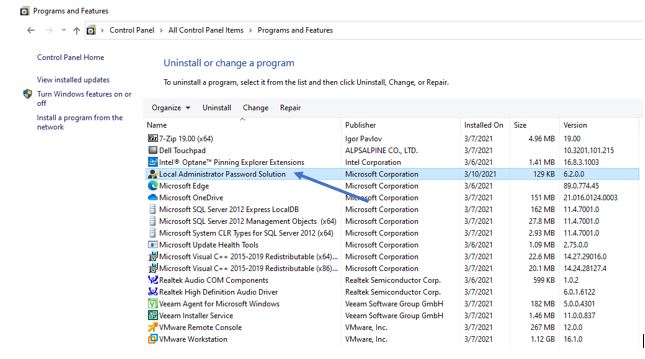
The LAPS client extension installed on the workstation
So the deployment GPO worked. Password management still wasn’t on yet though. I still had to set up the schema, permissions, and LAPS policy.
5. Extending the AD schema
Back on the domain controller I opened elevated PowerShell and imported the module:
Import-Module AdmPwd.PS

Loading the legacy LAPS PowerShell module
Then I extended the schema:
Update-AdmPwdADSchema
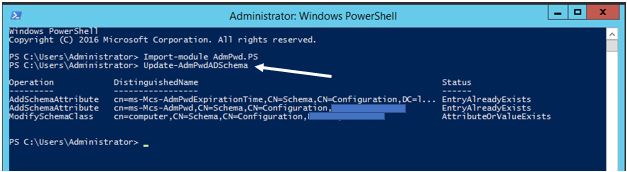
Running the schema update
This adds the attributes that store the password and its expiration time. Schema changes hit the whole forest. Review and test them before production.
My target computers were in an OU named Lab Computers.
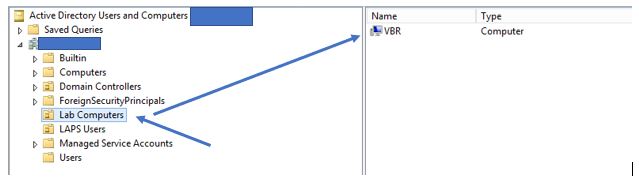
The Lab Computers OU in Active Directory
6. Delegating OU permissions
Each computer needs permission to update its own LAPS attributes. I granted that on the OU:
Set-AdmPwdComputerSelfPermission -OrgUnit 'Lab Computers'
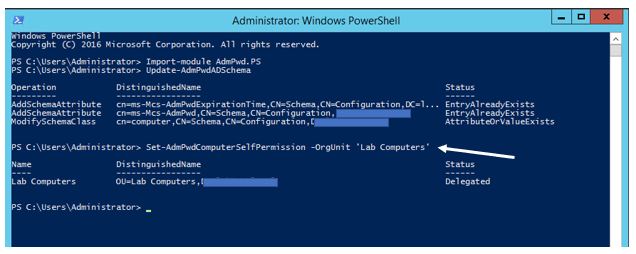
Granting computers permission to update their LAPS attributes
Then I checked who already had extended rights on the OU:
Find-AdmPwdExtendedRights -Identity 'Lab Computers'
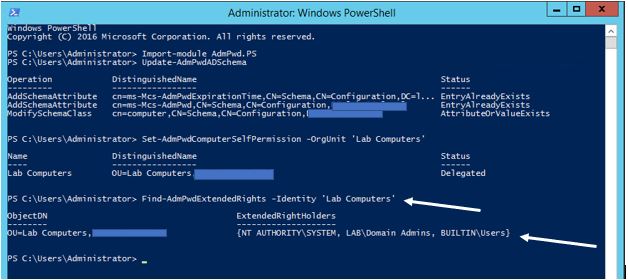
Reviewing principals with extended rights
Last, I delegated permission to read passwords.

Delegating permission to read managed passwords
In my test I gave this to the broad Users group. Don’t do that in production. Create a dedicated group for approved help desk or endpoint admins and grant access only to them:
Set-AdmPwdReadPasswordPermission `
  -OrgUnit 'Lab Computers' `
  -AllowedPrincipals 'LAPS Password Readers'
7. Creating the LAPS policy GPO
I created a second GPO called LAPS-Policy and linked it to Lab Computers. Keeping software deployment and password settings in separate GPOs makes each one easier to follow and troubleshoot.
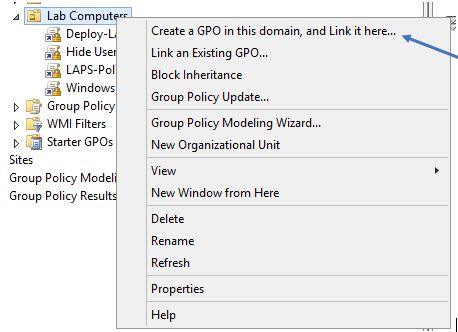
Creating a GPO for the LAPS configuration
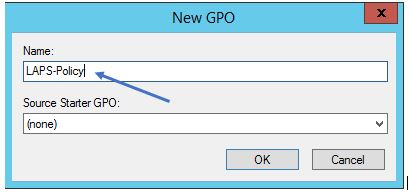
Naming the LAPS-Policy GPO
I edited it and opened the LAPS admin template settings:
Computer Configuration
  > Policies
    > Administrative Templates
      > LAPS
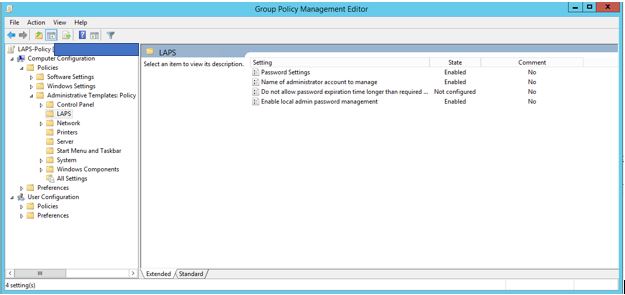
The legacy LAPS policy settings
8. Setting up password management
First I turned on local admin password management. Without it, the client is installed but never rotates the password.
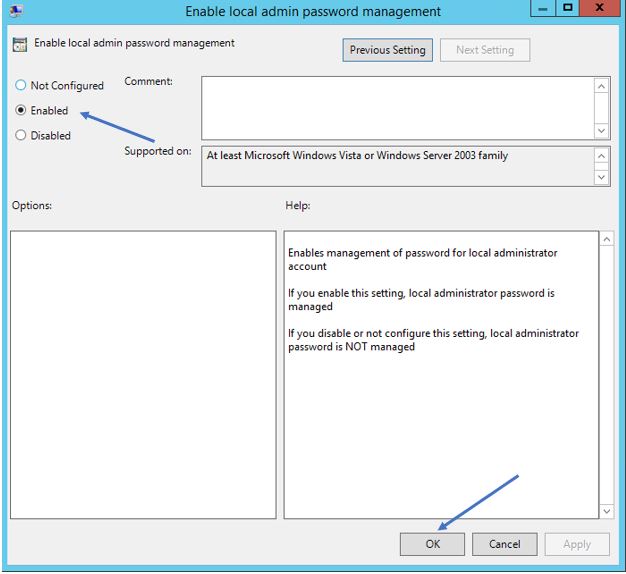
Enabling local administrator password management
If LAPS should manage a custom local admin account, set its name here. For the built-in Administrator, you can usually leave this alone. LAPS finds that account by its well-known SID.
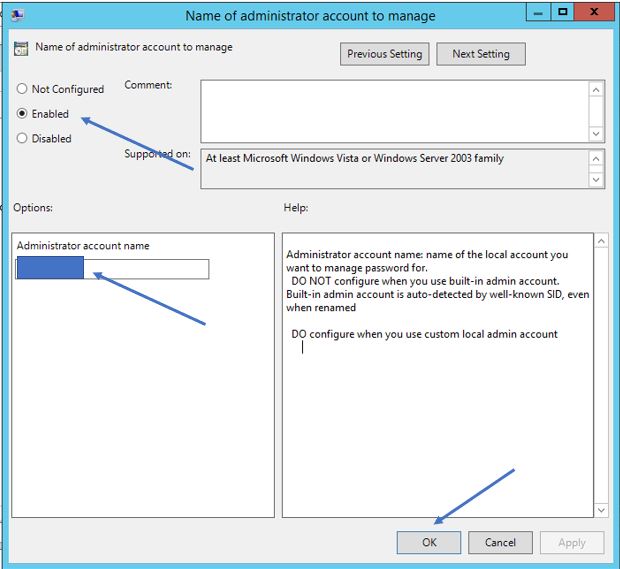
Configuring the administrator account name
Then I set the password rules for complexity, length, and max age.
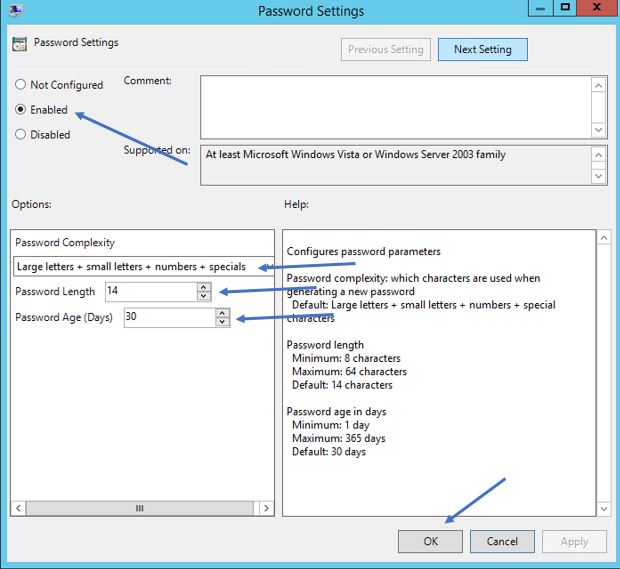
Configuring password complexity, length, and age
Longer than my 14 characters is better. Pick values that fit your security requirements and compatibility needs.
9. Applying and checking the policy
I forced another refresh on the domain controller and the test workstation:
gpupdate /force
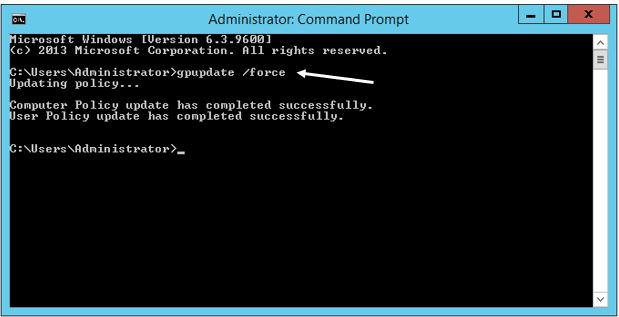
Group Policy updated successfully
The LAPS management client lives here:
C:\Program Files\LAPS
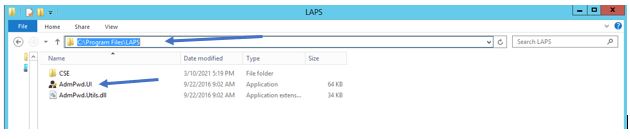
The installed LAPS management tools
I opened the LAPS client and searched for the workstation. The first check showed its password expiration info.
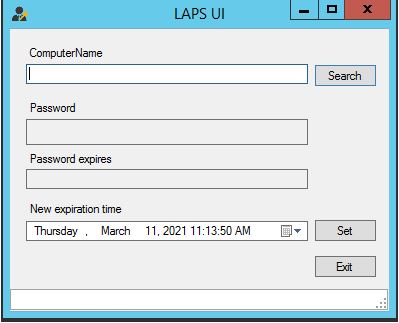
Looking up the managed workstation in LAPS
The full lookup showed the managed password and when it expires.
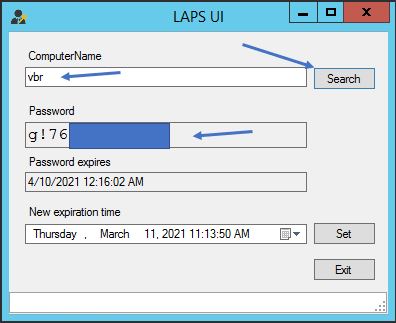
The generated local administrator password and expiration
That password is sensitive. In a real environment, limit and monitor who looks these up. Only do it for a real support or recovery need.
What I learned
Installing the client was just the start. It only worked once every piece lined up. Computers needed access to the MSI. The schema had to be extended. The OU needed the right permissions. The config GPO had to be linked. And the client had to refresh its policy.
Permissions were the most sensitive part. Letting a broad group read every password defeats the whole point of LAPS. A dedicated reader group with least privilege is much safer.
In the end, each workstation kept its own local admin password in Active Directory. Approved admins could look it up when needed. For anything new I’d use modern Windows LAPS. This setup is mainly useful for understanding or supporting older environments.