This blog is meant to be accompanied by a video which will release soon (like this) The source code for this project is divided into three parts (api), (frontend) and, (manifests)
Introduction
We are creating a voting application that lets users to vote between three movie choices: Star Wars, Avatar, and Avengers. Furthermore, we’ll host our entire application on AWS using Elastic Kubernetes Service (EKS).
Frontend: This will be a React-based user interface that users will interact with to submit their votes.
Backend: This will be a Go-based API that will manage user votes and update our database accordingly.
Database: This will be a MongoDB database that will store our voting records.
Architecture
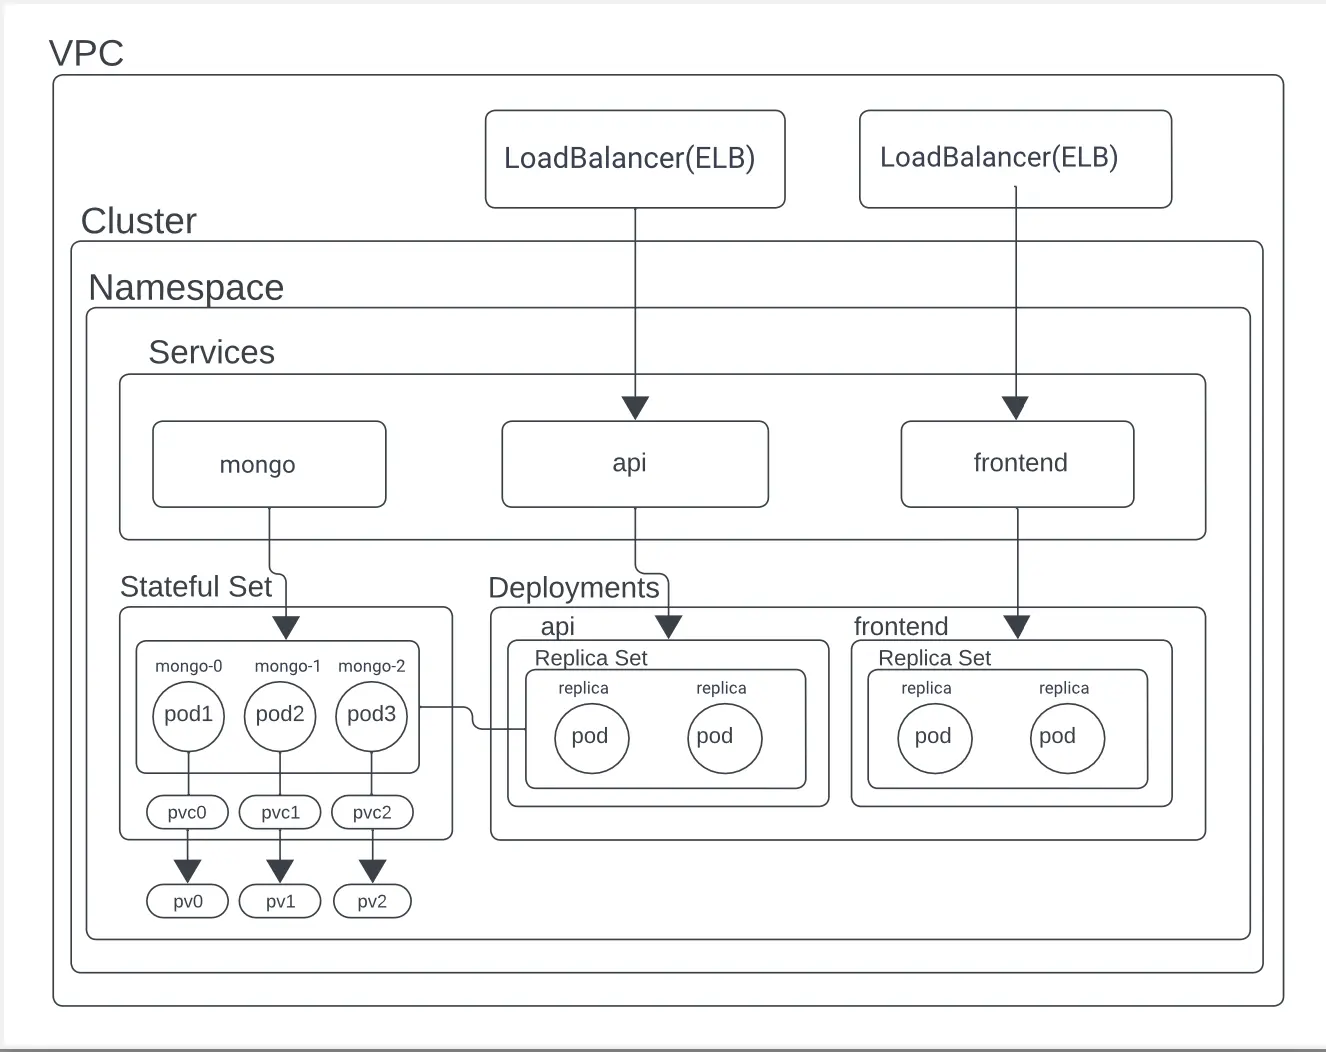
VPC (Virtual Private Cloud)
The networking layer that provides a private network for your resources. Our’s is within the AWS cloud.
Cluster
A Kubernetes cluster consists of a set of nodes (machines) that work together to run containerized applications. It is the main component of Kubernetes architecture.
Namespace
Namespaces are a way to divide cluster resources between multiple users. Hint the name namespacing. It’s like a another cluster inside your actual Kubernetes cluster.
Services
Services define a set of Pods and a policy that dictates how to access them. In this project, we have a cluster IP service for the MongoDB StatefulSet and LoadBalancer services for the API and frontend.
- mongo: This is a service of type ClusterIP, which means it is only accessible from within the cluster. It is used to connect to the MongoDB StatefulSet which is the database.
- api: This is a service of type LoadBalancer, which means it is accessible from outside the cluster. It is used to connect to the API Deployment which is the backend.
- frontend: This is a service of type LoadBalancer, which means it is accessible from outside the cluster. It is used to connect to the frontend Deployment which is the user interface.
StatefulSet
The stateful set is ideal for Stateful applications like databases. We use it to deploy our MongoDB database since it requires persistent storage and unique network identifiers. In our configuration, we have a StatefulSet with three replica pods for high availability and fault tolerance. The primary pod handles read-write operations, while secondary pods provide data redundancy.
- pod1, pod2, pod3: These pods are individual instances of MongoDB running within the StatefulSet.
- pvc0, pvc1, pvc2 and pv0, pv1, pv2: These are Persistent Volume Claims (PVC) and Persistent Volumes (PV).
- PVC (Persistent Volume Claim): A request for storage by the user. A PVC consumes PV resources. (Think of it similarly to a Pod - Pods consume node resources and PVCs consume PV (Persistent Volume) resources).
- PV (Persistent Volume): A piece of storage in the cluster that has been added to the storage pool using StorageClass (in our case gp2).
Deployments
Deployments manage stateless applications on Kubernetes, ensuring the creation and scaling of Pods. In our configuration, we have two Deployments (each with a ReplicaSet): one for the API and one for the frontend.
api: This deployment manages the Go-based API that processes votes and interacts with the database.
frontend: This deployment manages the React-based user interface that users interact with to submit their votes.
- ReplicaSet: Makes sure that a specified number of Pod replicas are running at any given time. (useful for self-healing and scaling)
Overall Workflow
- A user interacts with the frontend to submit a vote.
- The frontend sends the vote to the API.
- The API processes the vote and updates the database.
- The database stores the vote and sends a response back to the API.
- The API sends a response back to the frontend, confirming that the vote has been processed.
- The user sees the new vote on the frontend.
Prerequisites
You will need an AWS account and you will need to have the AWS CLI installed on your machine. You will also need to have kubectl and docker installed on your machine.
Here are the links to install the prerequisites:
- AWS CLI
- kubectl
- docker and, depending on your machine, docker buildx
Initial Setup
IAM User
We are going to be using the principal of least privilege as per best practices. To do this we are going to create a new IAM user. My IAM user is called ‘kubectl’ and I have attached the kubectl-policy custom policy. We are going to be using this IAM user to configure aws in our terminal.
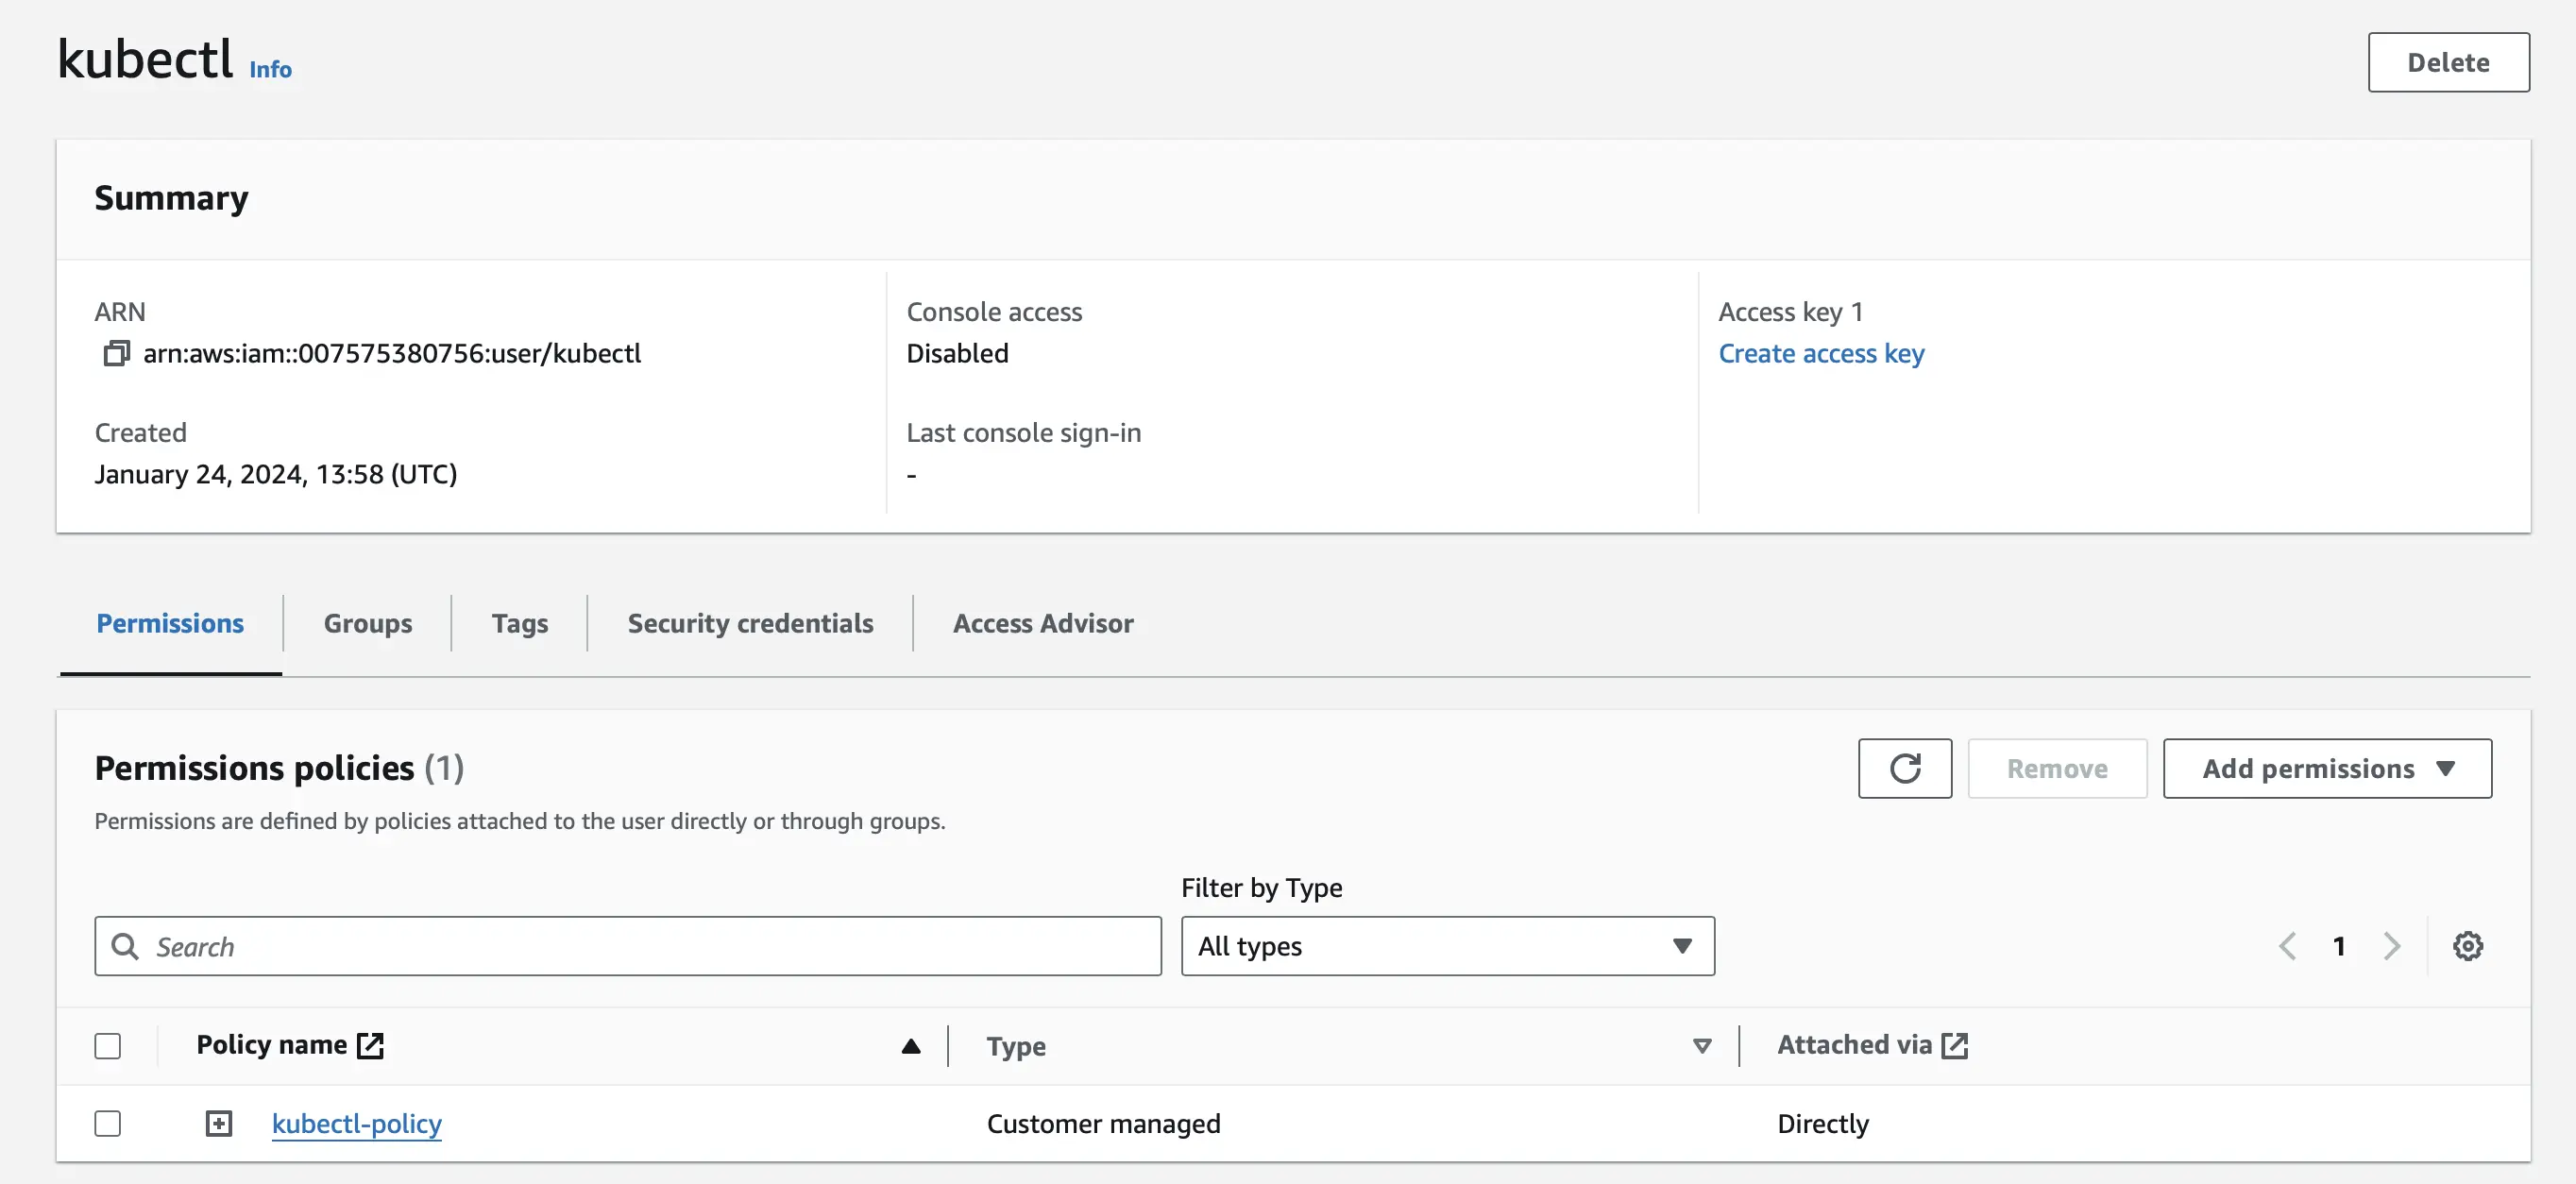
The kubectl-policy custom policy allows the IAM user to describe, list, and access the EKS cluster.

Here is the kubectl-policy custom policy in JSON format
{
  "Version": "2012-10-17",
  "Statement": [{
    "Effect": "Allow",
    "Action": [
      "eks:DescribeCluster",
      "eks:ListClusters",
      "eks:DescribeNodegroup",
      "eks:ListNodegroups",
      "eks:ListUpdates",
      "eks:AccessKubernetesApi"
    ],
    "Resource": "*"
  }]
}
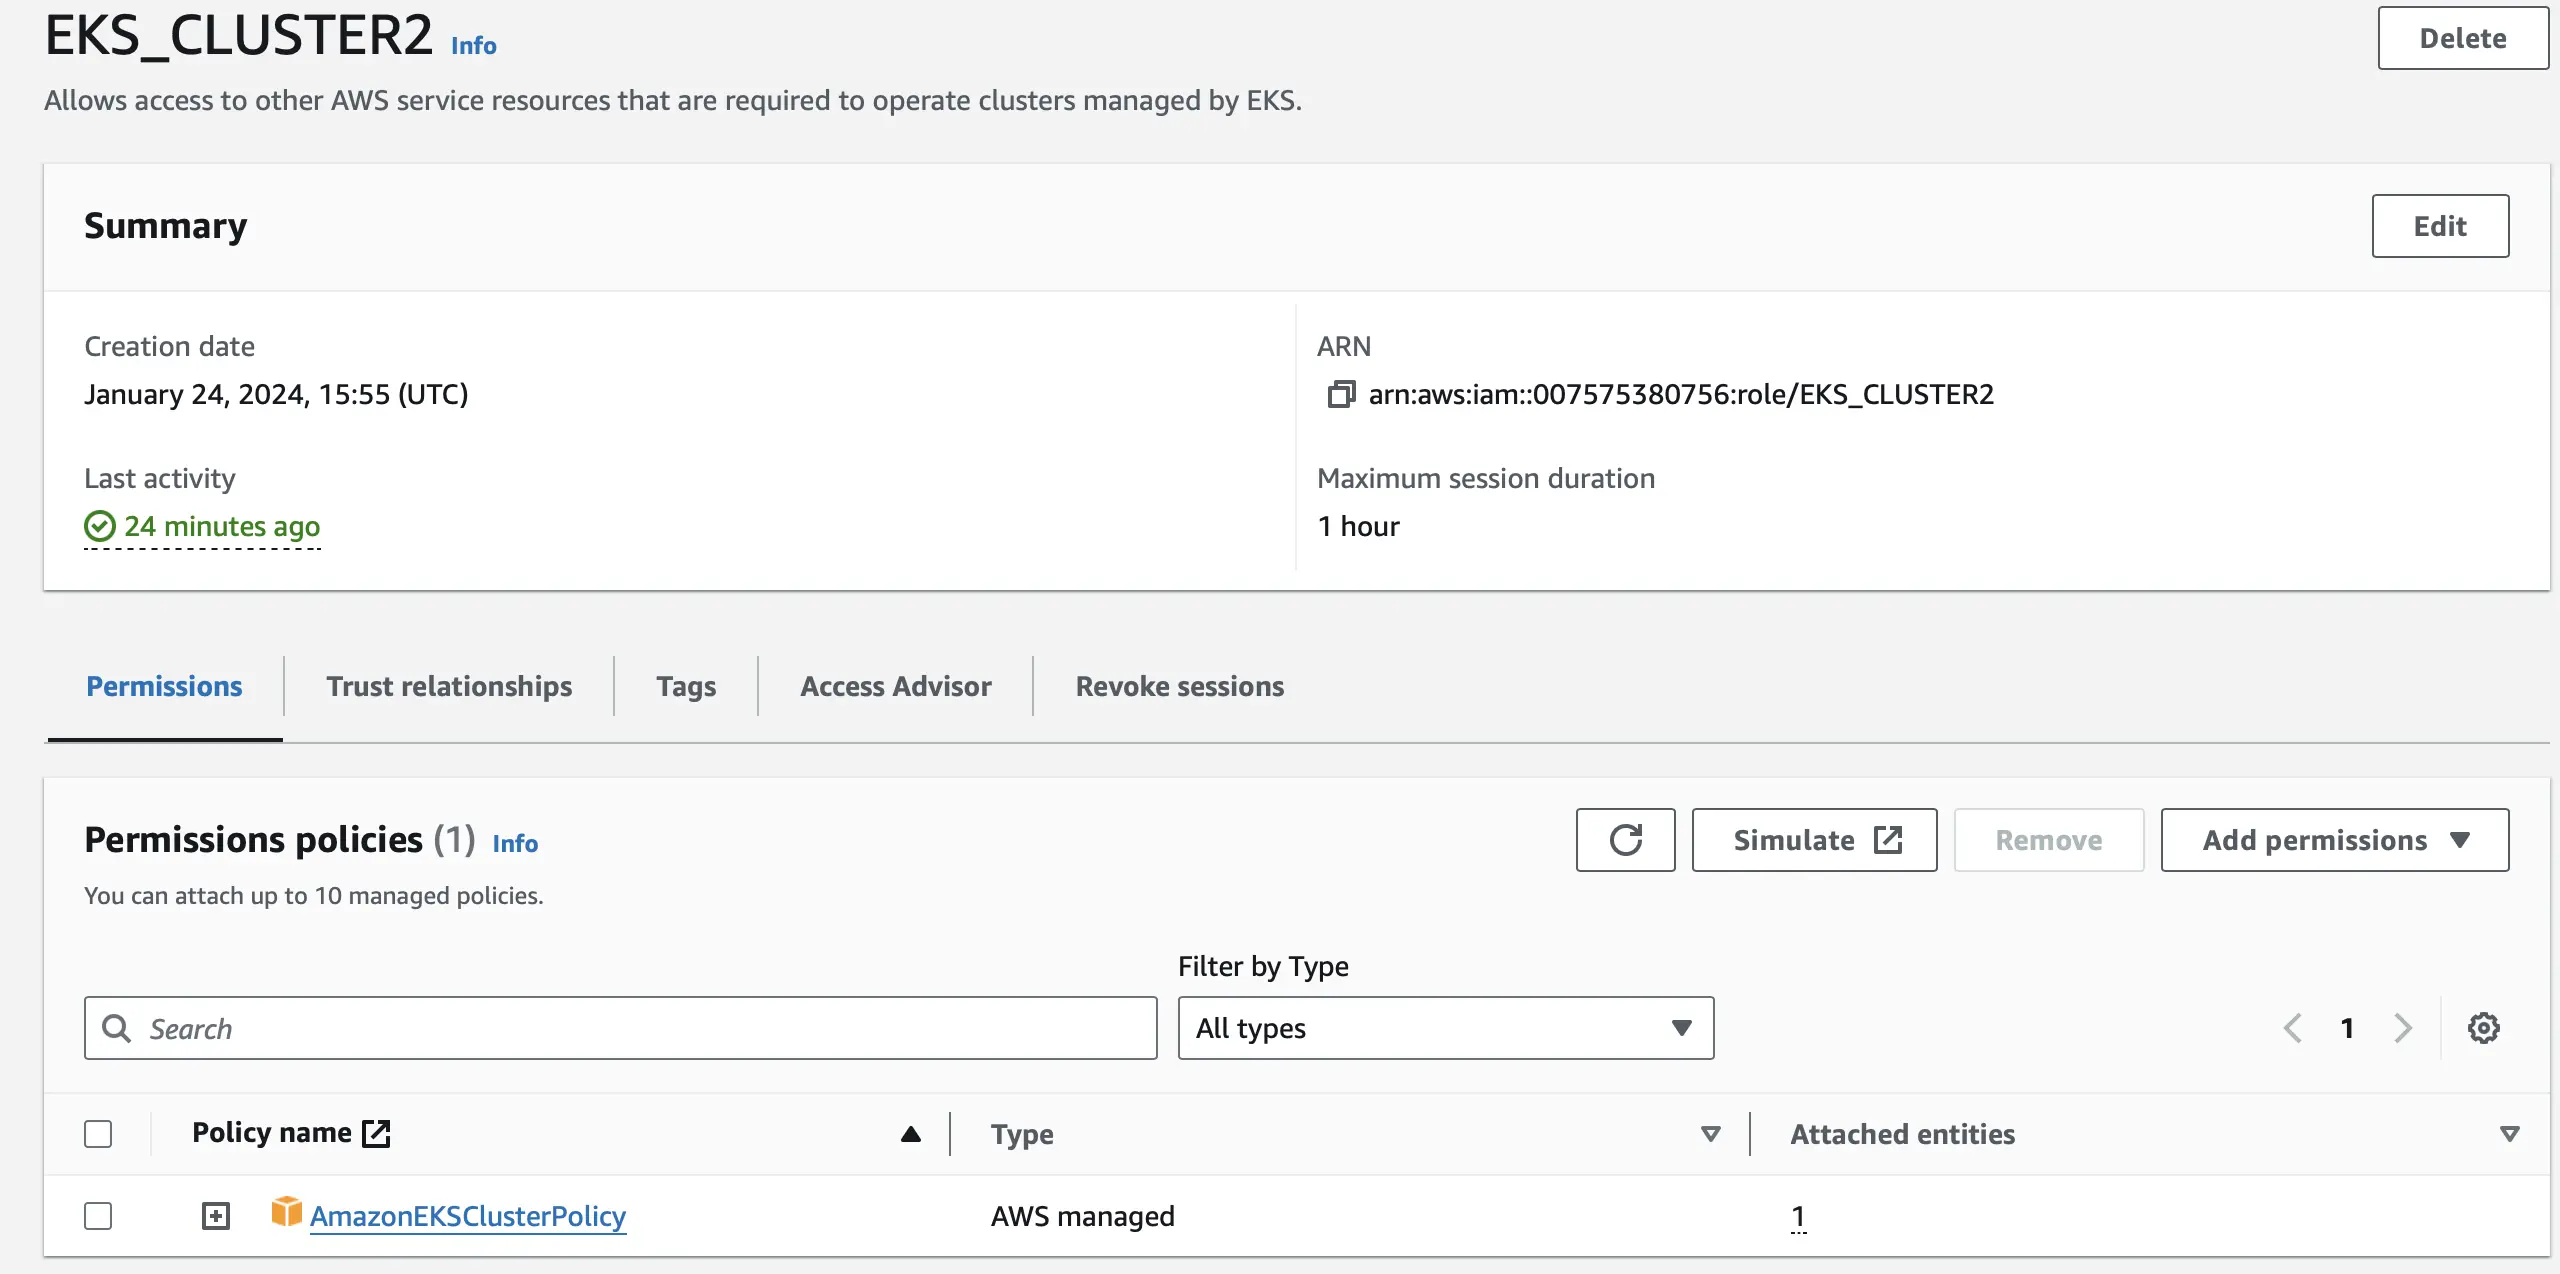
IAM Cluster Role
For our EKS cluster role, we are going to create a new role and attach the Amazon EKS Cluster IAM Role policy.
IAM Node Group Role
For our EKS node group role, we are going to create a new role and attach four of Amazon’s policies.

Setting up the EKS Cluster
Creating the EKS Cluster
Create a new EKS cluster with all default settings. Attach the IAM Cluster Role that we created earlier.
Once the cluster is created, make a node group with two nodes of t2.medium. Attach the IAM Node Group Role that we created earlier.
Also, add the Amazon EBS CSI Driver in the add-ons section. This driver is responsible for dynamically provisioning EBS volumes in response to PVC requests. This is required for the MongoDB StatefulSet to work properly.

Configuring kubectl and the kubectl config map
Once the EKS cluster and node group are created, we need to configure kubectl to connect to the cluster. Kubectl is a command-line tool that allows you to manipulate Kubernetes clusters.
To do this, you first need to configure the AWS CLI with the access keys of the IAM user that we created earlier.
aws configure
You can make sure you have configured the AWS CLI correctly by running
aws sts get-caller-identity
You should get back the ARN of the IAM user you created earlier.
Then, you need to set the context for kubectl using the following command:
aws eks update-kubeconfig --name <eks-cluster-name> --region <aws-region>
The next step in the process would be to create a namespace and deploy the MongoDB StatefulSet. However, our current IAM user does not have the necessary permissions to do this. If you were to run kubectl get nodes with our IAM user you will get error: You must be logged in to the server (Unauthorized) This is because the IAM user does not have the necessary permissions to access the cluster.
Now let’s say you were to run aws configure again but this time with the root user’s access keys. You would be able to run kubectl get nodes without an error. This is because the root user is the one that created the cluster.
To fix this we need to configure the kubectl config map. The easiest way to do this is just to go to the AWS Cloud Shell (which has the root user’s credentials) and then run kubectl edit configmap aws-auth -n kube-system
This will return
apiVersion: v1
data:
  mapRoles: |
    - groups:
      - system:bootstrappers
      - system:nodes
      rolearn: arn:aws:iam::007575380756:role/<IAM-role>
      username: system:node:{{EC2PrivateDNSName}}
kind: ConfigMap
metadata:
  creationTimestamp: "2024-01-25T09:43:30Z"
  name: aws-auth
  namespace: kube-system
  resourceVersion: "1366"
  uid: 1e2ae7a7-db28-4fb7-aa8e-9ce9b8cc98b0
you need to add a section under mapRoles called mapUsers that looks like this
apiVersion: v1
data:
  mapRoles: |
    - groups:
      - system:bootstrappers
      - system:nodes
      rolearn: arn:aws:iam::007575380756:role/<IAM-role>
      username: system:node:{{EC2PrivateDNSName}}
  mapUsers: |
    - userarn: arn:aws:iam::007575380756:user/<IAM-user>
      username: <IAM-user>
      groups:
        - system:masters
kind: ConfigMap
metadata:
  creationTimestamp: "2024-01-25T09:43:30Z"
  name: aws-auth
  namespace: kube-system
now you can go to your terminal again (with the IAM user’s credentials) and successfully run kubectl get nodes to see if nodes are ready. You should get back
NAME                                          STATUS   ROLES    AGE   VERSION
ip-172-31-33-204.eu-west-2.compute.internal   Ready    <none>   53m   v1.29.0-eks-5e0fdde
ip-172-31-7-200.eu-west-2.compute.internal    Ready    <none>   53m   v1.29.0-eks-5e0fdde
Deploying our Resources
We deploy our resources using manifest files. A manifest file is a YAML file that contains the configuration for a Kubernetes resource. To deploy a resource using our manifest files, you would have to run kubectl apply -f <file-name>.
Now, I want to explain each manifest file and what it does.
- mongo-statefulset.yaml: This file defines the MongoDB StatefulSet. This includes the MongoDB image, the number of replica sets, storage volume claims for persistent storage, and configuration to set up MongoDB as a replica set.
- mongo-service.yaml: This file creates a Kubernetes Service for MongoDB. It is set up as a ClusterIP service which acts as an internal load balancer allowing other pods within the cluster to communicate with the MongoDB pods. It uses selectors to match the labels we set in the previous MongoDB stateful set.
- mongo-secret.yaml: This file creates a Kubernetes Secret for MongoDB user credentials. This is how the API deployment is able to securely access the MongoDB database (preventing hardcoding creds)
- api-deployment.yaml: This file defines the Deployment for the Go-based API backend: the container image to use, the number of replicas, and environment variables required for the API to connect to MongoDB (references the MongoDB secret)
- api-service.yaml: This file creates a Service for the API deployment of type LoadBalancer since our API needs external access. It does so by mapping an external port to the target port on the container pods managed by the API deployment.
- frontend-deployment.yaml: This file defines the Deployment for the React-based frontend: specifying the container image, number of replicas, and environment variables (which includes a reference to the API host to enable the frontend to communicate with the API).
- frontend-service.yaml: This file creates a Service for the frontend of type LoadBalancer since our users need to access the frontend from outside the cluster to vote.
Creating a Namespace
Run kubectl create ns <namespace-name> to create a namespace in the cluster.
Check if you actually created it by running kubectl get ns and you should get back your namespace
Deploying the MongoDB StatefulSet
Then run kubectl apply -f mongo-statefulset.yaml to apply the configuration defined in the mongo-statefulset.yaml file to your Kubernetes cluster.
Let’s break down mongo-statefulset.yaml
apiVersion: apps/v1

kind: StatefulSet # Defines the type of Kubernetes object (StatefulSet)

metadata:
  name: mongo
  namespace: <namespace-name>

spec: # specification defining the desired state of the StatefulSet.
  serviceName: mongo # name used to connect to the pods

  replicas: 3 # number of pods

  selector: # identifies the set of pods
    matchLabels:
      role: db # this label selector determines which pods are part of the group
  template: #  describes the pods that will be created.
    metadata:
      labels:
        role: db # Labels assigned to the pods
        env: demo # env label
        replicaset: rs0.main # the replica set label (mongo replicaset)

    spec: # pod specification
      affinity: # Affinity settings for the pod placement.
        podAntiAffinity: # Defines rules to separate pods from each other.
          preferredDuringSchedulingIgnoredDuringExecution: # Soft rule for anti-affinity.
            - weight: 100 # Weight associated with the scheduling preference.
              podAffinityTerm:
                labelSelector:
                  matchExpressions:
                    - key: replicaset
                      operator: In
                      values:
                        - rs0.main # Ensures pods with the same replicaset label (rs0.main) are not on the same host.
                topologyKey: kubernetes.io/hostname # Focuses on the hostname of the node for pod placement.

      terminationGracePeriodSeconds: 10

      containers:
        - name: mongo # Name of the container.
          image: mongo:4.2 # The Docker image to use for the container.
          command: # Command to run inside the container.
            - "numactl" #Command to control NUMA policy
            - "--interleave=all" #Option to interleave memory allocations across all NUMA nodes
            - "mongod" #Command to run the MongoDB daemon
            - "--wiredTigerCacheSizeGB" #Option to specify WiredTiger cache size (GB)
            - "0.1" #Cache size
            - "--bind_ip" # Option to specify the IP address to bind to
            - "0.0.0.0" # MongoDB will listen for incoming connections on all network interfaces
            - "--replSet" # Used to specify the name of the replica set in MongoDB.
            - "rs0" # Name of the MongoDB replica set
          ports:
            - containerPort: 27017 # The port on which the container is listening.

          volumeMounts: #attaches the persistent volume to the container
            - name: mongodb-persistent-storage-claim
              mountPath: /data/db

  volumeClaimTemplates: # Templates for creating persistent volume claims(PVC).
    - metadata:
        name: mongodb-persistent-storage-claim
      spec:
        accessModes:
          - ReadWriteOnce
        storageClassName: gp2 #type of storage that is provided by AWS EBS
        resources:
          requests:
            storage: 0.5Gi # Amount
To check if the statefulset was created successfully run kubectl get pods -n <namespace-name> -w (-w flag is for watch and -n for namespace) and you should get back something like this
AME      READY   STATUS              RESTARTS   AGE
mongo-0   0/1     ContainerCreating   0          6s
mongo-0   1/1     Running             0          7s
mongo-1   0/1     Pending             0          0s
mongo-1   0/1     Pending             0          0s
mongo-1   0/1     ContainerCreating   0          0s
mongo-1   1/1     Running             0          25s
mongo-2   0/1     Pending             0          0s
mongo-2   0/1     Pending             0          0s
mongo-2   0/1     ContainerCreating   0          0s
mongo-2   1/1     Running             0          14s
You can also check your persistent volume claims by running kubectl get pvc -n <namespace-name>
NAME                                       STATUS   VOLUME                                     CAPACITY   ACCESS MODES   STORAGECLASS   VOLUMEATTRIBUTESCLASS   AGE
mongodb-persistent-storage-claim-mongo-0   Bound    pvc-d93f7cc3-c922-4f0d-825f-3ab261e10594   1Gi        RWO            gp2            <unset>                 25m
mongodb-persistent-storage-claim-mongo-1   Bound    pvc-6f411063-8946-4e57-aa91-456733a33100   1Gi        RWO            gp2            <unset>                 4m33s
mongodb-persistent-storage-claim-mongo-2   Bound    pvc-ca7aa5aa-0f8b-41b2-9a92-931ab1f7e567   1Gi        RWO            gp2            <unset>                 4m8s
Creating a Service for the StatefulSet
To expose this we are going to be using a headless service (no ClusterIP). This is an internal service (not exposed to the internet), but it allows us to connect to the pods in the StatefulSet.
Let’s break down mongo-service.yaml
apiVersion: v1
kind: Service
metadata:
  name: mongo
  namespace: <namespace-name>
  labels:
    role: db
    env: demo
spec:
  ports:
  - port: 27017      #where the service will be listening
    targetPort: 27017  #where the service will be routing traffic to
  clusterIP: None      #what makes the service headless
  selector:    #identifies which pods this service will route traffic to
    role: db
Now, let’s create the service by running kubectl apply -f mongo-service.yaml and you should get back
service/mongo created
Check it by running
kubectl get svc -n <namespace-name>
and you should get back something like this
NAME    TYPE        CLUSTER-IP   EXTERNAL-IP   PORT(S)     AGE
mongo   ClusterIP   None         <none>        27017/TCP   2m10s
Setting up Replication and Inserting Data
Now that we have created the service for our StatefulSet, we can now set up replication. To do this we need to connect to the mongo shell by going inside the mongo-0 pod.
kubectl exec -it mongo-0 -n <namespace-name> -- mongo
For our database replication we are going to be making mongo-0 the primary and mongo-1 and mongo-2 the secondary replicas.
Execute the following commands in the mongo shell to set up replication
# initialize the MongoDB replica set
rs.initiate();

# set a delay of 2 seconds to allow rs.initiate() to complete
sleep(2000);

# add a secondary node to the replica set along with its hostname and port
rs.add("mongo-1.mongo:27017");

# add another secondary node
rs.add("mongo-2.mongo:27017");

# set a delay to allow secondary nodes to join the replica set and sync data
sleep(2000);

# fetch the current replica set configuration and store it in the 'cfg' variable
cfg = rs.conf();

# change configuration to specify the hostname of the primary node
cfg.members[0].host = "mongo-0.mongo:27017";

# apply the new configuration to the replica set
rs.reconfig(cfg, {force: true});

# set a 5 second delay for the replica set to stabilize and complete the reconfiguration process
sleep(5000);
Then switch the moviedb database by running use moviedb; and insert the movie data (the db is created automatically when you insert the data). You can do this by running
db.movies.insert({
  "title": "avengers",
  "moviedetail": {
    "director": "Joss Whedon",
    "genre": "Action, Adventure, Sci-Fi",
    "releaseYear": 2012,
    "votes": 0
  }
});

db.movies.insert({
  "title": "avatar",
  "moviedetail": {
    "director": "James Cameron",
    "genre": "Action, Adventure, Fantasy",
    "releaseYear": 2009,
    "votes": 0
  }
});

db.movies.insert({
  "title": "starwars",
  "moviedetail": {
    "director": "George Lucas",
    "genre": "Action, Adventure, Fantasy",
    "releaseYear": 1977,
    "votes": 0
  }
});
Check if we inserted the data correctly by running db.movies.find().pretty(); and you should get back
rs0:PRIMARY> db.movies.find().pretty();
{
        "_id" : ObjectId("65b393287f665c0281d522e5"),
        "title" : "avengers",
        "moviedetail" : {
                "director" : "Joss Whedon",
                "genre" : "Action, Adventure, Sci-Fi",
                "releaseYear" : 2012,
                "votes" : 0
        }
}
{
        "_id" : ObjectId("65b393377f665c0281d522e6"),
        "title" : "avatar",
        "moviedetail" : {
                "director" : "James Cameron",
                "genre" : "Action, Adventure, Fantasy",
                "releaseYear" : 2009,
                "votes" : 0
        }
}
{
        "_id" : ObjectId("65b3933f7f665c0281d522e7"),
        "title" : "starwars",
        "moviedetail" : {
                "director" : "George Lucas",
                "genre" : "Action, Adventure, Fantasy",
                "releaseYear" : 1977,
                "votes" : 0
        }
}
Creating MongoDB Secret
Create a secret that will hold our mongoDB credentials (username and password).
Let’s break down mongo-secret.yaml
apiVersion: v1
kind: Secret
metadata:
  name: mongodb-secret
  namespace: <namespace-name>
data:
  username: YWRtaW4=    # This is 'admin' in Base64 encoding
  password: cGFzc3dvcmQ=  # This is 'password' in Base64 encoding
# in kubernetes secrets are stored in base64 encoding
Now run kubectl apply -f mongo-secret.yaml and you should get back secret/mongodb-secret created
Deploying the API
We need an API so that whenever someone votes in our frontend it will update the database. We are going to be using a Go-based API.
Let’s go ahead and deploy the API as well by running kubectl apply -f api-deployment.yaml and you should get back
deployment.apps/api created
Let’s also break down api-deployment.yaml
apiVersion: apps/v1
kind: Deployment
metadata:
  name: api
  namespace: <namespace-name>
  labels:
    app: api
    env: demo
spec:
  replicas: 2  #two pods (containers) created
  strategy:
    type: RollingUpdate #rolling update for zero downtime
    rollingUpdate:
      maxSurge: 1  #pods that can be created above 2
      maxUnavailable: 25% # % of pods that can be unavailable during update
  selector:
    matchLabels:
      app: api
  template:
    metadata:
      labels:
        app: api
    spec:
      containers:
      - name: api
        image: davidsvida/api-deploy:v7 #docker image
        imagePullPolicy: Always  # ensure latest image
        env: #env variables for the container
          - name: MONGO_CONN_STR
            value: mongodb://mongo-0.mongo,mongo-1.mongo,mongo-2.mongo:27017/moviedb?replicaSet=rs0
          - name: MONGO_USERNAME
            valueFrom:
              secretKeyRef:  #to retrieve value from k8s secret
                name: mongodb-secret
                key: username
          - name: MONGO_PASSWORD
            valueFrom:
              secretKeyRef:
                name: mongodb-secret
                key: password
        ports:
        - containerPort: 8080 #listening port
        livenessProbe:  #check container health
          httpGet:
            path: /ok
            port: 8080
          initialDelaySeconds: 2  #wait 2 seconds before checking
          periodSeconds: 5 #check every 5 seconds
        readinessProbe: # check if container is ready to receive traffic
          httpGet:
            path: /ok
            port: 8080
          initialDelaySeconds: 5
          periodSeconds: 5
          successThreshold: 1  #after 1 successful check, container is ready
Check it and run kubectl get pods -n <namespace-name> and you should get back something like this
NAME                  READY   STATUS    RESTARTS   AGE
api-579856b9cd-f255n  1/1     Running   0          88s
api-579856b9cd-kgch8  1/1     Running   0          88s
mongo-0               1/1     Running   0          4h54m
mongo-1               1/1     Running   0          4h53m
mongo-2               1/1     Running   0          4h53m
Creating a Service for the API
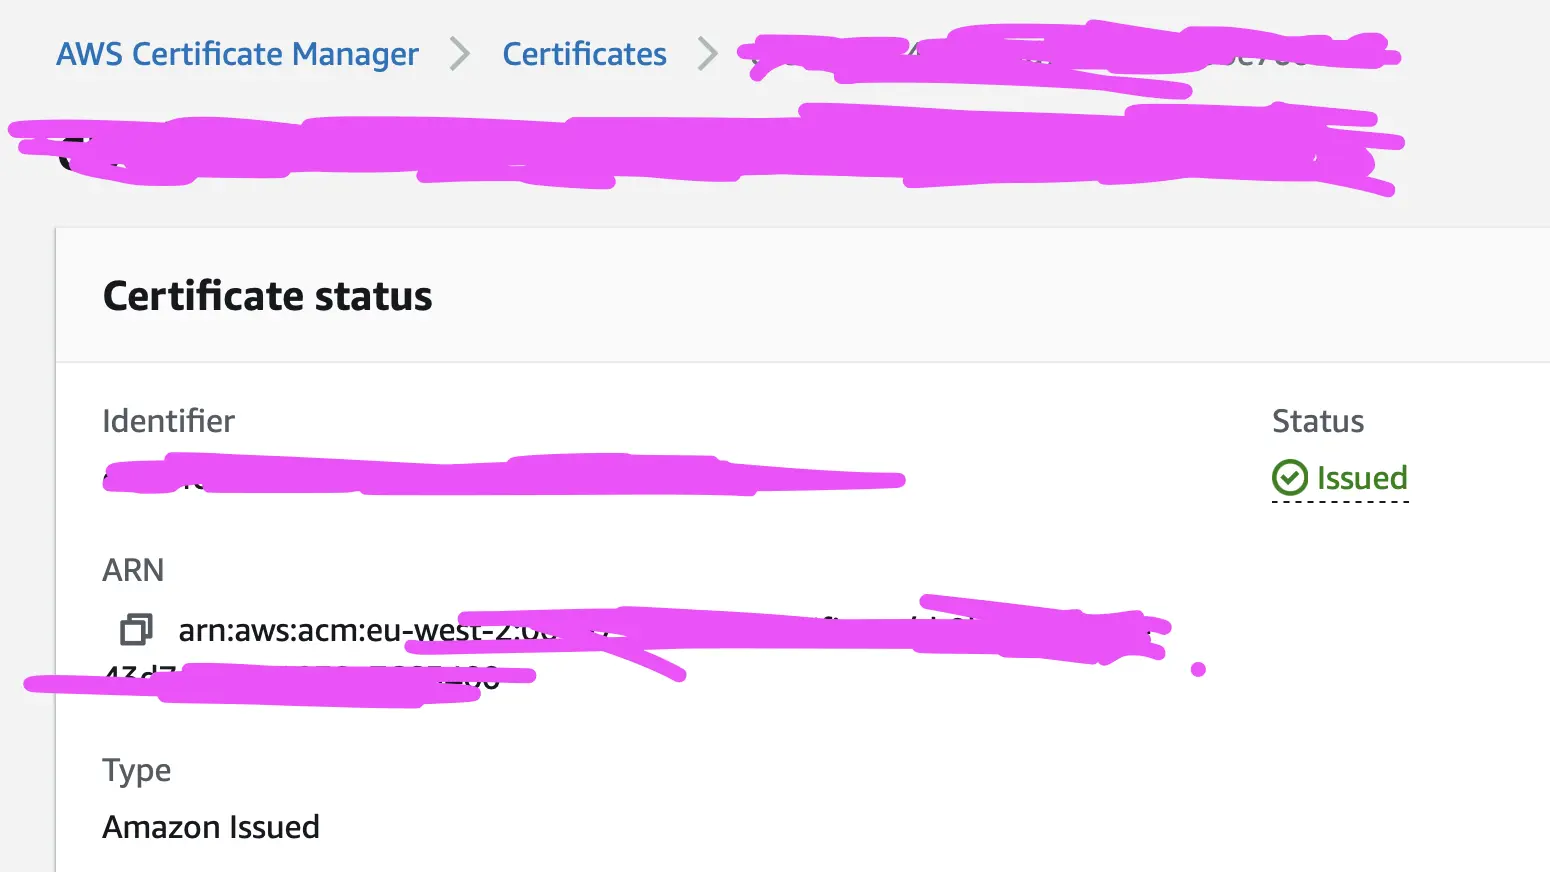
For this step, you need to have a SSL certificate from AWS Certificate Manager (ACM). You can get a free certificate from AWS Certificate Manager (ACM) for your domain. Retrieve the ARN of the certificate and replace the arn:aws:acm:region:account-id:certificate/certificate-id in the api-service.yaml file with your certificate ARN.
Let’s look at api-service.yaml
apiVersion: v1
kind: Service
metadata:
  name: api
  namespace: <namespace-name>
  annotations:
    service.beta.kubernetes.io/aws-load-balancer-ssl-cert: "arn:aws:acm:region:account-id:certificate/certificate-id" #for our ELB to use SSL
    service.beta.kubernetes.io/aws-load-balancer-backend-protocol: "http" #for internal communication
  labels:
    app: api
spec:
  selector:
    app: api
  ports:
    - protocol: TCP
      port: 443 #indicates listening HTTPS traffic
      targetPort: 8080
  type: LoadBalancer  #type of service(LoadBalancer)
Expose the API deployment through a service (load balancer) by running kubectl apply -f api-service.yaml and you should get back service/api created
To test if the API service was created, run kubectl get svc -n <namespace-name> and you should get back both services like this
NAME    TYPE           CLUSTER-IP      EXTERNAL-IP                                                              PORT(S)        AGE
api     LoadBalancer   10.100.120.76    af6d6ac51fafc48cc92ac450ac73c1b0-936014577.eu-west-2.elb.amazonaws.com    443:31938/TCP   4s
mongo   ClusterIP      None            <none>                                                                   27017/TCP      132m
Setting the DNS of the Load Balancer
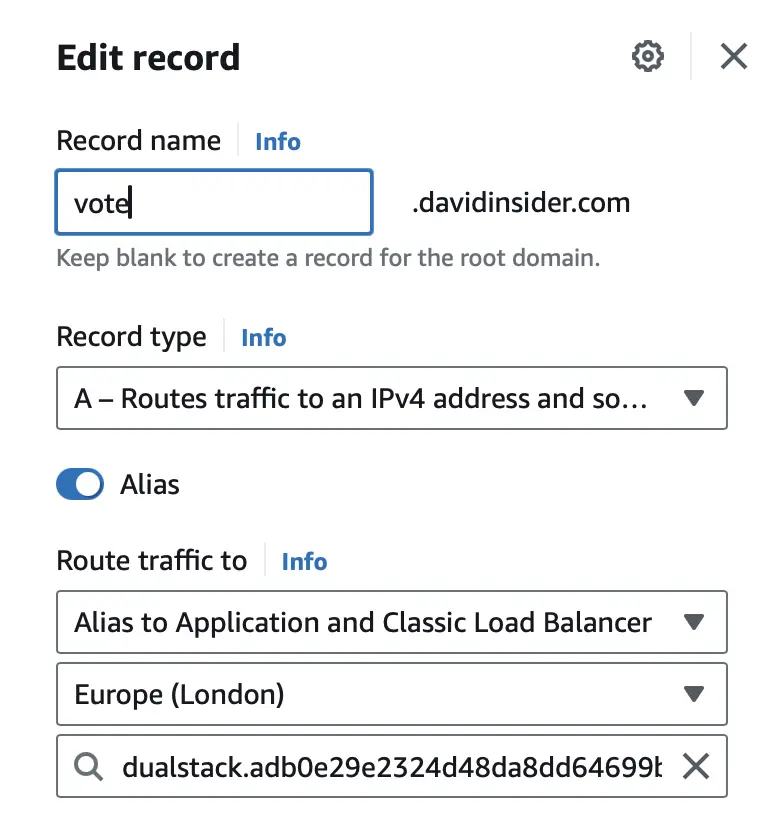
In api-service.yaml annotations, we have service.beta.kubernetes.io/aws-load-balancer-ssl-cert: "arn:aws:acm:region:account-id:certificate/certificate-id" which is for our ELB to use our SSL certificate from ACM. If we want this certificate to be actually used, we need to set the DNS of the load balancer to a subdomain of our domain tied to the certificate. To do this, create a CNAME record in Route 53 that points to the EXTERNAL-IP of the API service.
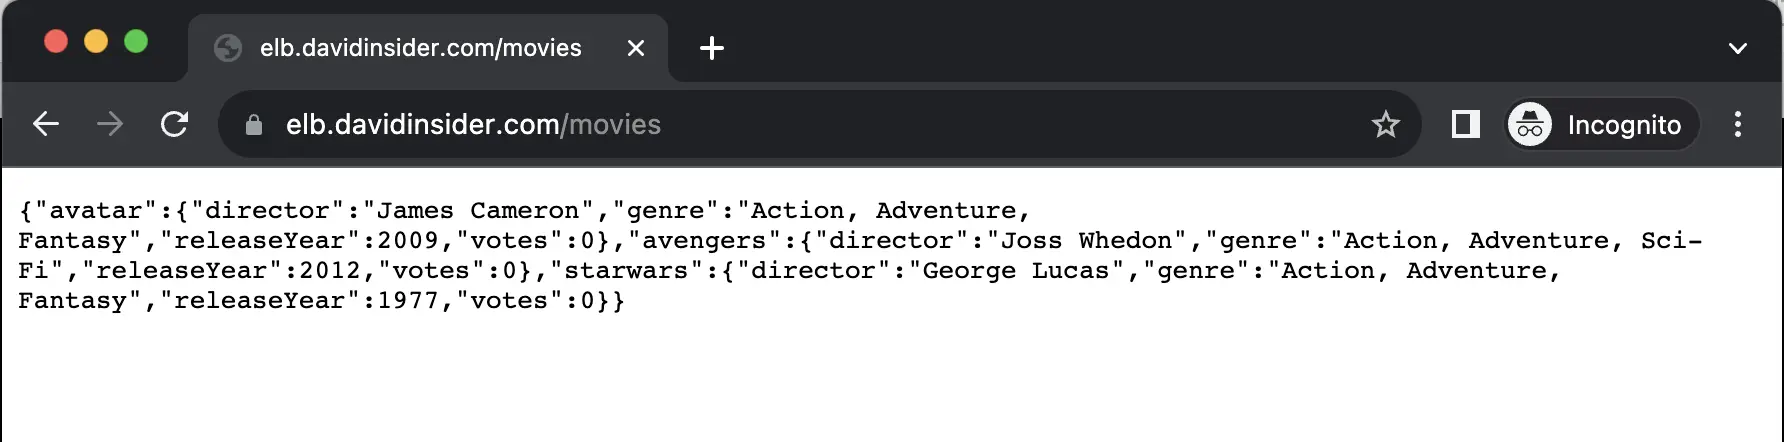
It will take a couple of minutes for your load balancer to be active and for the DNS to be set. Once everything is done, you can go to the DNS name and add /movies to the end of it and you should get back the data we inserted into our database earlier.
Building the Frontend Docker Image
Our React frontend requires you to change the .env file in order to connect to the backend API and then build the Docker image. This file must be set up with environment-specific variables before the build process since the React app will compile into a static site
Clone the GitHub Repository
- Clone the frontend repository to your local machine by running:
git clone https://github.com/davidsvida/frontend-deploy
Update the .env File
- Open the
.envfile in your editor,
vim .env
- Replace the
REACT_APP_APIHOSTPORTvariable’s value with the API’s ELB DNS address you created in Route 53 earlier:
REACT_APP_APIHOSTPORT=<subdomain>.<domain>.<tld>
Build and Push the Docker Image
Then, we are going to build our docker image and push it to docker hub. Since I am building on my Mac, I am going to have to use a tool called buildx to build my docker image for both arm64 (Apple Silicon) and amd64 (Intel).
before running the following commands, make sure you have docker buildx installed by running docker buildx version and if you don’t have it installed, run docker buildx install
docker buildx create --name mybuilder --use
docker buildx inspect --bootstrap
docker buildx build --platform linux/amd64,linux/arm64 -t <your-dockerhub-username>/<your-dockerhub-repo-name>:<version-number> . --push
Let’s break down the first line of code.
docker buildx create --name mybuilder --use: creates a builder instance calledmybuilderand then sets it as the currently active builder instance to use.docker buildx inspect --bootstrap: inspects the builder instance and bootstraps it. The bootstrap option prepares the builder instance for use.docker buildx build --platform linux/amd64,linux/arm64 -t <your-dockerhub-username>/<your-dockerhub-repo-name>:<version-number> . --push: to build our docker image for both arm64 and amd64 and then push it to docker hub.
Note on Infrastructure
This process involves manually updating the .env file with the backend address. Ideally, a serverless API or a CI/CD pipeline could automate this step, but I did’t have enough time to create either.
Deploying the Frontend
Now that we have built our docker image and pushed it to docker hub, we can now deploy our frontend and reference our docker image from docker hub.
Let’s break down frontend-deployment.yaml although not much has changed from api-deployment.yaml (main changes are different container images, environment variables, and label selectors)
apiVersion: apps/v1
kind: Deployment
metadata:
  name: frontend
  namespace: <namespace-name>
  labels:
    app: frontend
    env: demo
spec:
  replicas: 2
  strategy:
    type: RollingUpdate
    rollingUpdate:
      maxSurge: 1
      maxUnavailable: 25%
  selector:
    matchLabels:
      app: frontend
  template:
    metadata:
      labels:
        app: frontend
    spec:
      containers:
      - name: frontend
        image: <your-dockerhub-username>/<your-dockerhub-repo-name>:<version-number>  #the docker image we built and pushed to docker hub
        imagePullPolicy: Always
        env:
          - name: API_HOST_PORT
            value: "<subdomain>.<domain>.<tld>" #the environment variable previously set in the .env file
        ports:
        - containerPort: 8080
        livenessProbe:
          httpGet:
            path: /
            port: 8080
          initialDelaySeconds: 15
          periodSeconds: 10
          timeoutSeconds: 5
          failureThreshold: 3
        readinessProbe:
          httpGet:
            path: /
            port: 8080
          initialDelaySeconds: 15
          periodSeconds: 10
          timeoutSeconds: 5
          successThreshold: 1
          failureThreshold: 3
Run kubectl apply -f frontend-deployment.yaml and you should get back deployment.apps/frontend created
Creating a Service for the Frontend
Before exposing the frontend, you will need to change the placeholder with your certificate ARN (use the same certificate from AWS Certificate Manager (ACM) that you used for the API)
Then, expose the frontend deployment through a service (load balancer again) by running kubectl apply -f frontend-service.yaml and you should get back service/frontend created
This is essentially the same as api-service.yaml except we are exposing the frontend deployment instead of the api deployment.
apiVersion: v1
kind: Service
metadata:
  name: frontend
  namespace: <namespace-name>
  labels:
    app: frontend
  annotations:
    service.beta.kubernetes.io/aws-load-balancer-ssl-cert: "arn:aws:acm:region:account-id:certificate/certificate-id"
    service.beta.kubernetes.io/aws-load-balancer-backend-protocol: "http"
spec:
  selector:
    app: frontend
  ports:
    - protocol: TCP
      port: 443
      targetPort: 8080
  type: LoadBalancer
We have now finished creating all of our deployments and services. Let’s check everything we have created by running kubectl get all -n <namespace-name> and you should get back something like this.
david@dhcp-10-249-202-118 manifests % kubectl get all -n <namespace-name>
NAME                            READY   STATUS    RESTARTS   AGE
pod/api-579856b9cd-f255n        1/1     Running   0          169m
pod/api-579856b9cd-kgch8        1/1     Running   0          169m
pod/frontend-6f76b694f4-s7q98   1/1     Running   0          28m
pod/frontend-6f76b694f4-w9mmz   1/1     Running   0          28m
pod/mongo-0                     1/1     Running   0          173m
pod/mongo-1                     1/1     Running   0          172m
pod/mongo-2                     1/1     Running   0          172m

NAME               TYPE           CLUSTER-IP       EXTERNAL-IP                                                               PORT(S)        AGE
service/api        LoadBalancer   10.100.120.76    af6d6ac51fafc48cc92ac450ac73c1b0-936014577.eu-west-2.elb.amazonaws.com    443:31938/TCP   162m
service/frontend   LoadBalancer   10.100.175.254   adb0e29e2324d48da8dd64699t-936014577.eu-west-2.elb.amazonaws.com   443:32493/TCP   28m
service/mongo      ClusterIP      None             <none>                                                                    27017/TCP      172m

NAME                       READY   UP-TO-DATE   AVAILABLE   AGE
deployment.apps/api        2/2     2            2           169m
deployment.apps/frontend   2/2     2            2           28m

NAME                                  DESIRED   CURRENT   READY   AGE
replicaset.apps/api-579856b9cd        2         2         2       169m
replicaset.apps/frontend-6f76b694f4   2         2         2       28m

NAME                     READY   AGE
statefulset.apps/mongo   3/3     173m
Check both frontend-deployment.yaml and frontend-service.yaml to see if you did the previous steps correctly.
Setting the DNS of the Load Balancer for the Frontend
Like we did for the API, we need to go to Route 53 and set the DNS of the load balancer to a subdomain of our domain tied to the certificate.
Testing the Voting App
You can now go to the go to the DNS name you just created for your frontend and you should see the voting app. You can vote between Star Wars, Avatar, and Avengers.
To test that the votes are being added to the database, I went to the mongo-0 pod by running kubectl exec -it mongo-0 -n <namespace-name> -- mongo , switched to the moviedb database by running use moviedb; and then ran db.movies.find().pretty(); and I could see the votes being updated.

Another way to test this is to go to the DNS name of the API and add /movies to the end of it and you should see the all the updated votes.
Conclusion
I know not many people will read this but I am proud of this project. I have learned a lot about Kubernetes, EKS, and AWS. It was fun to do and I am happy with the result and I hope you are too.
Thank you for reading.