I protected an Azure VM with Azure Backup and then went through recovery. I created a Recovery Services vault and assigned a backup policy. I took the first recovery point and watched the job. Then I went through the VM restore options.
The screenshots are from an older Azure portal. Some labels and layouts have changed. The backup and recovery ideas still hold. Check current Azure Backup requirements and pricing before using these settings in production.
How it fits together
The Recovery Services vault is where you manage backup config, recovery points, jobs, and restores:
Azure VM
   |
   v
Recovery Services vault
   |
   +-- Backup policy
   |     +-- Schedule
   |     +-- Retention
   |
   +-- Recovery points
   |
   +-- Backup and restore jobs
The main lesson: a successful backup is only half the job. You also need a tested restore process and a recovery point that meets the workload’s recovery goals.
1. Creating the vault
I signed in to the Azure portal and searched for Recovery Services vaults.

Opening Recovery Services vaults from the Azure portal.
From the vaults page I started a new one.
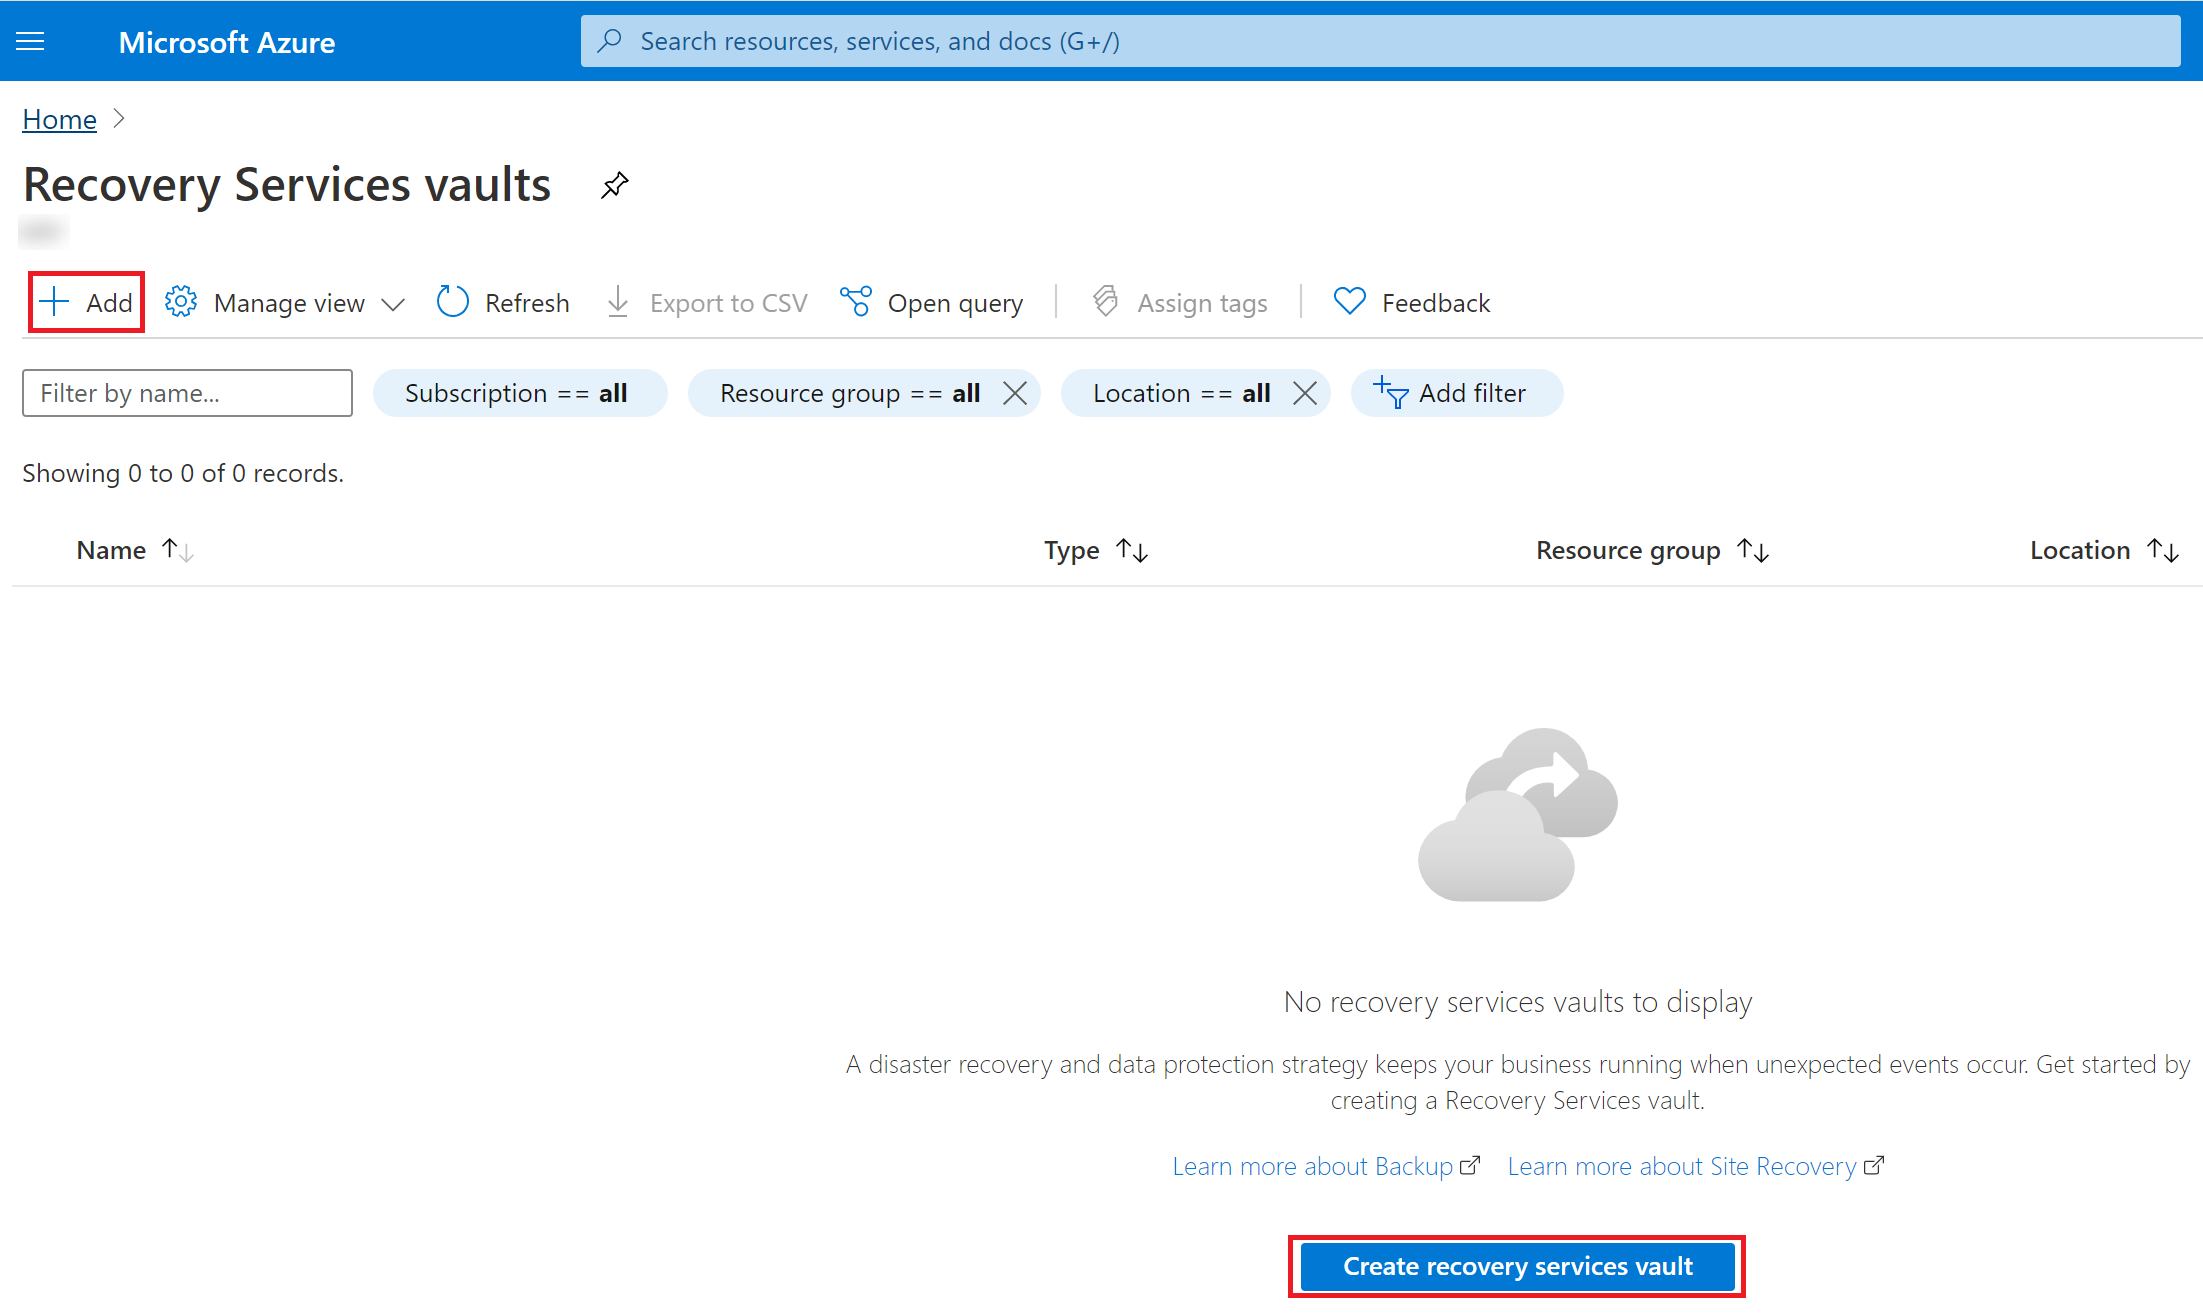
Starting the Recovery Services vault deployment.
I picked the resource group for it.
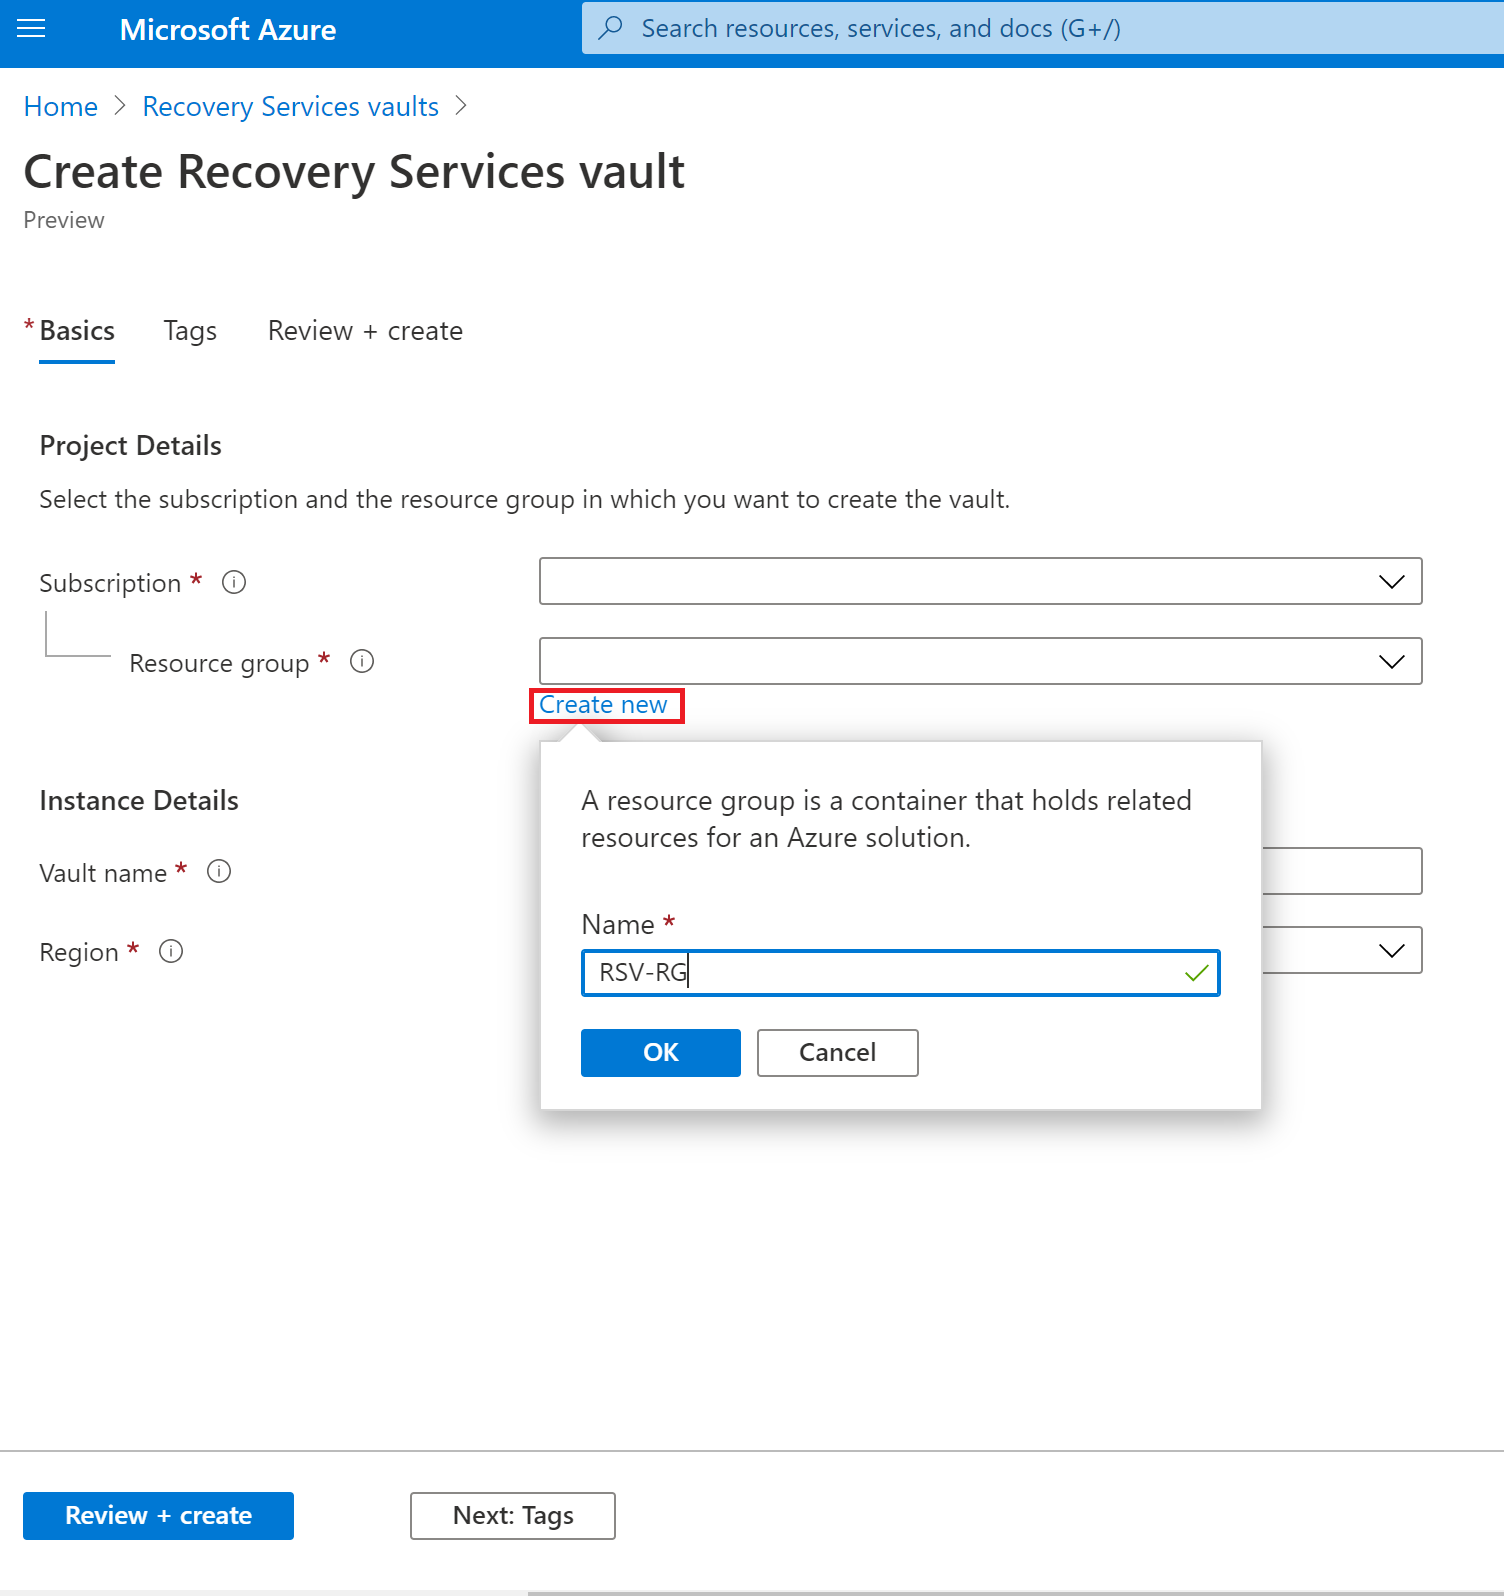
Choosing the resource group for the vault.
Then I named it and picked the region. I kept the vault in a region that made sense for the VM. I reviewed it and created it.
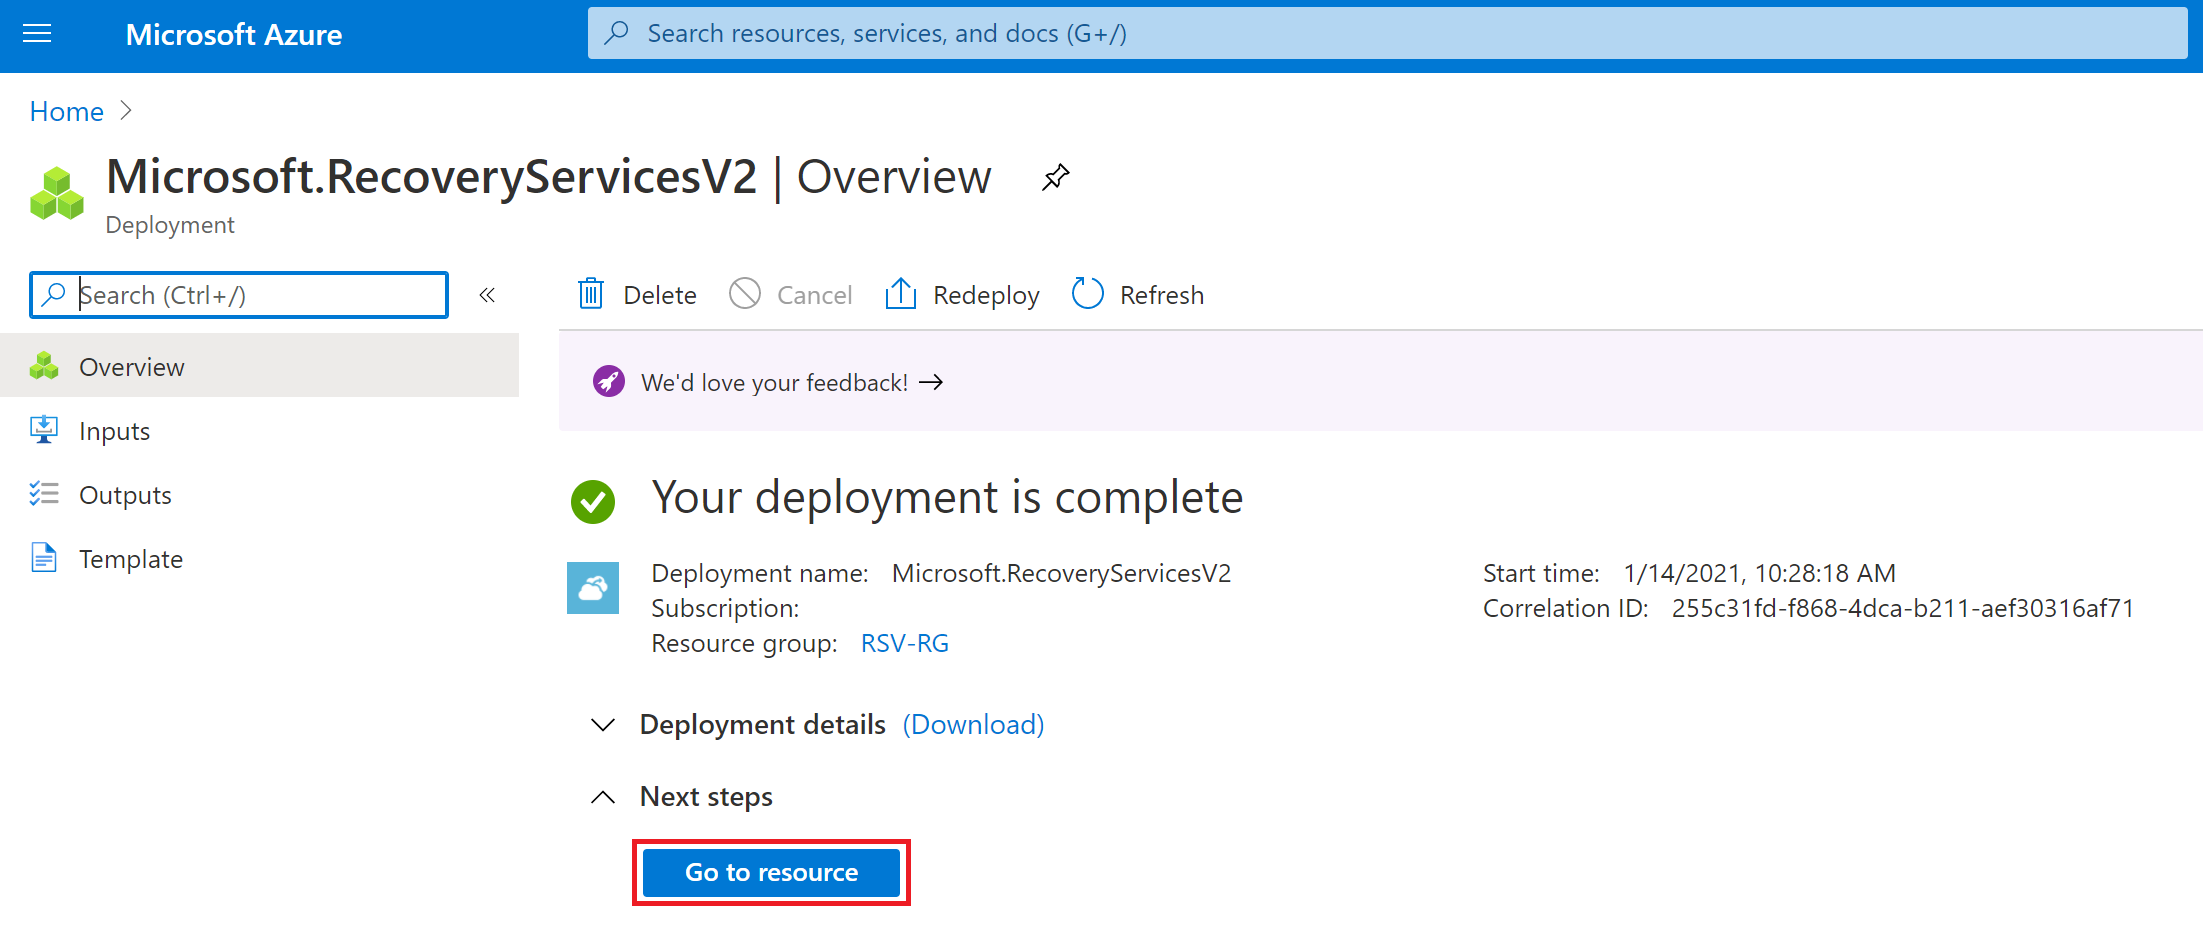
The deployment finishing for the new Recovery Services vault.
When deployment finished, I opened the new vault.
Before protecting production workloads, check the vault’s storage redundancy, soft delete, encryption, immutability, and multi-user authorization. Some of these are hard or impossible to change once protection starts.
2. Setting the backup goal
From the vault overview I clicked Backup.
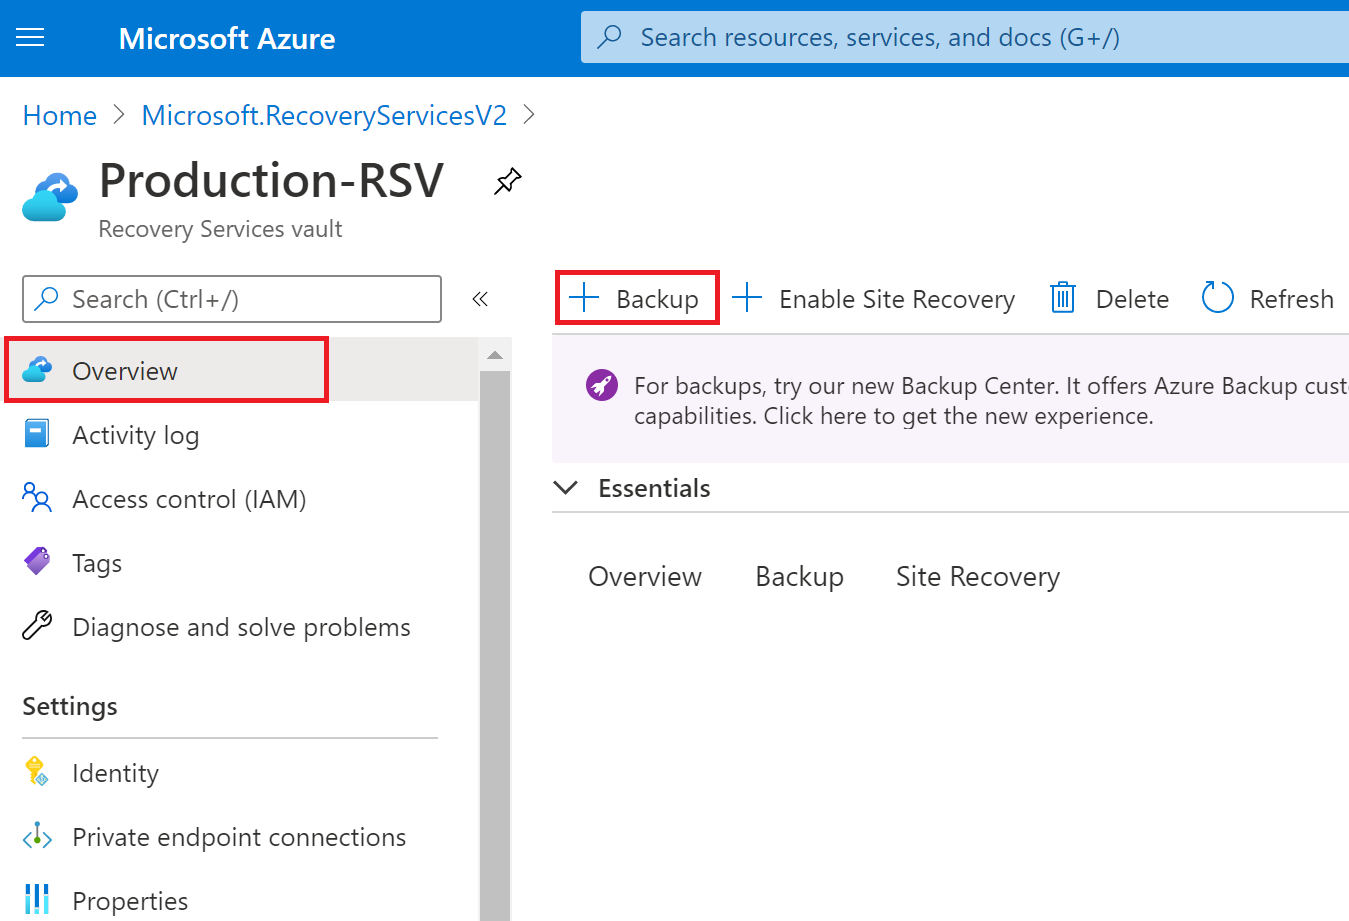
Opening backup configuration from the vault.
I told Azure the workload runs in Azure and I wanted to protect a VM.
Where is your workload running?  Azure
What do you want to back up?     Virtual machine
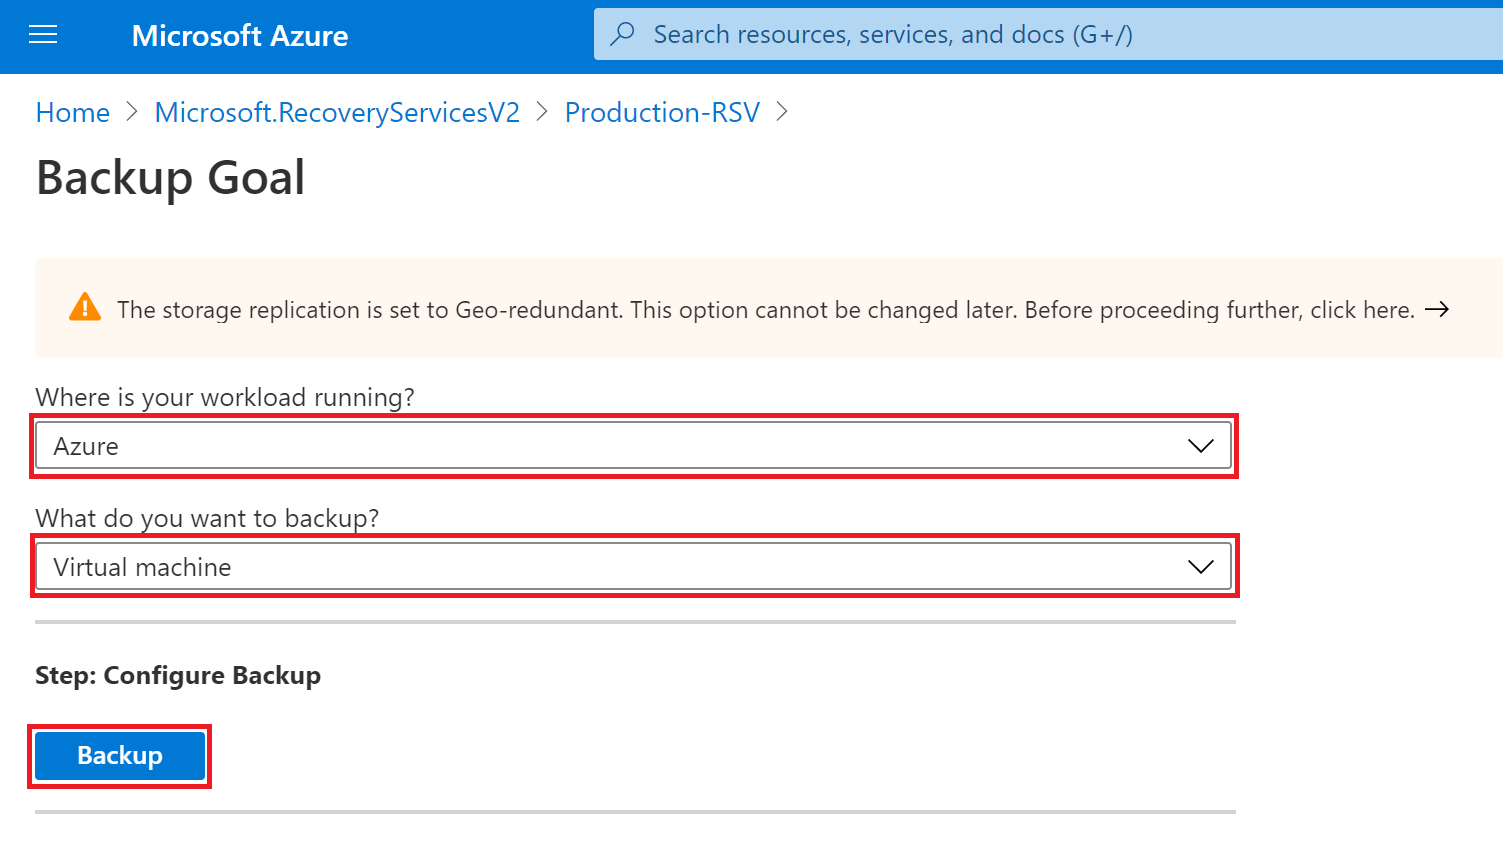
Selecting Azure Virtual Machine as the backup workload.
3. Picking the backup policy
The policy controls when recovery points get created and how long they’re kept. I reviewed Azure’s default. You can use it or create one that fits your recovery needs better.
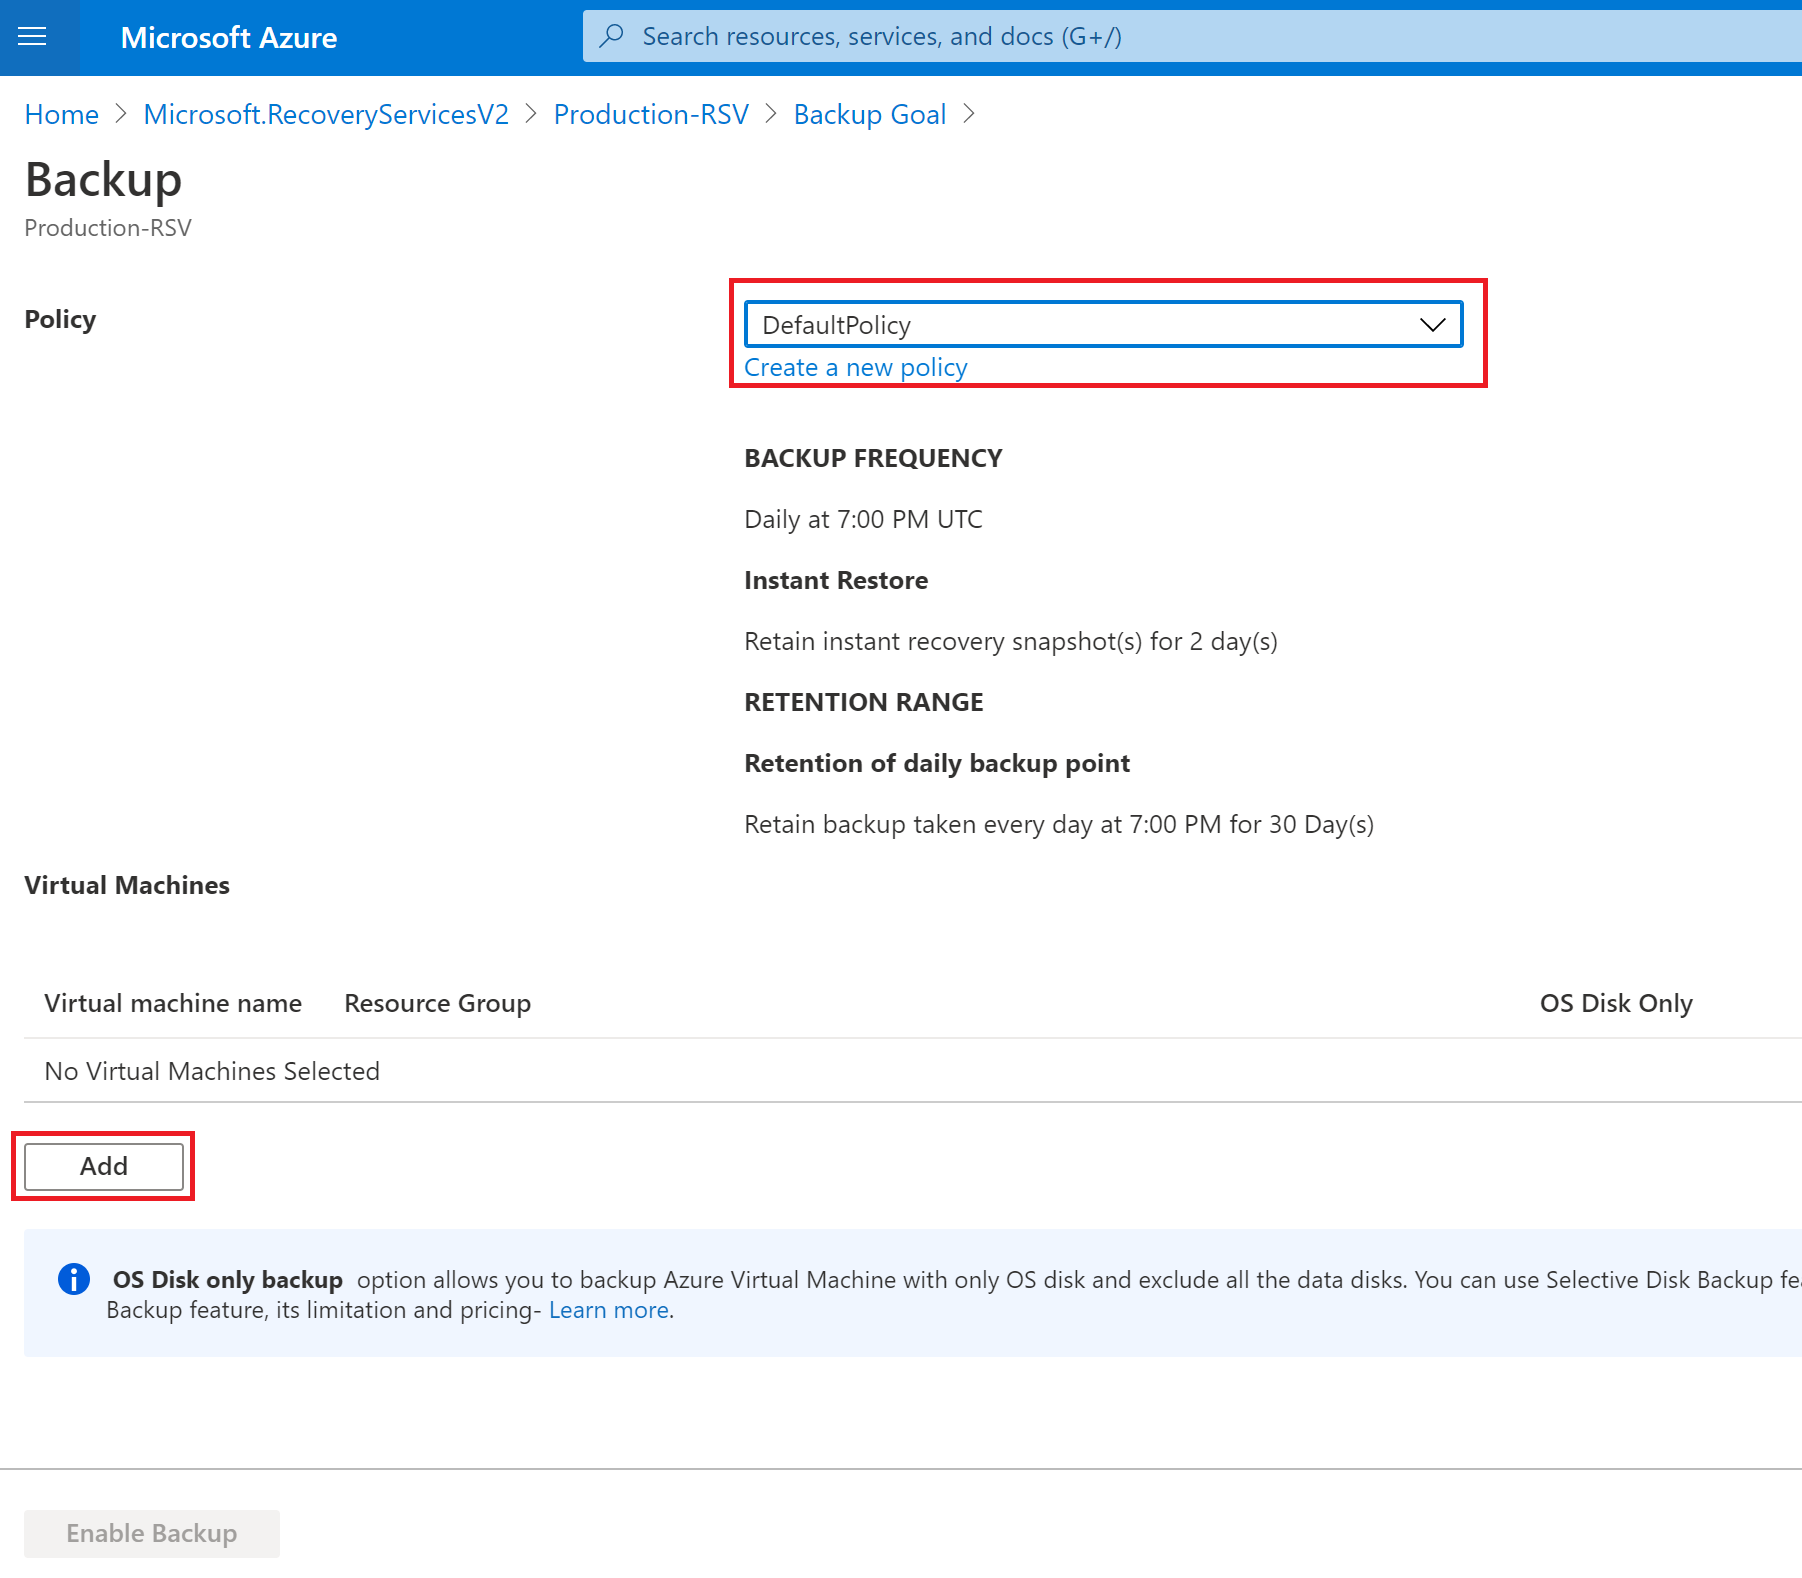
Reviewing the Azure VM backup policy.
For a real workload I’d base the schedule and retention on two things:
- Recovery point objective (RPO): how much recent data the business can afford to lose
- Retention requirement: how far back recovery must remain possible
Longer retention and more frequent backups use more storage. So the policy needs an ops review and a cost review.
4. Adding the VM
I picked the VM, confirmed it, and enabled backup.
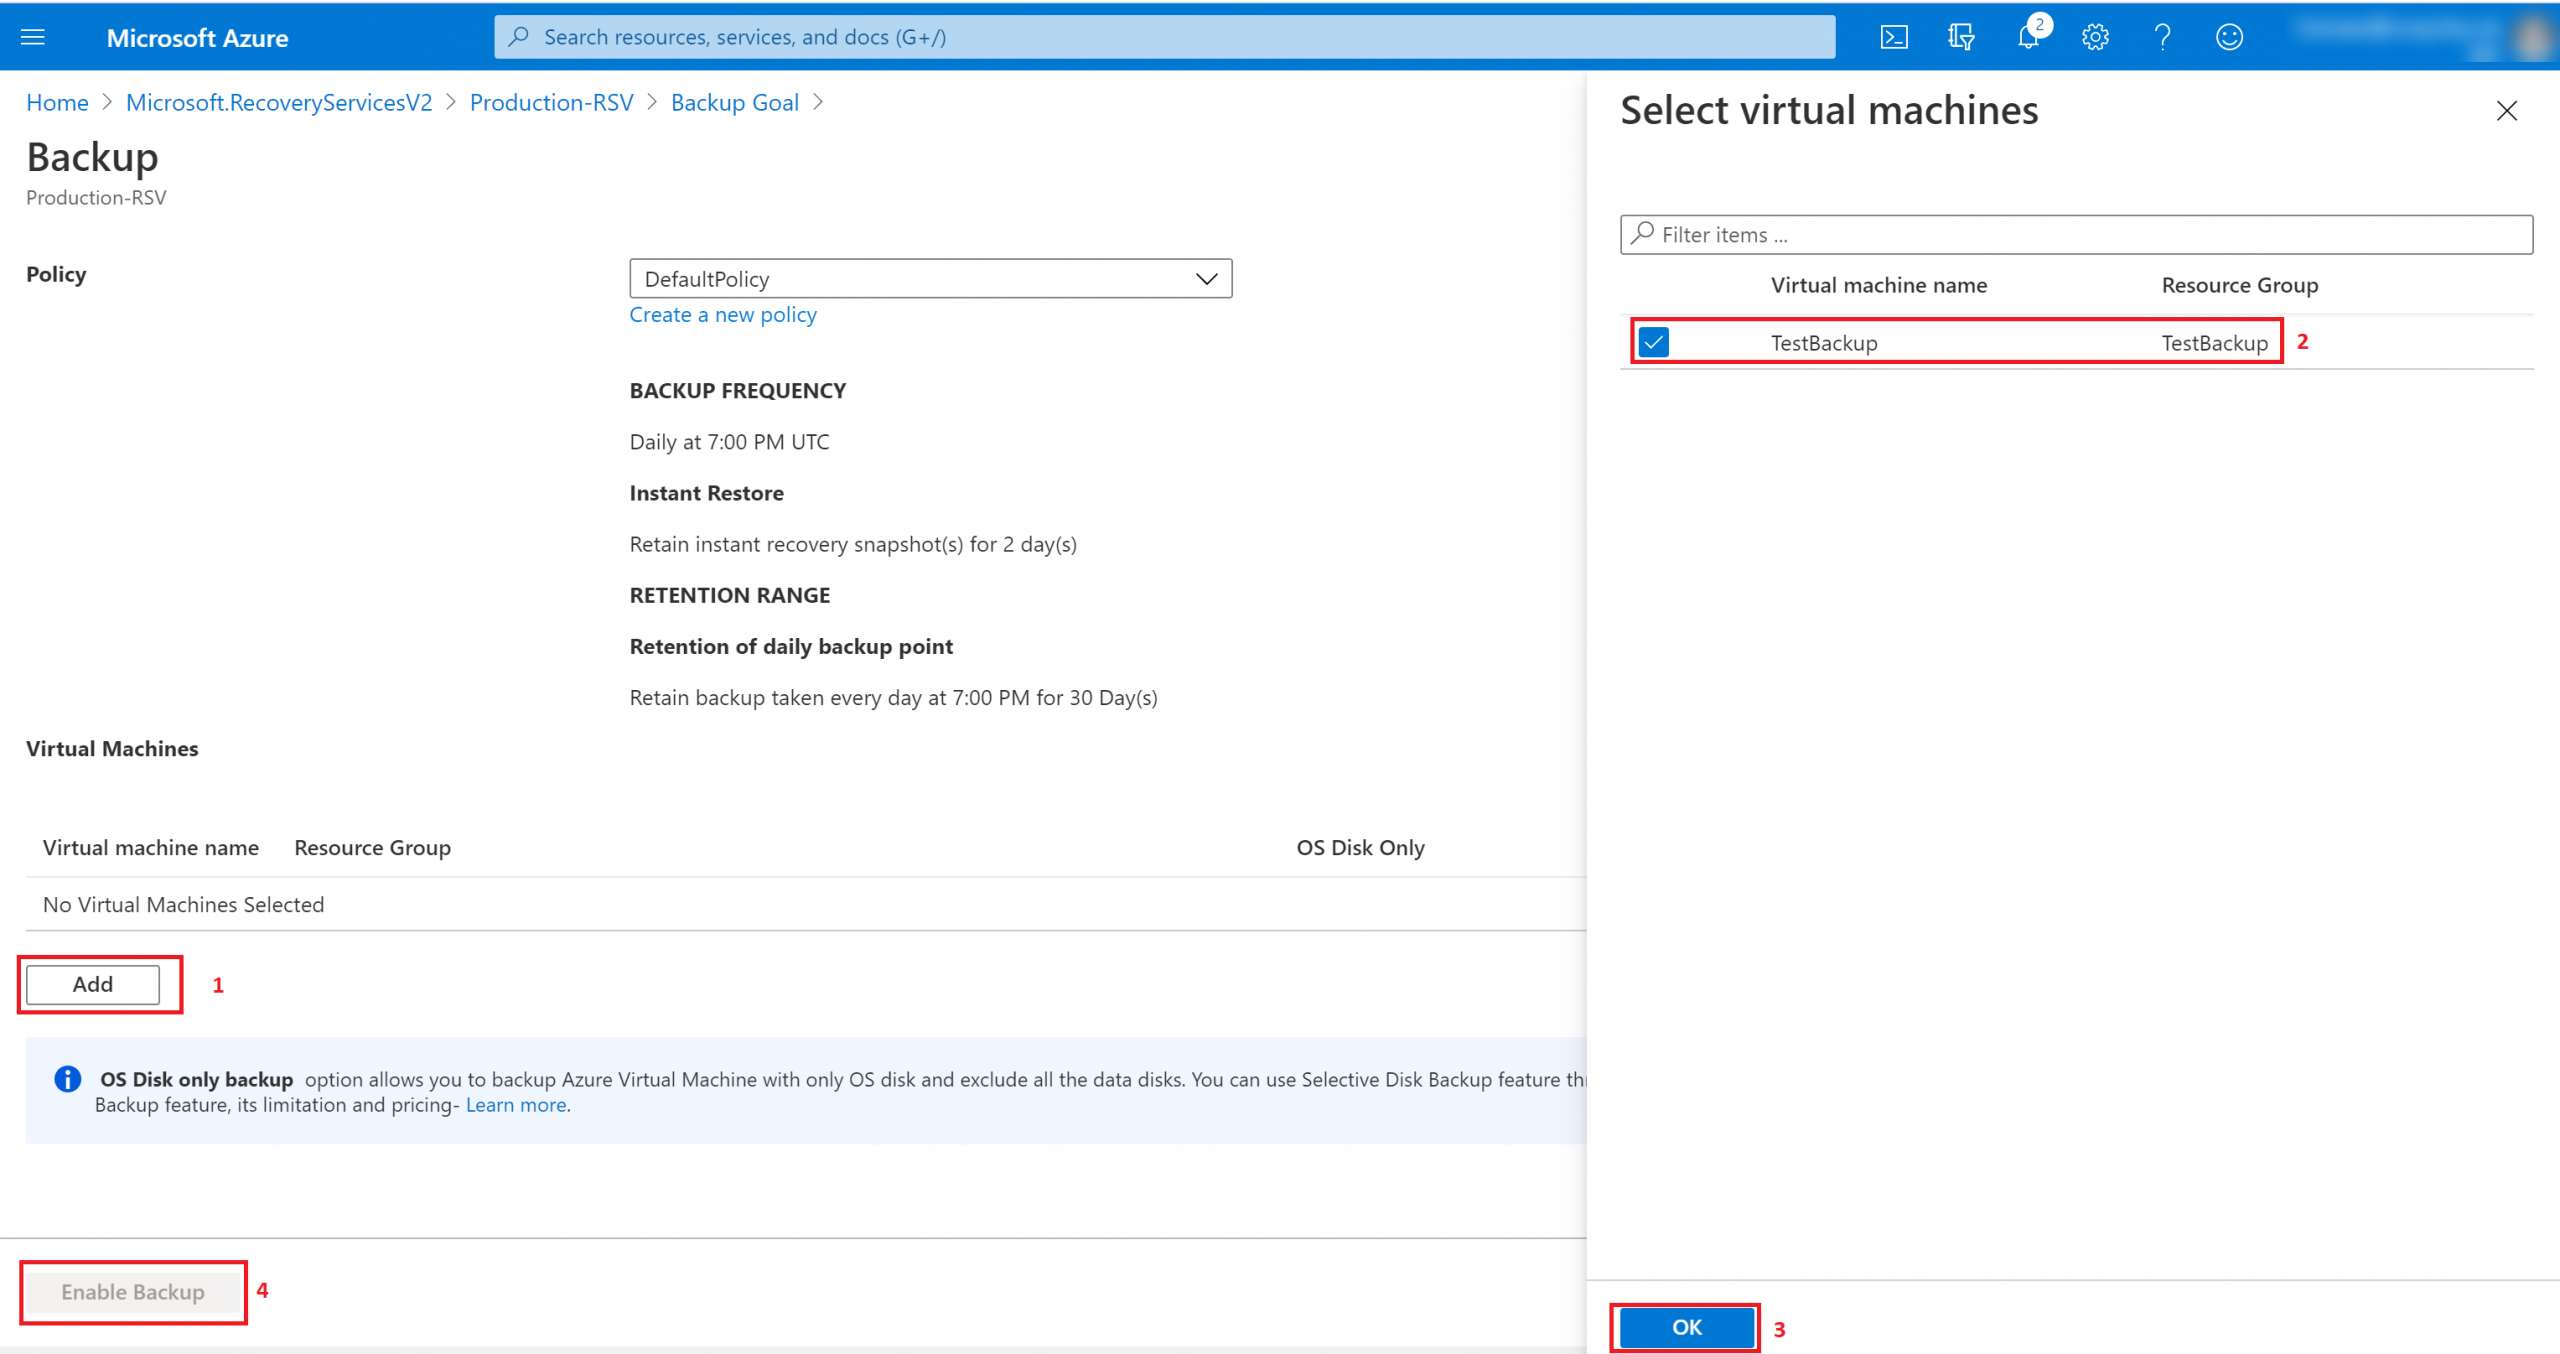
Selecting the Azure VM to protect.
Azure linked the VM to the vault and applied the policy.
5. Checking protection
In the vault I opened Protected items, then Backup items, and chose Azure Virtual Machine.
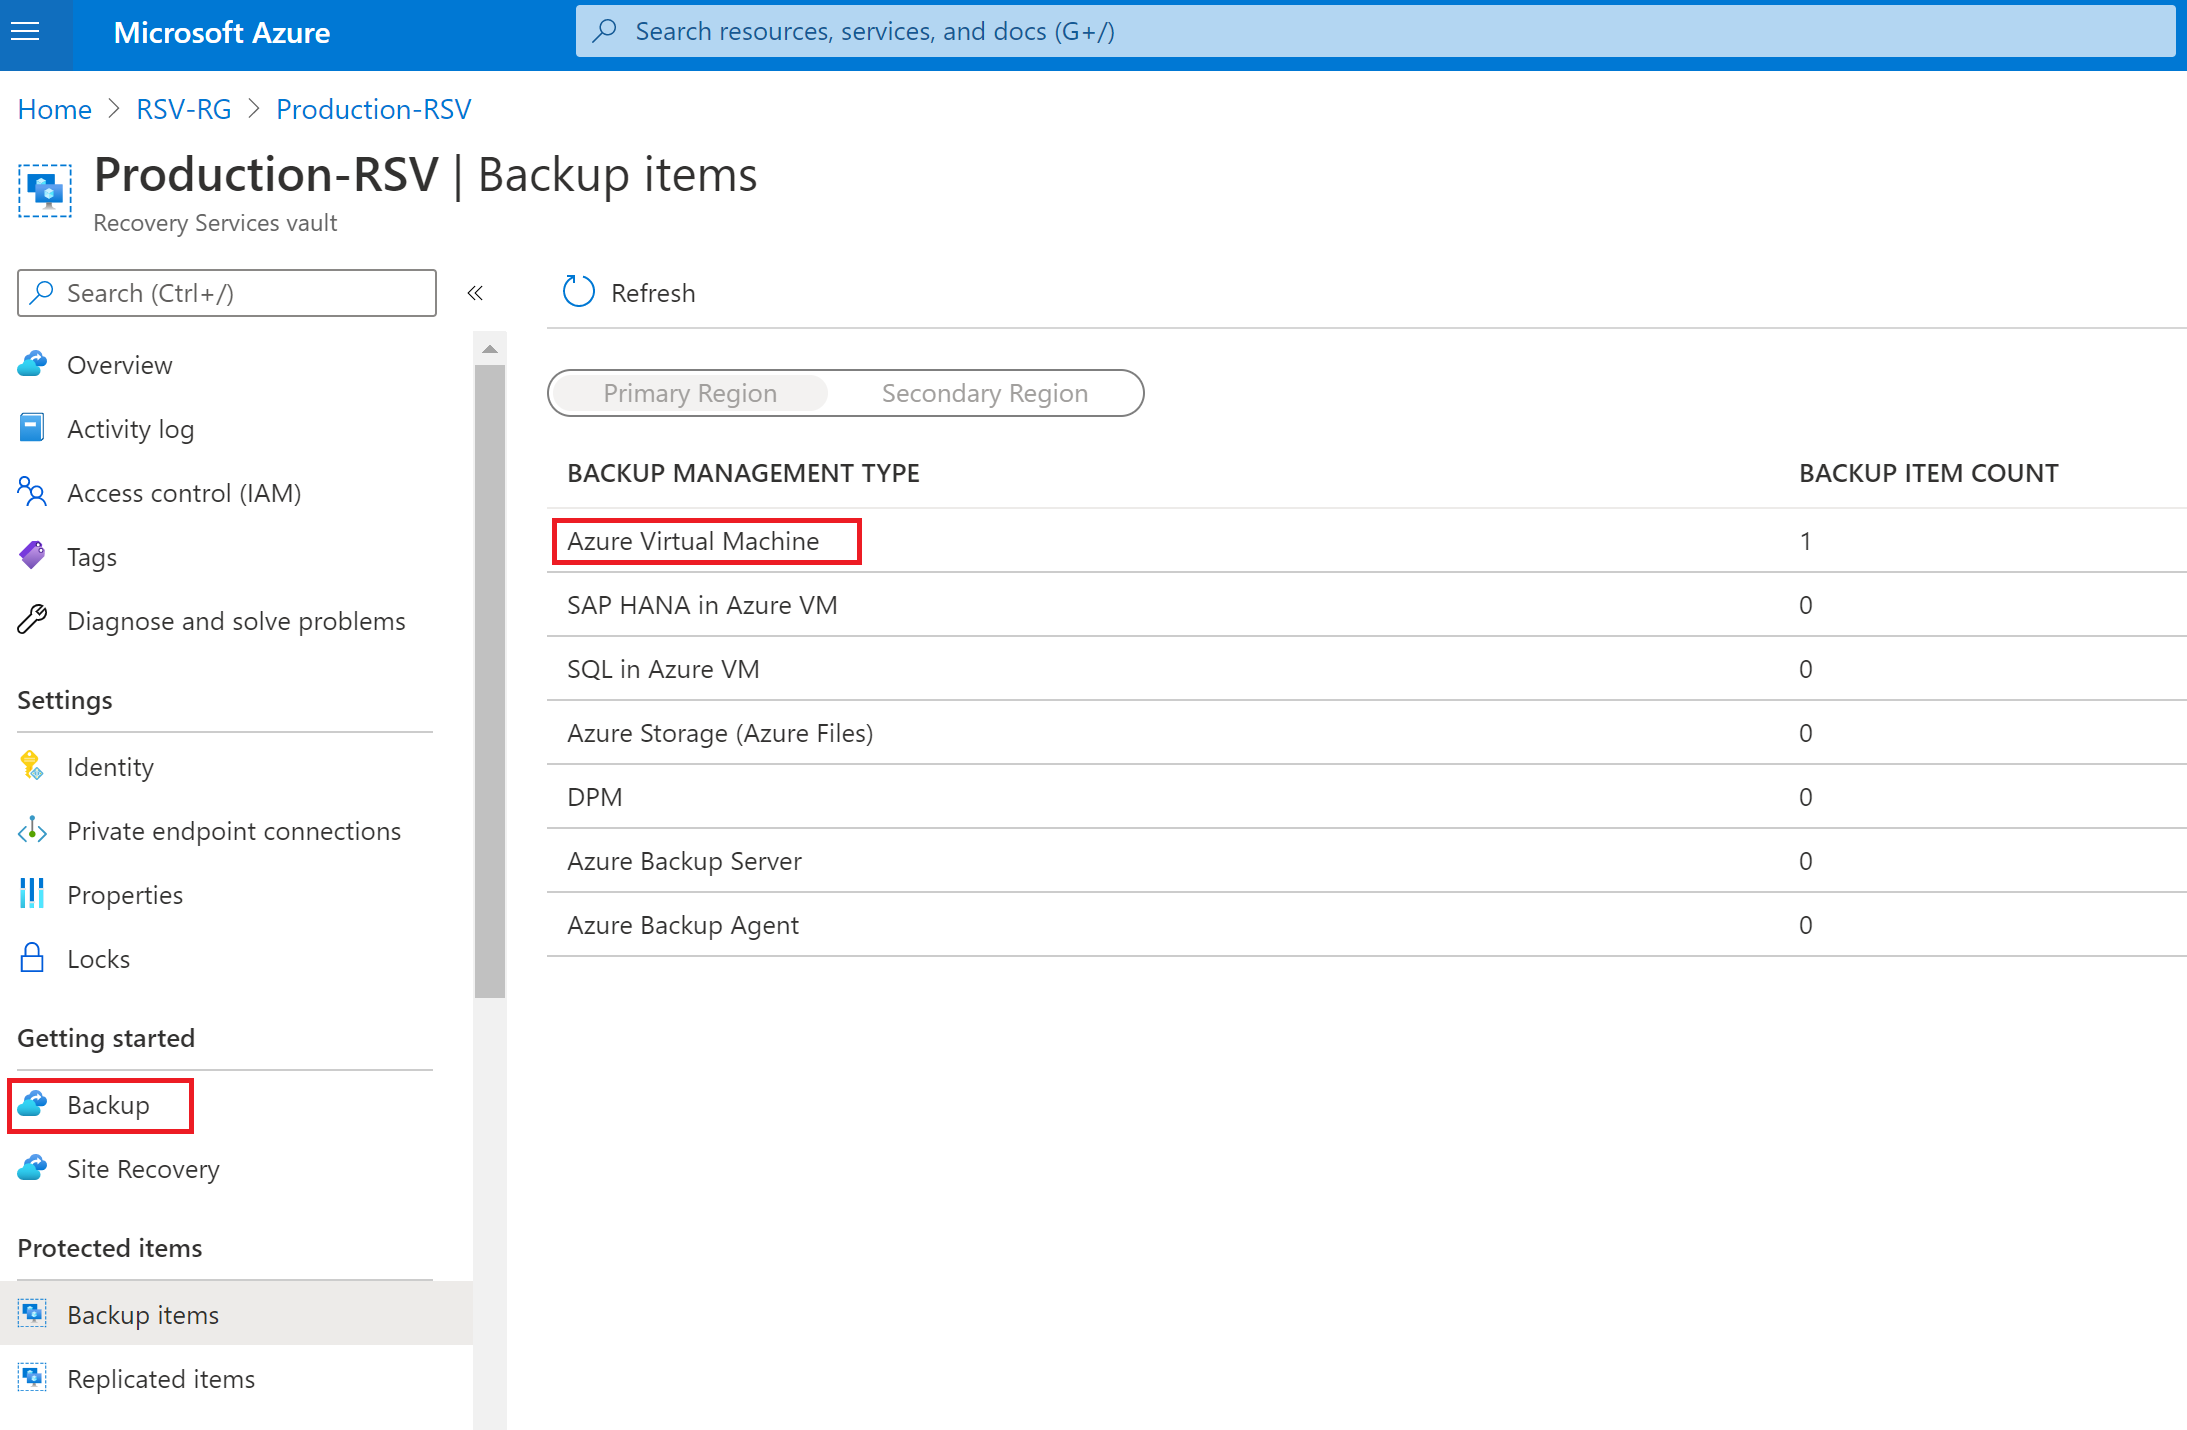
Opening the vault’s protected backup items.
The VM showed up in the list.
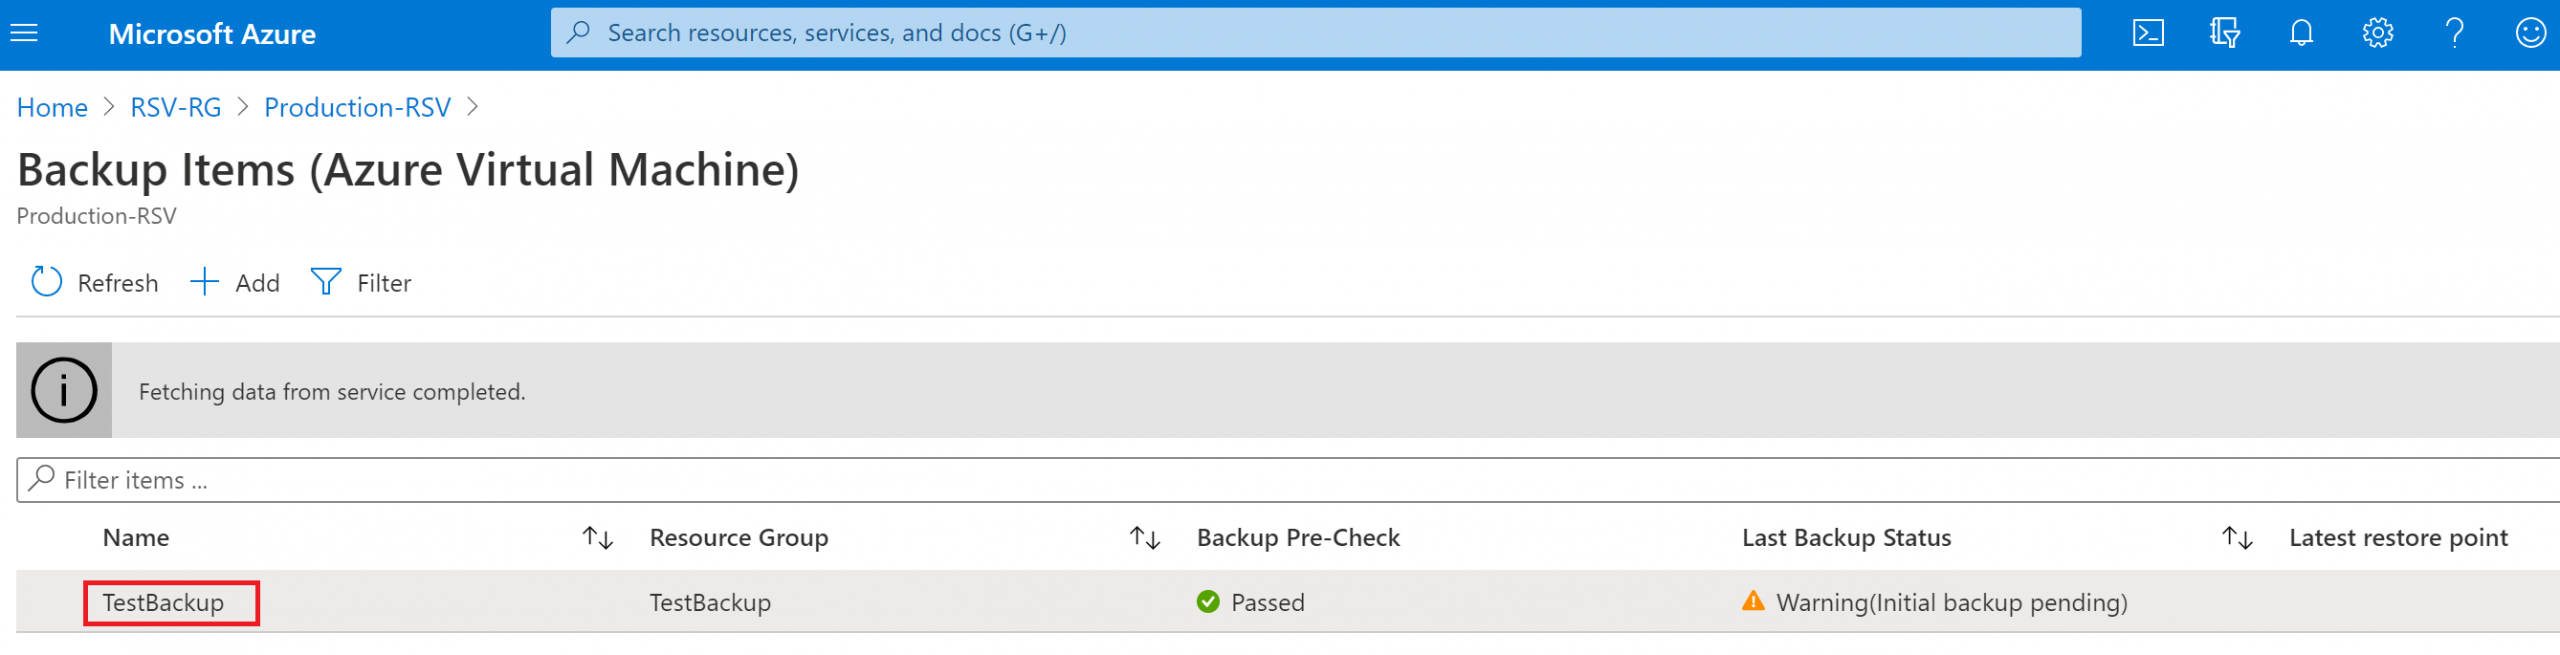
The protected Azure VM listed in the vault.
Protection was set up. But I still couldn’t recover anything until I had a successful recovery point.
6. Taking the first backup
I didn’t want to wait for the schedule, so I opened the VM and clicked Backup now.
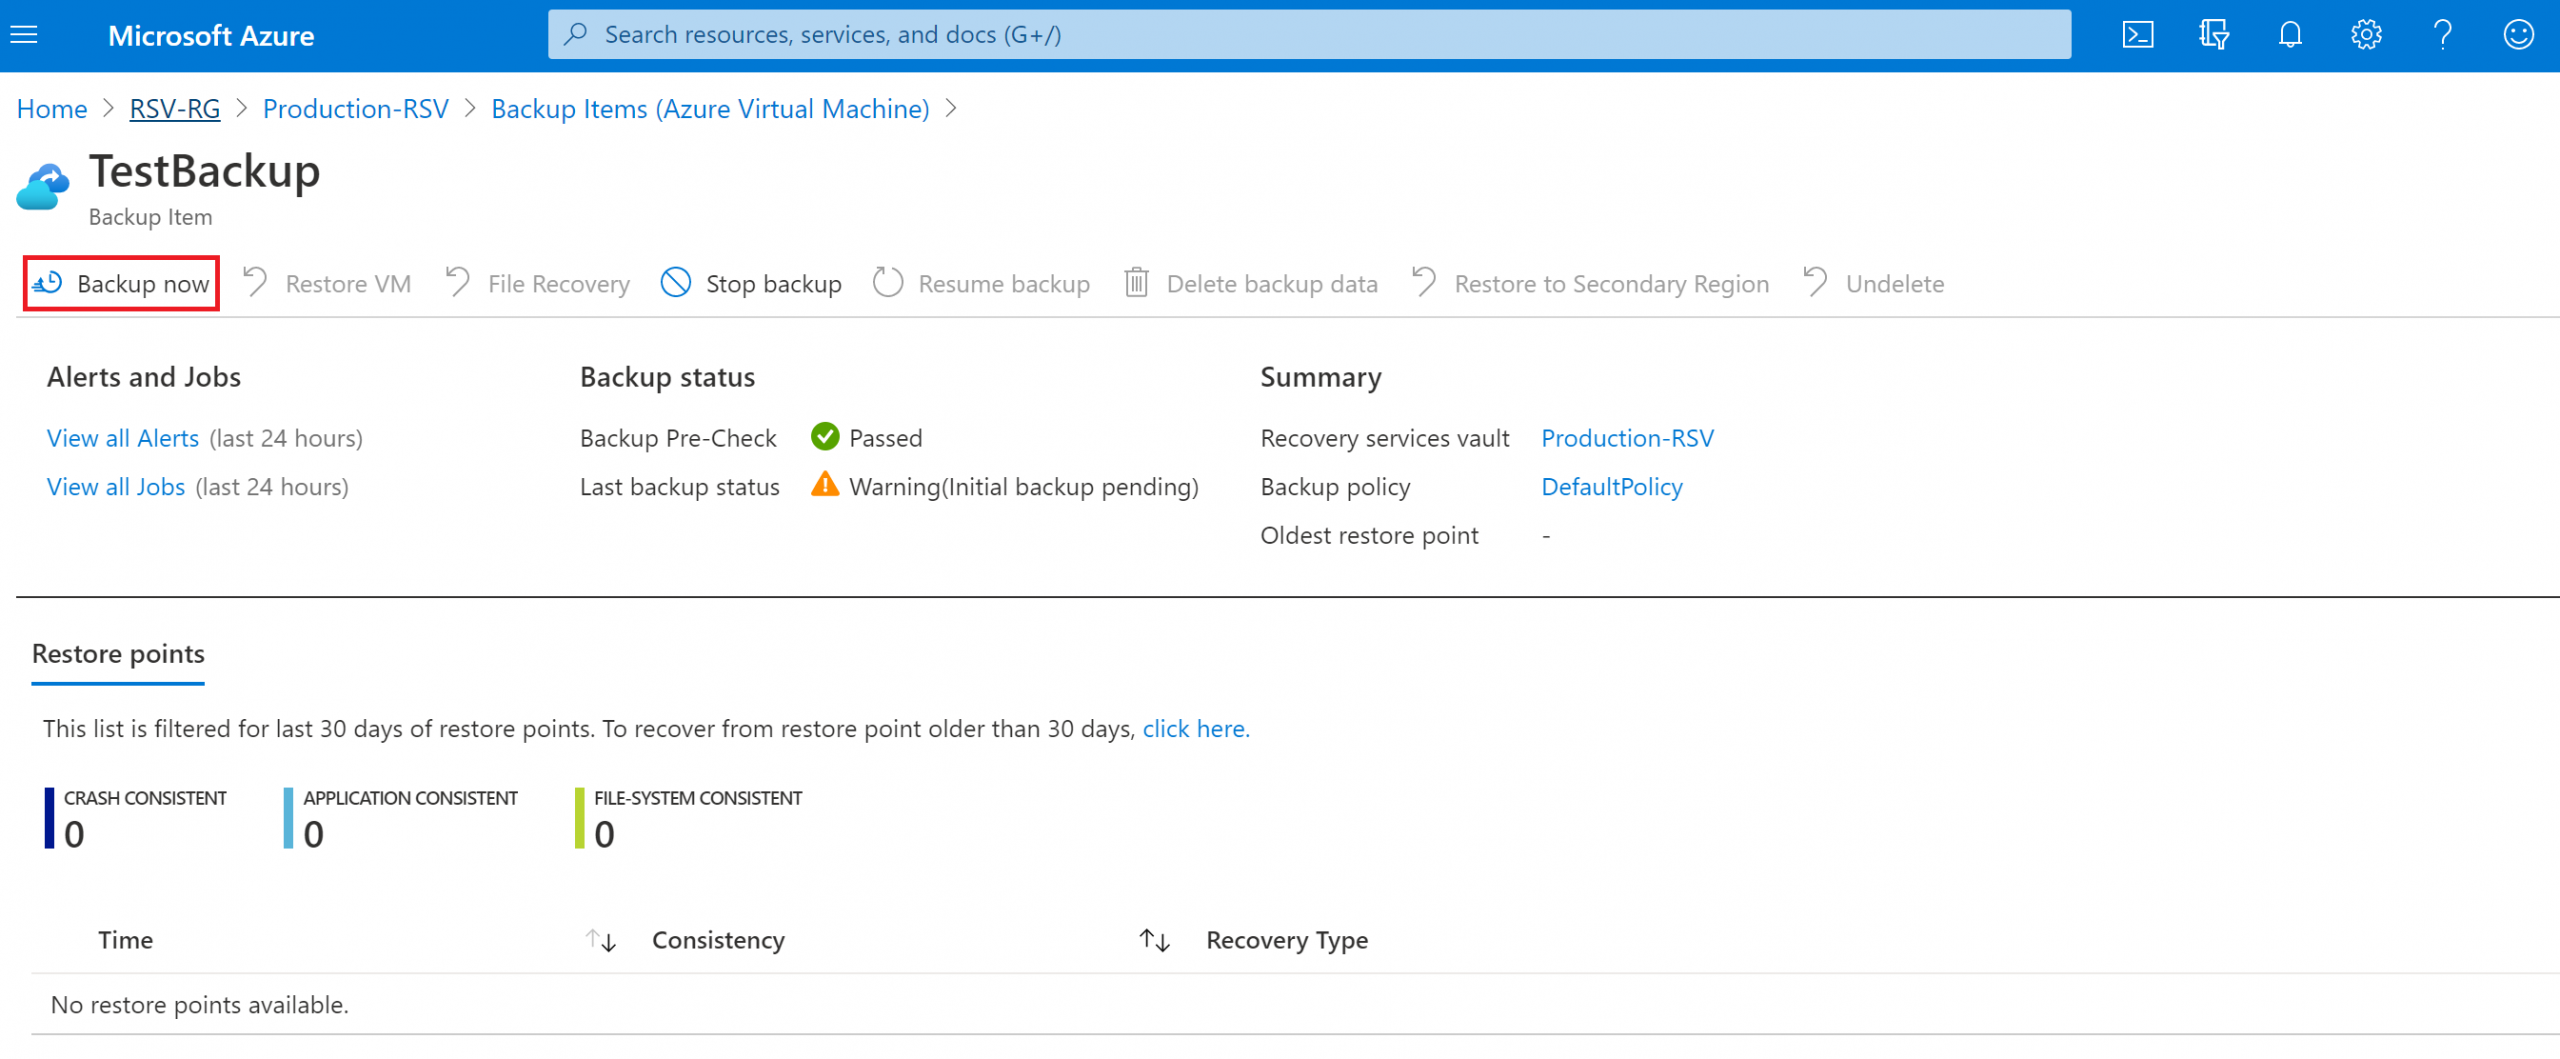
Starting an on-demand Azure VM backup.
An on-demand backup doesn’t replace the schedule. It just creates a recovery point now. You set its retention in that same screen.
Azure Backup can usually back up a running VM. It handles the snapshots and processing. Whether the backup is application-consistent depends on the OS, extensions, app state, and config.
7. Watching the backup job
I opened Backup Jobs in the vault to follow it.
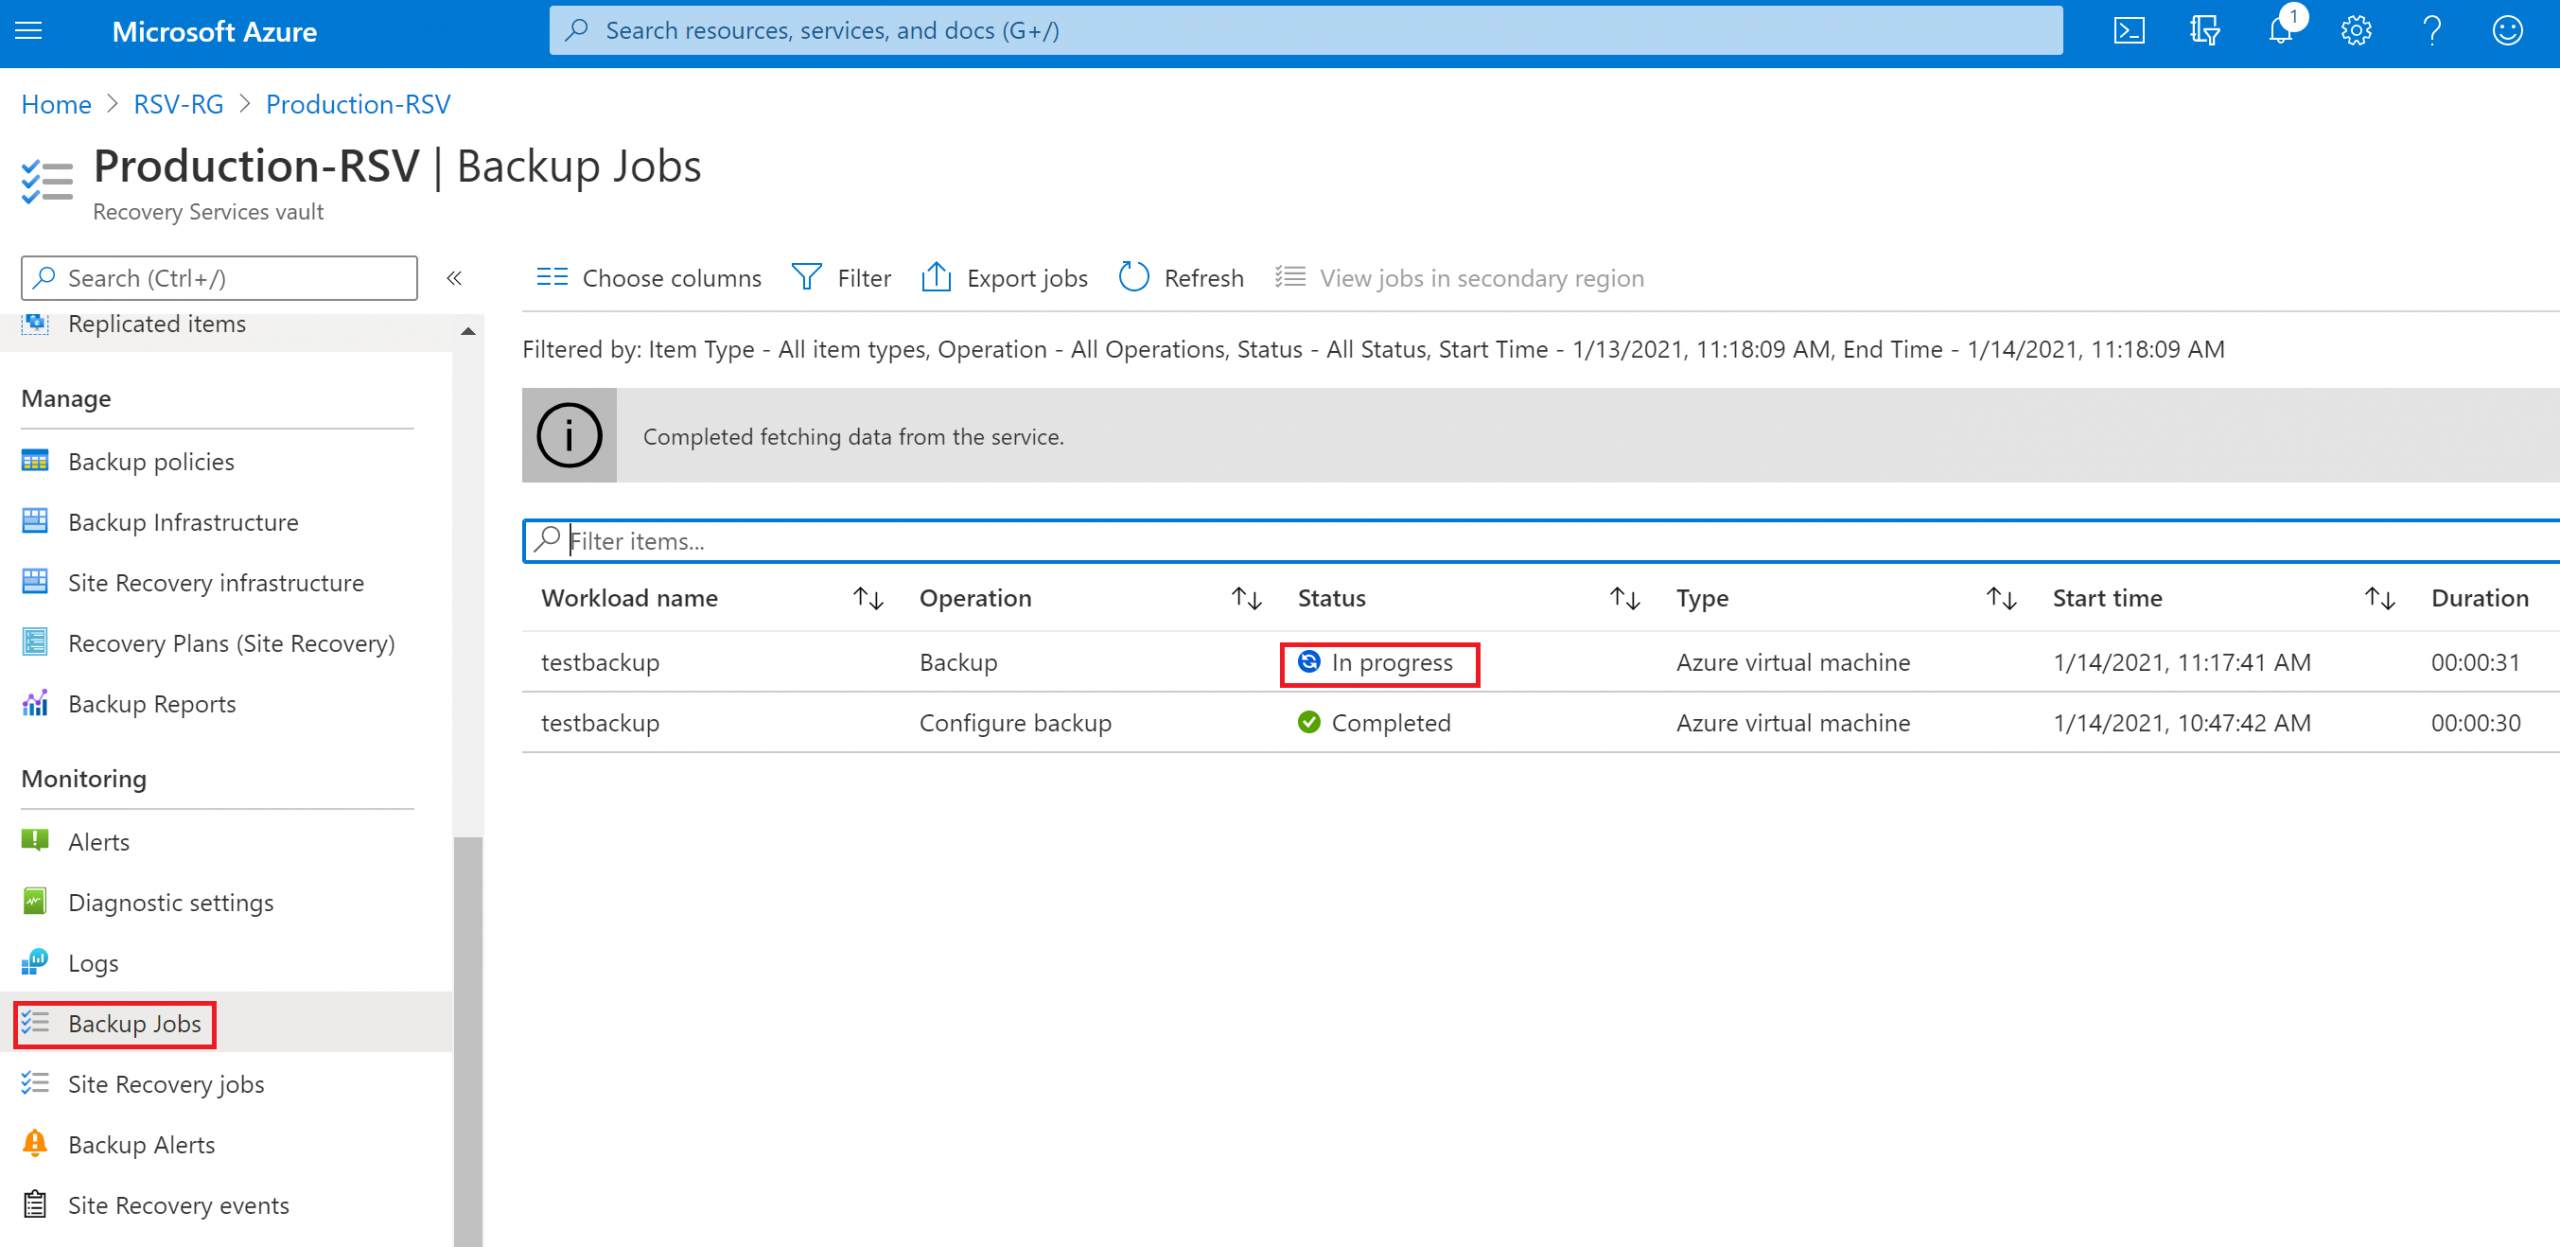
Monitoring the Azure VM backup job.
I waited for it to succeed and confirmed a recovery point existed. A failure, a warning, or a missing recovery point needs a look before you call the VM recoverable.
The first backup usually takes longer because there’s more data. Later ones are incremental. Time still depends on disk size, change rate, storage speed, and Azure itself.
8. Starting a restore
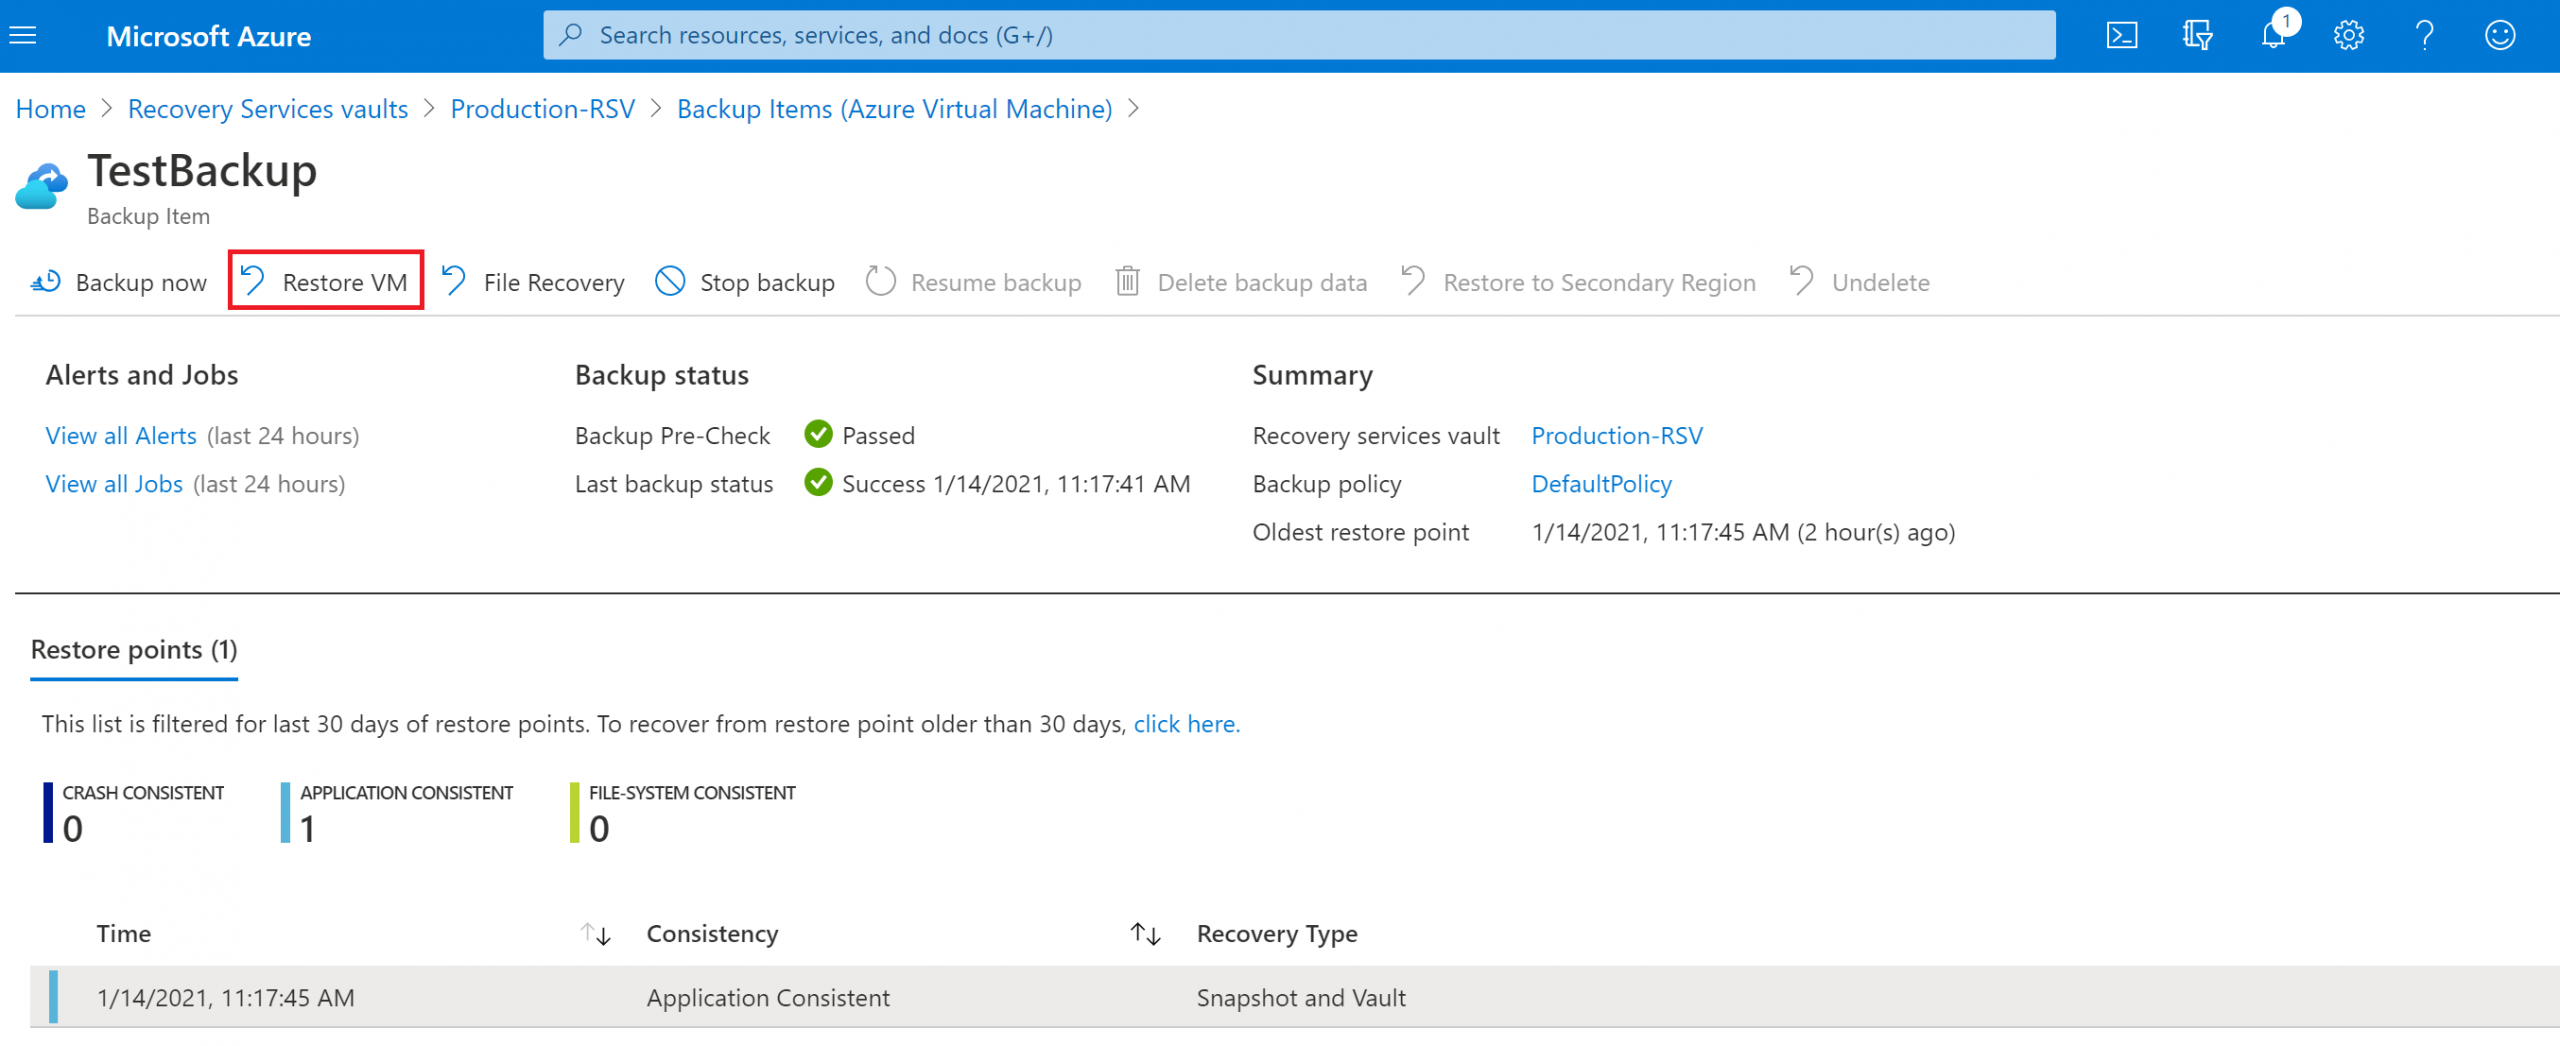
To recover, I went back to Backup items, opened the VM, and clicked Restore VM.
Starting the restore workflow for the protected VM.
I picked the recovery point for the date and time I needed. This matters. The newest backup isn’t always right if corruption or a bad change was already there when it ran.
9. Picking the restore method
Your options depend on the VM, vault, Region, and config. They can include:
- Create new: Build a separate VM from the selected recovery point.
- Restore disks: Recover the disks so I can control the later VM configuration.
- Replace existing: Replace the protected VM’s current disks while preserving its VM configuration.
- Cross Region Restore: Recover into the paired secondary region when the vault and workload meet the feature requirements.
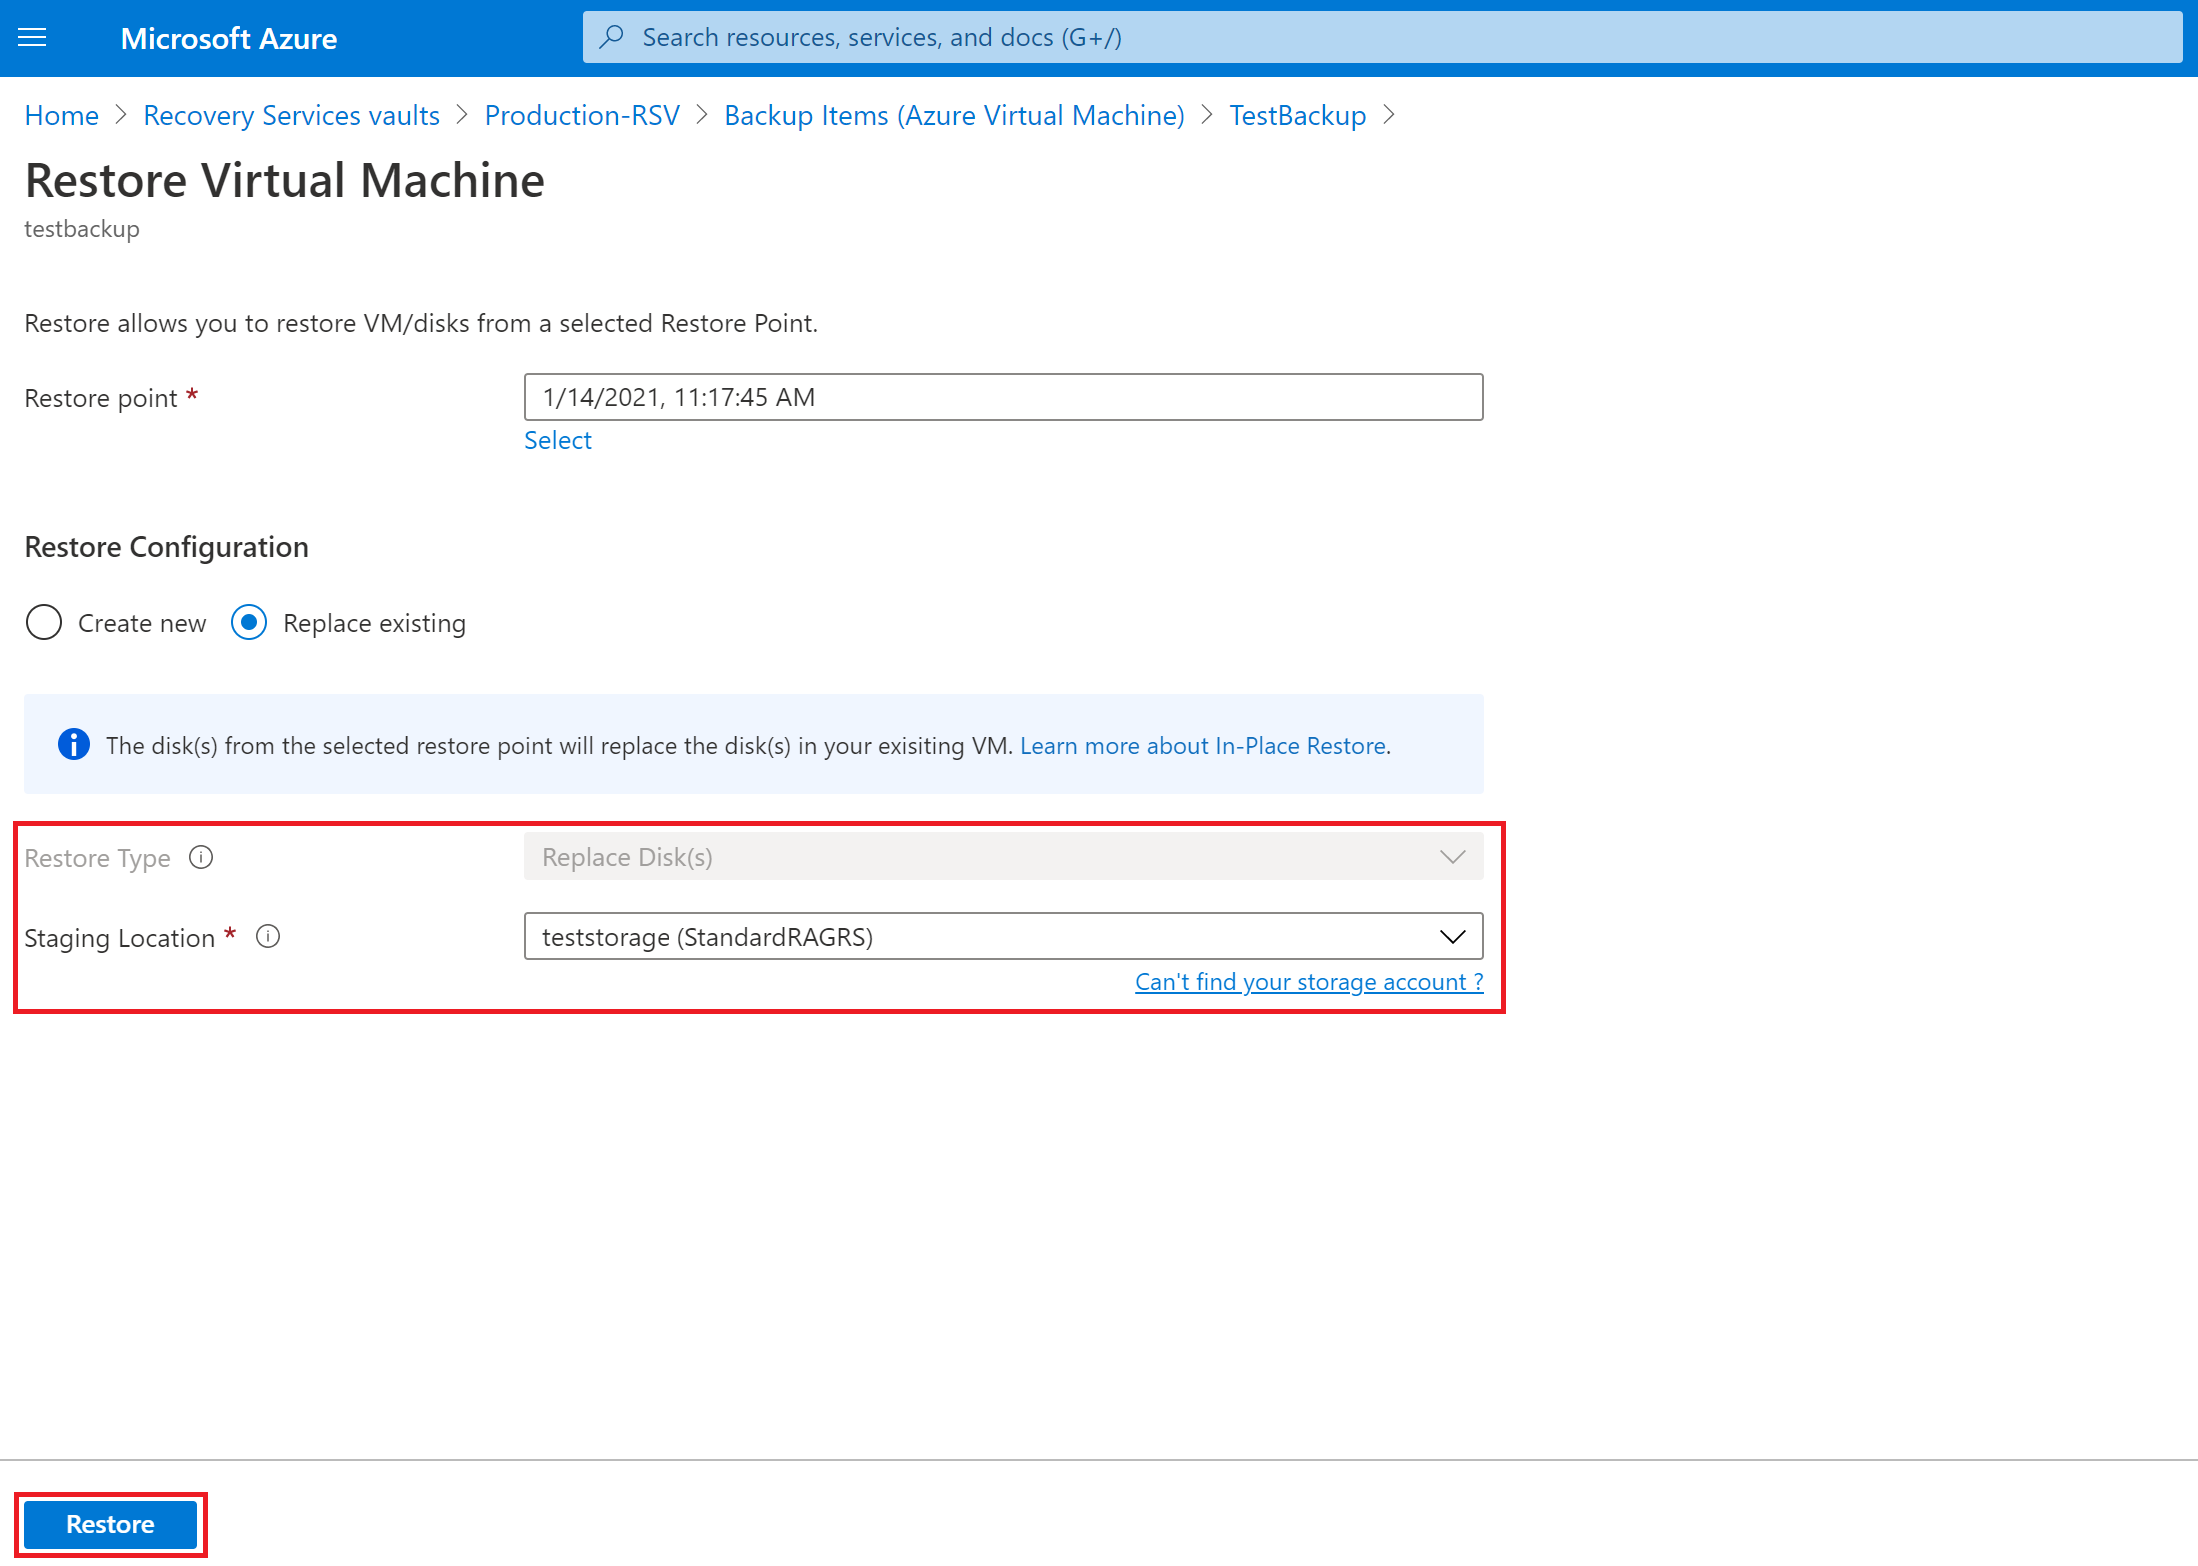
Selecting the recovery point, restore method, and staging settings.
Some methods need a staging storage account. Stopping or deallocating the original VM matters mostly when replacing its disks. You don’t always need to for a separate new VM. Follow the portal’s current prerequisites for whichever option you pick.
I started the restore and watched the job until it finished.
10. Checking the recovered VM
A finished restore doesn’t prove the workload works. After recovery I’d check:
- The VM boots successfully
- Expected disks are attached and accessible
- The operating system and application services start
- Network interfaces, DNS, routes, and security rules are correct
- Authentication and managed identities still work as expected
- The restored data matches the selected recovery point
- Monitoring and backup protection remain enabled
When I can, I’d restore into an isolated network first. That keeps the recovered server from clashing with production or talking to production systems before I’ve checked it.
The full flow
Create Recovery Services vault
        |
Configure backup policy
        |
Select and protect the VM
        |
Run Backup now
        |
Confirm successful recovery point
        |
Select recovery point
        |
Choose restore method
        |
Monitor and validate recovery
What I learned
Azure Backup makes it easy to schedule VM backups and keep recovery points. But a green backup status doesn’t mean you can recover. The policy has to meet your RPO and retention needs. The vault needs the right security and redundancy settings. And restores need regular testing.
The most useful part was walking through the restore choices before an emergency. Knowing when to create a new VM, restore disks, or replace the existing one makes a real recovery much less stressful.