I built a full deployment path for a static Node.js website hosted in Azure Storage. Terraform creates the infrastructure. Azure DevOps builds and publishes the app. Then I put the public site behind DNS, Cloudflare, and Azure Front Door.
The work had four parts. I set up Terraform and Azure CLI on Ubuntu. I configured Azure DevOps automation. I deployed the storage-backed site. Then I added DNS and security controls in front of it.
Note: Product screens and provider versions reflect my environment when I built this. They aren’t permanent defaults.
1. Installing Terraform on Ubuntu
I updated the package index and installed what I needed to verify HashiCorp’s repo.
sudo apt-get update && sudo apt-get install -y gnupg software-properties-common
Then I added HashiCorp’s signing key:
wget -O- https://apt.releases.hashicorp.com/gpg | \
gpg --dearmor | \
sudo tee /usr/share/keyrings/hashicorp-archive-keyring.gpg > /dev/null
And checked the key fingerprint:
gpg --no-default-keyring \
--keyring /usr/share/keyrings/hashicorp-archive-keyring.gpg \
--fingerprint
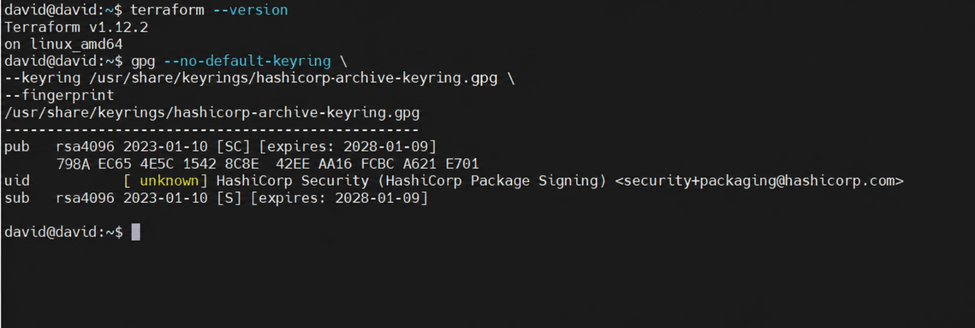
HashiCorp GPG fingerprint verification
I added the HashiCorp APT repo:
echo "deb [arch=$(dpkg --print-architecture) signed-by=/usr/share/keyrings/hashicorp-archive-keyring.gpg] \
https://apt.releases.hashicorp.com $(grep -oP '(?<=UBUNTU_CODENAME=).*' /etc/os-release || lsb_release -cs) main" \
| sudo tee /etc/apt/sources.list.d/hashicorp.list
Then installed Terraform and made sure the CLI worked:
sudo apt update
sudo apt-get install terraform
terraform -help
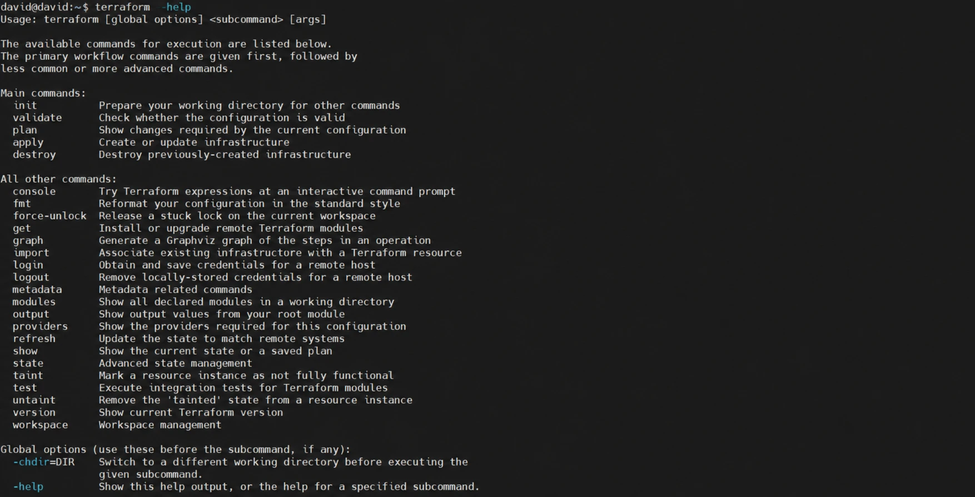
Terraform help output confirming installation
Terraform was ready on the Ubuntu host.
2. Signing in to Azure with Azure CLI
I installed Azure CLI:
curl -sL https://aka.ms/InstallAzureCLIDeb | sudo bash
For a normal login:
az login
My Linux VM had no browser, so I used device code login:
az login --use-device-code
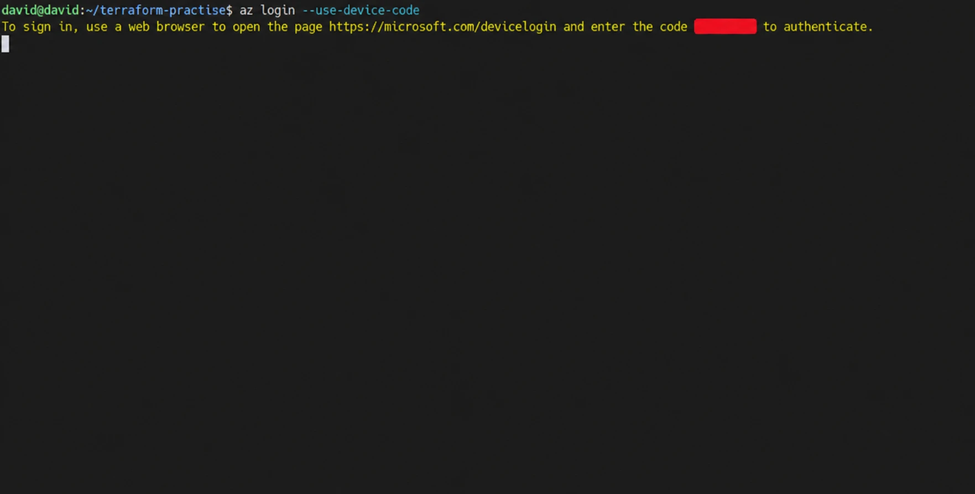
Azure CLI device-code login prompt
I opened the device login URL from the CLI and entered the code.
Successful Azure account sign-in
Then I listed my subscriptions:
az account list --output table
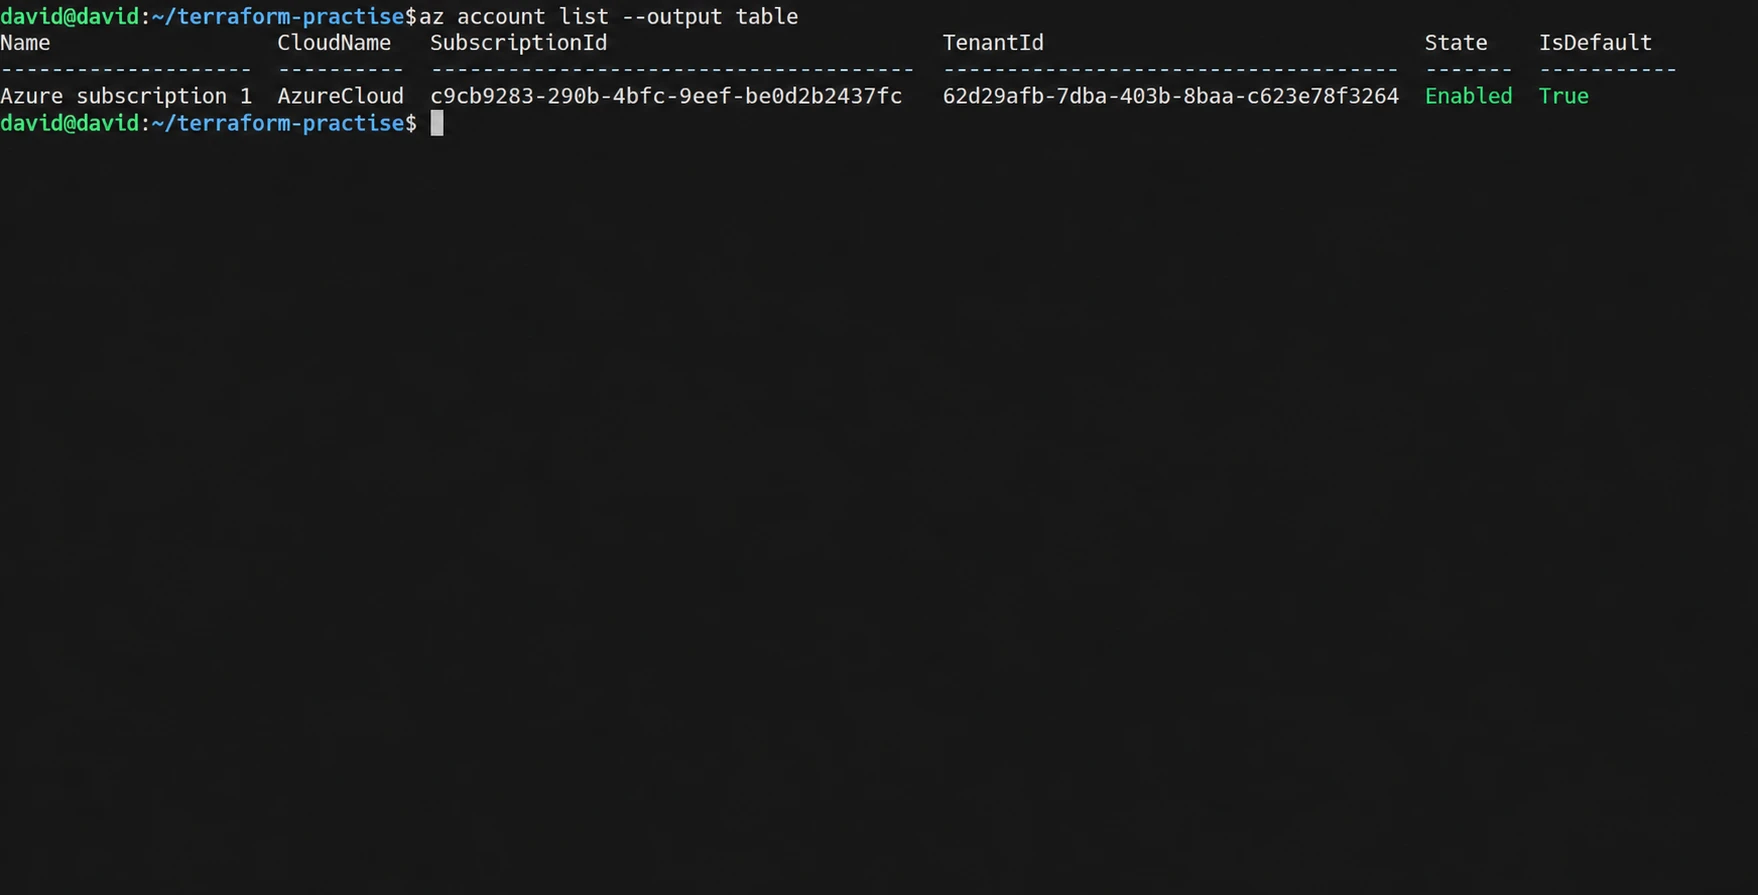
Azure subscription list from the CLI
You can pick a specific one if needed:
az account set --subscription "<SUBSCRIPTION_ID>"
I created provider.tf:
terraform {
  required_providers {
    azurerm = {
      source  = "hashicorp/azurerm"
      version = "=4.37.0"
    }
  }
}

provider "azurerm" {
  features {}
}
And initialized Terraform:
terraform init
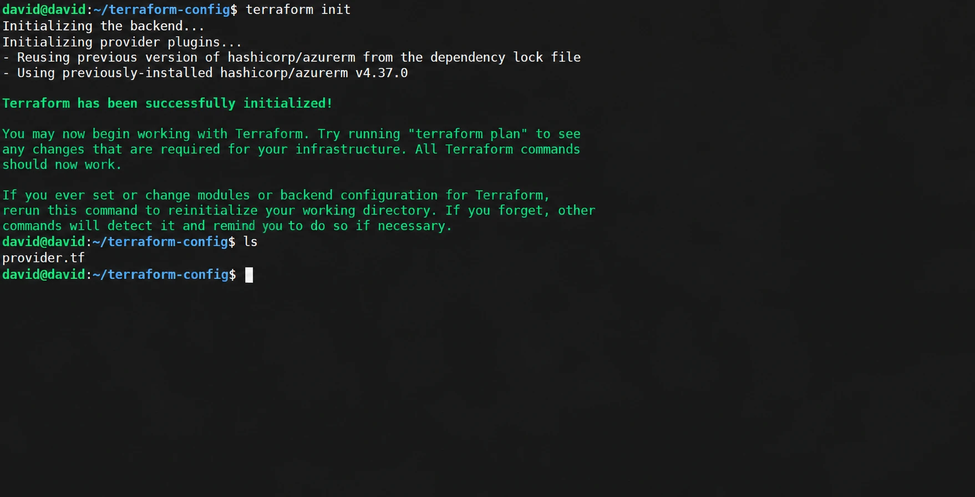
Terraform initialization against Azure
3. Setting up a self-hosted Azure DevOps agent
Azure DevOps pipelines need an agent to run jobs. I registered a Linux VM as a self-hosted agent.
Without a usable Microsoft-hosted or self-hosted agent, the pipeline fails before any job runs. That’s what happened to me first.
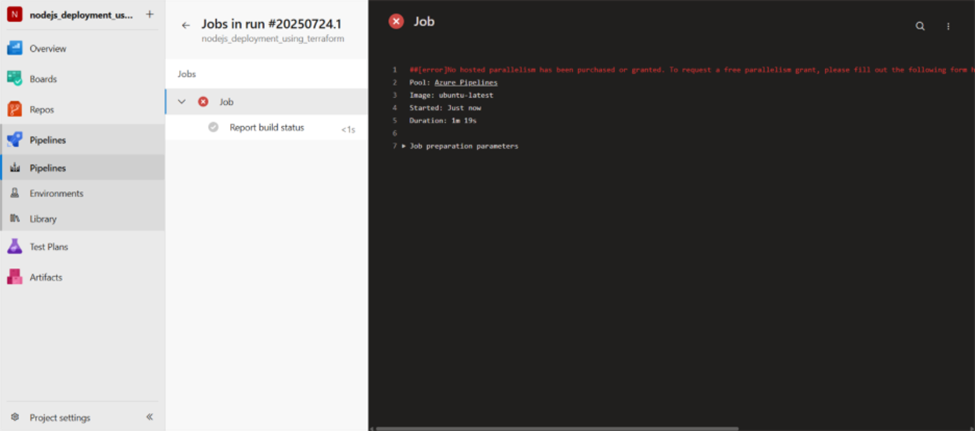
Azure DevOps pipeline error when no agent is available
In Azure DevOps I opened Project Settings → Agent pools.
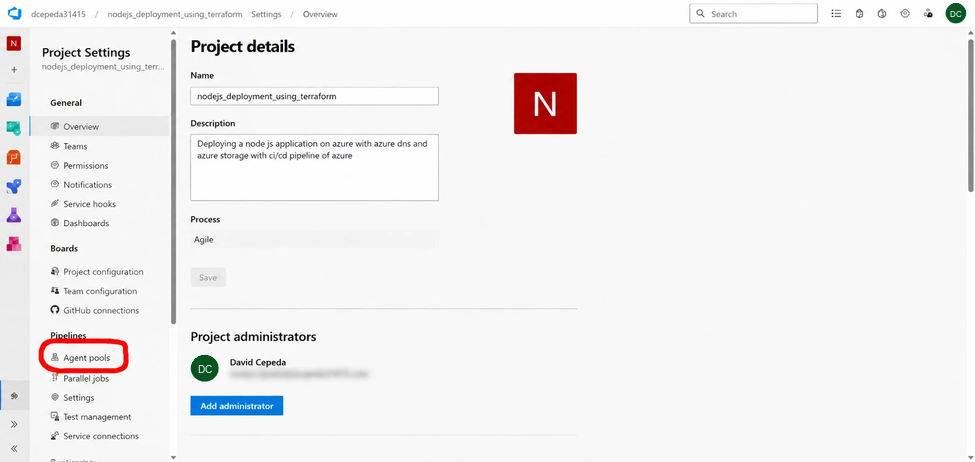
Azure DevOps Agent Pools page
I picked the Default pool.
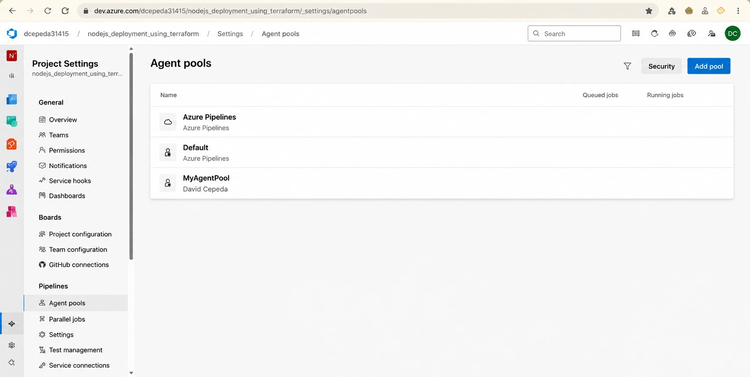
Default agent pool selection
Clicked New agent.
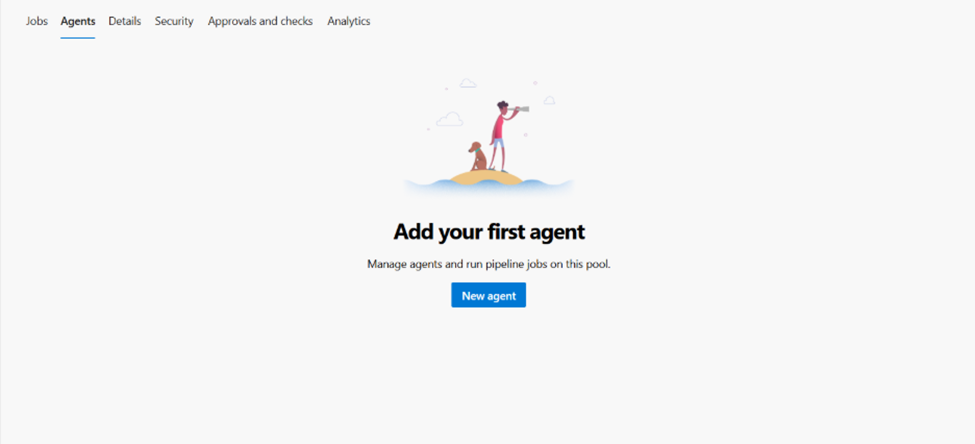
Adding a new Azure DevOps agent
And chose the Linux instructions.
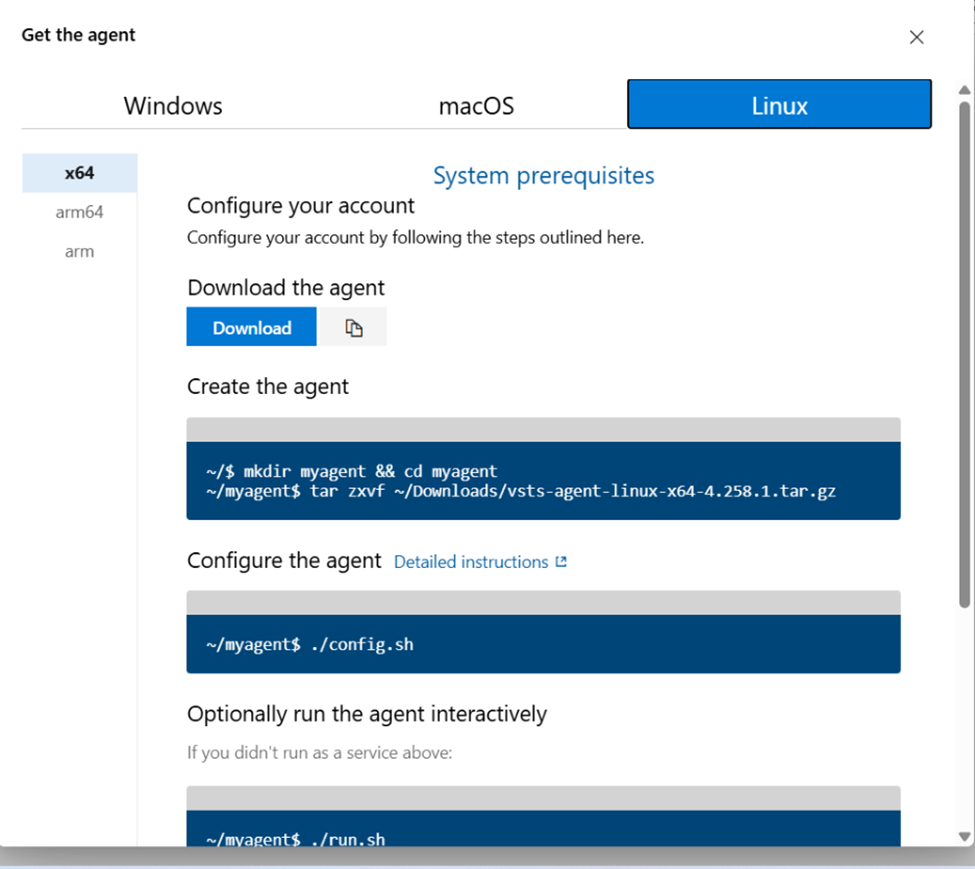
Linux self-hosted agent setup instructions
I downloaded and extracted the agent on the VM, then started the setup:
./config.sh
Setup needs an Azure DevOps Personal Access Token (PAT). I opened my user settings in Azure DevOps.
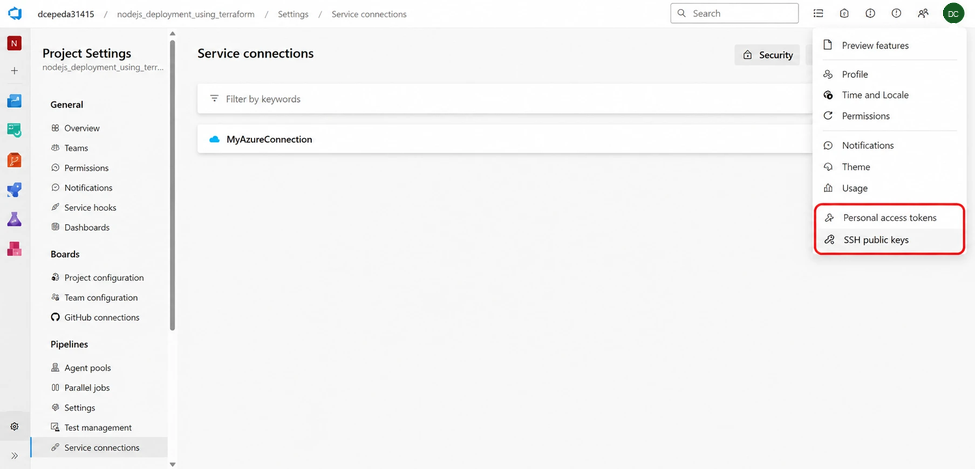
Azure DevOps user settings for personal access tokens
Created a new token.
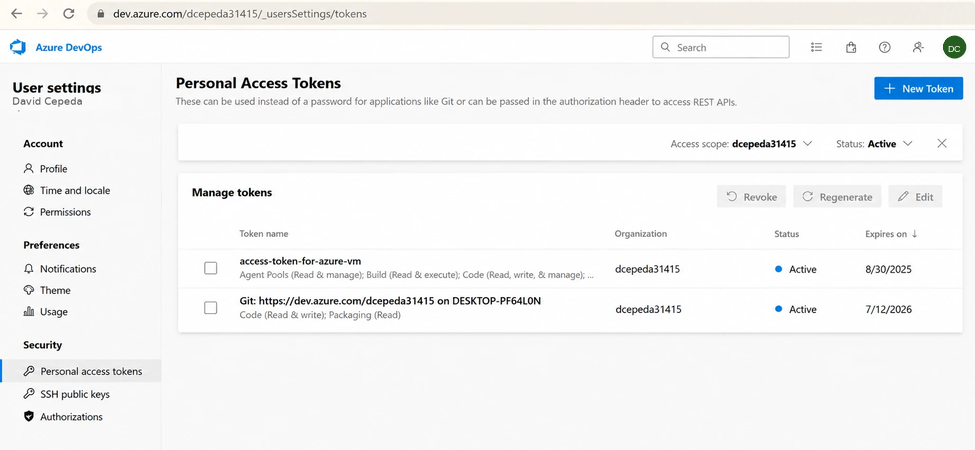
Creating a new personal access token
I gave the PAT access to Agent Pools, Build, Code, and Work Items.
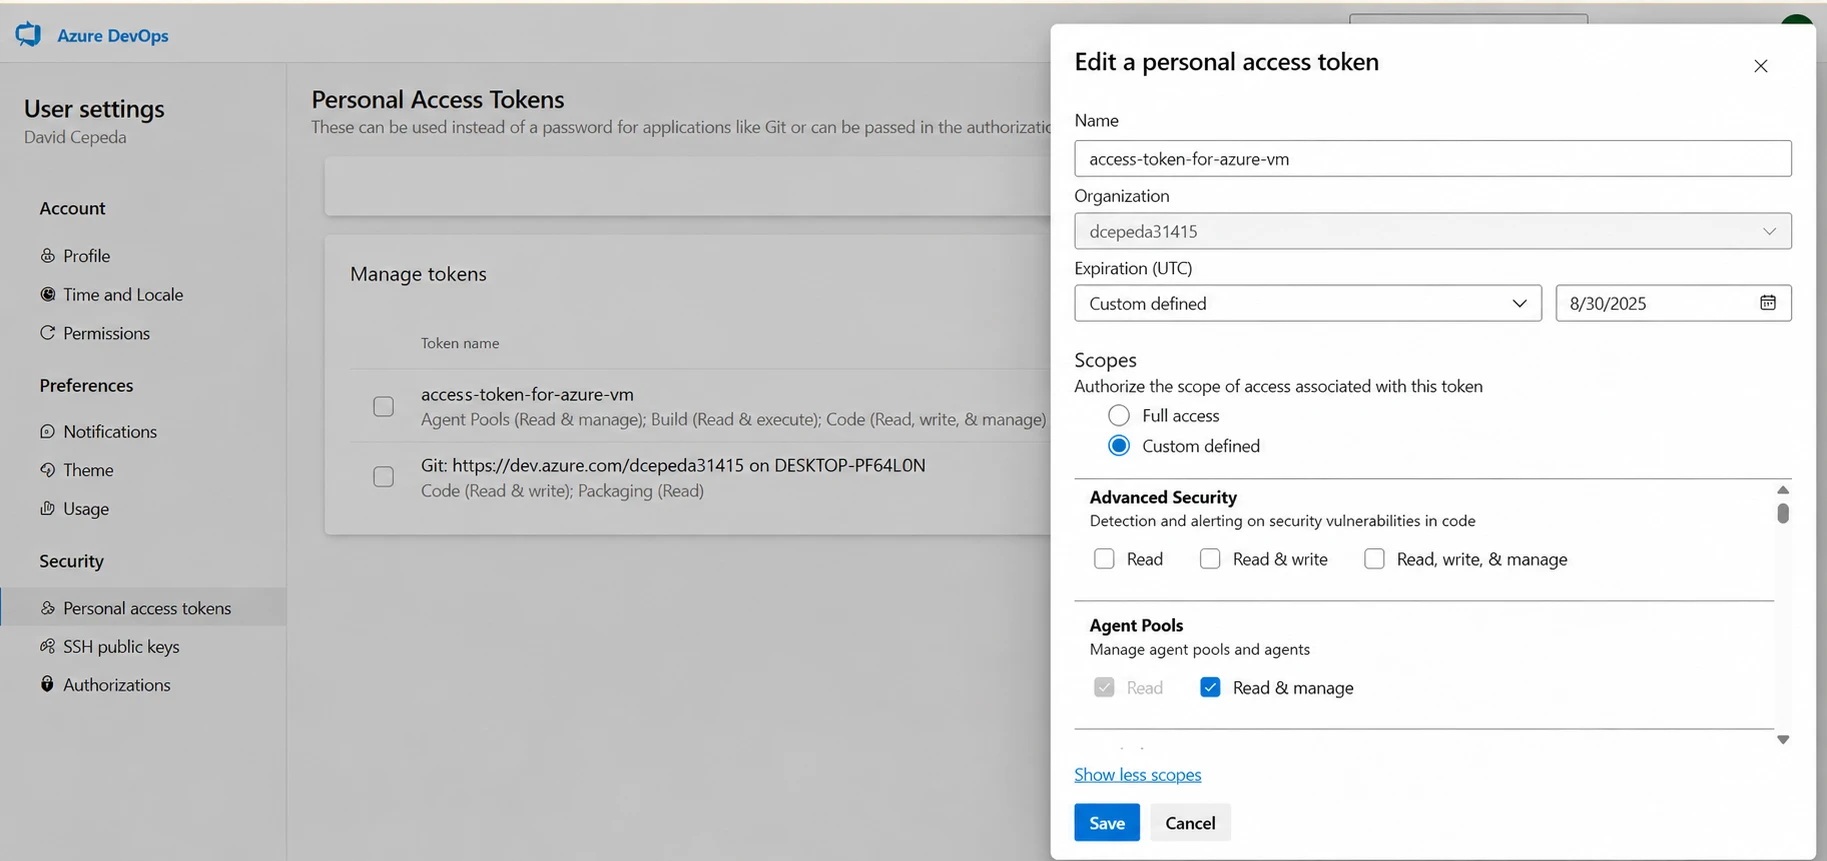
PAT permissions used for agent registration
Then I ran the agent config. It asks for the organisation URL, PAT, agent pool, and agent name.
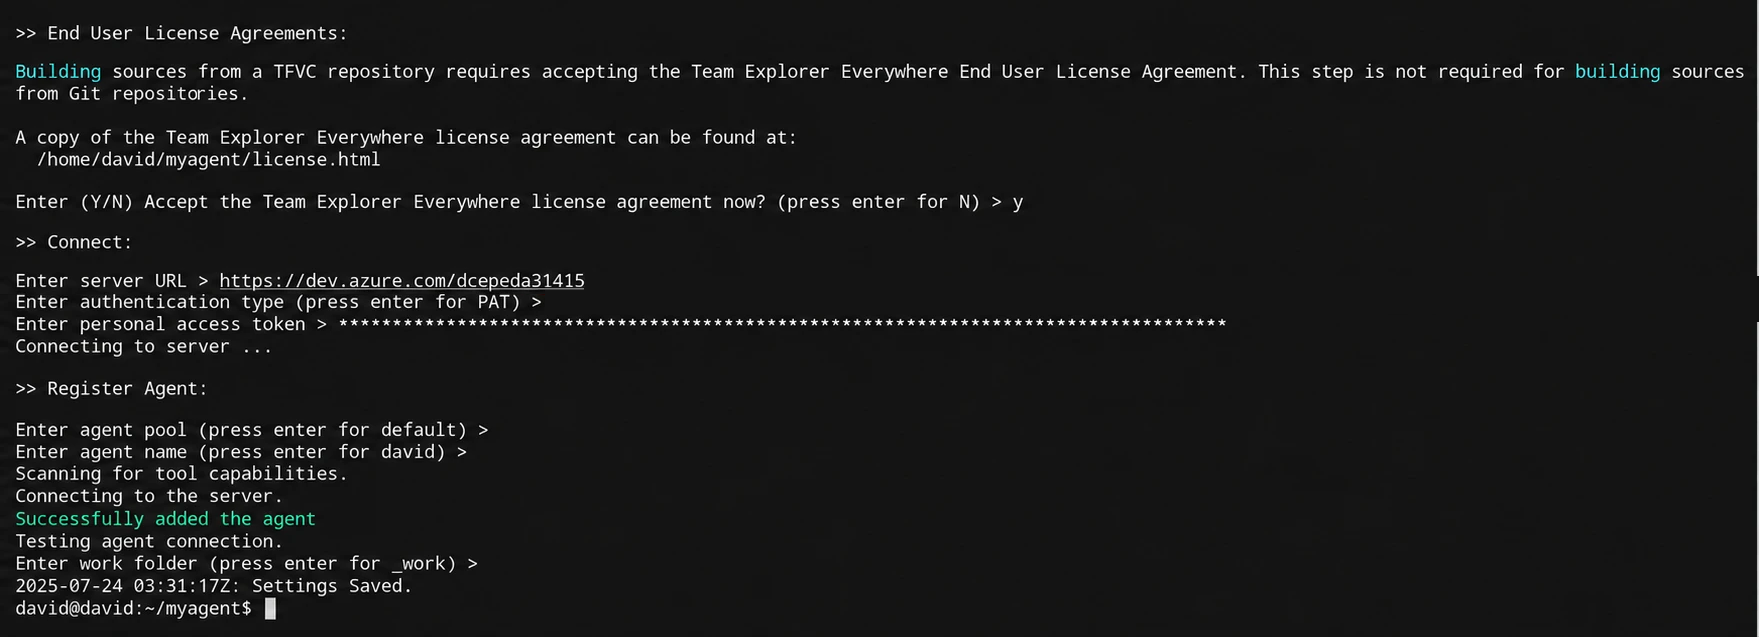
Linux agent configuration requesting Azure DevOps credentials
The organisation URL looks like this:
https://dev.azure.com/<your-organisation>
I used the Default pool. After registering, the agent showed up in Azure DevOps.
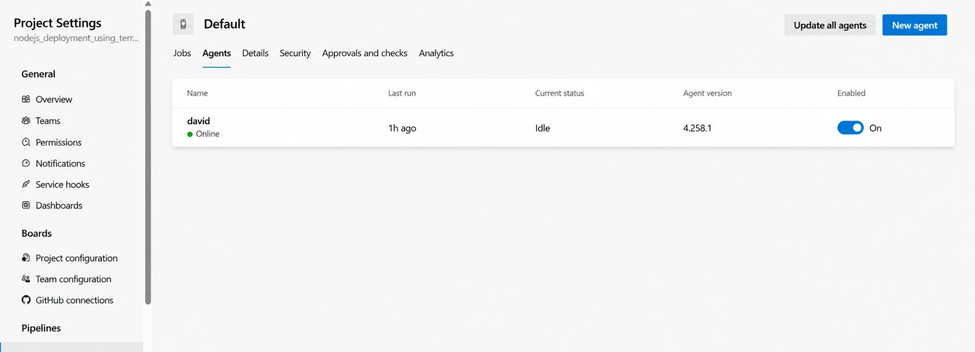
Self-hosted agent registered in the Default pool
4. Creating a service connection
The pipelines also need permission to manage Azure resources.
I opened:
Project Settings
→ Service connections
→ New service connection
→ Azure Resource Manager
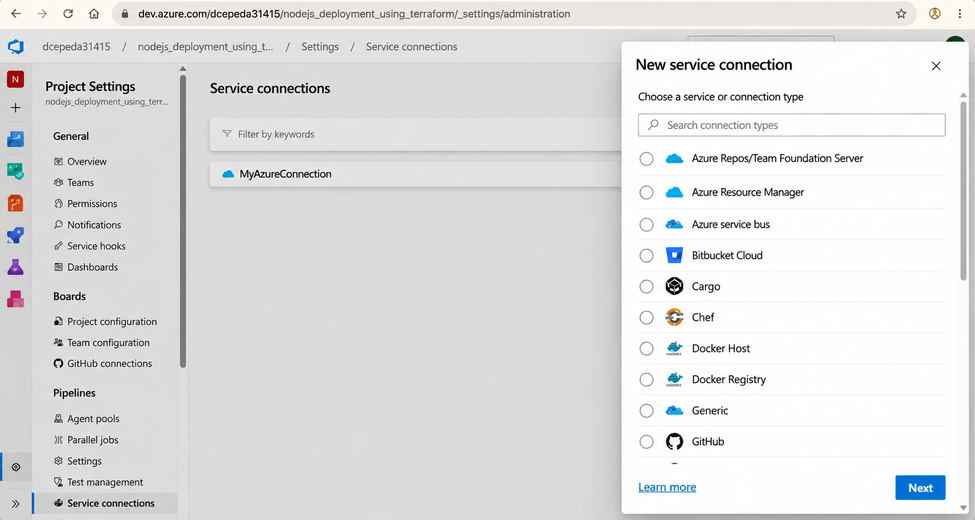
Creating an Azure Resource Manager service connection
I let it create a service principal automatically. I picked the subscription and resource group and named the connection:
MyAzureConnection
I also allowed pipelines to use it.
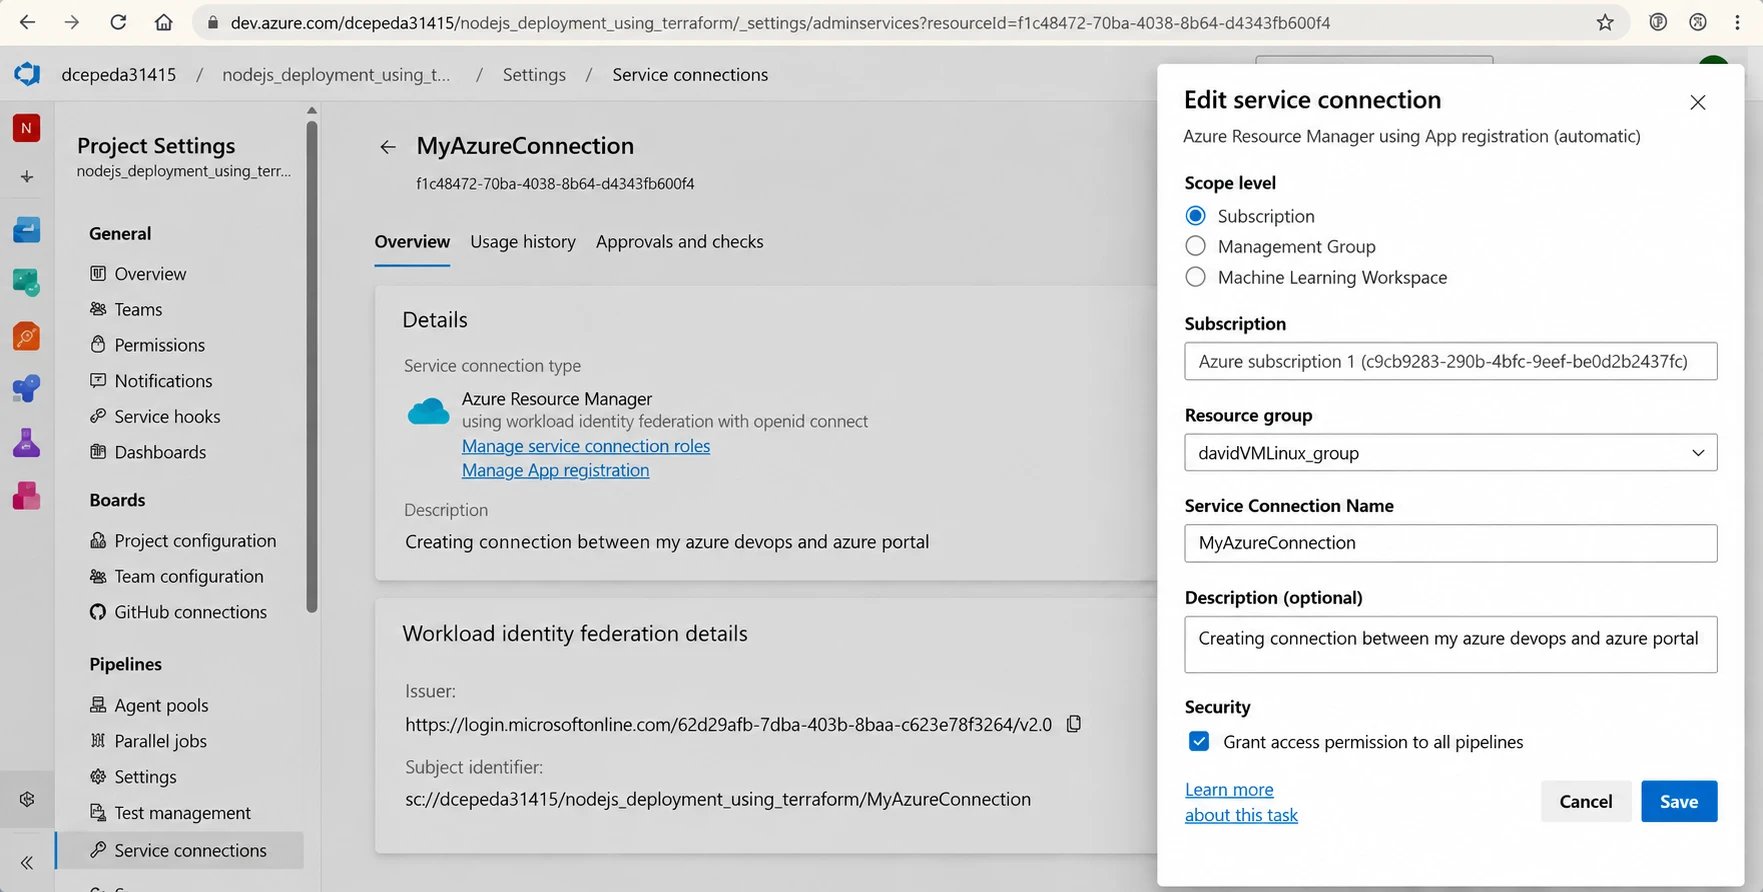
Service connection configuration and authorization
Then I confirmed it showed up in the project.
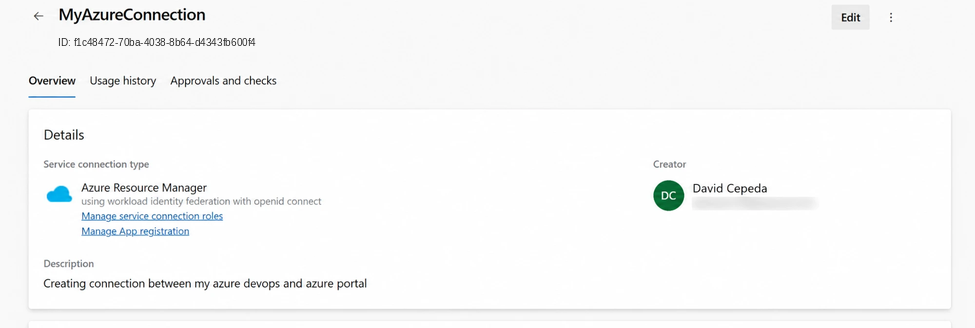
Completed Azure DevOps service connection
5. Creating the storage account with Terraform
The site is hosted in an Azure Storage account. I tested the Terraform deploy by hand on the Linux VM before moving it into Azure DevOps.
I created main.tf:
terraform {
  required_providers {
    azurerm = {
      source  = "hashicorp/azurerm"
      version = "4.37.0"
    }
  }
}

provider "azurerm" {
  features {}
  subscription_id = "<YOUR_SUBSCRIPTION_ID>"
}

data "azurerm_resource_group" "existing_rg" {
  name = "<YOUR_RESOURCE_GROUP>"
}

resource "azurerm_storage_account" "static" {
  name                     = "<storage_account_name>"
  resource_group_name      = data.azurerm_resource_group.existing_rg.name
  location                 = data.azurerm_resource_group.existing_rg.location
  account_tier             = "Standard"
  account_replication_type = "LRS"
}
Replace:
<YOUR_SUBSCRIPTION_ID>
<YOUR_RESOURCE_GROUP>
<storage_account_name>
with your own values.
Then I ran:
terraform init
terraform plan
terraform apply -auto-approve
It uses an existing resource group and creates a Standard LRS storage account in it.
6. Automating the storage account with a Terraform pipeline
My pipeline handles two cases.
If the storage account doesn’t exist, Terraform creates it. Then a shell script assigns blob upload permissions.
If it already exists, the pipeline imports it into Terraform state before planning and applying.
Here’s the pipeline:
trigger:
  - master

pool:
  name: Default

variables:
  terraformDir: './terraform-pipeline'

steps:
- checkout: self

- script: |
    echo "Initializing Terraform..."
    terraform init

    echo "Checking whether the storage account already exists..."
    az storage account show \
      --name davidinsidernodejsapp \
      --resource-group davidVMLinux_group \
      --query "name" \
      --output tsv >/dev/null

    if [ $? -eq 0 ]; then
      echo "Storage account found. Importing it into Terraform state..."
      terraform import azurerm_storage_account.static \
        /subscriptions/<subscription_id>/resourceGroups/davidVMLinux_group/providers/Microsoft.Storage/storageAccounts/davidinsidernodejsapp
      STORAGE_CREATED="false"
    else
      echo "Storage account does not exist. Terraform will create it."
      STORAGE_CREATED="true"
    fi

    terraform plan -out=tfplan
    terraform apply -auto-approve tfplan

    if [ "$STORAGE_CREATED" = "true" ]; then
      dos2unix assign_role.sh
      chmod +x ./assign_role.sh
      bash ./assign_role.sh
    else
      echo "Skipping role assignment because the storage account already existed."
    fi
  displayName: 'Terraform: Provision Storage Account + Conditional Role Assignment'
Update these values before running it:
terraformDir
storage account name
resource group name
subscription ID
Terraform import resource ID
Here’s the role assignment script:
#!/bin/bash

SP_OBJECT_ID="######"
RESOURCE_GROUP="davidVMLinux_group"
STORAGE_ACCOUNT="davidinsidernodejsapp"
SUBSCRIPTION_ID="######"

echo "Assigning Storage Blob Data Contributor to: $SP_OBJECT_ID"

az role assignment create \
  --assignee "$SP_OBJECT_ID" \
  --role "Storage Blob Data Contributor" \
  --scope "/subscriptions/$SUBSCRIPTION_ID/resourceGroups/$RESOURCE_GROUP/providers/Microsoft.Storage/storageAccounts/$STORAGE_ACCOUNT"

if [ $? -eq 0 ]; then
  echo "Role assignment successful."
else
  echo "Role assignment failed."
  exit 1
fi
Replace:
SP_OBJECT_ID
RESOURCE_GROUP
STORAGE_ACCOUNT
SUBSCRIPTION_ID
with your service principal and Azure resource values.
It assigns:
Storage Blob Data Contributor
That gives the pipeline identity permission to upload site files to the $web container.
7. Building the Node.js app pipeline
In Azure DevOps I created a new pipeline.
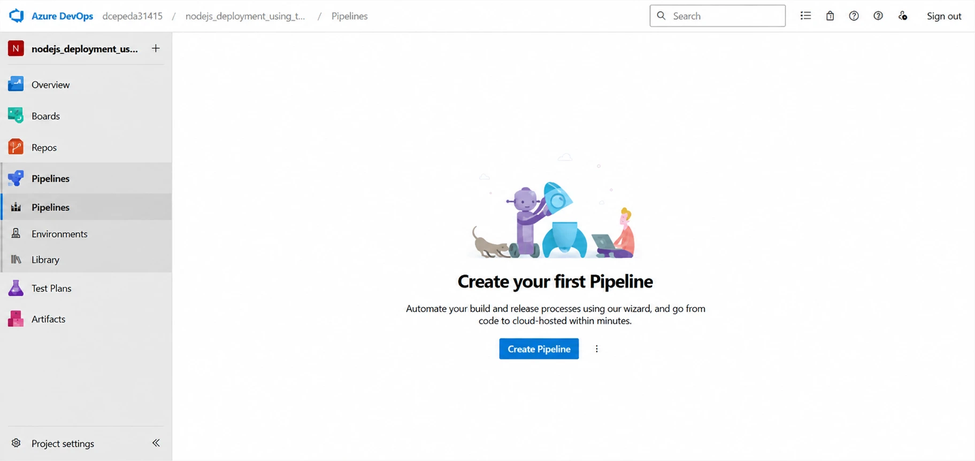
Starting creation of an Azure DevOps pipeline
I picked Azure Repos Git as the source.
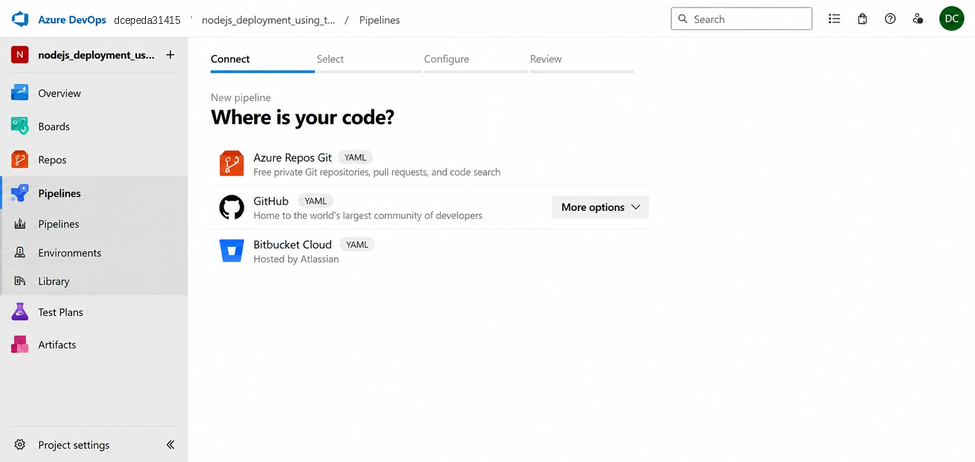
Selecting Azure Repos Git as the source
Then the repo with the Node.js app.
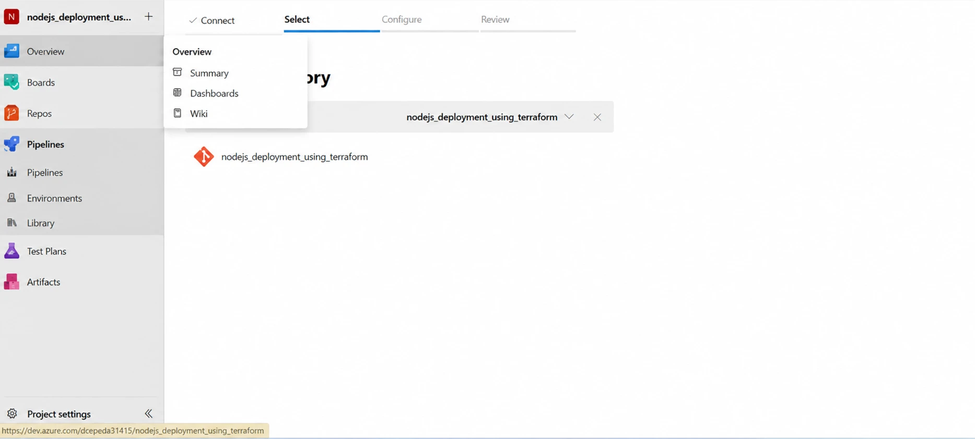
Selecting the repository for the Node.js pipeline
When it asked how to configure the pipeline, I used the YAML file in the repo. I started from a Node.js template.
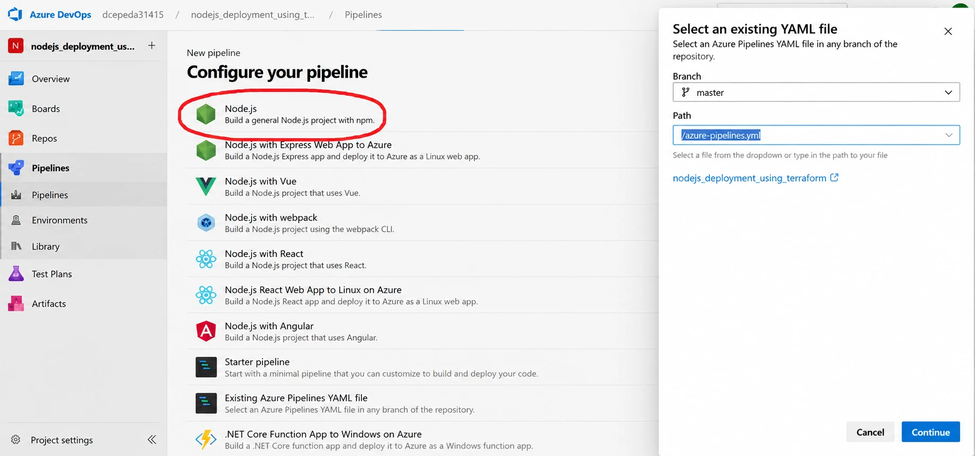
Choosing a starter Node.js YAML pipeline
I selected the YAML file:
azure-pipelines.yml
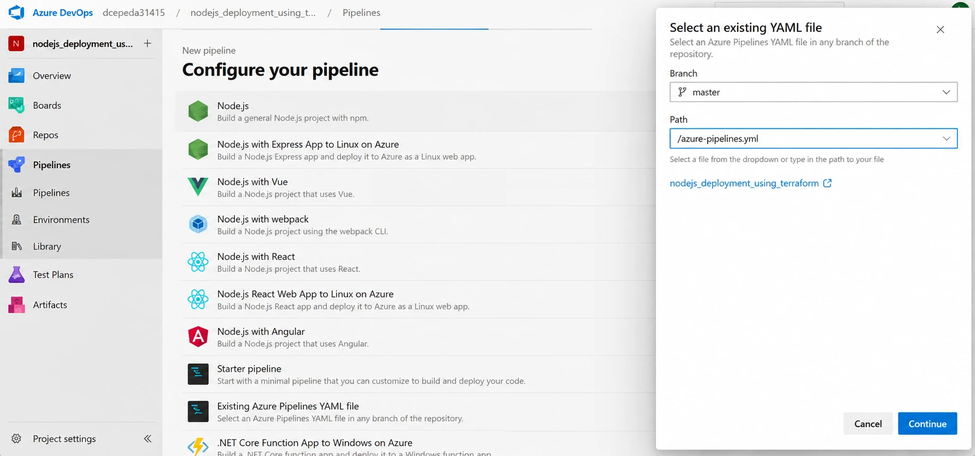
Selecting the Azure Pipelines YAML file
The app pipeline only runs after the infrastructure pipeline succeeds.
Here’s the YAML:
trigger:
- none

resources:
  pipelines:
    - pipeline: terraformInfra
      source: terraform_infra_pipeline
      trigger:
        branches:
          include:
            - master

pool:
  name: Default

stages:
- stage: DEPLOYAPP
  displayName: "Deploy Static App"
  condition: succeeded()
  jobs:
  - job: UploadToBlob
    displayName: "Upload Static Site to Blob Storage"
    steps:
    - task: NodeTool@0
      inputs:
        versionSpec: '20.x'
      displayName: "Install Node.js 20.x"

    - script: |
        npm install
        npm run build
      displayName: "Install dependencies & Build project"

    - task: CopyFiles@2
      inputs:
        contents: |
          **/*
        targetFolder: '$(Build.ArtifactStagingDirectory)'
      displayName: "Copy build output to Artifact Staging"

    - task: PublishBuildArtifacts@1
      inputs:
        pathToPublish: '$(Build.ArtifactStagingDirectory)'
        artifactName: 'node-website-artifact'
        publishLocation: 'Container'
      displayName: "Publish Build Artifact"

    - task: AzureCLI@2
      inputs:
        azureSubscription: 'MyAzureConnection'
        scriptType: 'bash'
        scriptLocation: 'inlineScript'
        inlineScript: |
          az storage blob upload-batch \
            --account-name davidinsidernodejsapp \
            --destination '$web' \
            --source "$(Build.ArtifactStagingDirectory)" \
            --overwrite true \
            --auth-mode login
      displayName: "Upload Website to Azure Blob Storage"
Values to change for your setup:
terraform_infra_pipeline
master
Default
MyAzureConnection
davidinsidernodejsapp
The app pipeline’s service connection has to match the one I created earlier.
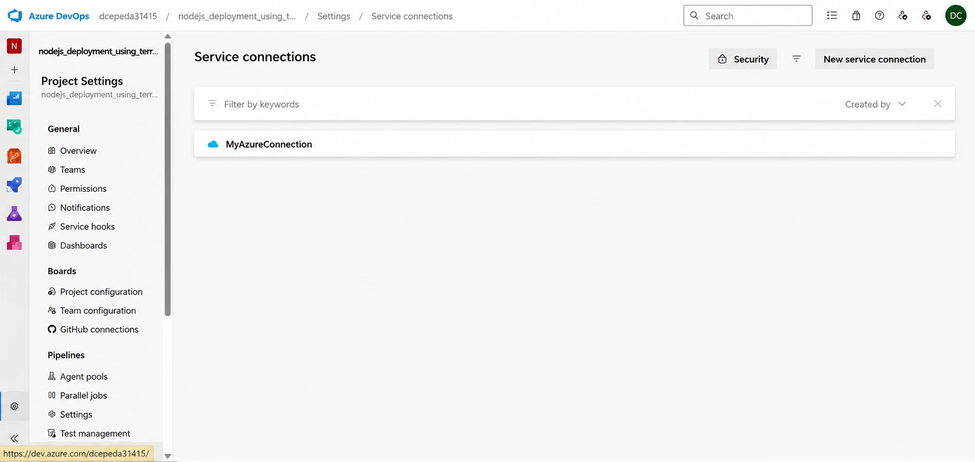
The MyAzureConnection service connection in Project Settings
I ran the pipeline. Azure DevOps asked for permission the first time one pipeline referenced another resource.
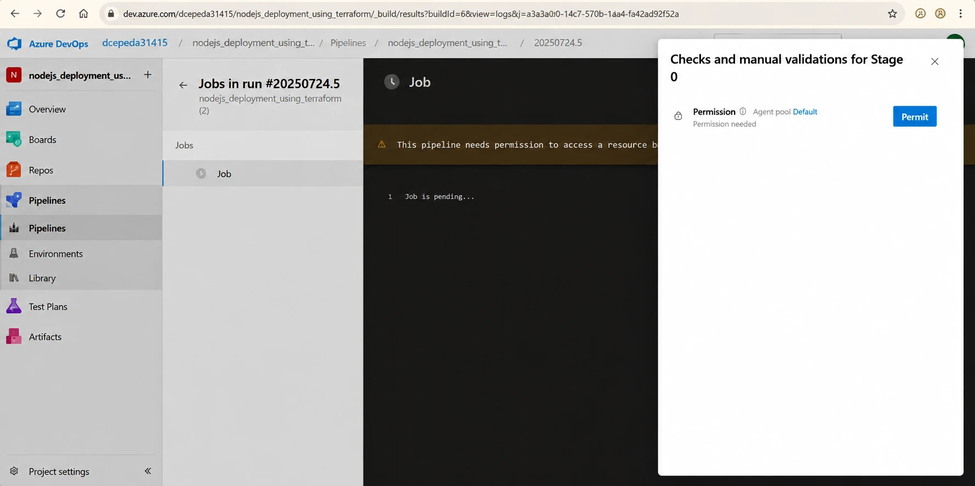
First-run permission prompt for the pipeline
After I approved it, the pipeline built the project and uploaded the output.
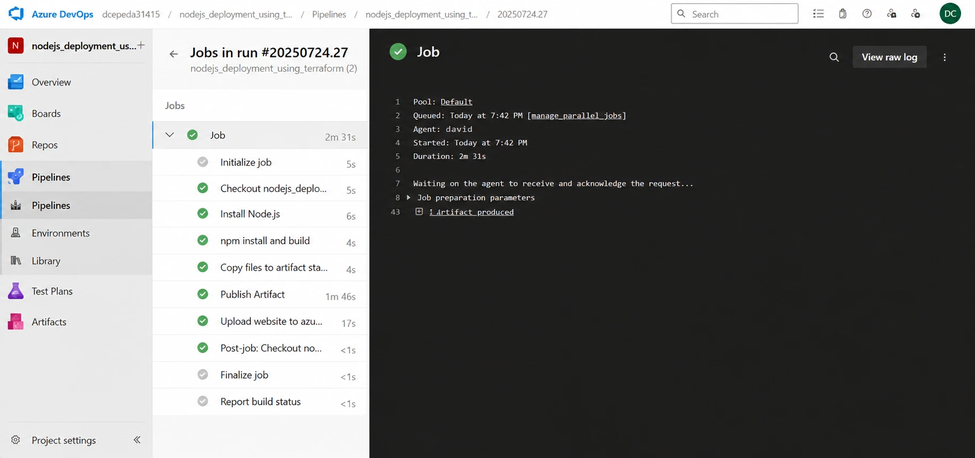
Node.js deployment pipeline running successfully
I checked that the files showed up in the $web container.
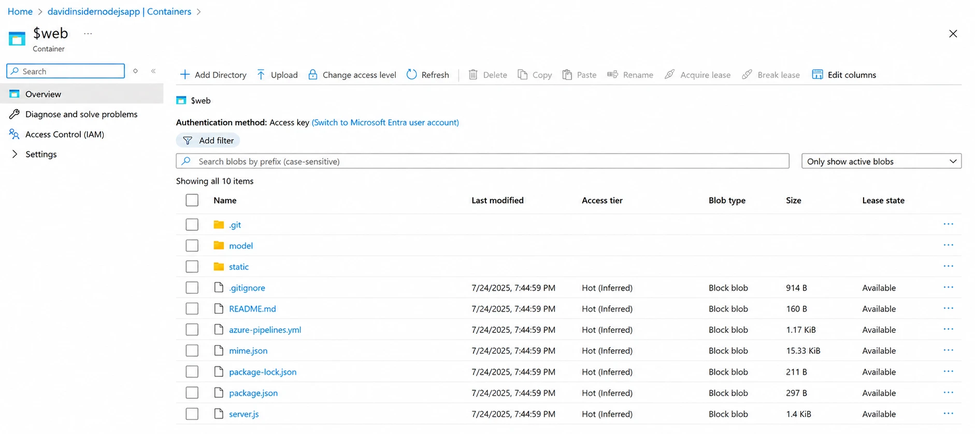
Static website artifacts uploaded to the $web container
Files like index.html and error.html need to be at the static website root.
8. Connecting the domain to Cloudflare
Next I put Cloudflare in front of the site.
I added the root domain to Cloudflare.
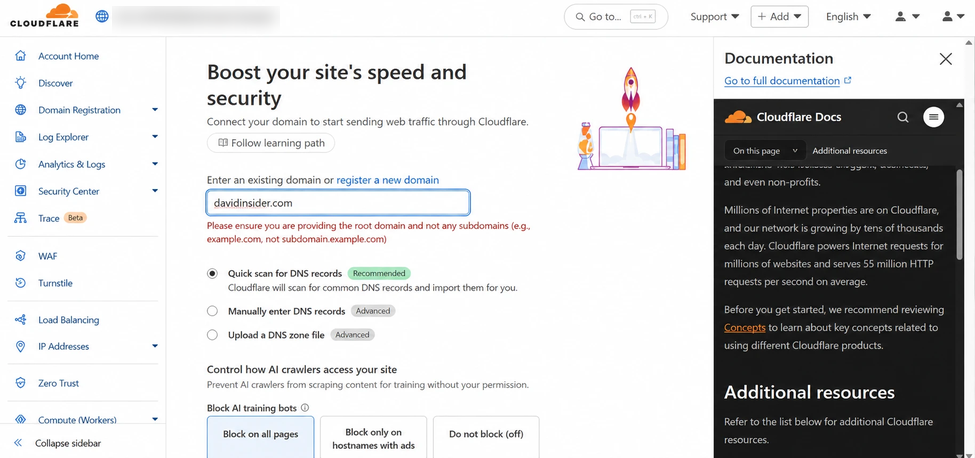
Adding the domain to Cloudflare
I picked the Free plan.
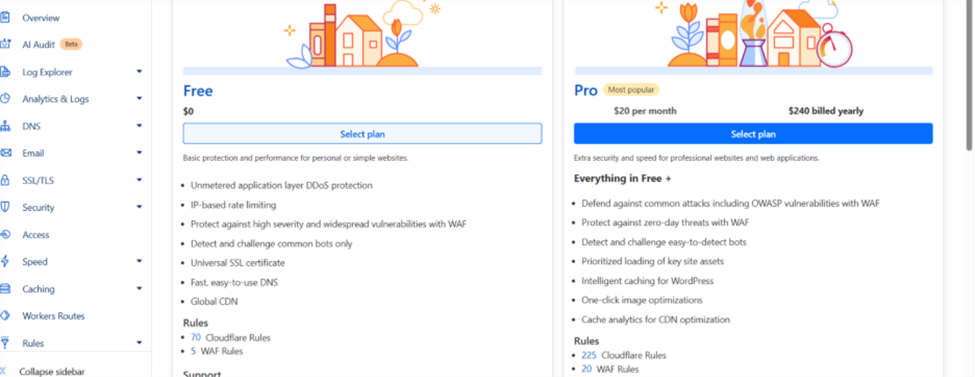
Selecting the Cloudflare Free plan
Cloudflare gave me two nameservers.
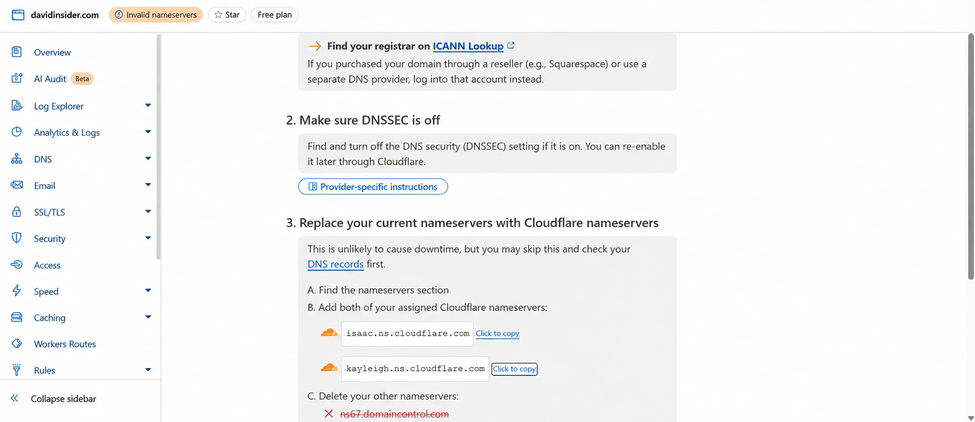
Cloudflare-assigned authoritative nameservers
My registrar is GoDaddy, so I opened its nameserver settings.
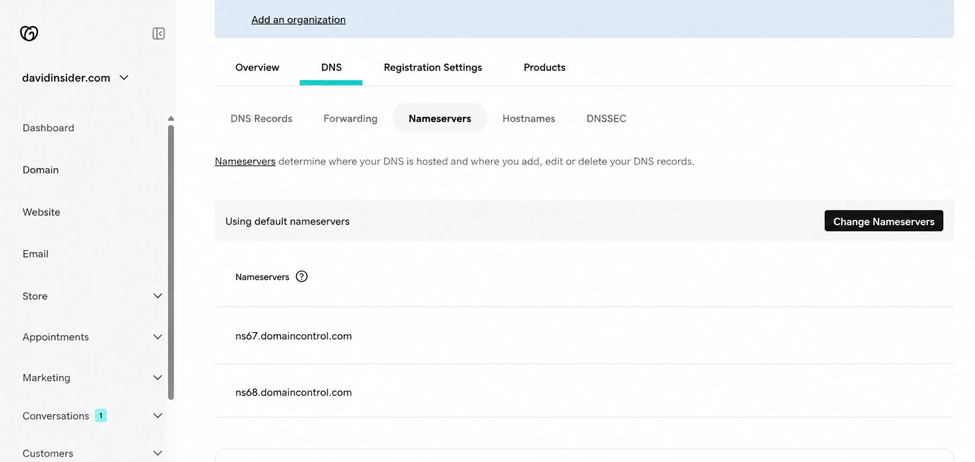
Changing nameservers in GoDaddy
I chose custom nameservers.
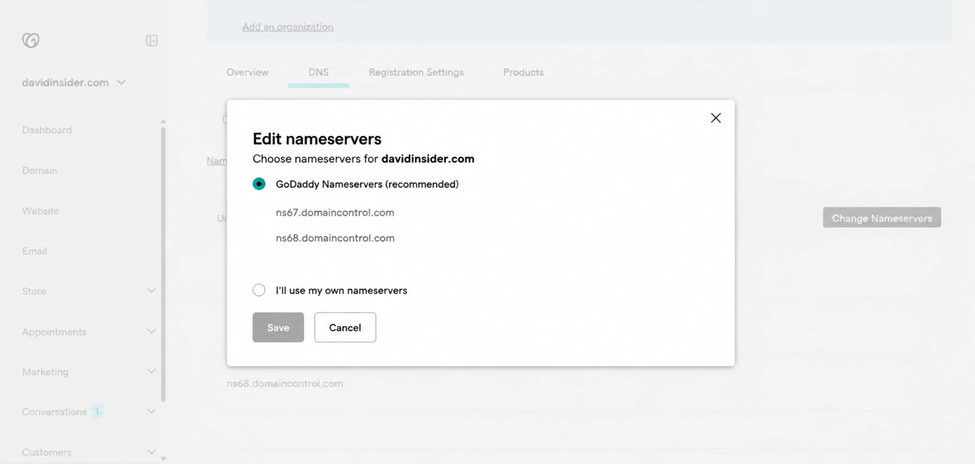
GoDaddy nameserver options before switching to custom nameservers
I entered Cloudflare’s two nameservers and saved.
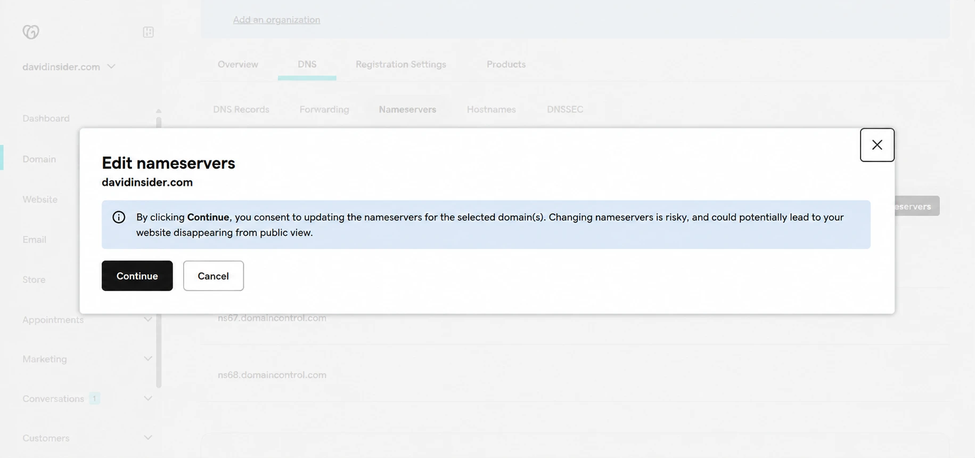
Nameserver update request in progress
I went back to Cloudflare DNS and created a CNAME for the site’s subdomain. Cloudflare still showed the nameservers as pending at that point.
Mine looked like this:
Type:   CNAME
Name:   davidinsidernodejsapp1
Target: <Azure Storage static website hostname>
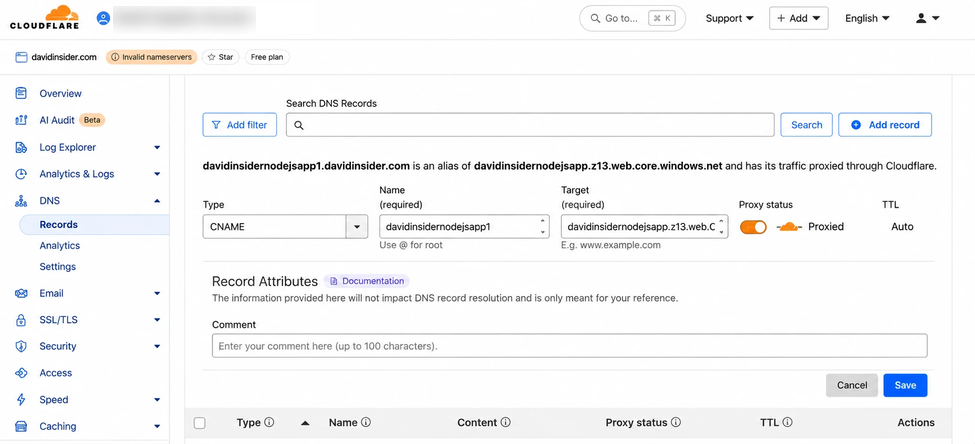
Cloudflare DNS CNAME record for the Azure static website
9. Blocking countries with a Cloudflare rule
I opened Cloudflare’s security rules and created one.
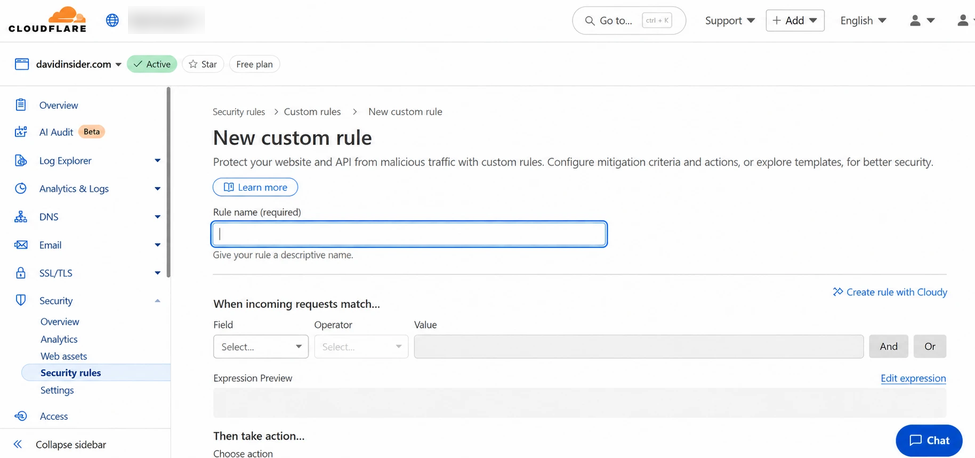
Creating a Cloudflare security rule
I named it:
block-india-saudi
I added country conditions for India and Saudi Arabia joined with OR.
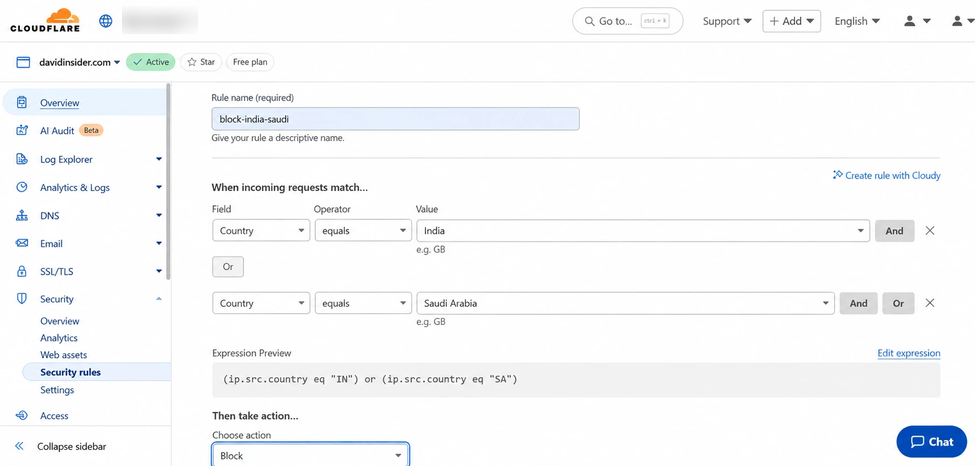
Country match conditions for India and Saudi Arabia
I set the action to Block and deployed it.
Matching requests get denied at Cloudflare before they ever reach Azure.
10. Redirecting countries to an error page
I also tried another option. Instead of blocking, you can send certain countries to a specific page.
I opened Cloudflare Rules and created a redirect rule.
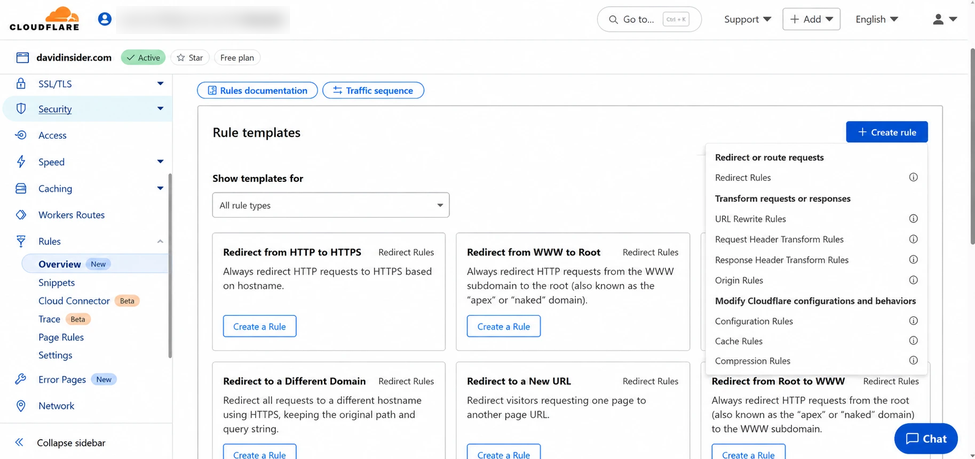
Creating a Cloudflare redirect rule
I used a custom filter expression for the countries.
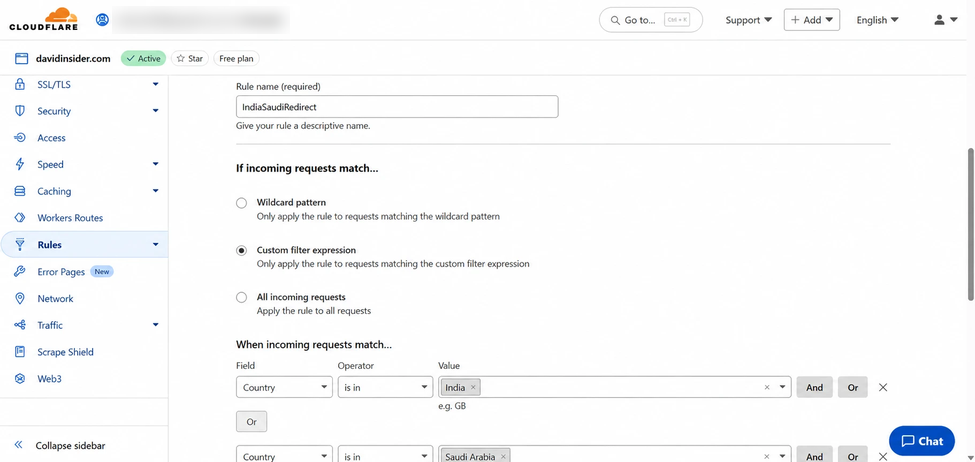
Country-based redirect filter expression
Then set a static redirect to the error page with this status:
302 Temporary Redirect
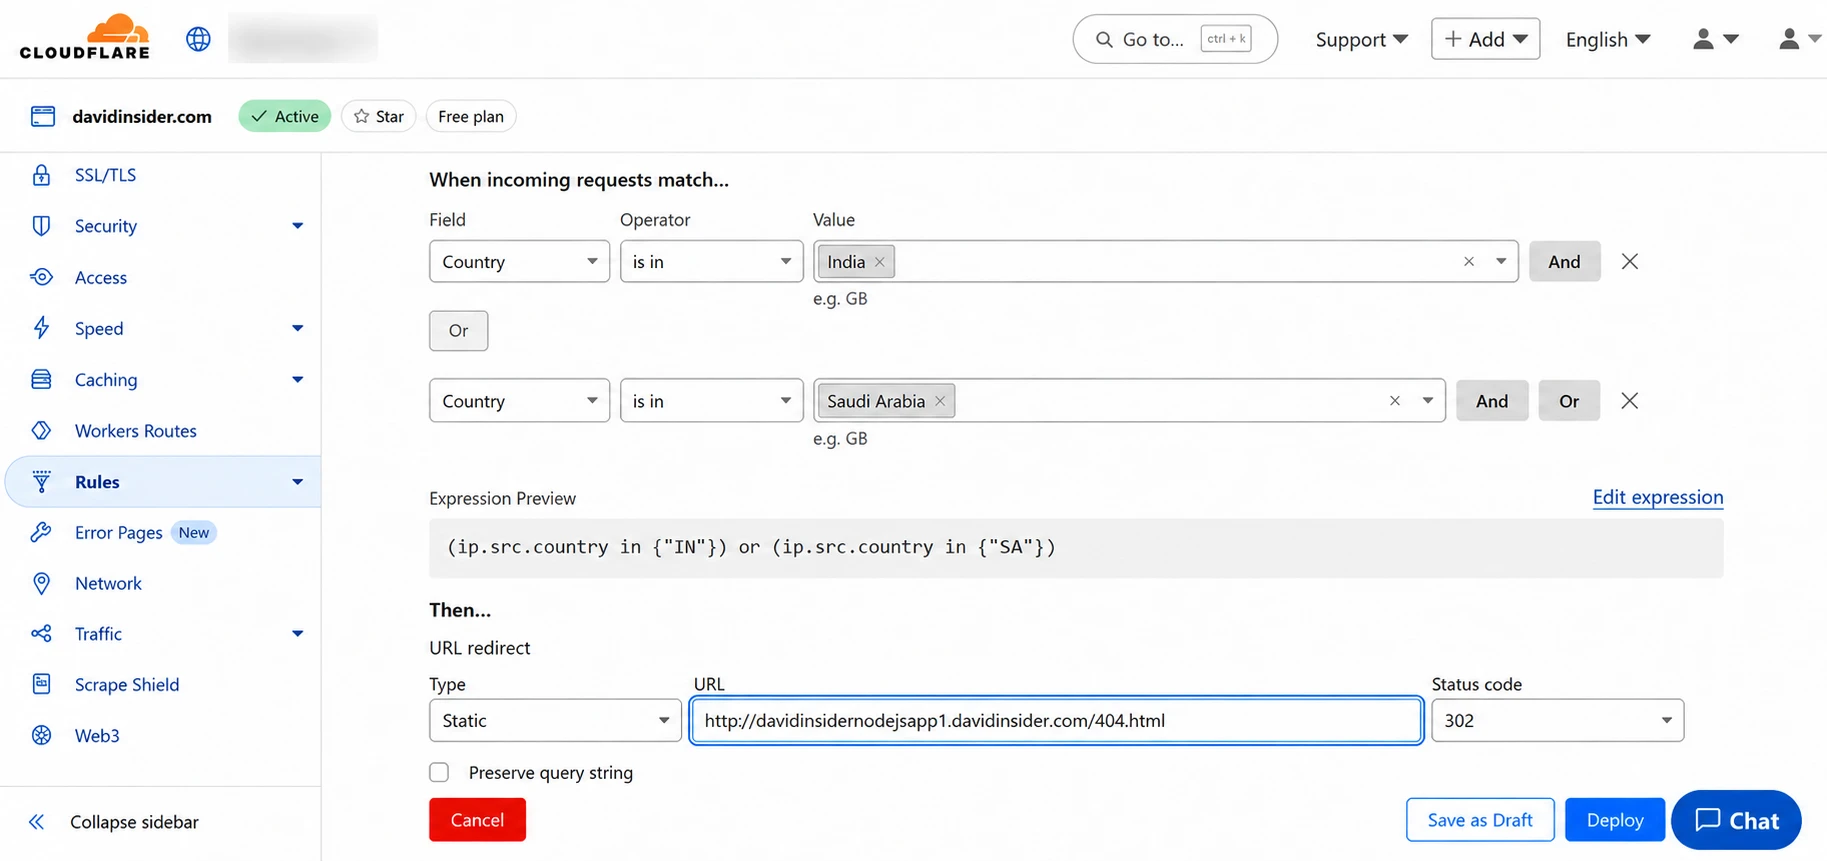
Static 302 redirect configuration
That sends people to a page I control instead of a generic access denied.
11. Putting Azure Front Door in front
Then I added Azure Front Door. Users reach the app through a Front Door endpoint instead of the storage hostname.
First I opened the storage account’s networking settings and turned off public network access.
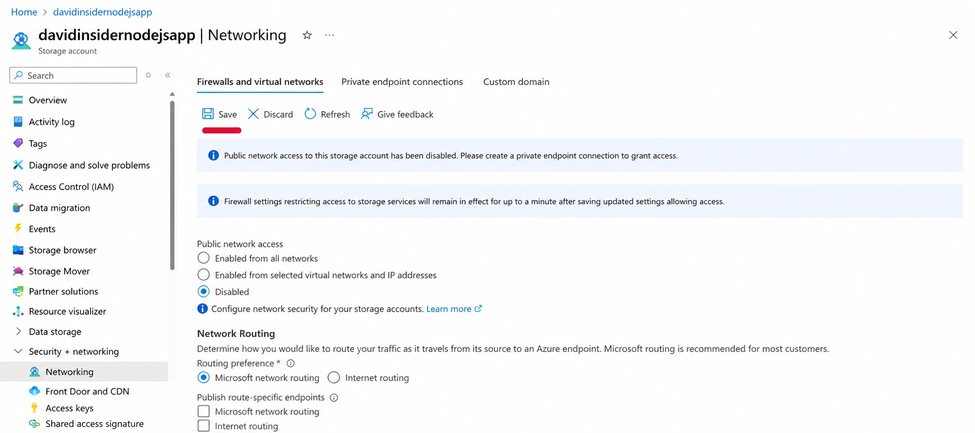
Disabling public network access on the Azure Storage account
Then I opened Front Door and CDN and started the setup.
I set the origin host to the storage static website.
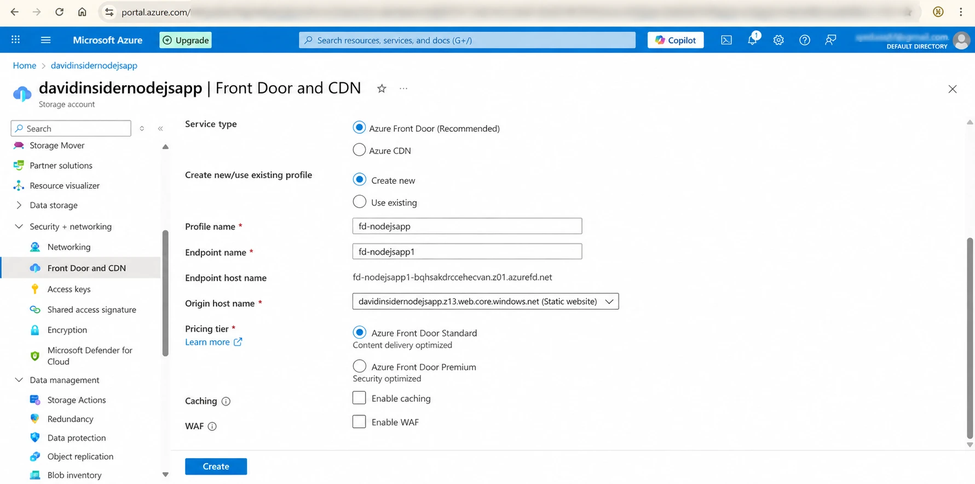
Creating an Azure Front Door/CDN endpoint
Once Front Door gave me an endpoint, I pointed the subdomain’s DNS at it.
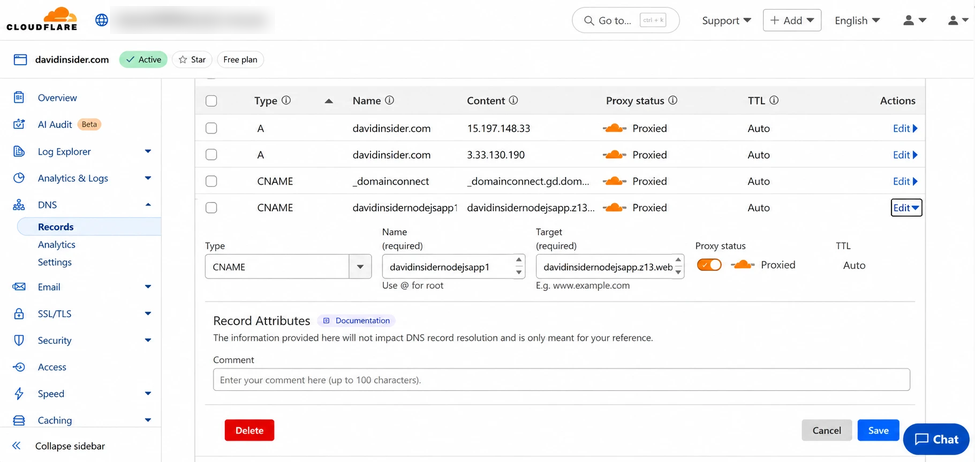
Editing the subdomain CNAME record in Cloudflare
12. Moving DNS to Azure DNS
I also moved DNS hosting to Azure DNS.
I created an Azure DNS zone for the domain.
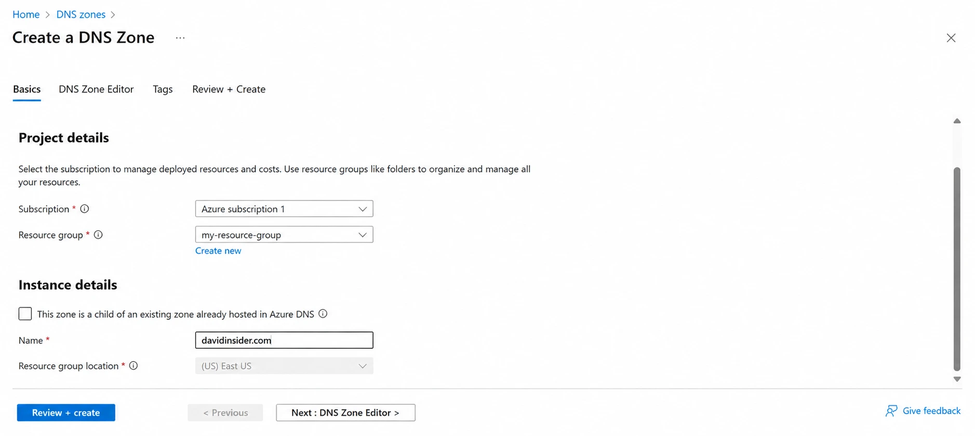
Creating an Azure DNS zone
Azure gave me nameservers for the zone.
Azure DNS nameserver values
In GoDaddy I swapped in the Azure DNS nameservers.
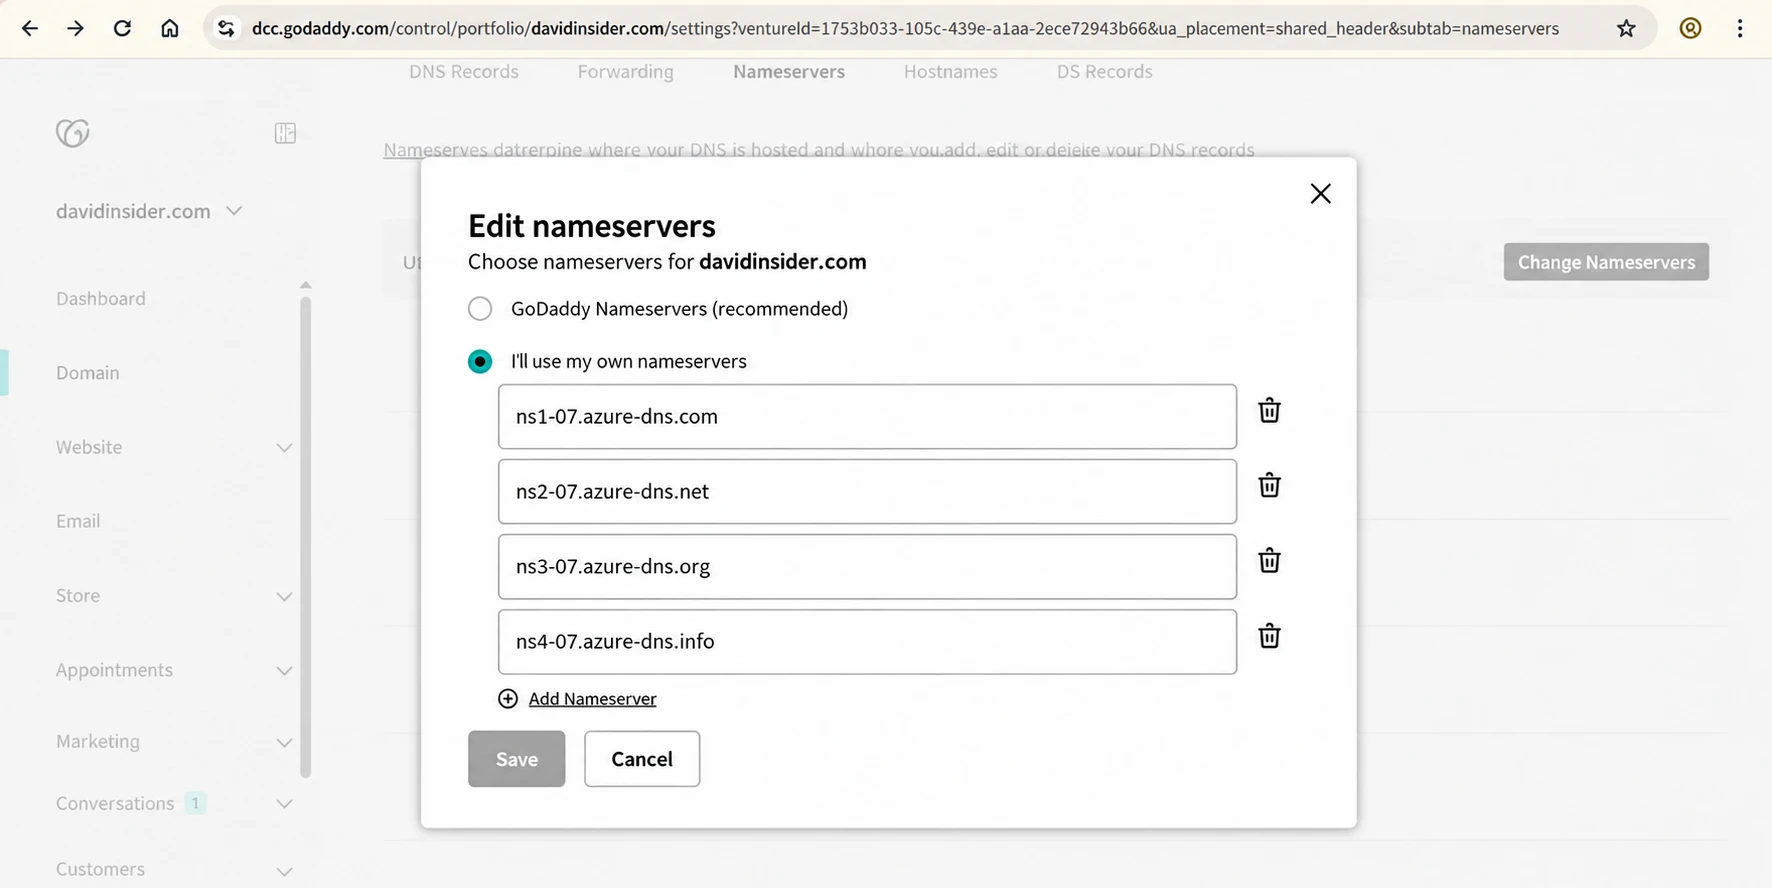
Changing GoDaddy nameservers to Azure DNS
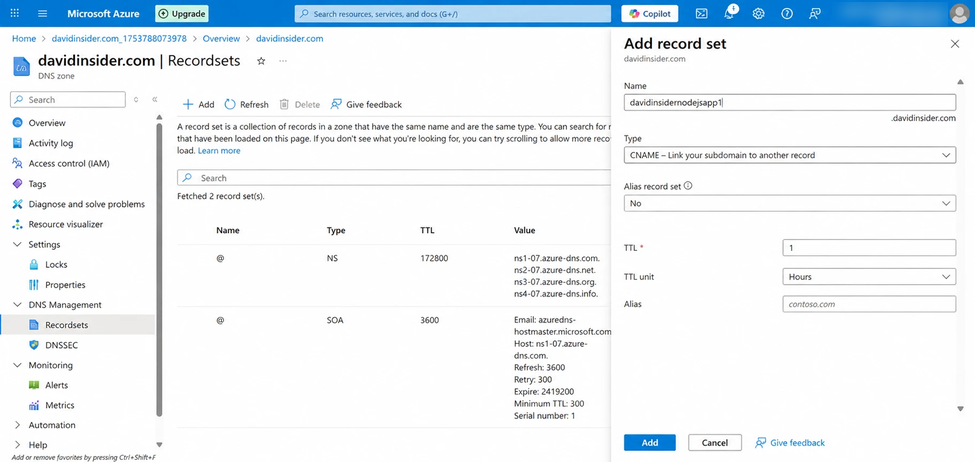
Inside the zone I created a CNAME for the app subdomain.
Mine looked like this:
Name:  davidinsidernodejsapp1
Type:  CNAME
TTL:   3600
Alias: <static site or Front Door hostname>
13. Creating the Front Door profile
I searched for Front Door and CDN profiles and started a custom Front Door deployment.
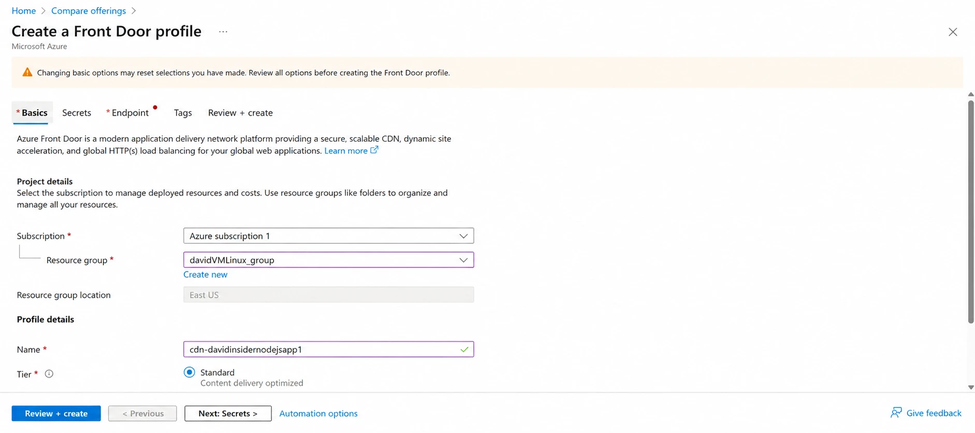
Starting custom Azure Front Door creation
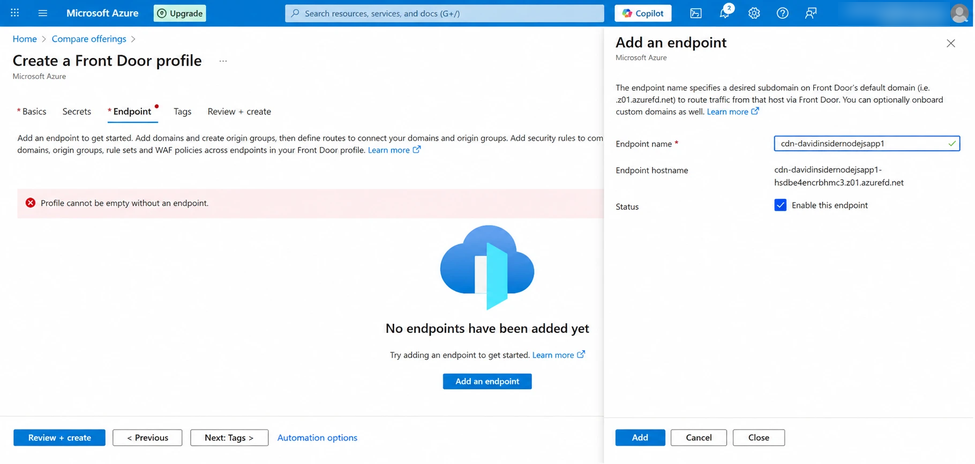
I picked the subscription and resource group and named the profile.
Added the endpoint details.
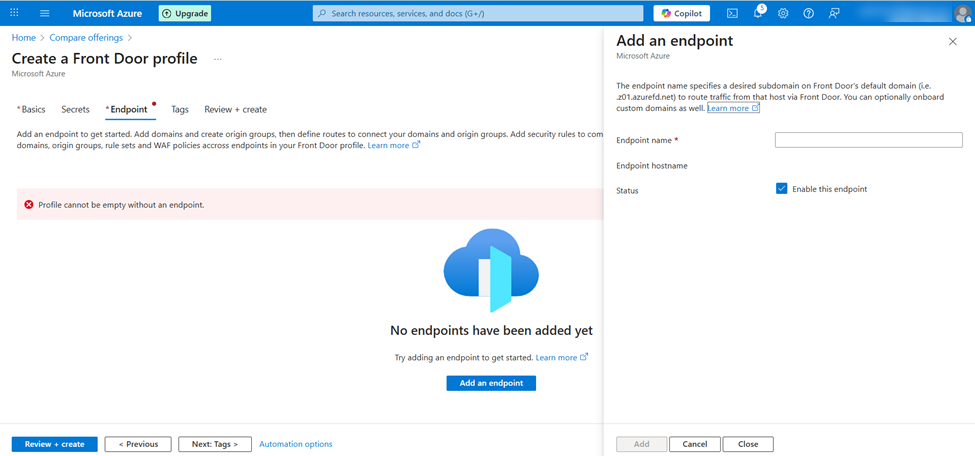
Configuring the Front Door endpoint
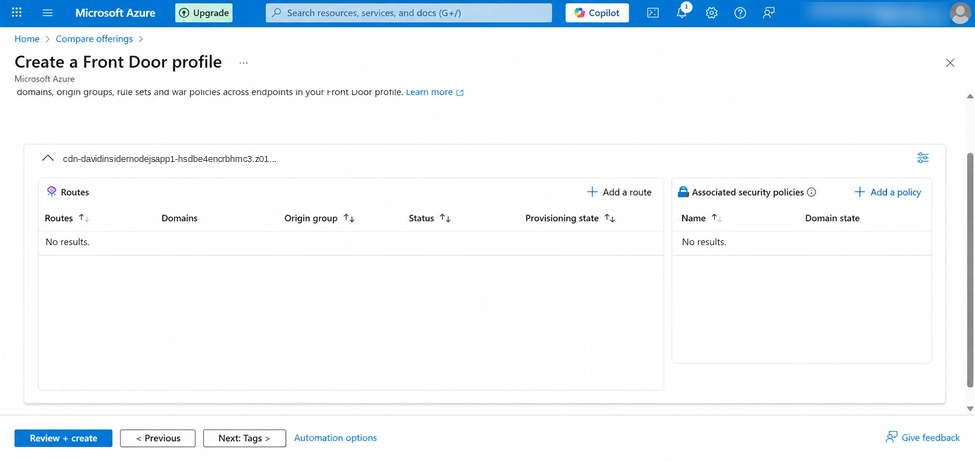
Created a route.
Adding a route to the Front Door profile
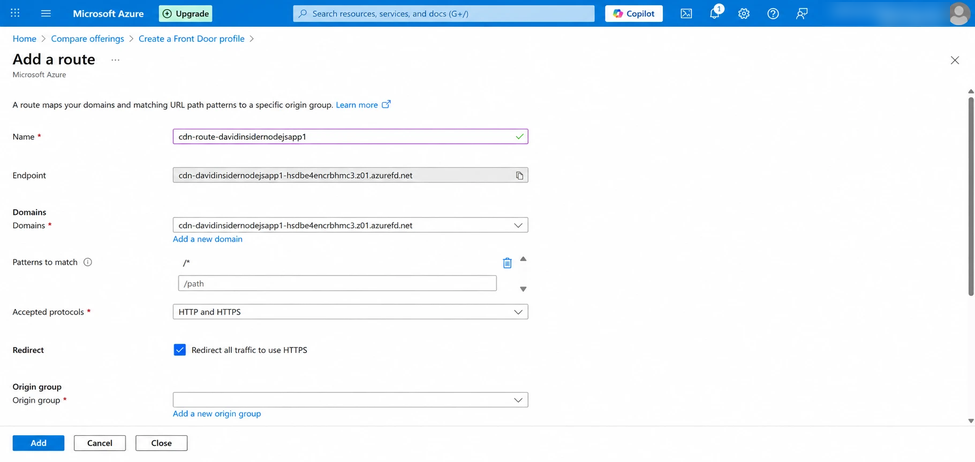
Named the route and linked it to an origin group.
Front Door route configuration
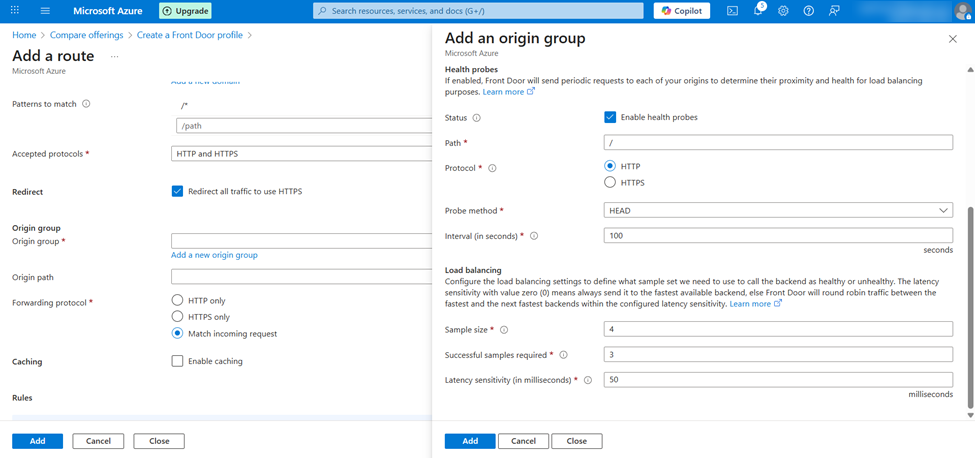
Created a new origin group.
Creating an origin group
Named it.
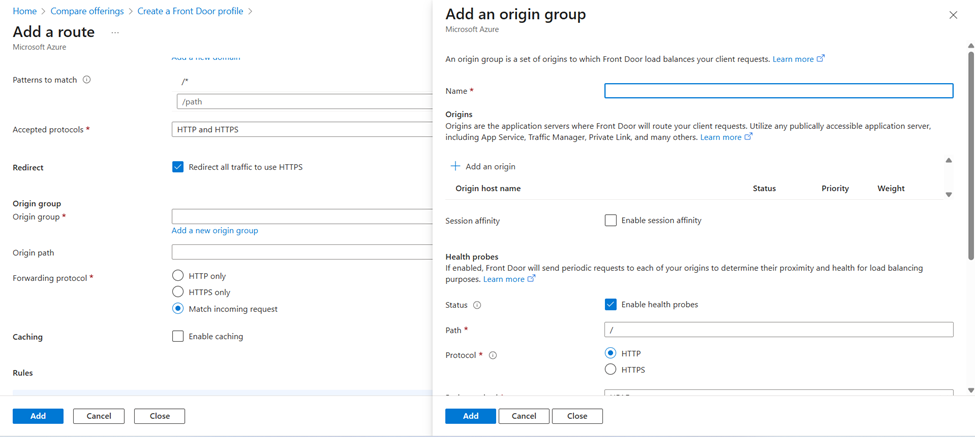
Naming the origin group
Added an origin.
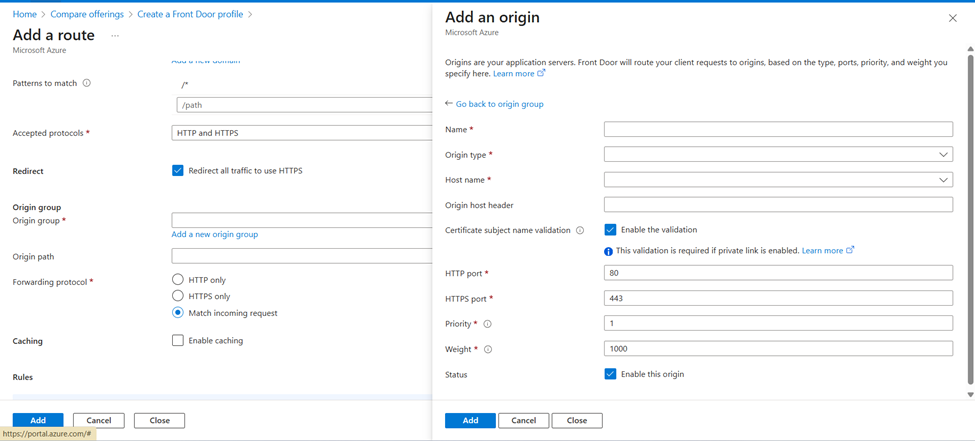
Adding a new Front Door origin
For origin type I picked Azure Storage Static Website.
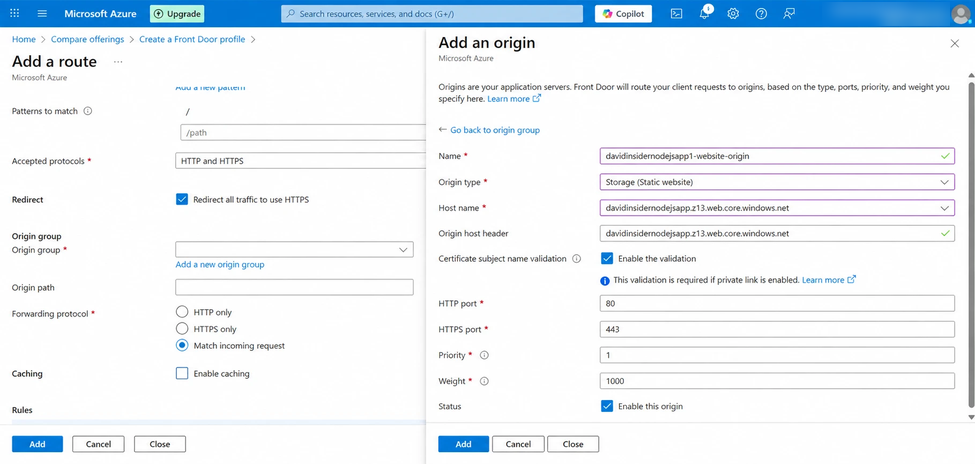
Selecting Azure Storage Static Website as the origin type
Azure found the static website hostname. I added it as the origin.
Adding the Azure Storage origin
I confirmed it showed up in the origin group.
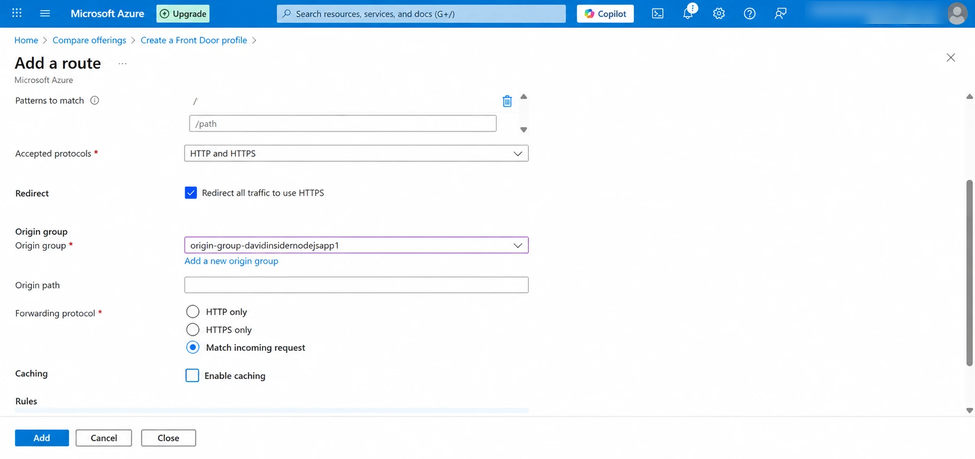
Front Door origin group with origin attached
Reviewed the config.
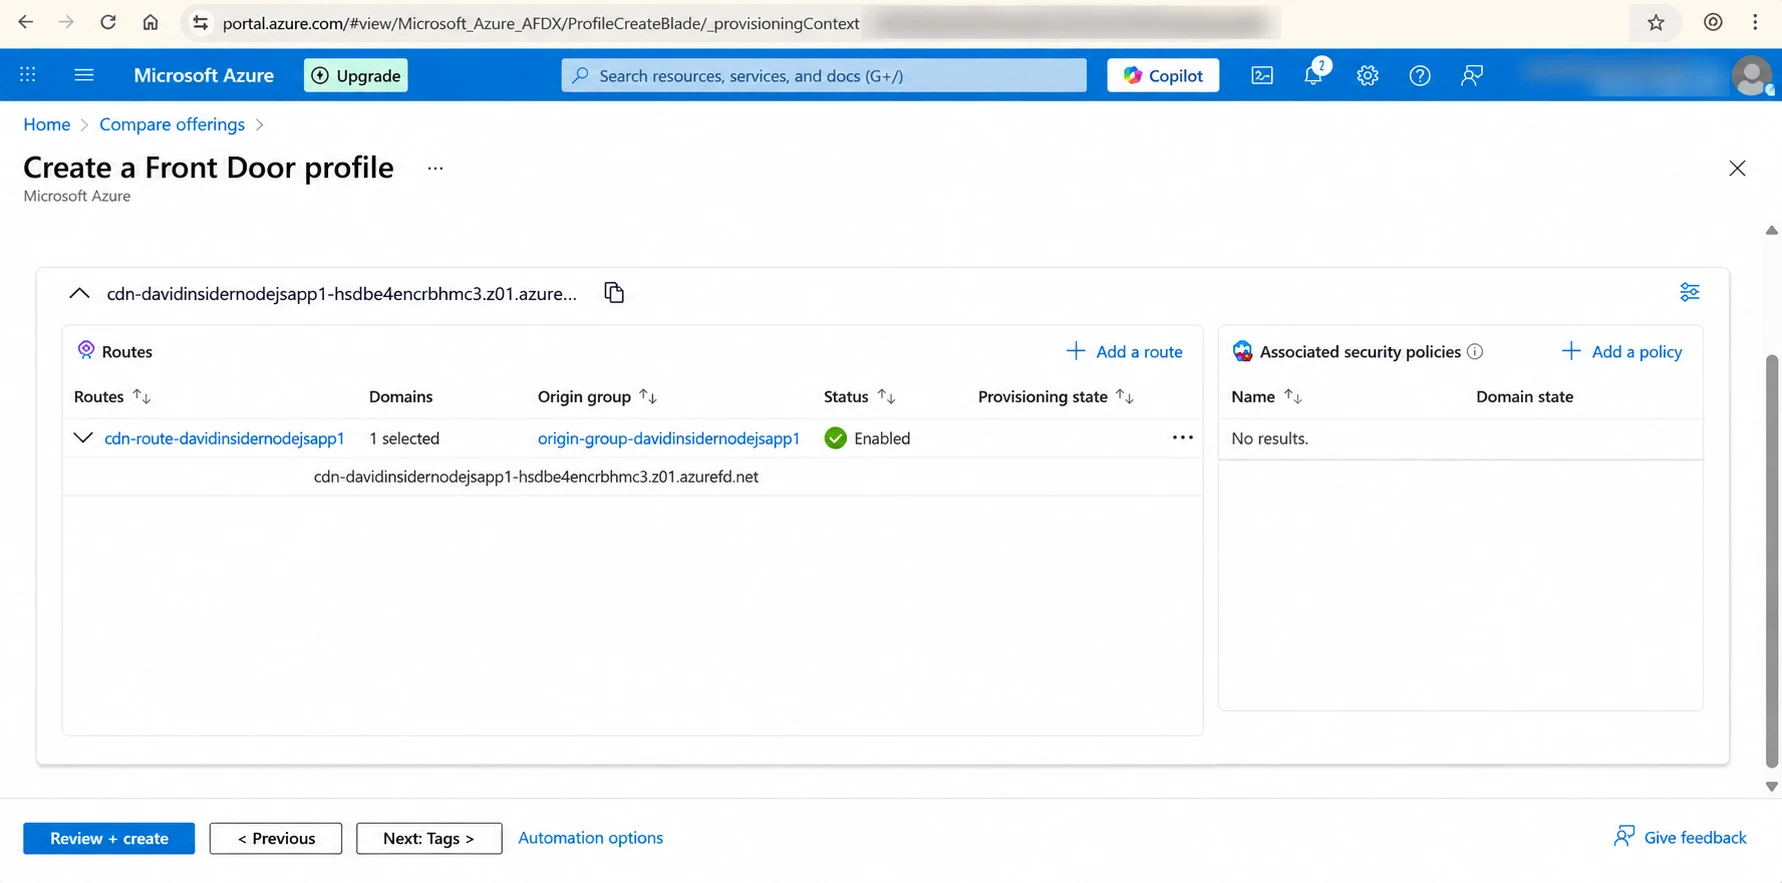
Review and create for the Front Door profile
Validation passed, so I created the profile.
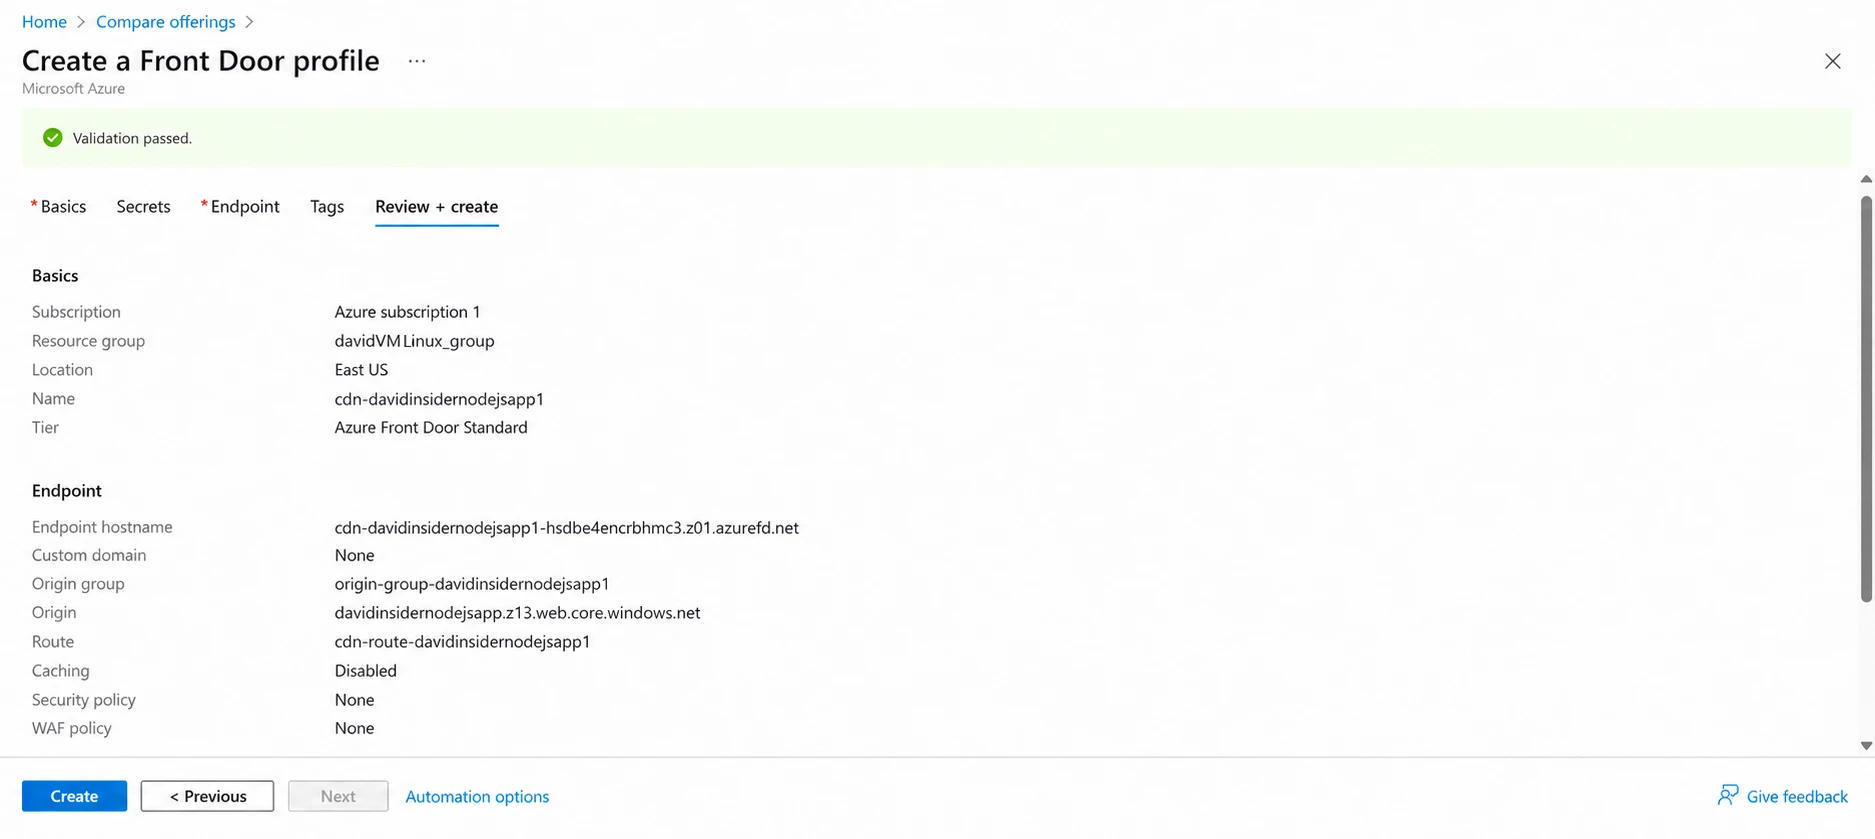
Successful Front Door validation before deployment
14. Pointing the subdomain at Front Door
For my custom hostname:
davidinsidernodejsapp1.davidinsider.com
I edited its CNAME in the DNS zone and replaced the old target with the Front Door/CDN hostname.
Now traffic flows like this:
User
  │
  ▼
Custom domain
  │
  ▼
DNS
  │
  ▼
Azure Front Door
  │
  ▼
Azure Storage static website
15. Geo-filtering in Azure CDN/Front Door
Azure has its own geo-filtering option too.
I opened the CDN/Front Door endpoint and found the geo-filtering settings. In my setup this feature came with the Standard Microsoft CDN tier.
I set:
Action: Block
Countries:
  India
  Saudi Arabia
Relative path: /*
That applies the block to the whole site.
Final architecture
Here’s everything together:
Terraform
   │
   ▼
Azure Storage
   │
   └── $web static website container
          ▲
          │
Azure DevOps Node.js pipeline
          ▲
          │
Azure DevOps Terraform pipeline
          │
          ├── Self-hosted Linux agent
          └── Azure service connection

Public traffic
   │
   ▼
Custom domain
   │
   ├── Cloudflare rules / redirects
   │
   └── Azure DNS
          │
          ▼
     Azure Front Door
          │
          ▼
 Azure Storage website
Wrapping up
I kept infrastructure and app deployment separate but chained them together.
Terraform owns the storage infrastructure. Azure DevOps handles automation. The self-hosted agent runs the jobs. The service connection gives the pipeline access to Azure. The Node.js pipeline only builds after the infrastructure pipeline succeeds, then uploads the files to the static website container.
Cloudflare and Front Door add DNS, edge routing, geo-filtering, and custom domain control. Now I have a repeatable path from infrastructure code to a public website. No more uploading each release by hand.