Setting Up Azure File Sync
I set up Azure File Sync so a Windows Server could keep serving a normal local file share while Azure Files held the central copy. I also turned on cloud tiering. With tiering, every file still shows up on the server, but rarely used content can live in Azure.
The design is simple:
Windows Server local path
        |
        | Server endpoint
        v
     Sync group
        |
        | Cloud endpoint
        v
  Azure file share
Azure services and supported OS versions change. Before you try this, check Microsoft’s current Azure File Sync planning guide and agent release notes. Don’t rely on an old compatibility list or download link.
What I needed
- An Azure subscription
- A supported Windows Server with current updates
- Windows PowerShell 5.1 or later
- An Azure region that supports Azure File Sync
- Permission to create Azure resources and register the server
- A non-system data volume if cloud tiering will be enabled
1. Getting the server ready
I opened an elevated PowerShell session and confirmed the server met the Azure File Sync requirements.
Some older instructions turn off Internet Explorer Enhanced Security Configuration during registration. Only do that if registration really needs it. Turn it back on right after. There’s no reason to leave a security control off.
2. Installing the agent
I downloaded the agent for my Windows Server version and installed it from elevated PowerShell.
Start-Process -FilePath ".\StorageSyncAgent.msi" -ArgumentList "/quiet" -Wait
The agent adds a Windows service that watches for changes. It also adds the file system filter for sync and tiering, plus tools for admin work and troubleshooting.
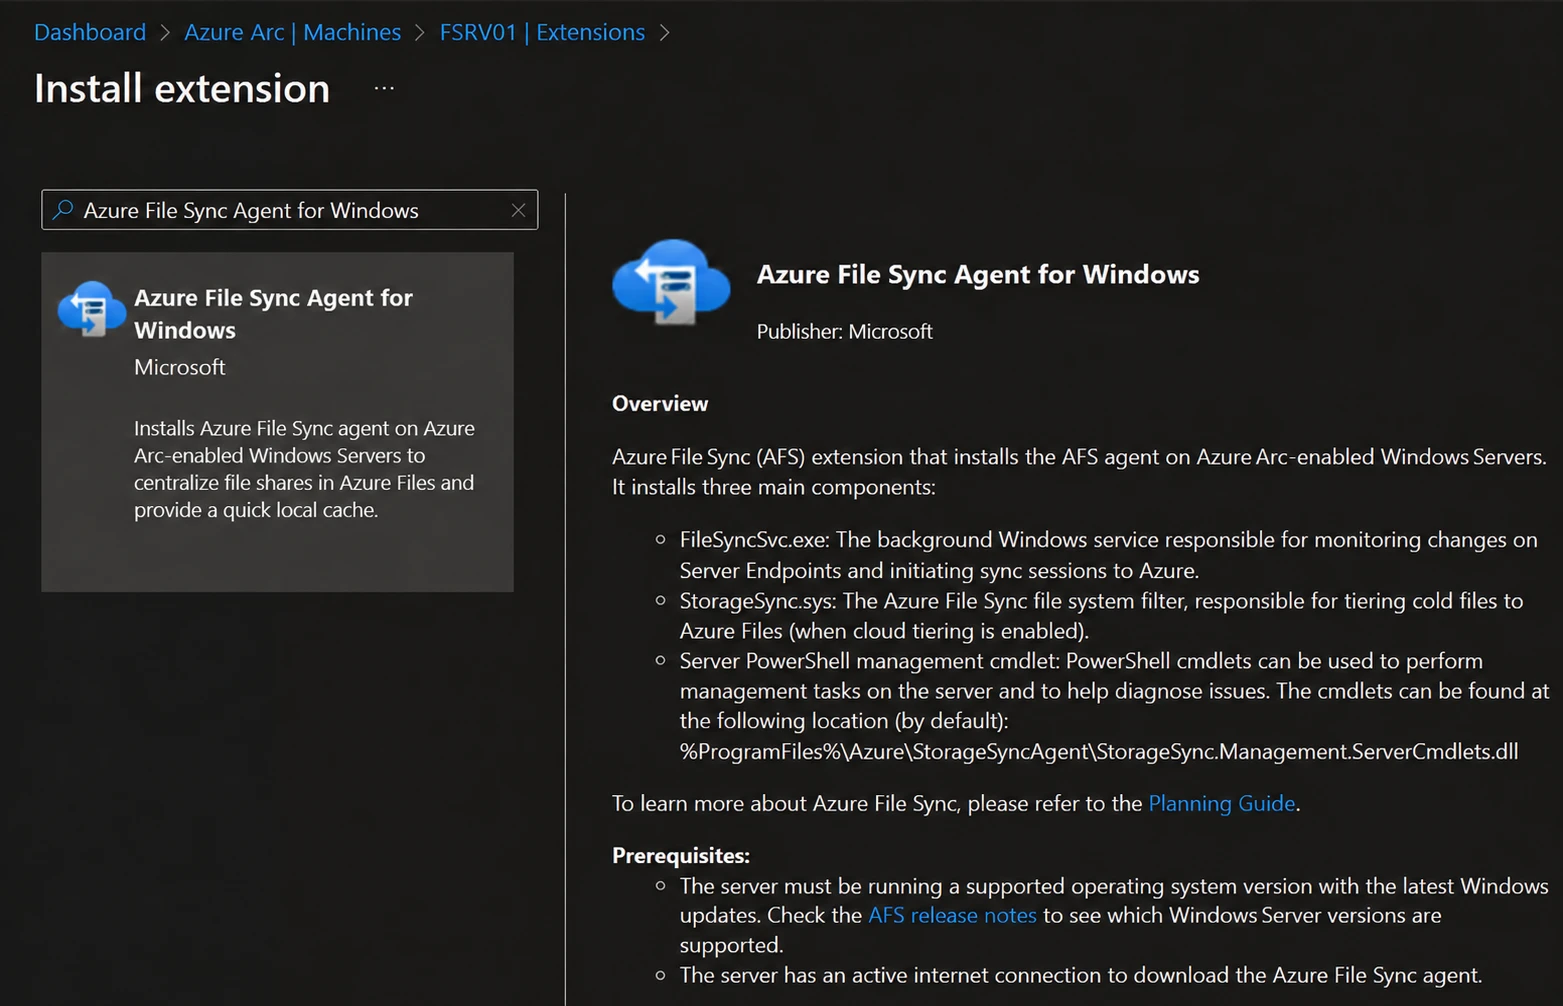
On an Azure Arc-enabled Windows Server, the Azure File Sync Agent extension can install it for you.
Azure File Sync Agent extension for an Azure Arc-enabled Windows Server
3. Creating the Storage Sync Service
Next I signed in to Azure and created a resource group and a Storage Sync Service. I used the Az PowerShell module:
$subscriptionName = Read-Host "Enter the Azure subscription name"
Connect-AzAccount -Subscription $subscriptionName

$region = Read-Host "Enter the Azure region"
$resourceGroup = Read-Host "Enter the resource group name"
$syncServiceName = Read-Host "Enter the Storage Sync Service name"

New-AzResourceGroup -Name $resourceGroup -Location $region

New-AzStorageSyncService `
    -ResourceGroupName $resourceGroup `
    -Name $syncServiceName `
    -Location $region
I kept that session open so the next steps could reuse the variables and sign-in.
4. Registering the server
I registered the server with the Storage Sync Service. This sets up the trust Azure File Sync needs to manage sync.
Register-AzStorageSyncServer `
    -StorageSyncServiceName $syncServiceName `
    -ResourceGroupName $resourceGroup
In a failover cluster, register every node.
5. Creating the storage account and file share
Then I created a general-purpose v2 storage account and a file share. Storage account names have to be globally unique. Only lowercase letters and numbers.
$storageAccountName = Read-Host "Enter a globally unique storage account name"

$storageAccount = New-AzStorageAccount `
    -Name $storageAccountName `
    -ResourceGroupName $resourceGroup `
    -Location $region `
    -SkuName Standard_LRS `
    -Kind StorageV2 `
    -EnableHttpsTrafficOnly $true

$fileShareName = Read-Host "Enter the Azure file share name"
$fileShare = New-AzStorageShare `
    -Context $storageAccount.Context `
    -Name $fileShareName
Standard_LRS was enough here. In production, pick redundancy, performance, backup, and networking based on your recovery and uptime needs.
6. Creating the sync group
A sync group has one cloud endpoint and one or more server endpoints. I created it in the Storage Sync Service:
$syncGroupName = Read-Host "Enter the sync group name"

New-AzStorageSyncGroup `
    -ResourceGroupName $resourceGroup `
    -SyncGroupName $syncGroupName `
    -StorageSyncService $syncServiceName
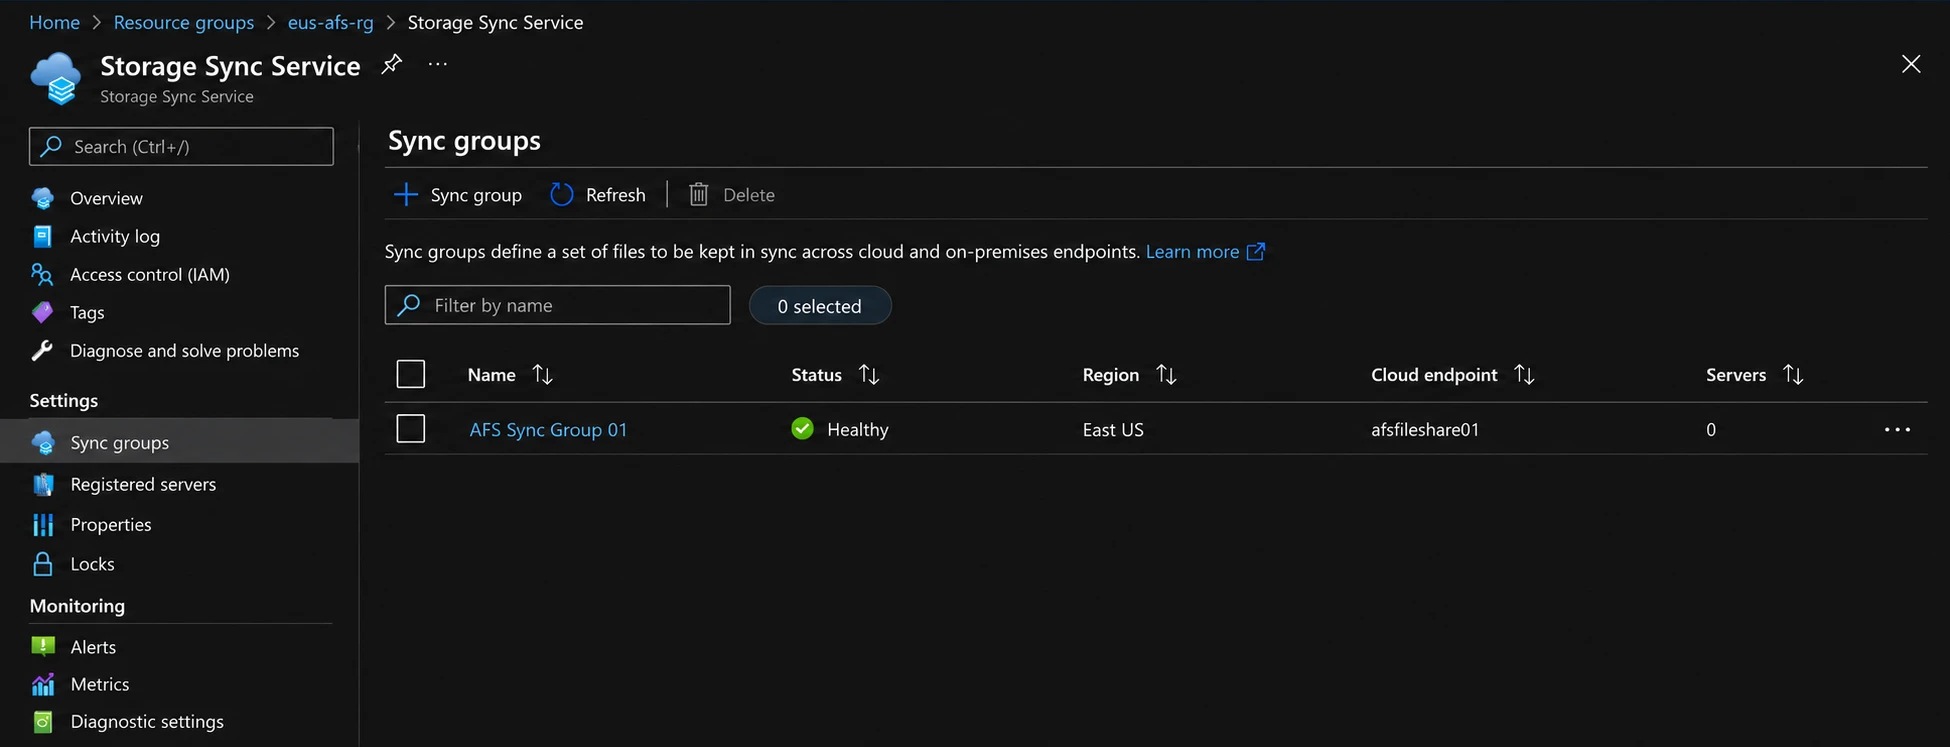
The new sync group is healthy in the Storage Sync Service
7. Adding the cloud endpoint
The cloud endpoint links the sync group to the Azure file share. That share is the central copy of the data.
New-AzStorageSyncCloudEndpoint `
    -Name "CloudEndpoint-$syncGroupName" `
    -ResourceGroupName $resourceGroup `
    -StorageSyncServiceName $syncServiceName `
    -SyncGroupName $syncGroupName `
    -StorageAccountResourceId $storageAccount.Id `
    -StorageAccountShareName $fileShare.Name
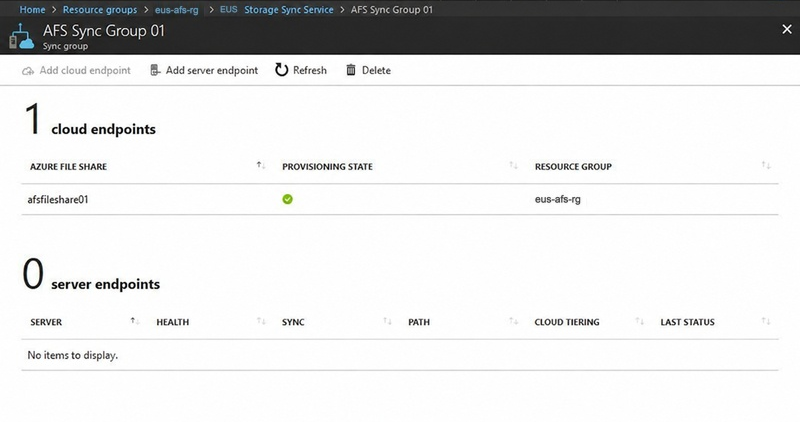
The Azure file share is connected as the cloud endpoint
8. Adding the server endpoint
The server endpoint is the local folder that syncs. I turned on cloud tiering, so I used a data volume instead of the system volume.
$serverPath = Read-Host "Enter the local path, such as D:\Data"

$registeredServer = Get-AzStorageSyncServer `
    -ResourceGroupName $resourceGroup `
    -StorageSyncServiceName $syncServiceName

New-AzStorageSyncServerEndpoint `
    -Name $registeredServer[0].FriendlyName `
    -ResourceGroupName $resourceGroup `
    -StorageSyncServiceName $syncServiceName `
    -SyncGroupName $syncGroupName `
    -ServerResourceId $registeredServer[0].ResourceId `
    -ServerLocalPath $serverPath `
    -CloudTiering `
    -VolumeFreeSpacePercent 20
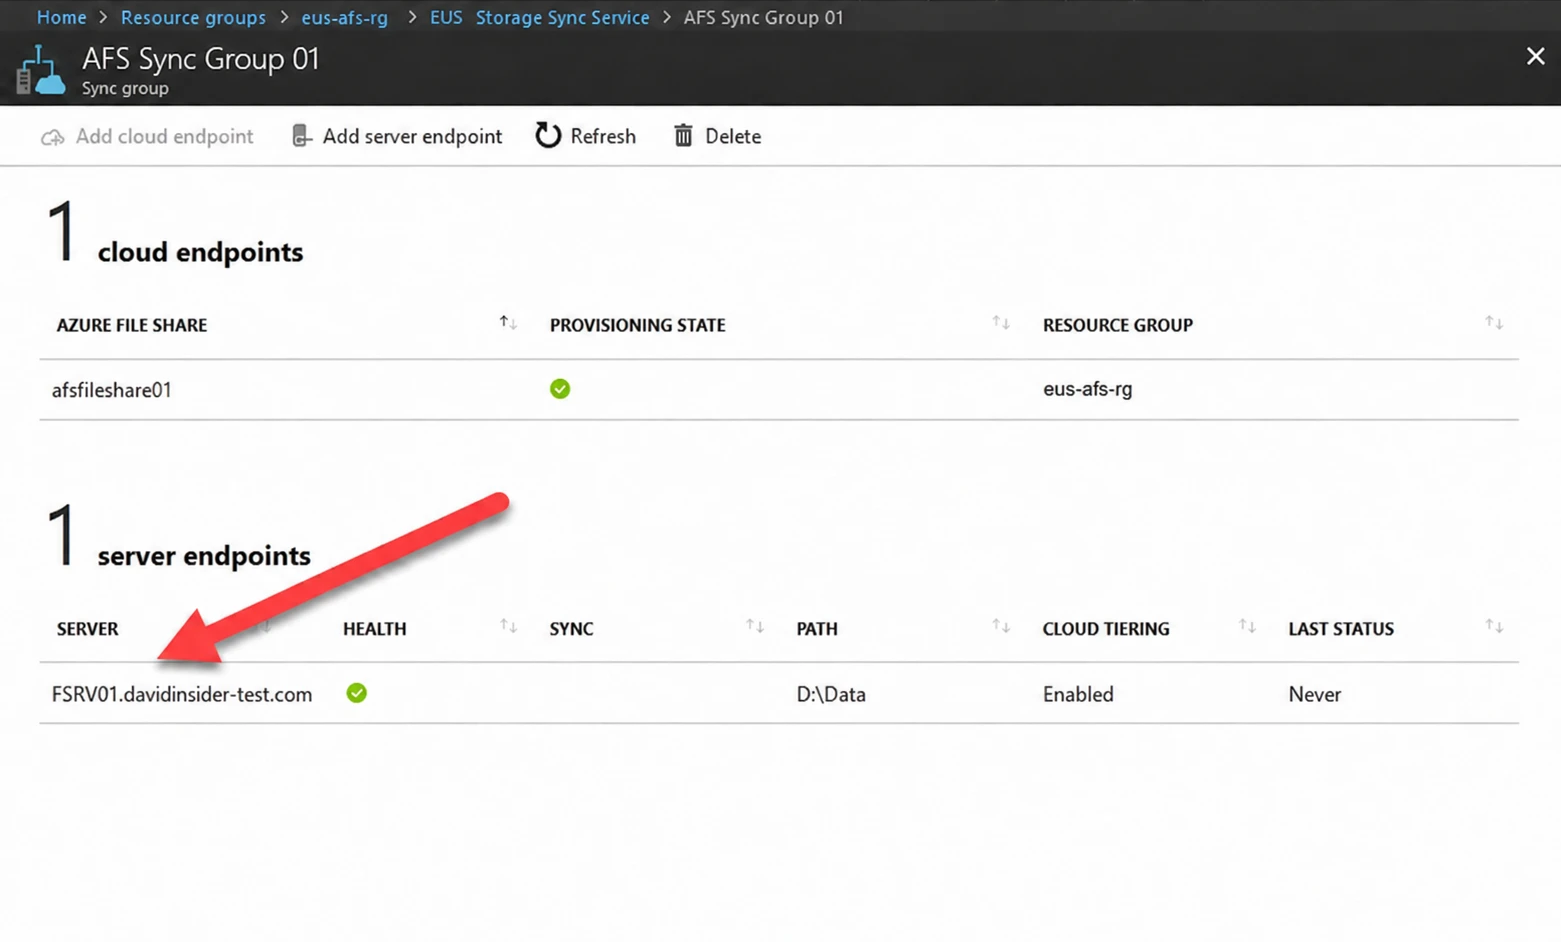
The registered Windows Server appears as a healthy server endpoint
VolumeFreeSpacePercent is a target, not a fixed cache size. My value was fine for testing. In production, base it on the volume size, working set, and how people access files.
9. Testing sync and cloud tiering
I copied test files into the local folder. They showed up in the Azure file share.
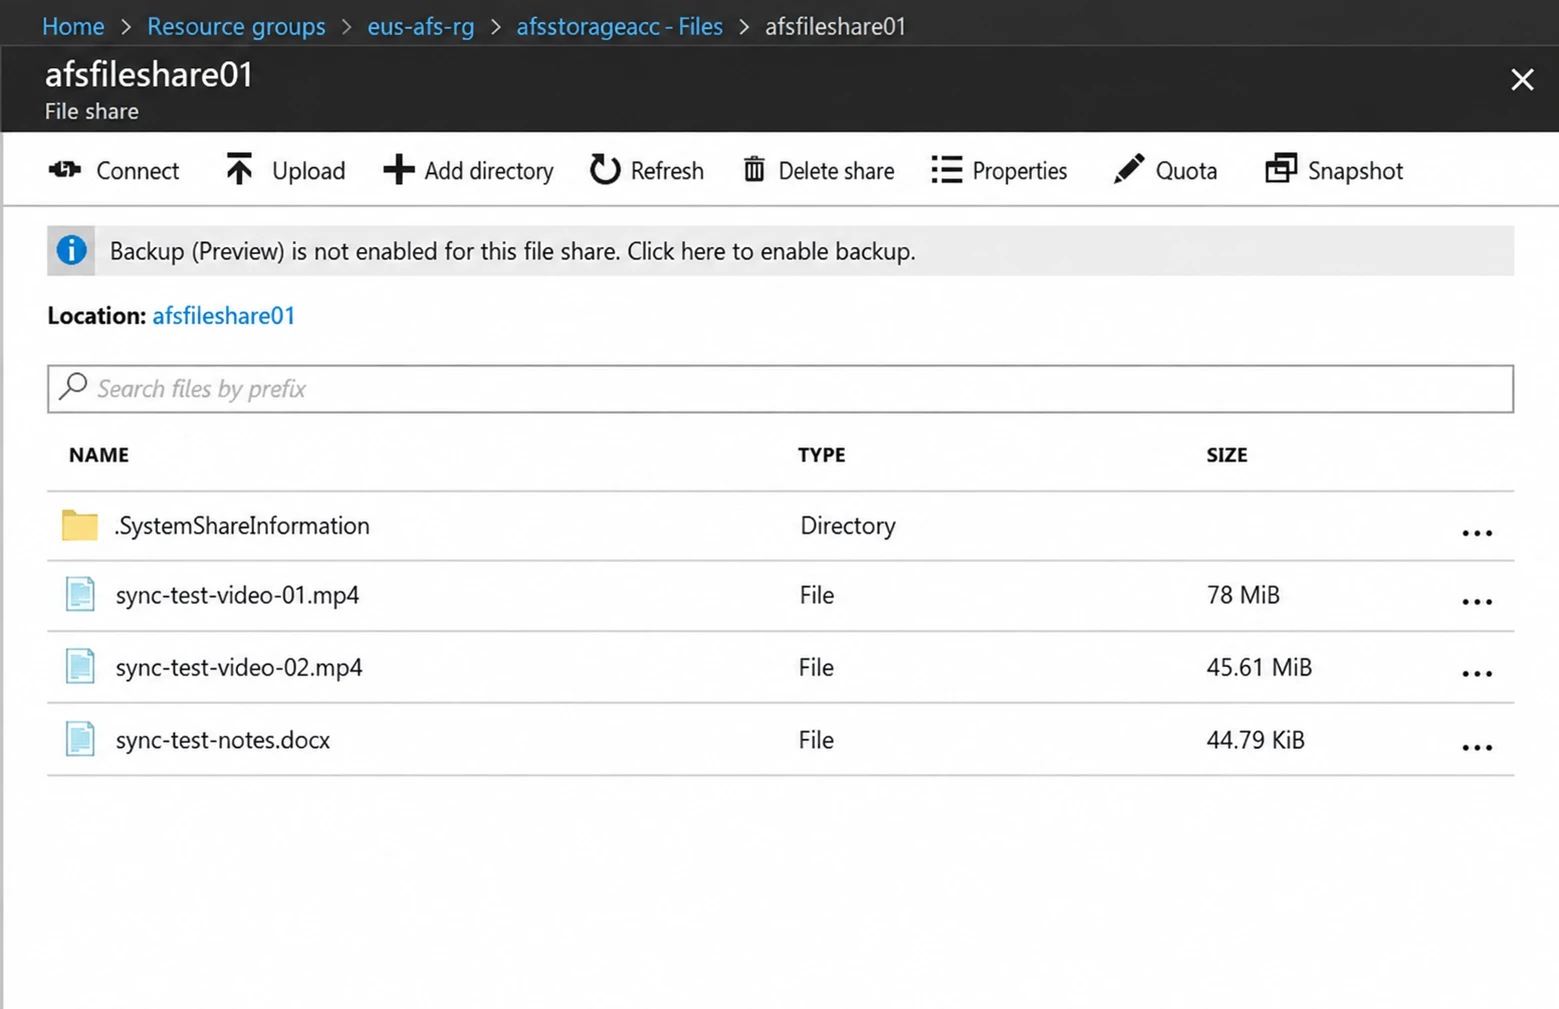
Synchronized files visible in the Azure file share
I checked the server endpoint too. It was healthy and tiering was on.
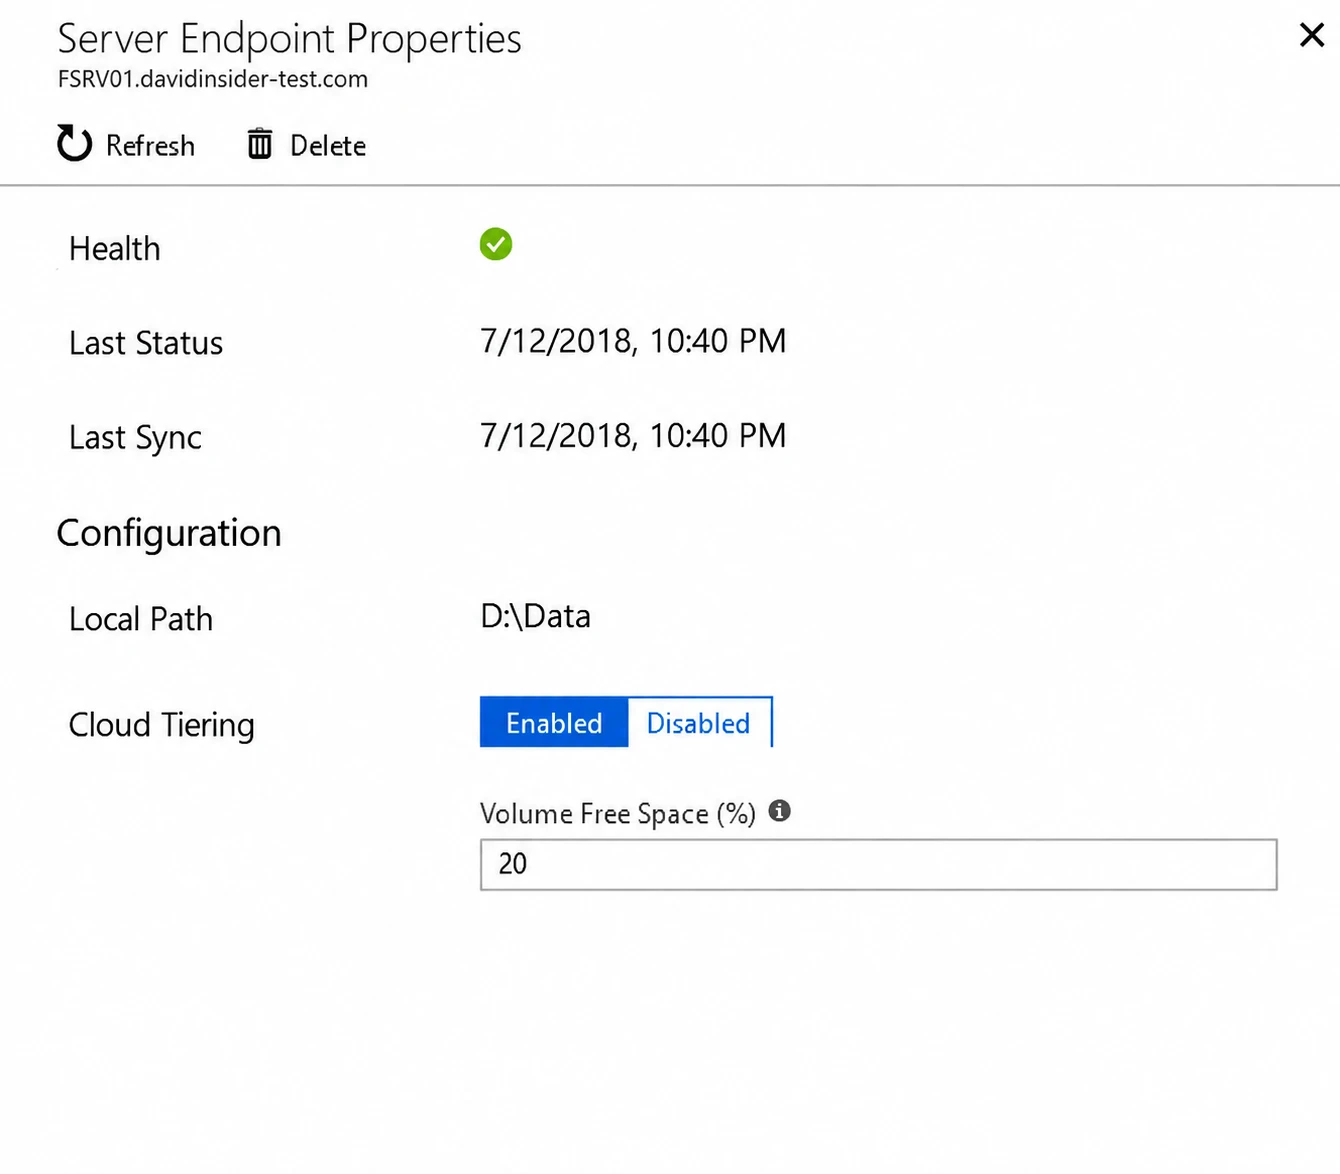
Cloud tiering enabled on the server endpoint
Last, I compared a file’s size with its size on disk. Size on disk was smaller. Azure File Sync had tiered part of the file to Azure, but the file was still visible locally.
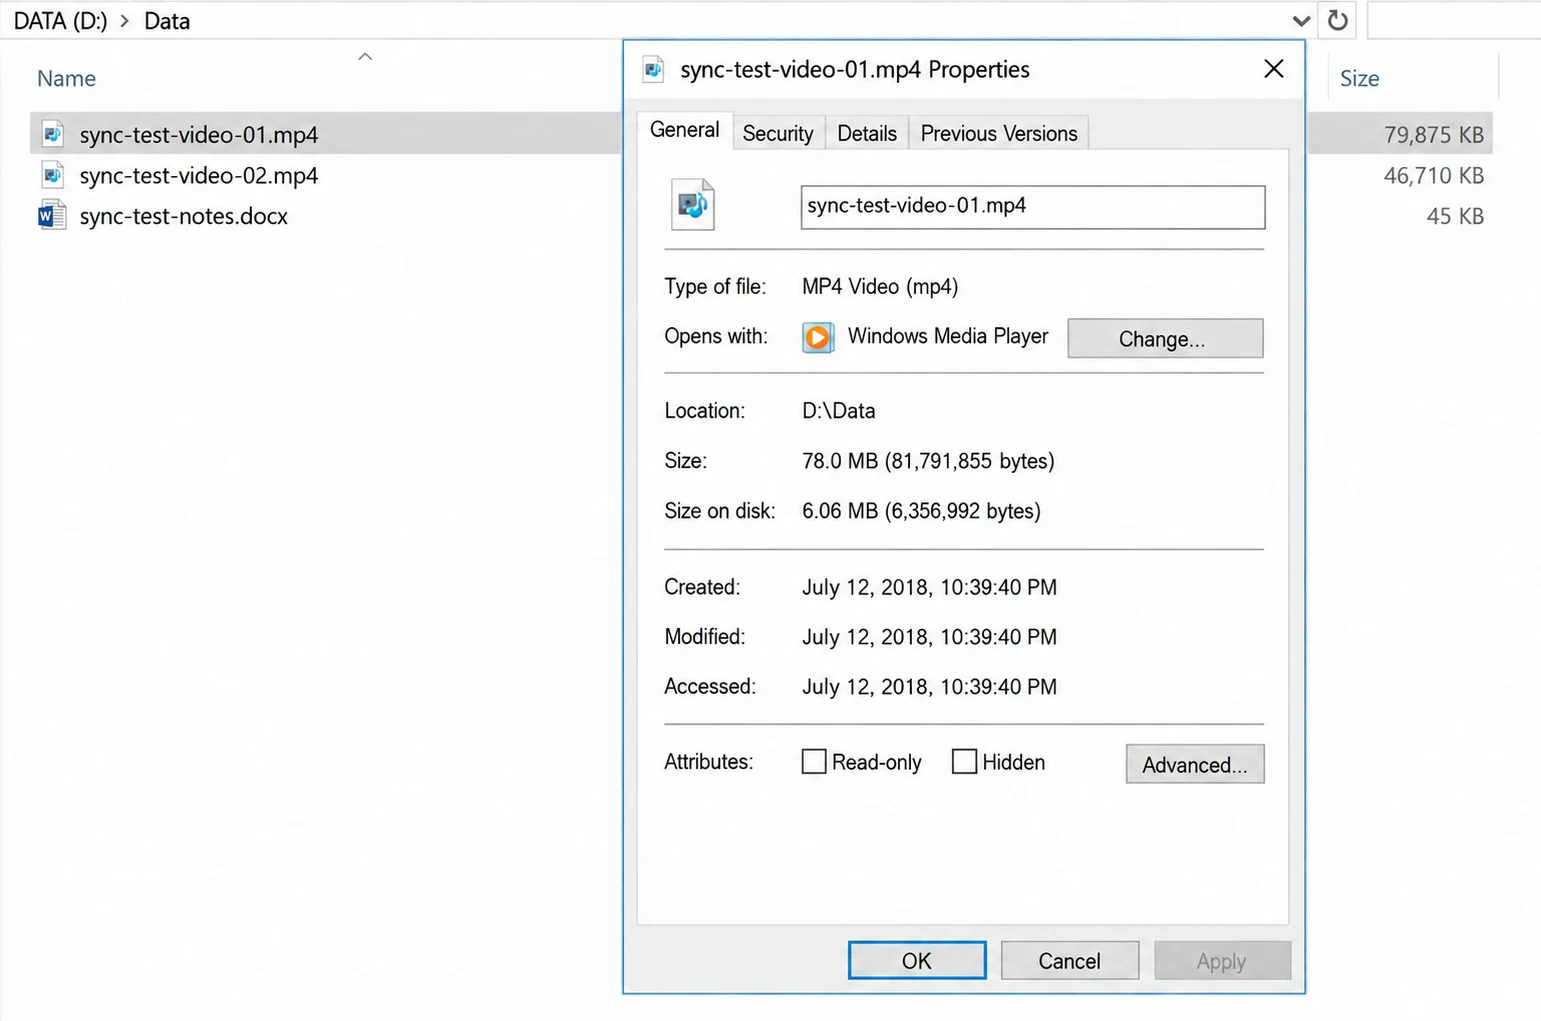
The file remains visible locally while using less physical disk space
Result
The server and the Azure file share were now linked through a healthy sync group. Files in the local folder synced to Azure Files. Cloud tiering cut down how much had to stay on the server’s disk.
Before using this in production, I’d set up Azure Files backup and lock down network access to the storage account. I’d monitor sync health and test file recovery. I’d document how conflicts get handled. And I’d make sure the redundancy tier fits the business recovery needs.