Building Active Directory Across Multiple Azure VNets
I built a small Active Directory environment in Azure. It has one Windows Server Domain Controller and three Windows client VMs spread across three virtual networks. I wanted domain logins and DNS to work across all the VNets. Every endpoint had to join the same domain, and traffic had to work both ways.
Here’s the layout:
                         cu-domain.local
                                |
                   Domain Controller + Endpoint 1
                         VNet1: 10.0.0.0/16
                           /             \
                    VNet peering     VNet peering
                       /                   \
            VNet2: 10.1.0.0/16    VNet3: 10.2.0.0/16
                  Endpoint 2             Endpoint 3
The names and address ranges are just what I picked. For production I’d follow the company’s naming standards and avoid .local. I’d run more than one Domain Controller. And I’d lock down admin access instead of opening RDP to the whole internet.
1. Creating the resource group
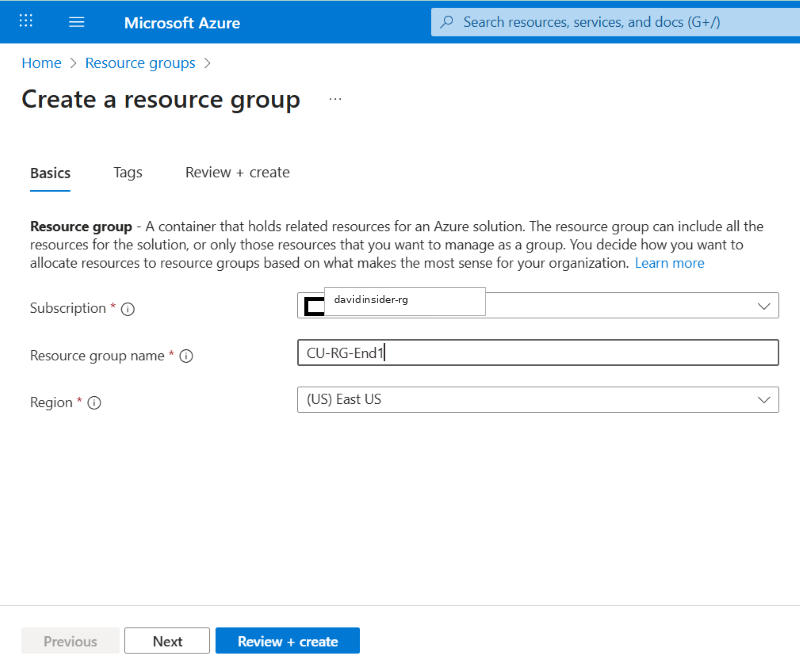
First I created a resource group to hold the networks, VMs, and everything else. I kept all resources in the same region where I could.
Creating the resource group
One resource group also made cost tracking and cleanup easier.
2. Building three virtual networks
I created VNet1 in the resource group and the same region.
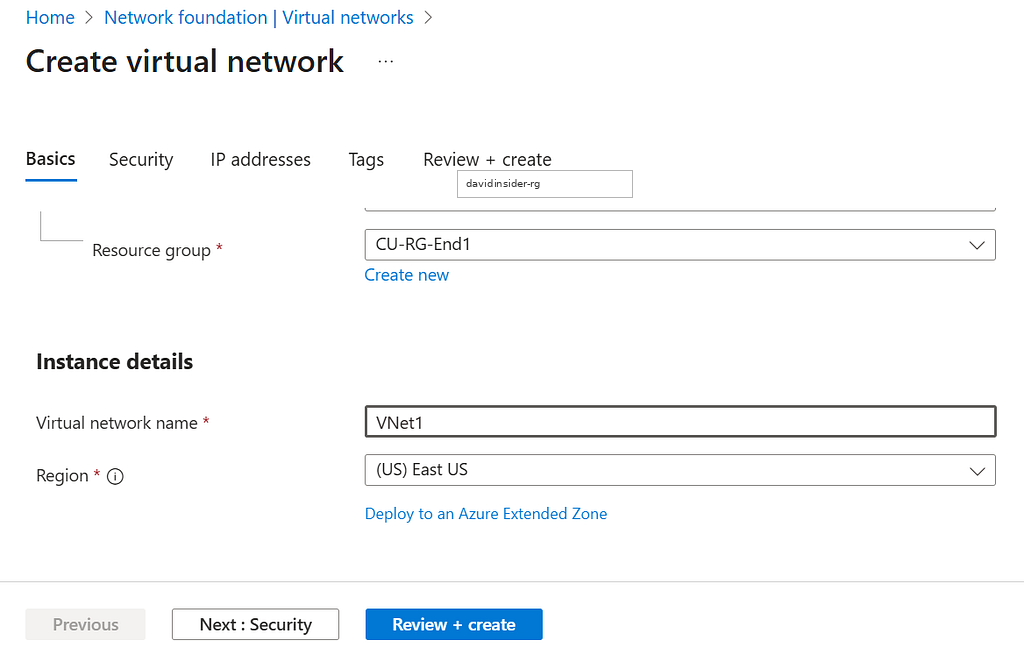
Creating VNet1 in the resource group
I assigned it the 10.0.0.0/16 address space with a 10.0.0.0/24 subnet.
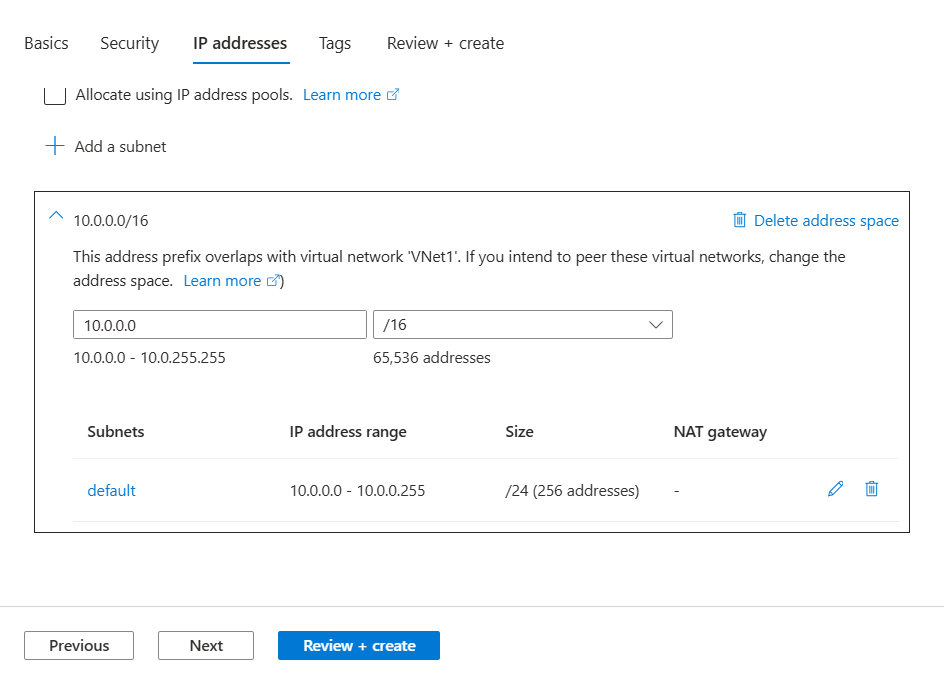
Configuring the VNet1 address space and subnet
I repeated it with ranges that don’t overlap:
VNet1:10.0.0.0/16, subnet10.0.0.0/24VNet2:10.1.0.0/16, subnet10.1.0.0/24VNet3:10.2.0.0/16, subnet10.2.0.0/24
Azure won’t peer VNets whose ranges conflict. So no overlap is a hard requirement.
3. Creating the Domain Controller VM
I created a Windows Server VM named CU-DC-VM in VNet1.
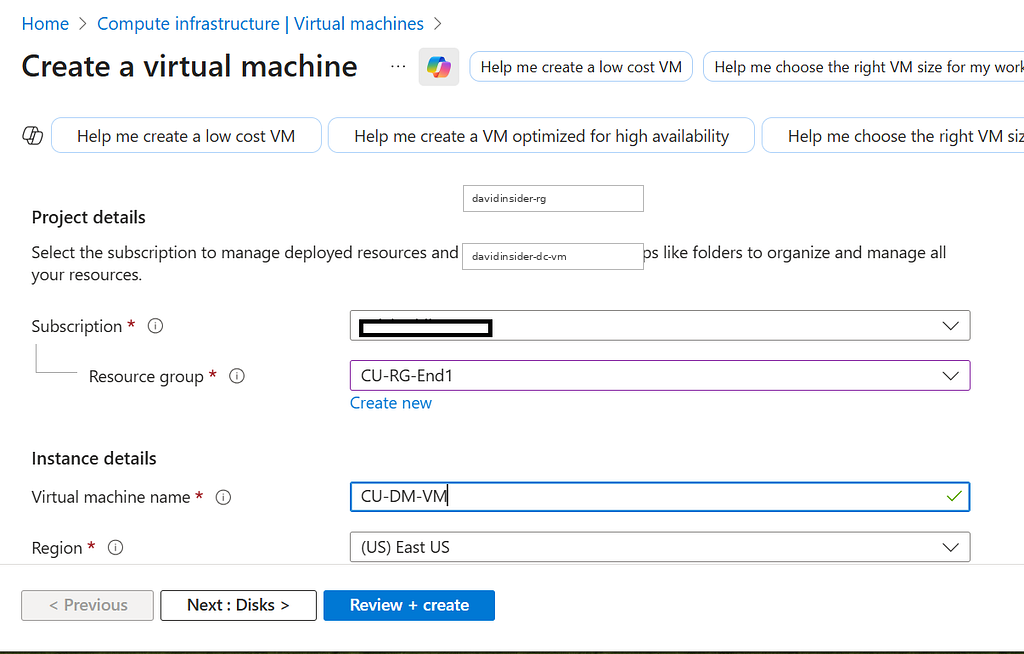
Naming the Domain Controller VM and selecting its resource group
I picked Windows Server 2019 Datacenter and a VM size that can run Active Directory Domain Services and DNS comfortably.
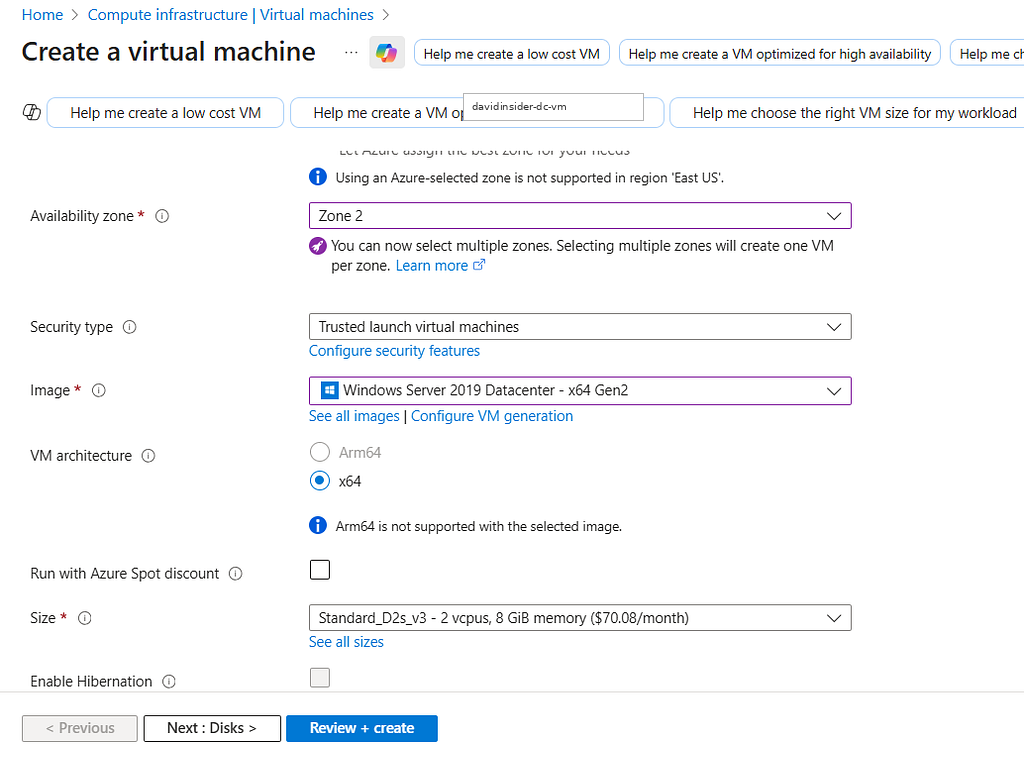
Selecting the Windows Server image and VM size
I created a local admin account and turned on RDP so I could finish setting up Windows.
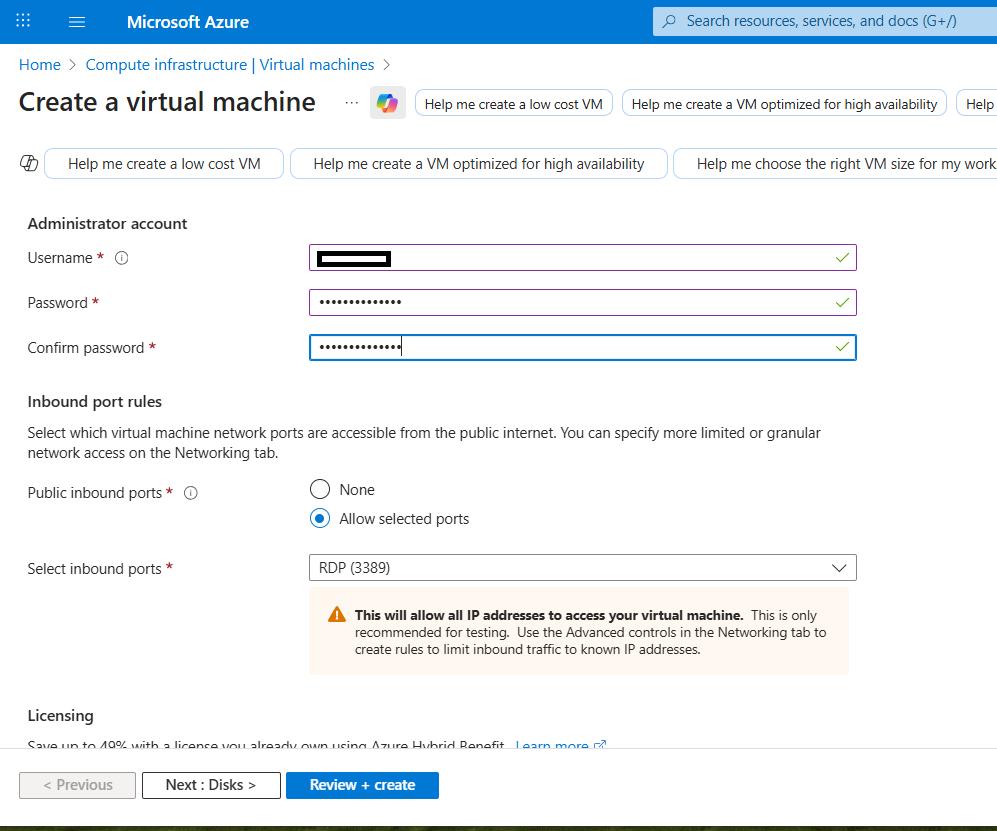
Creating the administrator account and selecting RDP
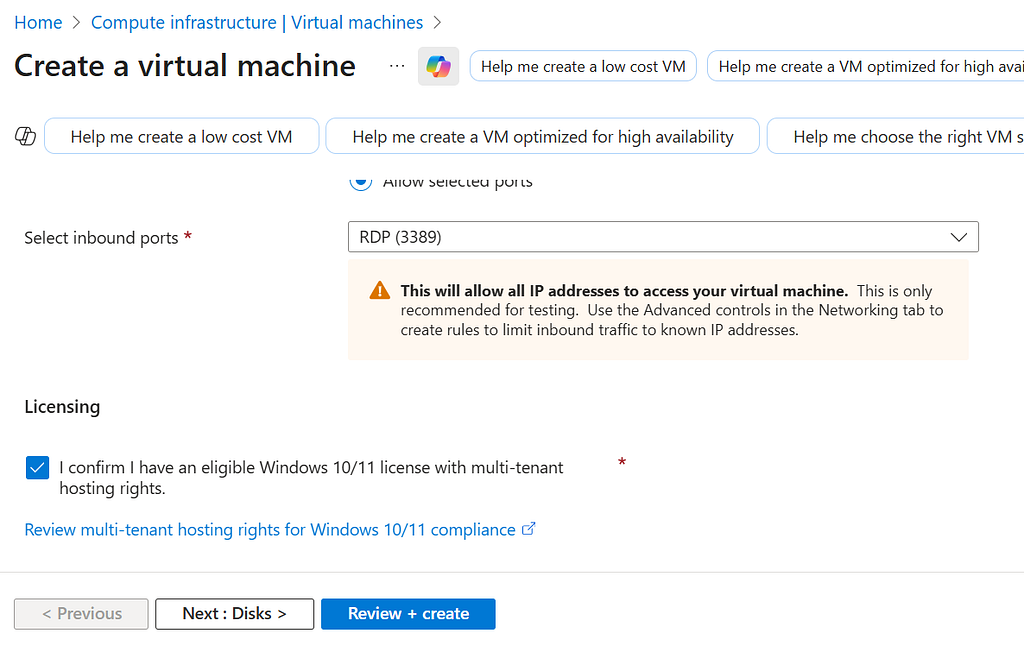
Reviewing the inbound RDP and licensing settings
Pay attention to the portal warning. Opening RDP here can allow connections from any public IP. For anything beyond a throwaway test, use Azure Bastion, a VPN, or an NSG rule limited to your own IP.
I put the VM’s network interface in VNet1. Domain members use this server for DNS, so I made its private IP static in Azure. That way it never changes.
4. Creating the Windows endpoints
Next I created three Windows client VMs:
- Endpoint 1 in
VNet1 - Endpoint 2 in
VNet2 - Endpoint 3 in
VNet3
The steps matched the Domain Controller. I just picked a Windows client image and the right VNet for each one. These Windows client images need the right licensing rights too.
5. Connecting to the server
On the Domain Controller VM’s page I opened Connect, picked RDP, and downloaded the file.
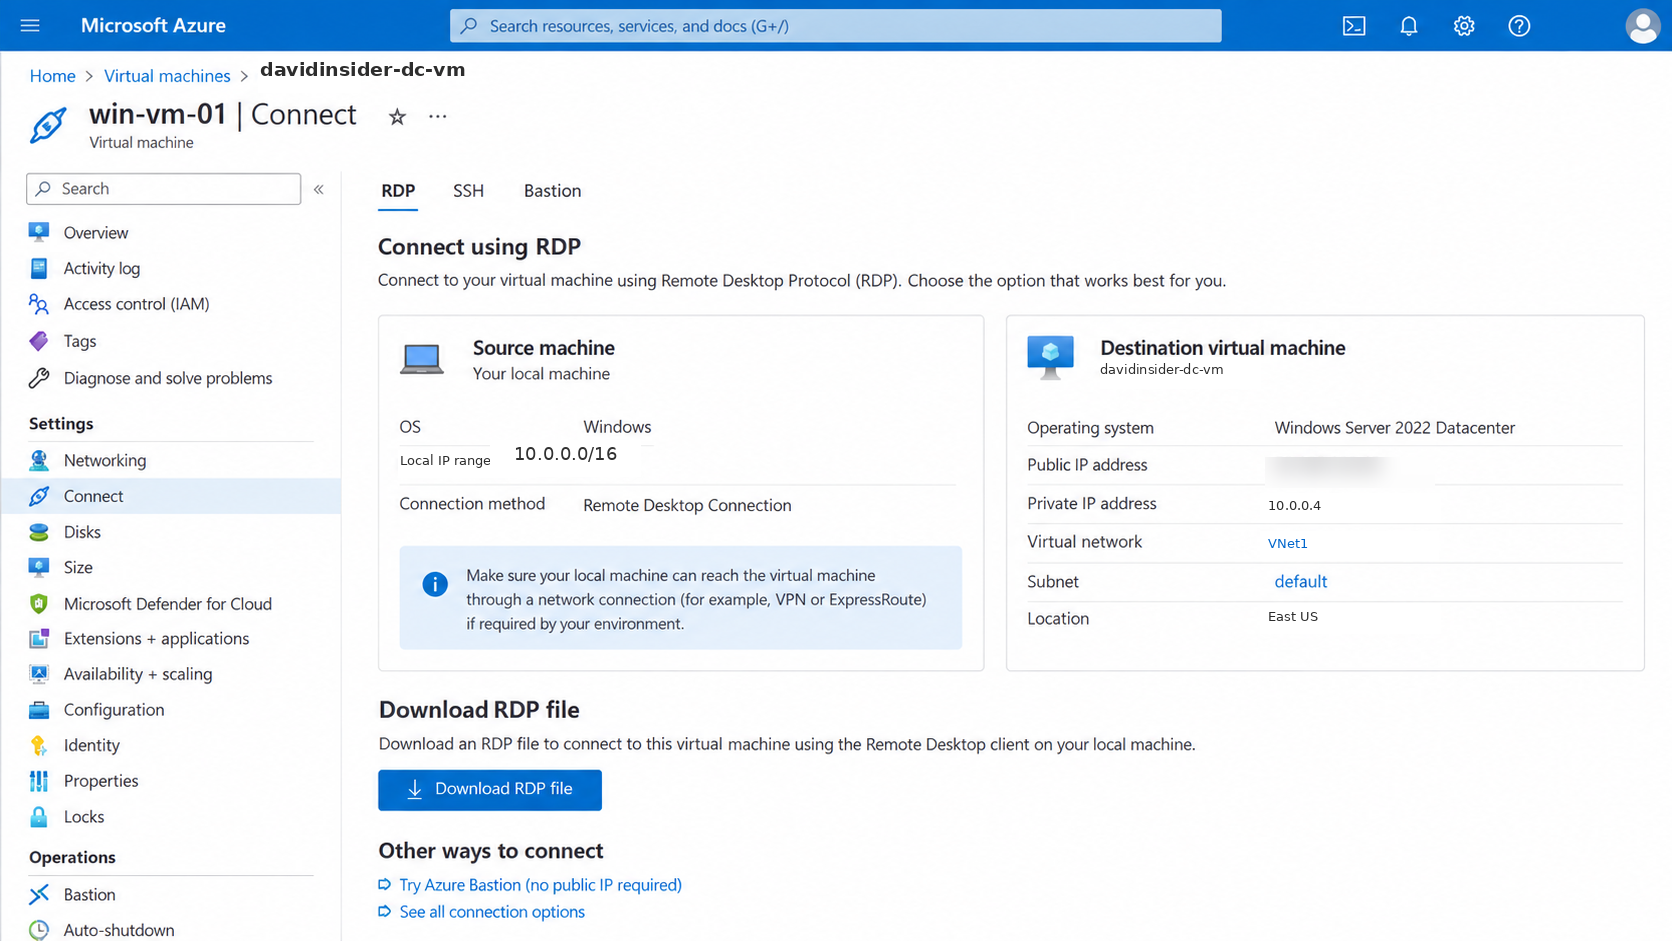
Downloading the RDP connection file for CU-DC-VM
I opened it and signed in with the local admin account.
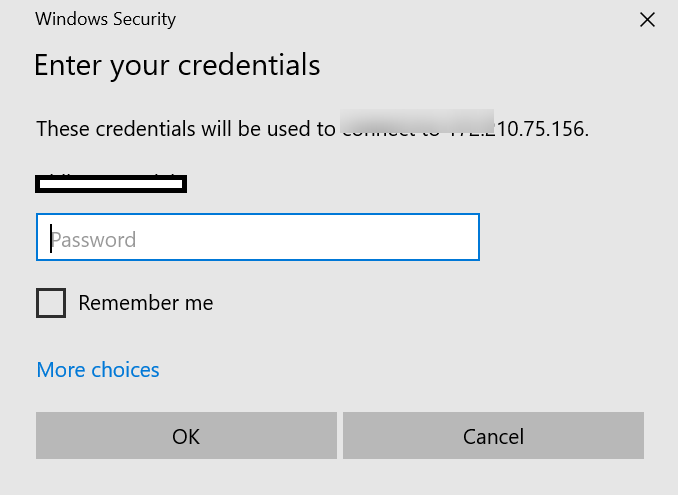
Entering the Domain Controller VM credentials
6. Installing Active Directory Domain Services
On the server I opened Server Manager → Manage → Add Roles and Features. I chose a role-based install and picked the local server. Then I enabled Active Directory Domain Services and accepted the management tools.
When it finished, Server Manager said AD DS was installed. The server still needed to be promoted though.
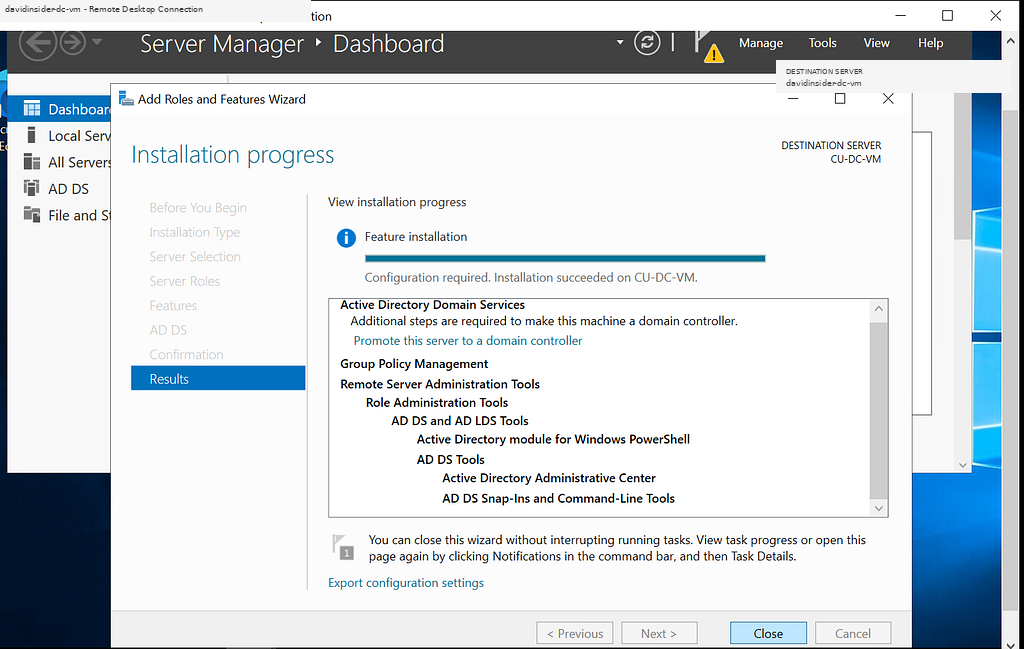
Active Directory Domain Services installed successfully
7. Promoting the server to a Domain Controller
I clicked Promote this server to a domain controller in the Server Manager notice. I created a new forest named cu-domain.local.
I kept DNS Server and Global Catalog on and set a separate Directory Services Restore Mode password. I read the DNS warning and let the prerequisite check run. Once it passed, I started the promotion.
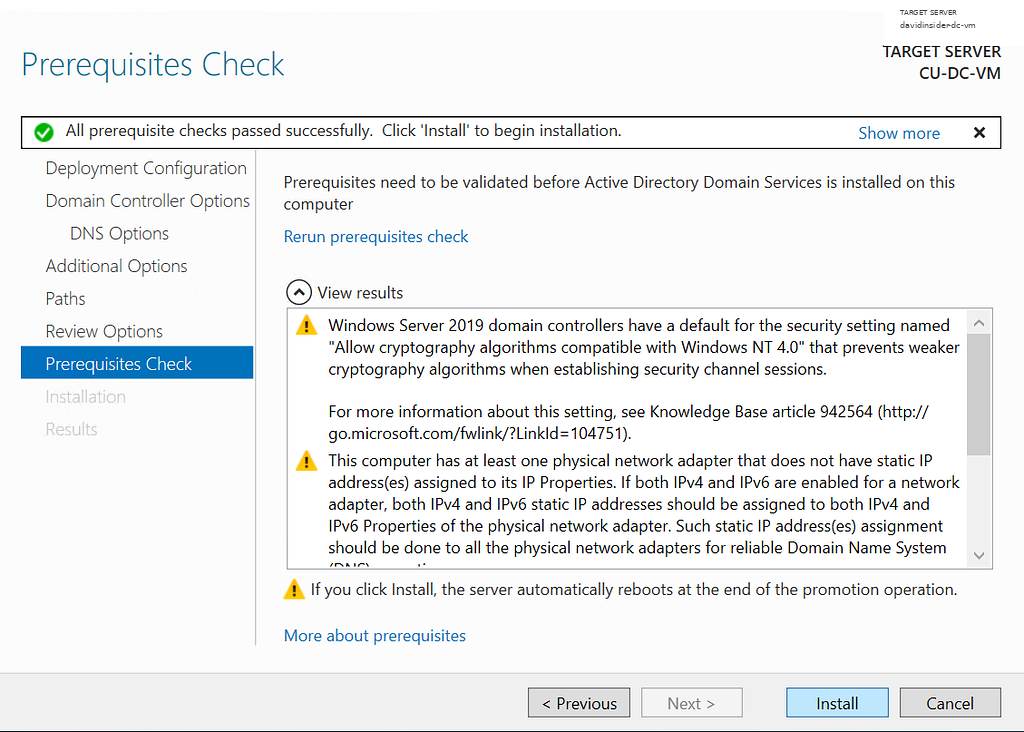
The Domain Controller promotion prerequisite check passed
The VM restarted on its own. After that it was the Domain Controller and DNS server for the new domain.
8. Peering the VNets
Endpoints 2 and 3 needed a network path to the Domain Controller in VNet1. I opened VNet1 → Peerings → Add and peered VNet1 with VNet2.
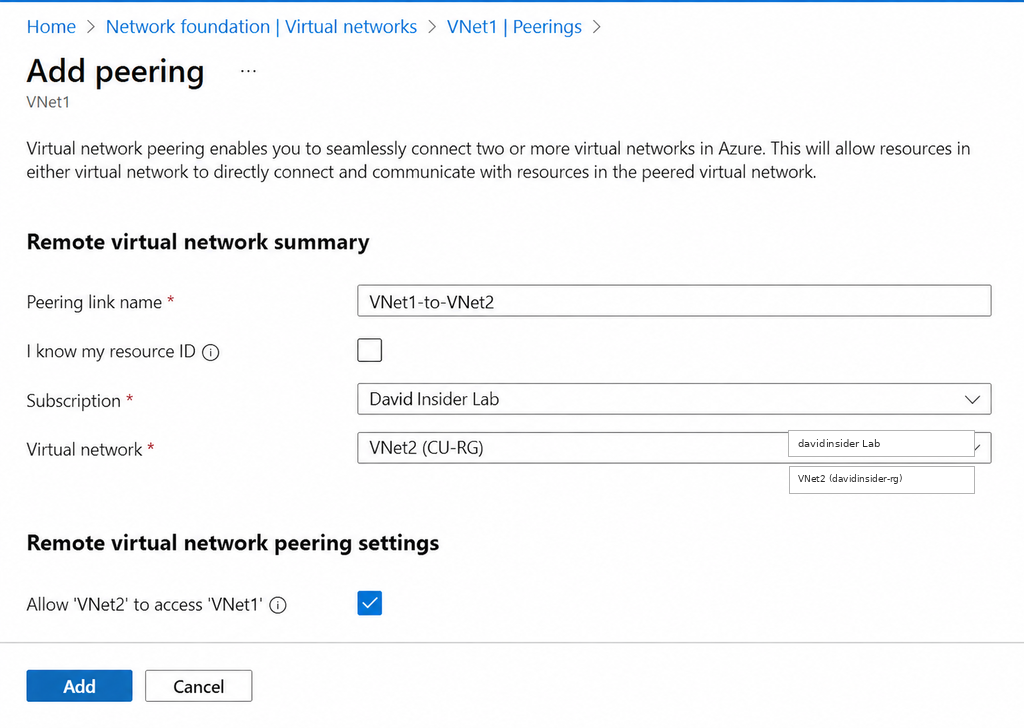
Selecting VNet2 as the remote virtual network
I allowed network access both ways. I also had forwarded traffic on. You only need that if another appliance or routing design depends on it.
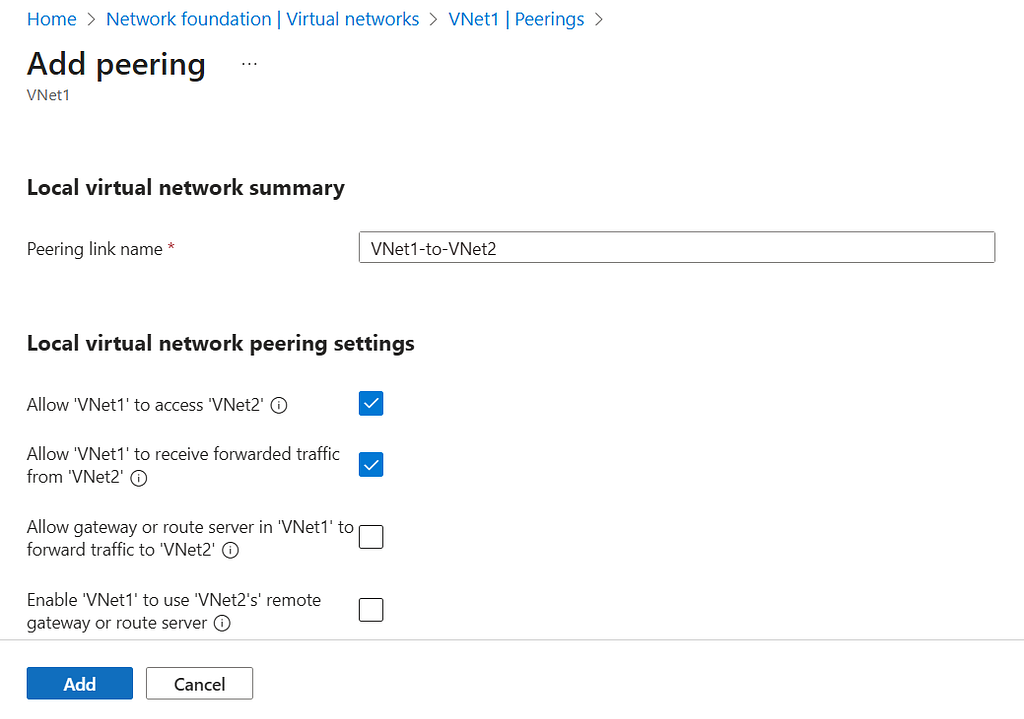
Configuring the local side of the VNet peering
I did the same between VNet1 and VNet3. Azure peering isn’t transitive. This hub-and-spoke gives each endpoint network a path to VNet1. It doesn’t connect VNet2 and VNet3 to each other.
9. Pointing every VNet at AD DNS
I noted the Domain Controller’s private IP. Mine was 10.0.0.4.
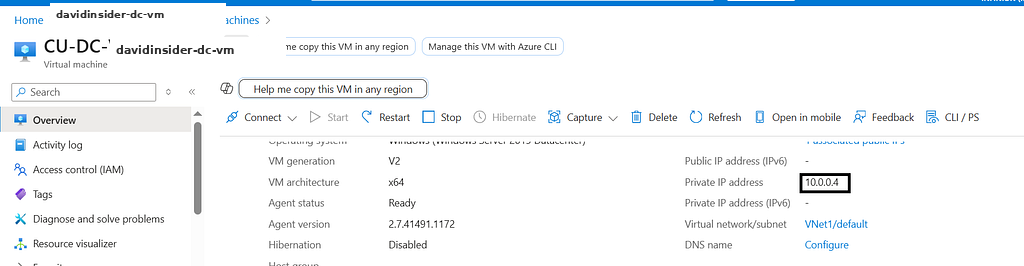
The Domain Controller’s private IP address
Then I switched DNS on VNet1, VNet2, and VNet3 from Azure-provided to custom and entered 10.0.0.4.
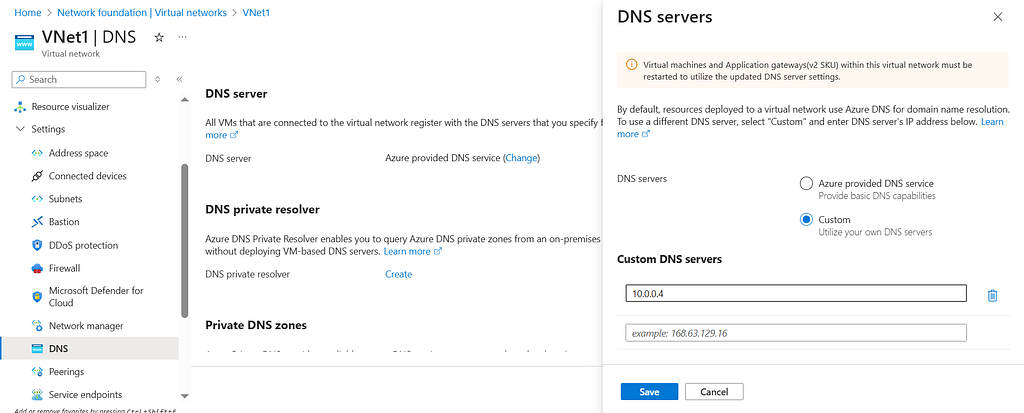
Using the Domain Controller as the custom DNS server
Existing VMs had to restart or renew DHCP to pick up the new DNS. Don’t skip this. Domain joins usually fail if the endpoint can’t resolve the domain through the Domain Controller’s DNS.
10. Joining the endpoints to the domain
On each endpoint I opened Settings → Accounts → Access work or school and clicked Connect. Then I chose Join this device to a local Active Directory domain.
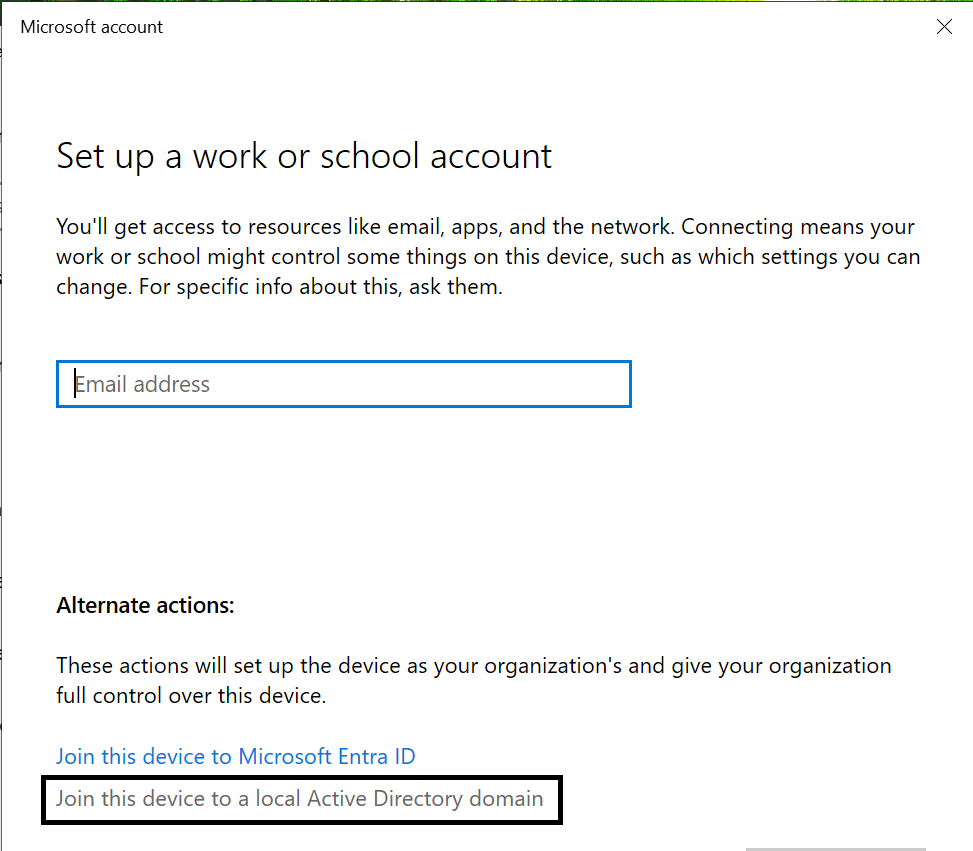
Selecting the local Active Directory domain join option
I entered cu-domain.local and an account allowed to join computers.
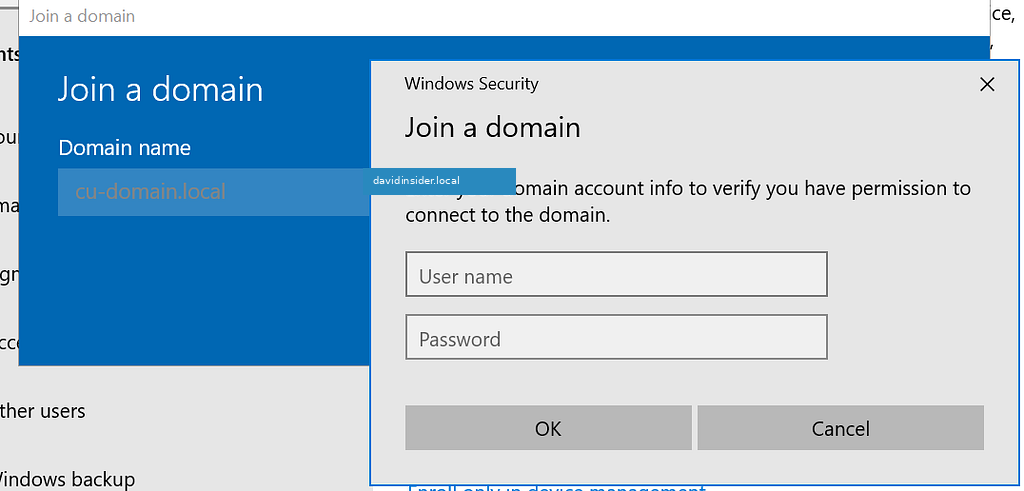
Joining an endpoint to cu-domain.local
Windows confirmed the join and asked for a restart.
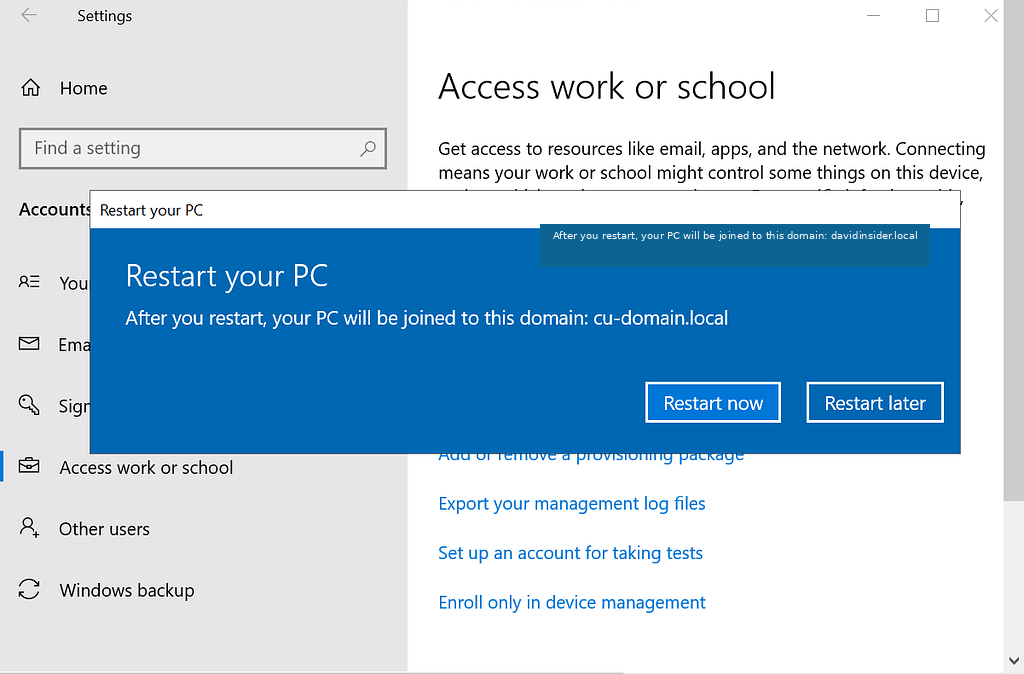
Restarting the endpoint to complete the domain join
I did this on all three. In production I’d use delegated join permissions instead of a Domain Admin account.
11. Checking DNS and connectivity
From the Domain Controller I pinged each endpoint.
ping <Endpoint1-IP>
ping <Endpoint2-IP>
ping <Endpoint3-IP>
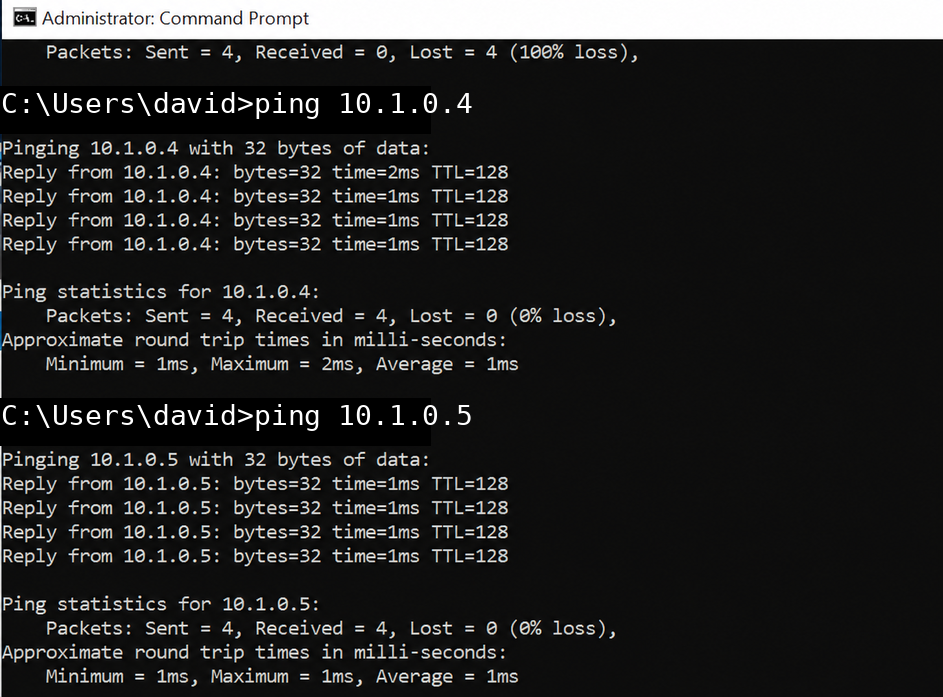
Successful connectivity tests from the Domain Controller to the endpoints
Then I tested the other direction from each endpoint.
ping 10.0.0.4
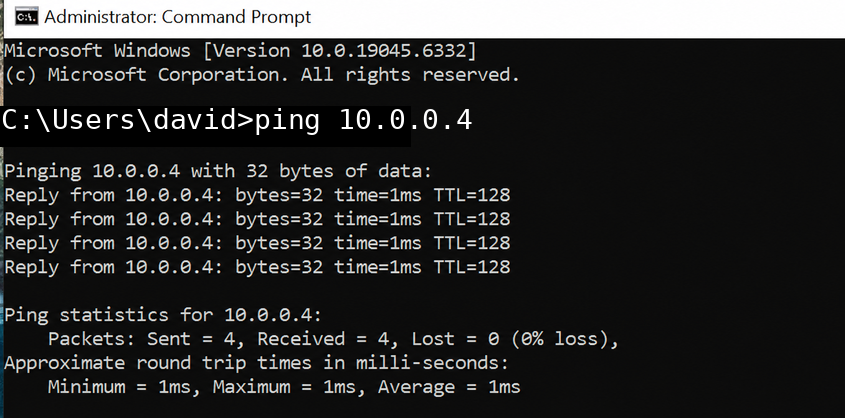
An endpoint successfully reaching the Domain Controller
Ping can fail even when routing works. Windows Firewall blocks ICMP echo by default. I turned on the built-in File and Printer Sharing (Echo Request - ICMPv4-In) rule on the right profile.
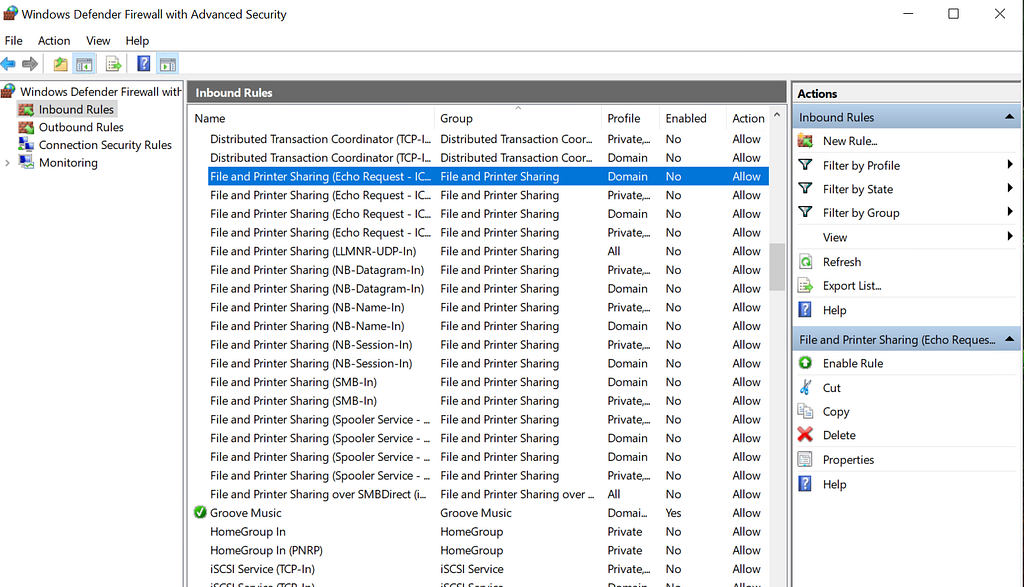
Enabling the built-in ICMPv4 echo request firewall rule
Ping alone doesn’t prove AD is healthy. I also checked that the endpoints used the Domain Controller for DNS and could resolve cu-domain.local. They showed up in Active Directory Users and Computers. And a domain user could sign in.
Result
I ended up with one AD forest, one Domain Controller, and three domain-joined endpoints across three VNets. Peering gave the network paths. Custom VNet DNS sent domain lookups to AD DNS.
This was great practice for Azure networking, DNS dependencies, DC promotion, and domain joins. Before using it for real, I’d add a second Domain Controller and secure private admin access. I’d set up backup and recovery, apply least privilege, and monitor AD and DNS. And I’d delete the resources when I’m done so Azure stops billing.