
Building AWS WorkSpaces with Managed Microsoft AD and a Windows File Share
I built an AWS environment where Amazon WorkSpaces users log in through AWS Managed Microsoft AD. From their WorkSpace they reach a private, domain-joined Windows EC2 server. That server does two jobs. It runs the Active Directory admin tools, and it hosts a basic SMB file share on an extra EBS volume.
Here’s the finished design:
Amazon WorkSpace
       |
       | AWS Managed Microsoft AD authentication
       v
Private VPC subnets in two Availability Zones
       |
       | RDP for administration / SMB for file access
       v
Domain-joined Windows EC2 server + EBS data volume
Service availability, bundles, prices, and supported zones change. Check the current AWS docs and pricing before you build this.
1. Checking the WorkSpaces Availability Zones
Zone names like us-east-1a map differently in every AWS account. So I opened the EC2 console and wrote down the Zone ID behind each Zone name in my account.
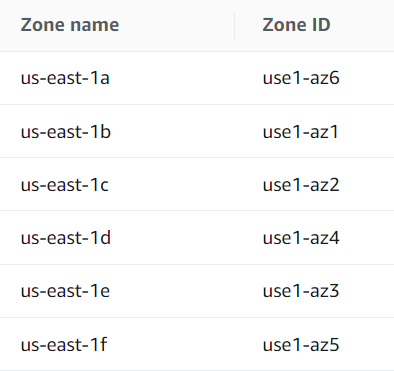
Availability Zone names and their account-specific Zone IDs
Then I compared those IDs to the zones WorkSpaces supports in us-east-1.
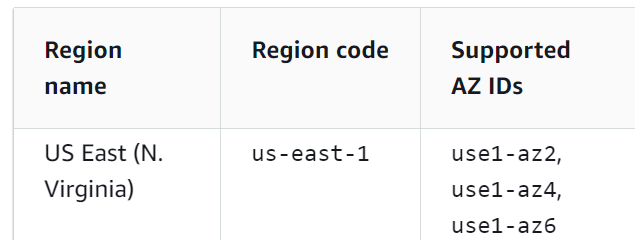
The supported WorkSpaces Zone IDs for my Region
In my account us-east-1c mapped to use1-az2 and us-east-1d mapped to use1-az4. I used those two for the private subnets. The same names in another account can point to different zones. Always check the IDs.
2. Creating the VPC
I opened the VPC wizard and picked VPC and more. That builds the VPC, subnets, route tables, internet gateway, and NAT in one go.
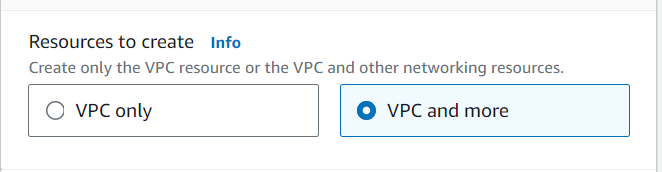
Using the VPC and more workflow
I chose two zones and set them to the WorkSpaces-supported ones I found.
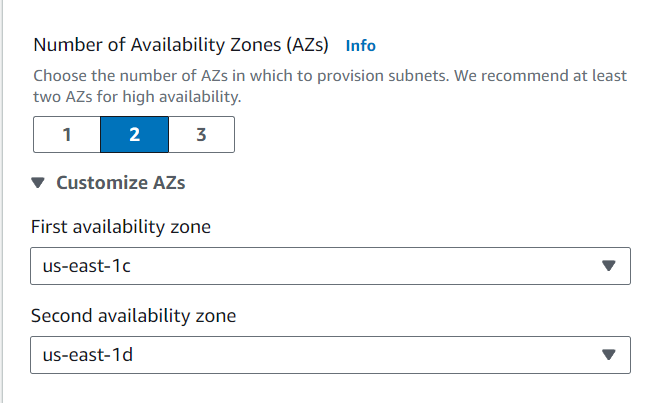
Creating subnets in two supported Availability Zones
I created one NAT gateway and skipped the S3 gateway endpoint.
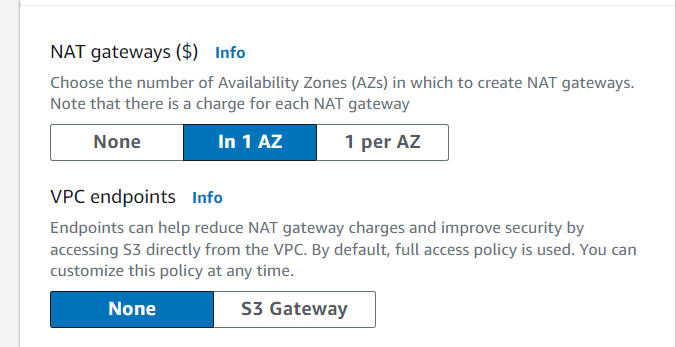
Selecting one NAT gateway and no S3 gateway endpoint
One NAT gateway is cheaper than one per zone. But it creates a cross-zone dependency and can add data transfer charges. For production I’d weigh cost against availability. Usually I’d give each active zone its own outbound path.
The preview showed two public subnets, two private subnets, separate route tables, an internet gateway, and the NAT gateway.
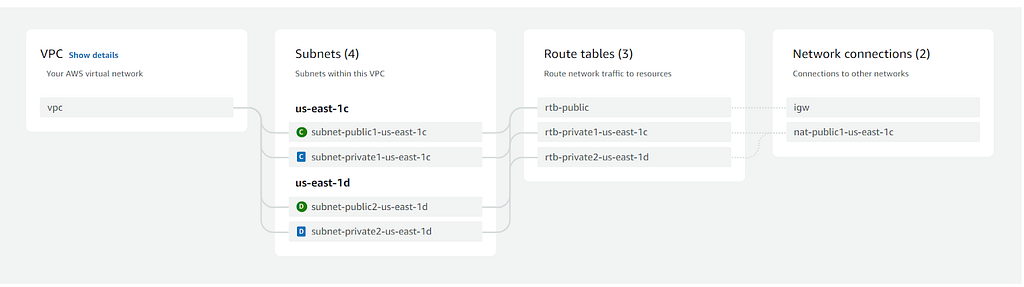
The VPC, subnet, routing, and NAT layout before creation
After creating it, I saved the two private subnet IDs. I needed them for the directory later.
3. Creating AWS Managed Microsoft AD
In Directory Service I chose Set up directory → AWS Managed Microsoft AD. Standard Edition was enough for this.
I entered the DNS name, NetBIOS name, and a strong password for the managed Admin account.
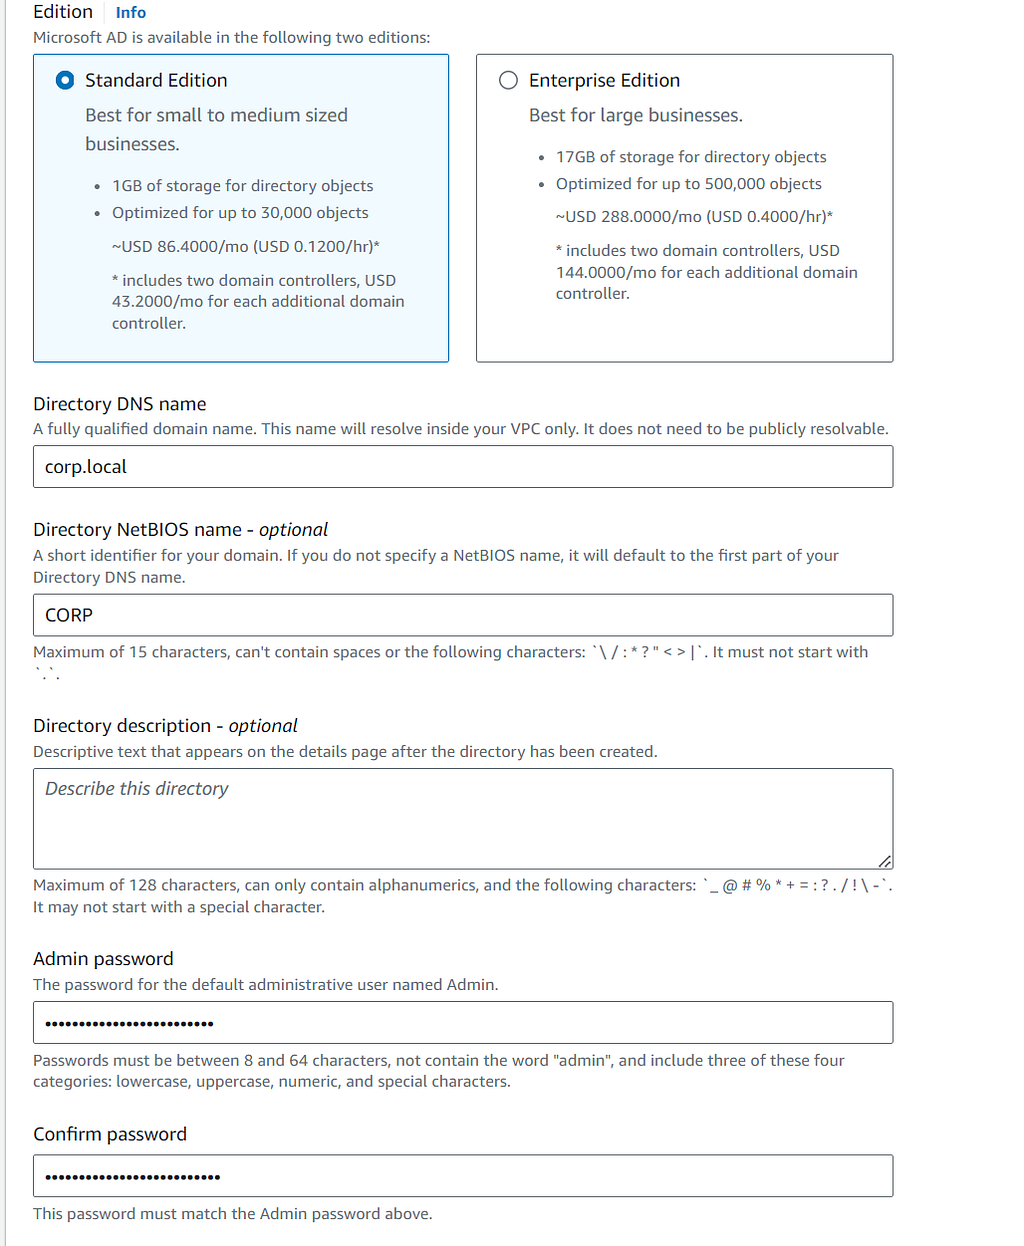
Configuring the Managed Microsoft AD edition and directory names
I used corp.local for this build. In production, use a delegated subdomain of a domain you own, like ad.example.com. Don’t invent a .local namespace.
On the networking page I picked the new VPC and one private subnet in each supported zone. Directory Service started building two managed Domain Controllers.

AWS provisioning the new managed directory
I waited for the status to show Active.
4. Registering the directory with WorkSpaces
The directory showed up in the WorkSpaces console with Registered set to False.

The active directory before WorkSpaces registration
I clicked Actions → Register and picked my two private subnets. I reviewed the directory options and submitted it.
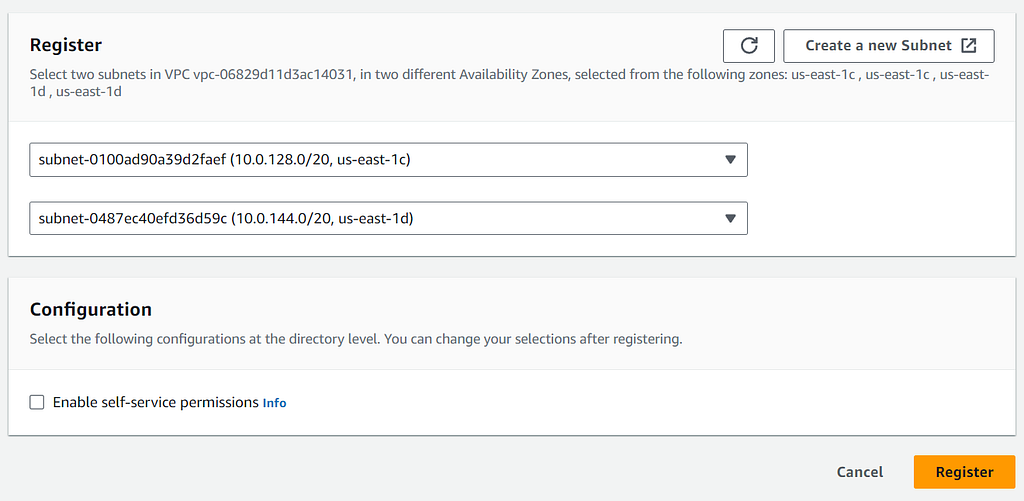
Registering the directory with two private subnets
5. Launching the WorkSpace
I made a separate directory user for the WorkSpace. The built-in Admin account shouldn’t be anyone’s daily desktop login.
In the WorkSpaces console I picked the directory, the new user, and a Windows bundle. When it finished, I used the welcome email to set the password and register the WorkSpaces client.
Free tier eligibility and bundles change. Check pricing before leaving a WorkSpace running.
6. Creating the EC2 role for domain join
The Windows server needed Systems Manager and Directory Service access to join the domain. I created an IAM role with EC2 as the trusted service.
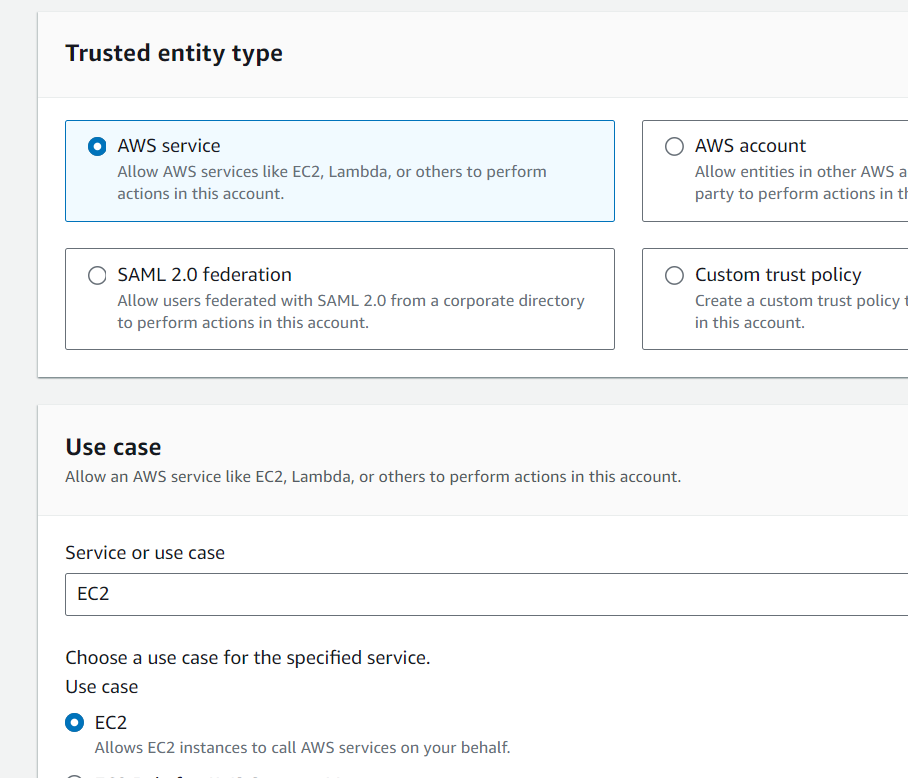
Creating an IAM role trusted by EC2
I attached these AWS-managed policies:
AmazonSSMDirectoryServiceAccess
AmazonSSMManagedInstanceCore
For production, check the current AWS domain join steps and permissions. Managed policy names can change.
7. Launching the Windows server
I launched a current Windows Server Base AMI into one of the private subnets and gave it the IAM role.
Under Advanced details I picked the Managed Microsoft AD directory for automatic domain join. I also chose an instance size that can actually handle Windows admin work and file sharing. A tiny free tier size isn’t a real file server.
For RDP I used the directory’s security group as the source. Its name ends in workspacesMembers.

The directory security group used as the RDP source
That kept the server private. I could manage it from the WorkSpace without opening TCP 3389 to the internet.
Once it started, I noted its private IP.
8. Connecting from the WorkSpace
Inside the WorkSpace I opened Remote Desktop Connection and connected to the server’s private IP.
I signed in with the Managed Microsoft AD admin account like this:
CORP\Admin
The NetBIOS prefix depends on your directory. I used the password from setup and kept it out of this post, my scripts, and source control.
9. Installing the AD admin tools
On the server I opened Server Manager and clicked Add roles and features.
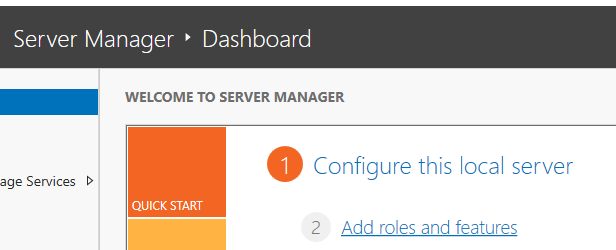
Opening Add Roles and Features from Server Manager
Under Features I picked Remote Server Administration Tools and the Active Directory management parts.
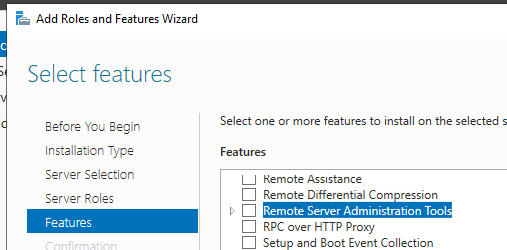
Selecting Remote Server Administration Tools
That installed Active Directory Users and Computers, the Active Directory Administrative Center, the AD PowerShell module, and a few other tools.
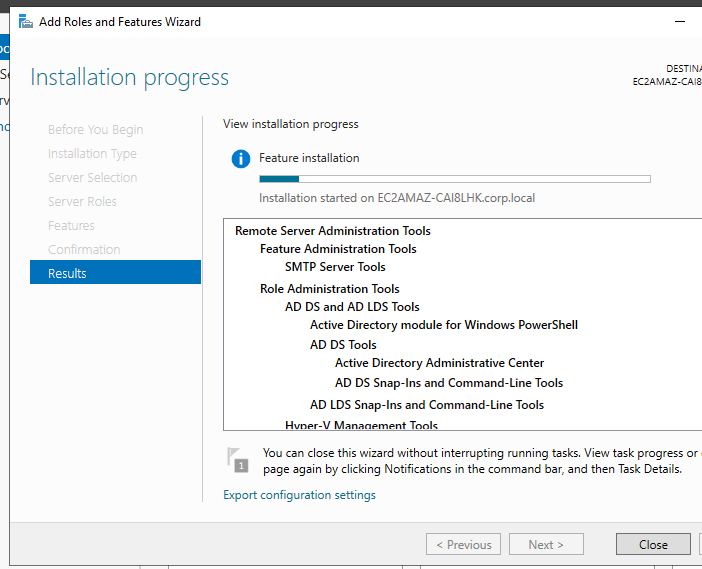
Installing the Active Directory management tools
Then I created an AD security group just for file share access and added only the right users. For day-to-day admin work I’d use a delegated account, not the directory Admin.
10. Adding an EBS data volume
I created a separate EBS volume for shared data in the same zone as the server. After attaching it, I opened Disk Management and brought the disk online. I initialized it and formatted it as NTFS. Then I gave it a drive letter and a clear label.
I picked the final hostname before publishing the share. The name ends up in the path, like this:
\\FILESERVER\Shared
My screenshots show the default Windows hostname, EC2AMAZ-CAI8LHK. FILESERVER is just an example name.
For a production file server I’d also set up EBS encryption, backups, monitoring, capacity alerts, and recovery tests.
11. Allowing only the traffic I needed
My security group had RDP, SMB, ICMP, legacy NetBIOS ports, and the dynamic RPC range.
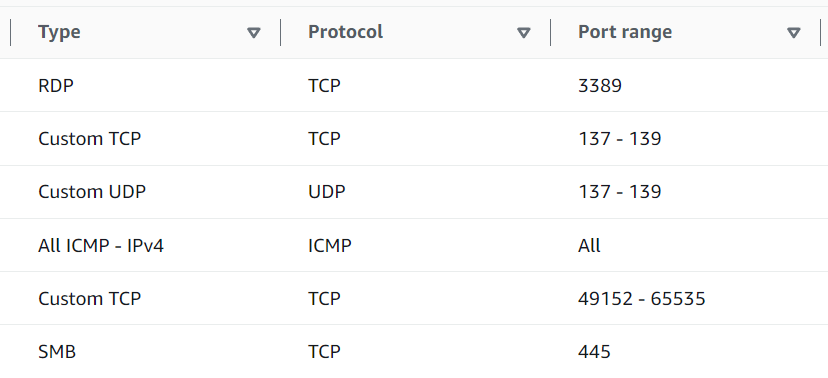
My Windows administration and file-sharing security-group rules (Source column not shown)
Every rule points at a security group. None use 0.0.0.0/0.
For modern SMB, TCP 445 is the main port. TCP and UDP 137-139 are legacy NetBIOS ports. Only open them if you really need them. The dynamic RPC range is for some Windows and AD admin tasks, not normal file access. Limit RDP to admin WorkSpaces or a dedicated admin security group.
12. Creating and testing the SMB share
On the data volume I created a folder and shared it over SMB. I gave access to my AD security group, not to all domain users.
Both permission layers matter:
- Share permissions control access through the SMB share.
- NTFS permissions control access to the folders and files themselves.
I tested from the WorkSpace. I opened the UNC path, created a test file, read it, and deleted it. Then I signed in as a user outside the group to make sure access was denied.
Result
AWS Managed Microsoft AD handled identity for both WorkSpaces and the domain-joined server. Users could sign in to their WorkSpace and reach a private SMB share. AD groups controlled who could get to the data.
It isn’t production-ready yet. First I’d split admin work from file server duties. I’d review least privilege in IAM and AD delegation. I’d add backups and monitoring and harden SMB and RDP. I’d confirm the high availability needs. And I’d delete unused WorkSpaces, NAT gateways, directories, instances, and EBS volumes so they stop billing.