Automating EC2 Patching with AWS Systems Manager Patch Manager
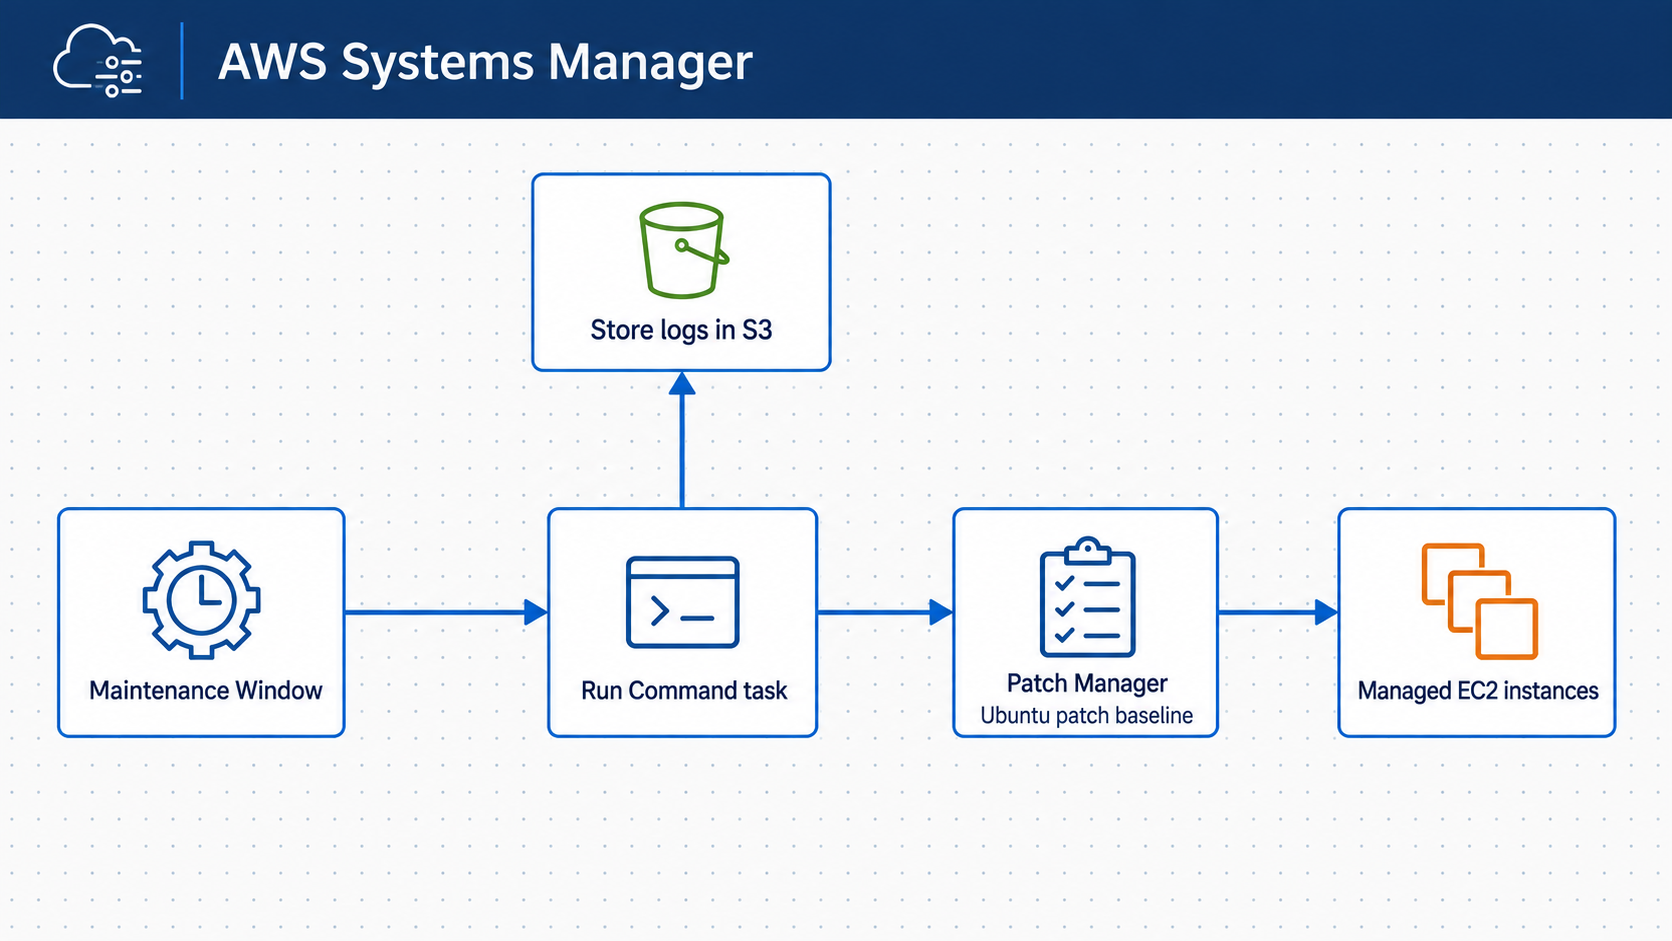
I moved an Ubuntu EC2 instance off manual update checks and onto a repeatable patching workflow in AWS Systems Manager. First I made sure Systems Manager could manage the instance. Then I ran a scan with the AWS baseline and built my own Ubuntu baseline. Last, I scheduled it with a Maintenance Window.
It uses several Systems Manager features together:
Maintenance Window
        |
        v
Run Command task: AWS-RunPatchBaseline
        |
        v
Patch baseline + tagged managed nodes
        |
        v
Compliance results and optional S3 logs
I used the classic flow with a baseline, a patch group, and a Maintenance Window. AWS also has patch policies now. Compare the current options before you standardize on one for production.
Times in the console and logs are in UTC. The Maintenance Window schedule uses America/New_York.
Part 1: Prepare the managed instance
1. Launching the Ubuntu instance
I launched an Ubuntu Server 24.04 instance. The AWS image already had SSM Agent, so I didn’t need to install it.
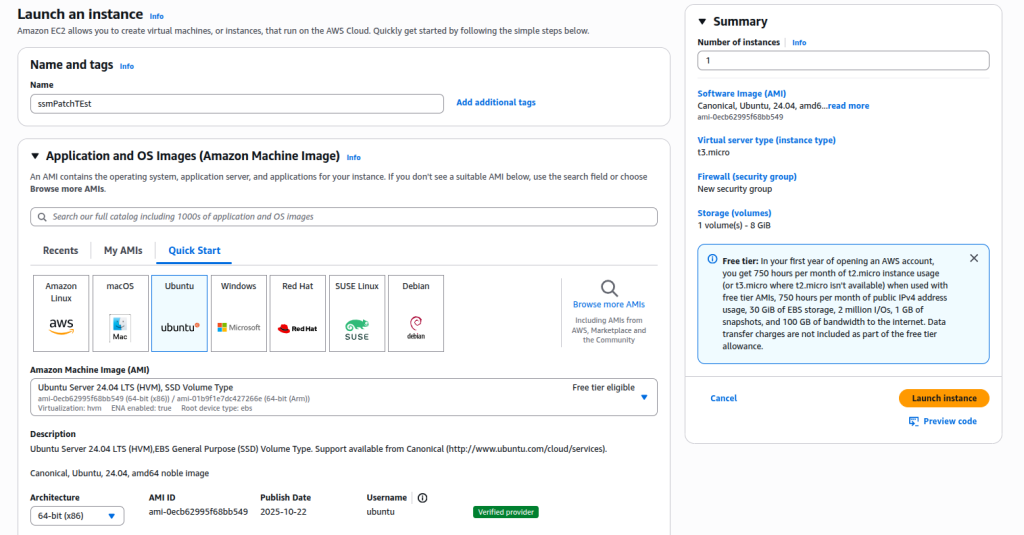
Launching the Ubuntu EC2 instance used for patch testing
How the agent is packaged depends on the OS and AMI. I still checked it on the server instead of assuming.
2. Creating the EC2 role
I opened IAM and created a role with EC2 as its trusted service.
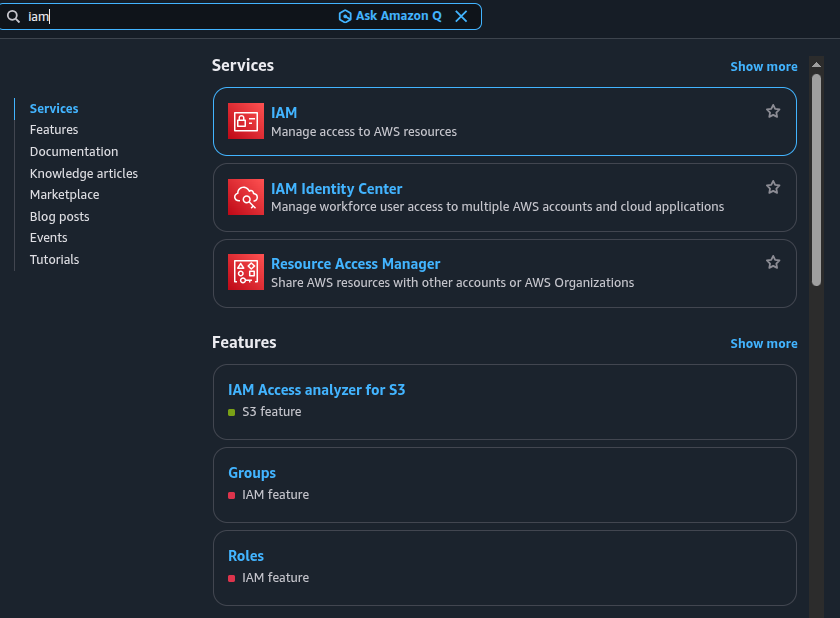
Opening IAM to create the EC2 role
I attached the AWS-managed policy:
AmazonSSMManagedInstanceCore
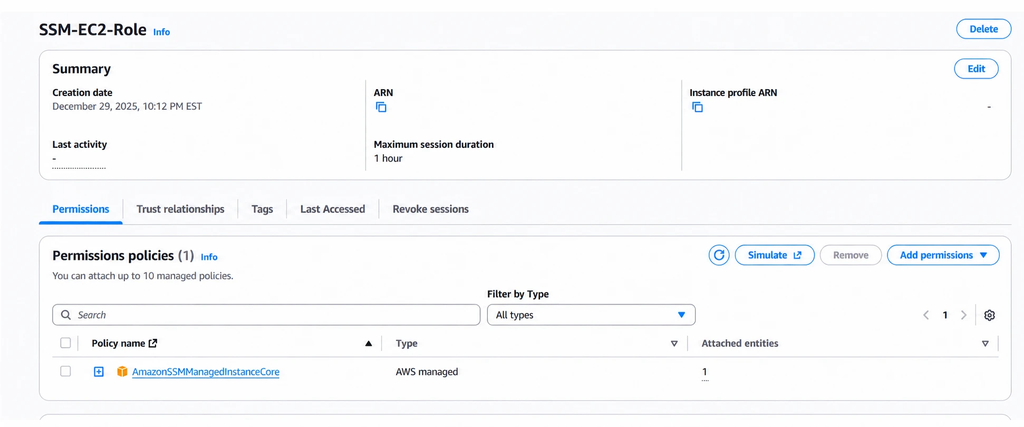
The EC2 role includes AmazonSSMManagedInstanceCore
SSM Agent uses this instance profile. If you send output to S3 or logs to CloudWatch, add only the exact bucket, prefix, KMS, or log permissions you need.
3. Attaching the role
On the instance page I went to Actions → Security → Modify IAM role and attached the new profile.
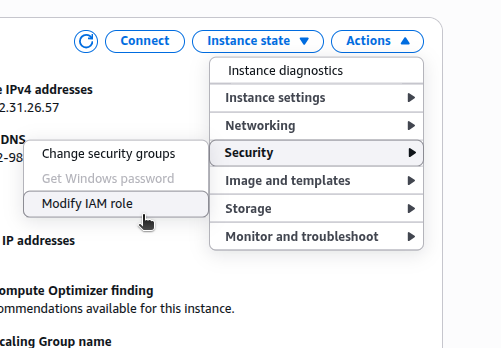
Modifying the IAM role assigned to the EC2 instance
4. Checking SSM Agent
On this Ubuntu image the agent runs as a Snap service. I checked that it was enabled and active:
snap services amazon-ssm-agent
sudo systemctl status snap.amazon-ssm-agent.amazon-ssm-agent.service
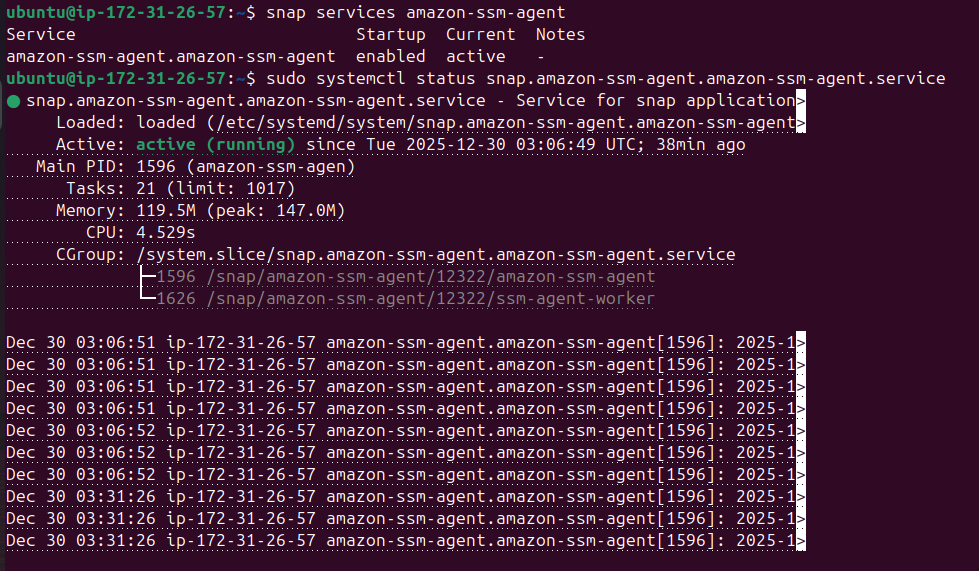
SSM Agent is active and running on the Ubuntu instance
I also confirmed the instance showed up as a managed node. The agent needs outbound HTTPS to the Systems Manager endpoints. That can go through internet or NAT access, or through VPC interface endpoints.
Part 2: Running a manual scan
5. Opening Patch Manager
I opened AWS Systems Manager from the AWS console.
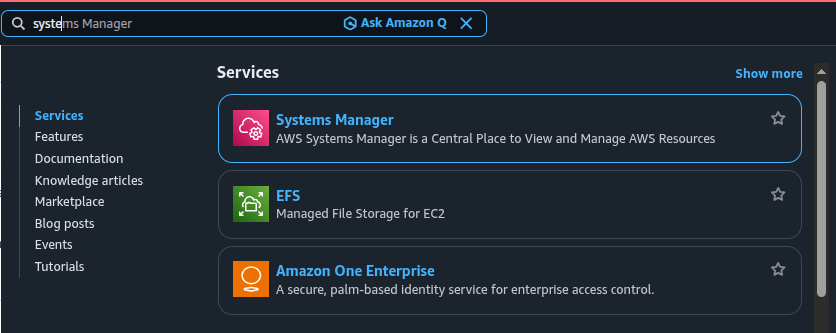
Opening AWS Systems Manager
Under Node Tools, I selected Patch Manager.
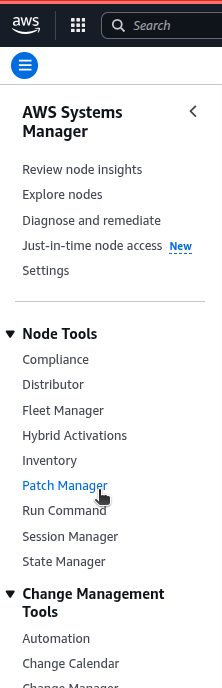
Patch Manager in the Systems Manager navigation
On the Patch Manager page I clicked Patch now.
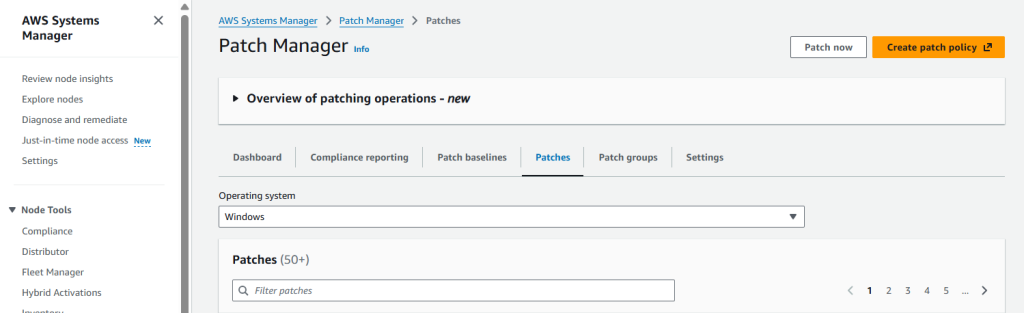
Starting an on-demand Patch Manager operation
6. Scanning without installing
For the first run, I chose Scan and targeted only the test instance.
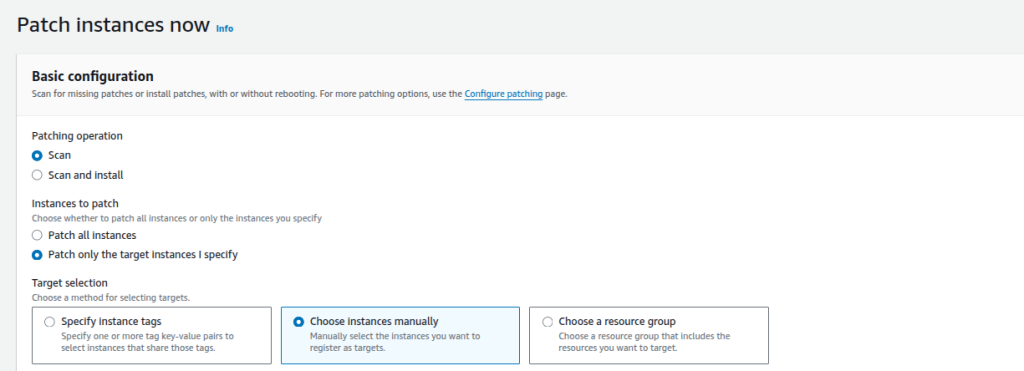
Configuring a scan-only operation for one target instance
A scan checks compliance but doesn’t install anything. That made it a safe first test of connectivity, permissions, and baseline choice.
Since it’s Ubuntu, Patch Manager used the AWS Ubuntu baseline.
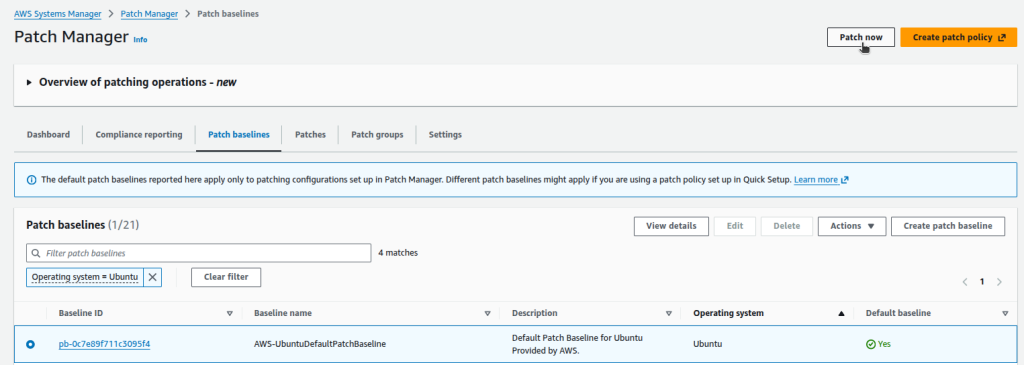
The AWS-managed default Ubuntu patch baseline
The execution completed successfully.
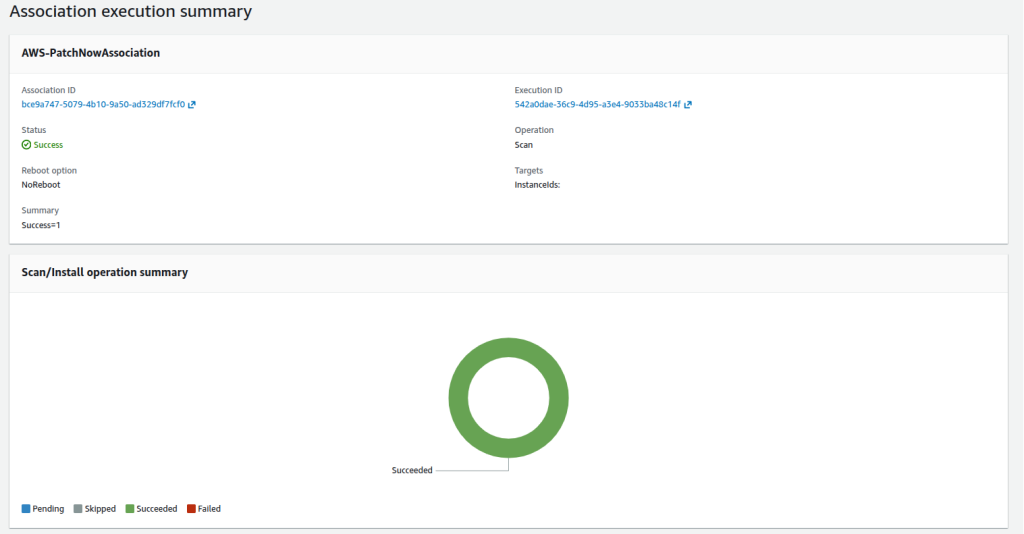
Successful Patch Manager scan execution
Success only meant the command ran. I still checked the compliance result to see what was missing.
Part 3: Building a custom Ubuntu baseline
7. Creating the baseline
In the Patch baselines tab I clicked Create patch baseline.
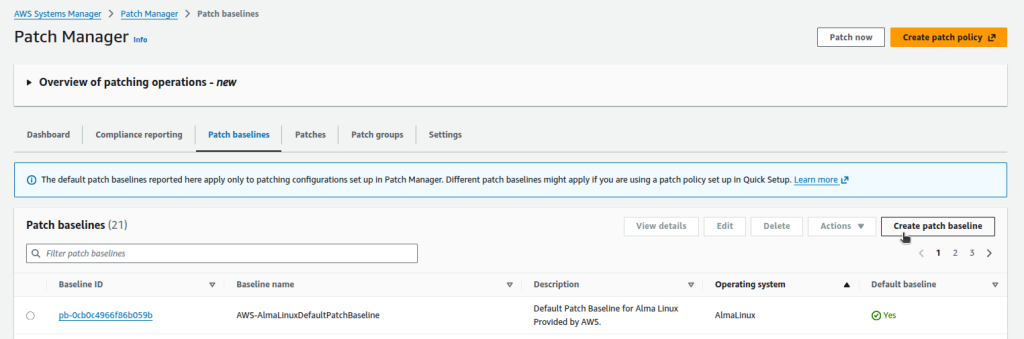
Creating a custom patch baseline
I named it and picked Ubuntu as the OS. I didn’t make it the account default.
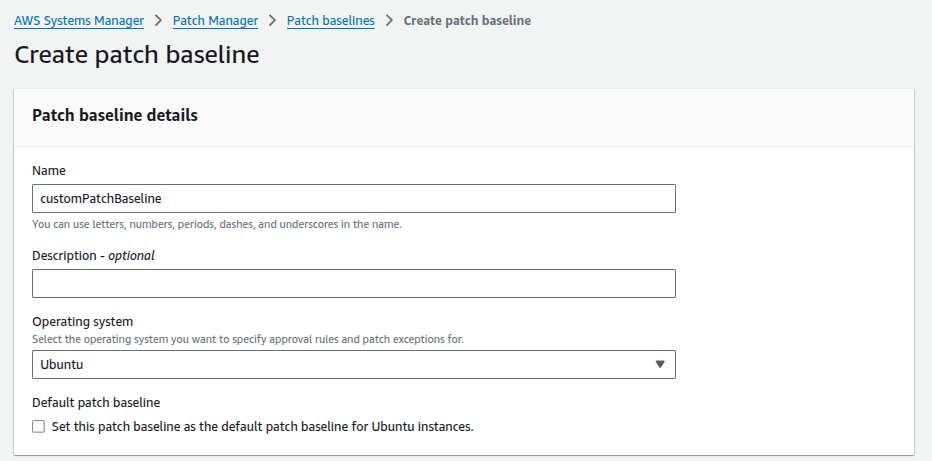
Creating an Ubuntu-specific custom baseline
8. Setting approval rules
I set which Ubuntu products, sections, and priorities get auto-approved. I also chose whether to include non-security updates and how matching patches show up in compliance.
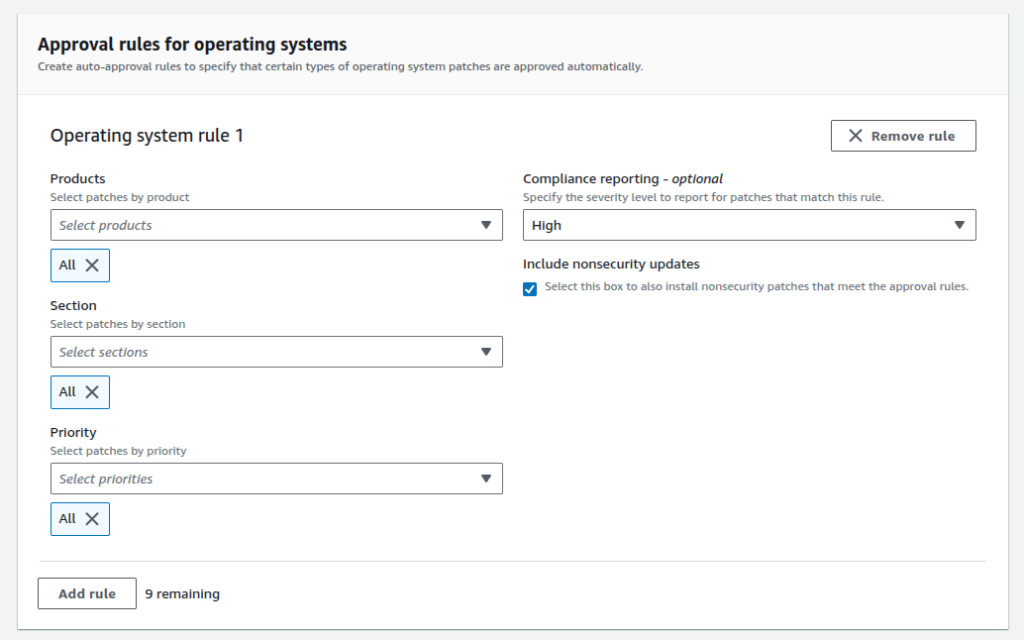
Defining the Ubuntu patch approval rule
This rule is for testing, not a production policy. In production I’d work out approval delays, rejections, exceptions, and severity reporting with the security and app owners. I’d also push patches through test and staging groups first.
9. Tagging the instance into a patch group
I added this tag to the managed instance:
Key:   Patch Group
Value: CustomPatchTest
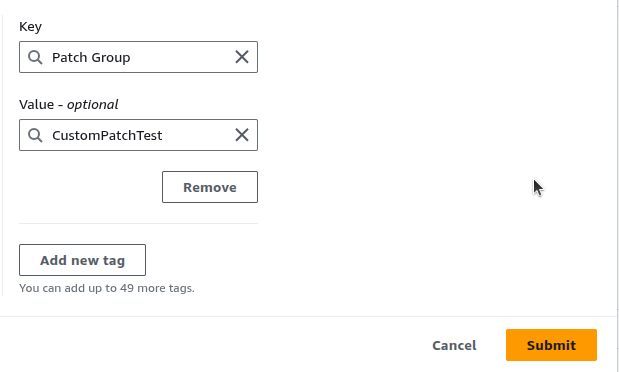
Adding the CustomPatchTest patch-group tag
The key and value have to match the baseline association exactly.
10. Linking the group to the baseline
I selected my baseline and opened Actions → Modify patch groups.
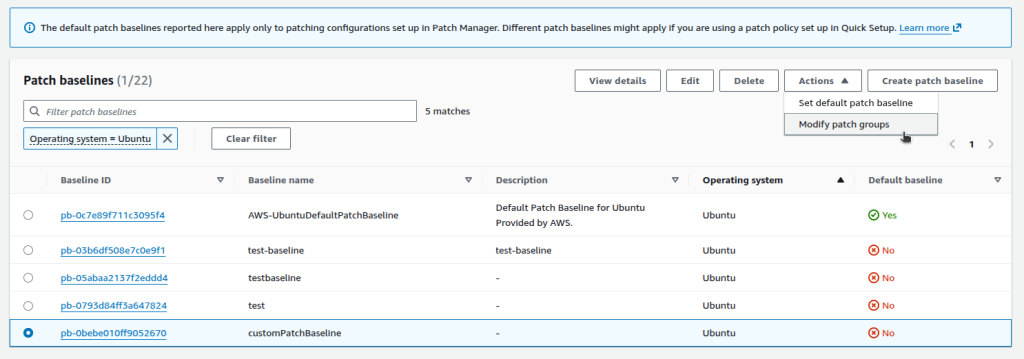
Opening the custom baseline’s patch-group configuration
I added CustomPatchTest as the patch-group value.
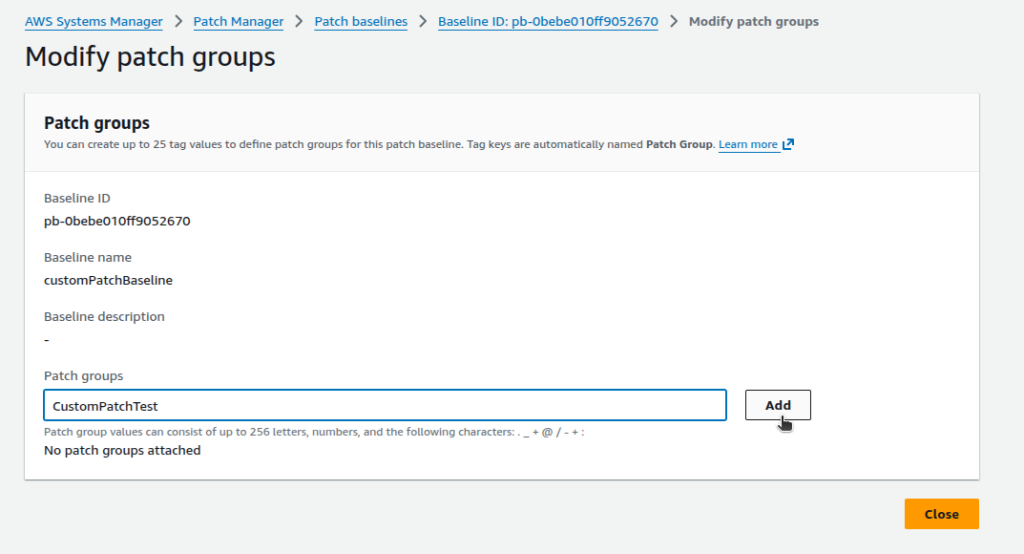
Associating CustomPatchTest with the custom Ubuntu baseline
The Patch groups tab then showed the group linked to the baseline.
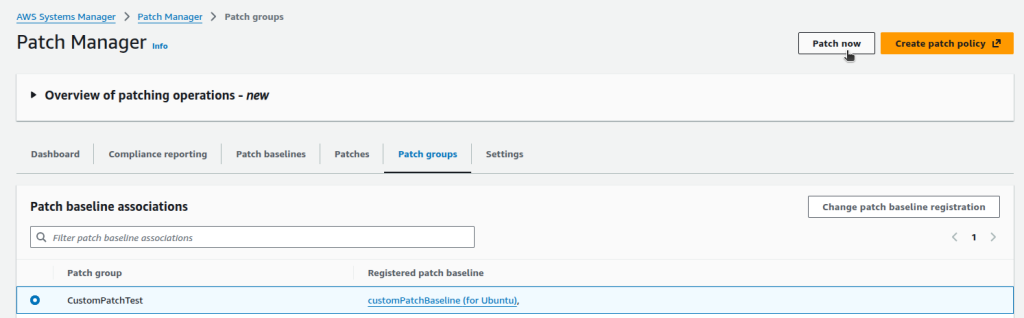
The patch group registered to the custom baseline
11. Scanning with the custom baseline
I ran another scan against the patch group. It finished successfully on the tagged targets.
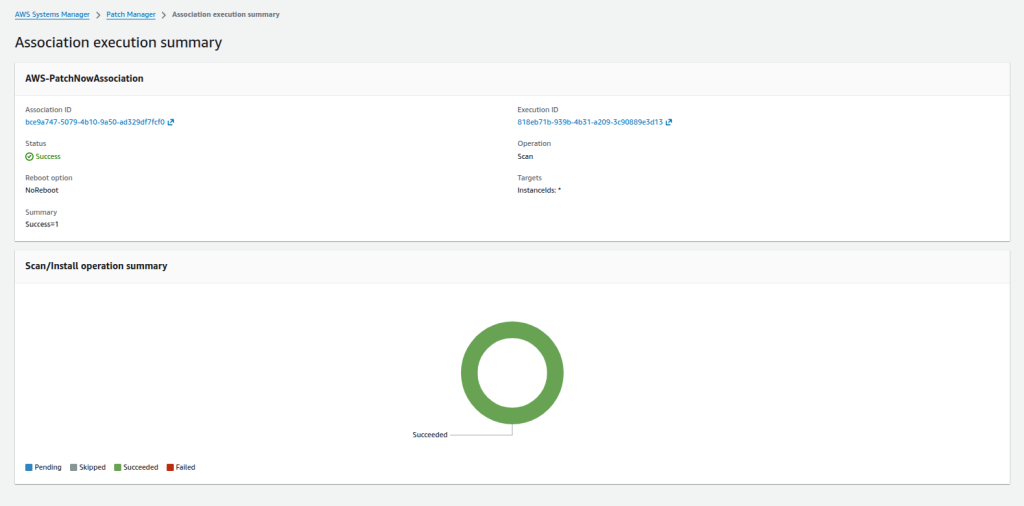
Successful scan using the custom patch group
I sent the command output to an S3 prefix called PatchLinux.
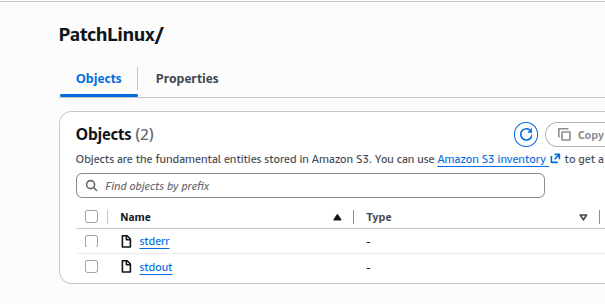
Patch Manager stdout and stderr objects stored in S3
The output showed the package manager activity, baseline ID, snapshot ID, patch group, and compliance result.

Patch scan details in the stored stdout log
Patch logs can expose hostnames, package versions, and environment details. So I kept the bucket private and encrypted. I limited access and added a lifecycle policy.
Part 4: Scheduling it
12. Creating a Maintenance Window
I opened Maintenance Windows and clicked Create maintenance window.

Creating a Systems Manager Maintenance Window
I gave it a clear name and left Allow unregistered targets off.
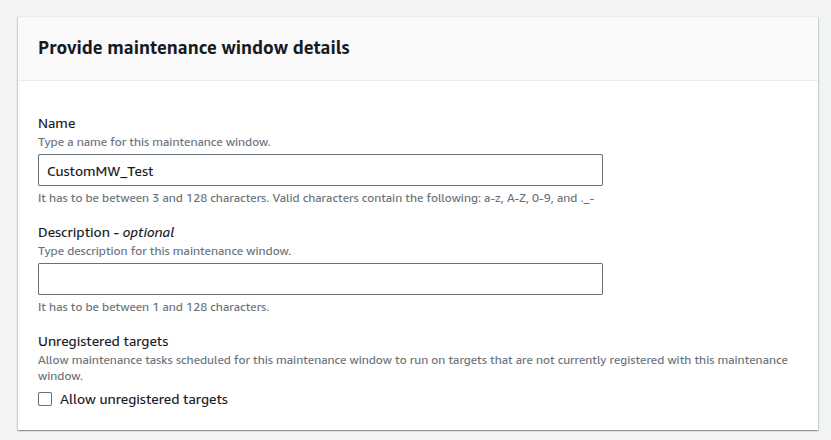
Restricting the Maintenance Window to registered targets
13. Setting the schedule and limits
I set the schedule, time zone, duration, and cutoff.
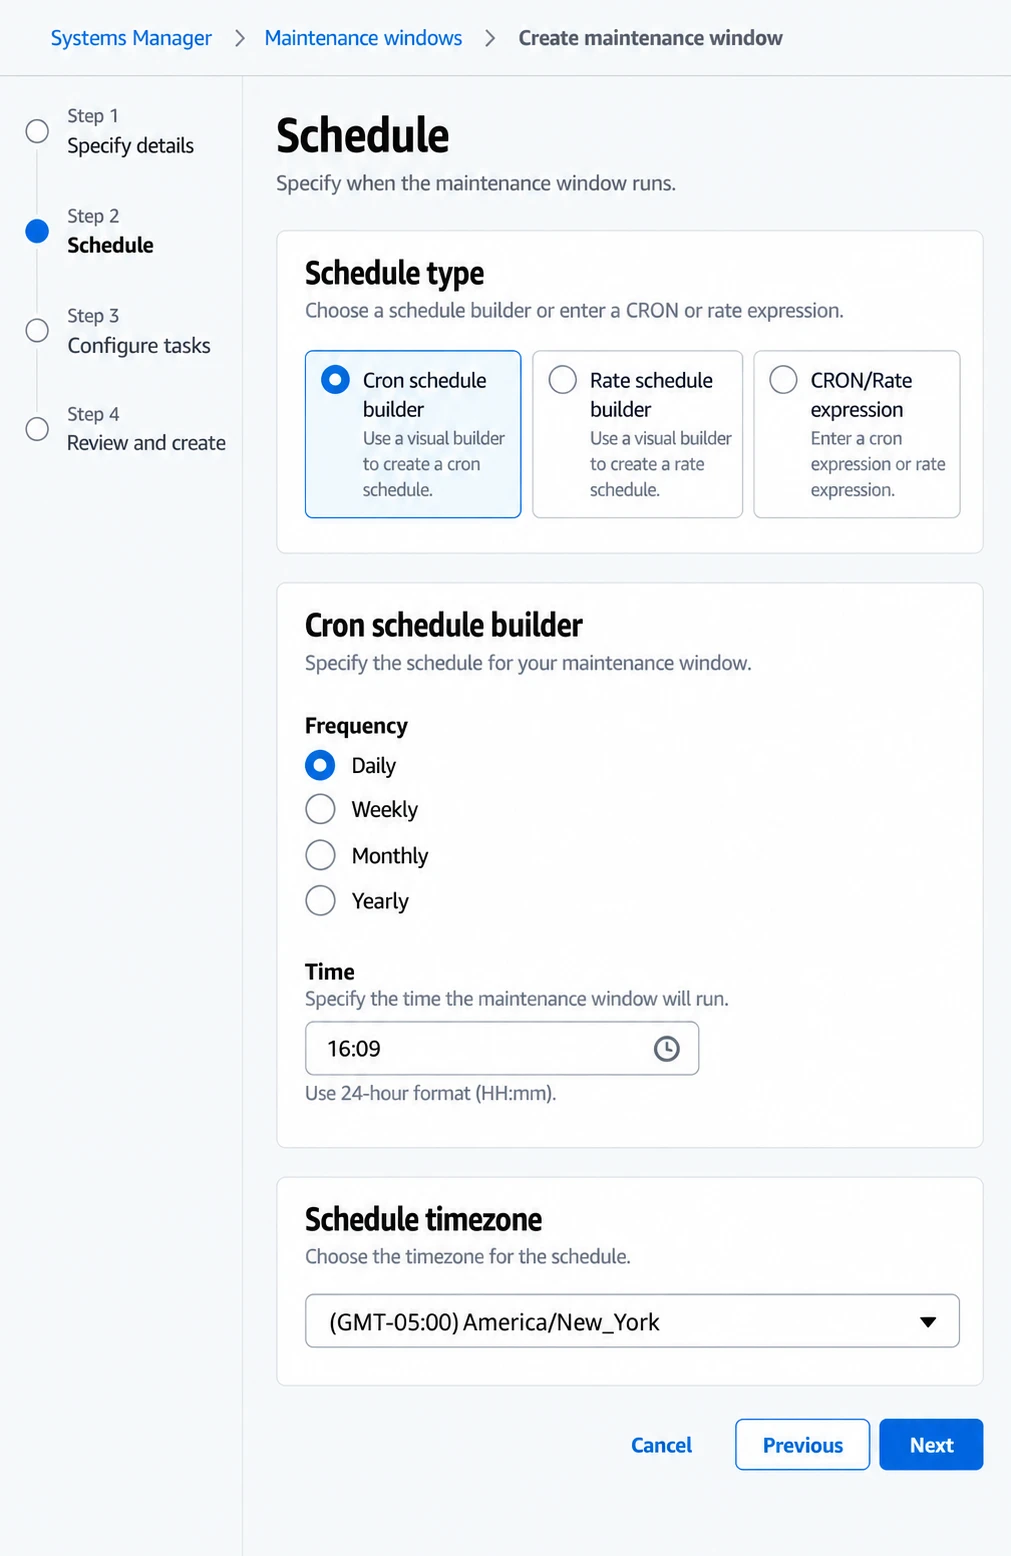
Configuring the Maintenance Window schedule
I used a short daily schedule for testing. In production I’d use an approved change window with enough time for patching and reboots. I’d set a cutoff so tasks can’t start late. I’d also coordinate with load balancers, Auto Scaling, backups, and health checks.
14. Registering the target
On the Targets tab I clicked Register target.
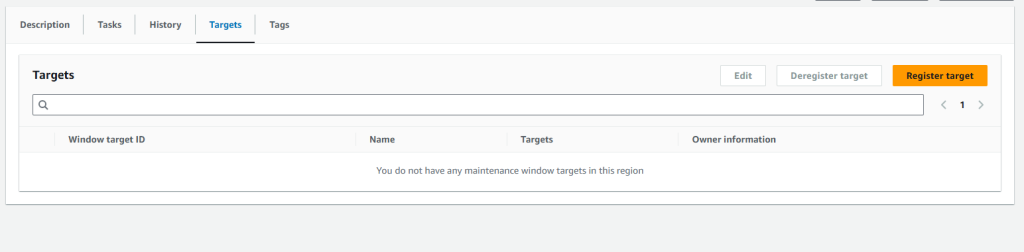
Registering a target with the Maintenance Window
I targeted instances with the same Patch Group=CustomPatchTest tag.
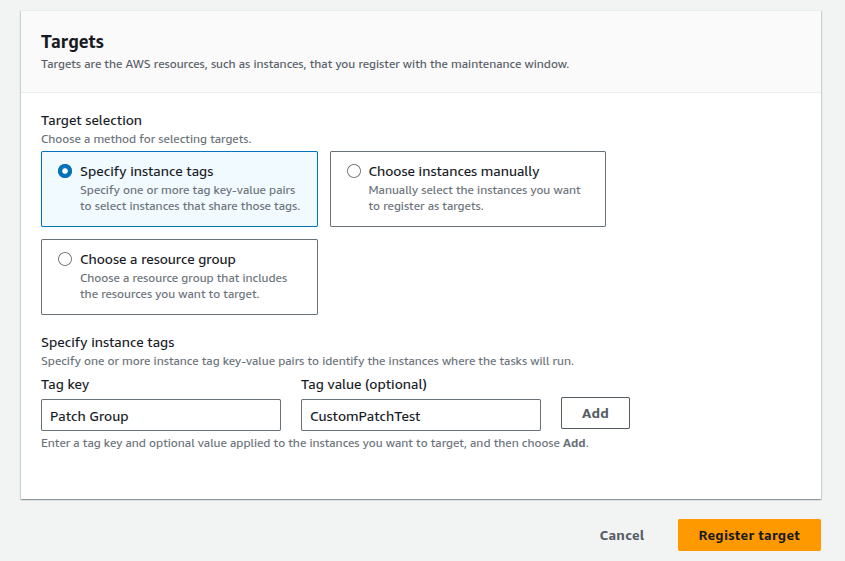
Targeting managed instances with the patch-group tag
Tag targeting scales well. It also means adding that tag to a server now has real consequences.
15. Registering the Run Command task
Under Tasks I clicked Register Run command task.
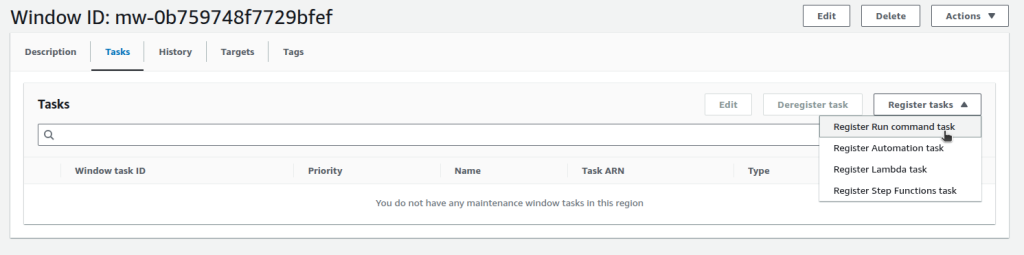
Registering a Run Command task in the Maintenance Window
I named it ScanTask and kept the invocation cutoff on.
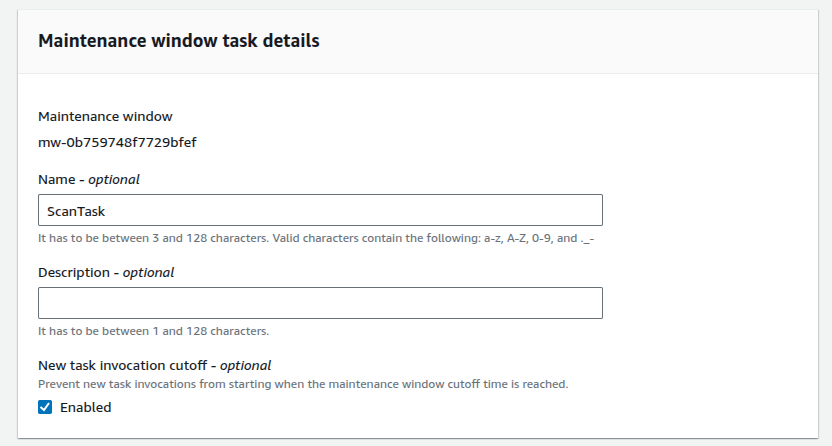
Naming the scheduled patch task
I selected the AWS-owned AWS-RunPatchBaseline document.
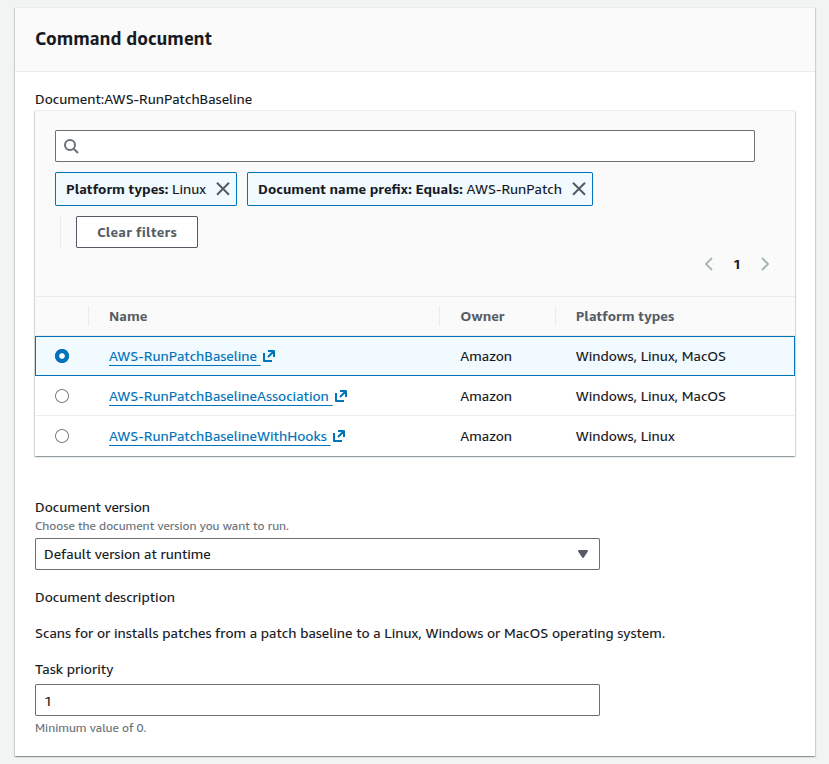
Selecting the AWS-RunPatchBaseline command document
I picked the registered target.
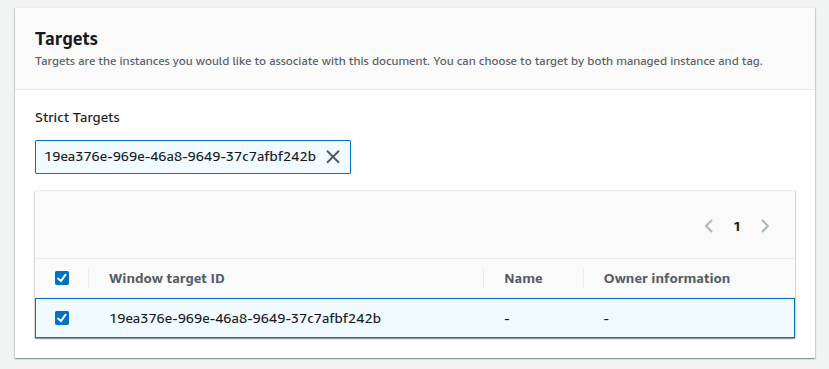
Assigning the registered target to the task
With only one instance, I set concurrency to one and stopped after one error.
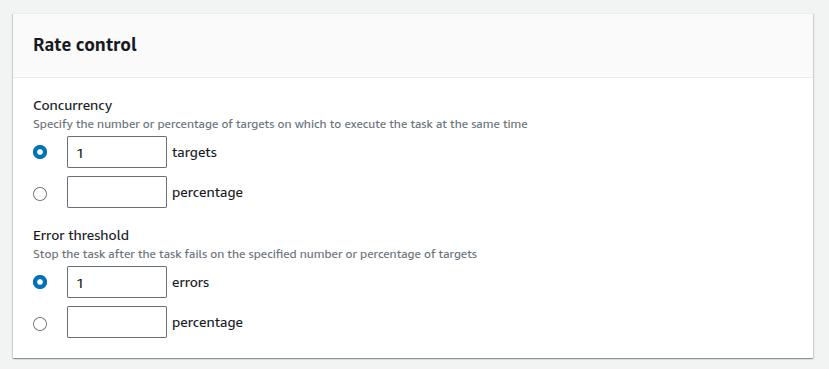
Limiting task concurrency and the error threshold
The task parameters have to set the operation:
Operation = Scan
To install patches instead, use Operation = Install. Pick the reboot behavior on purpose and test in a non-production group first. A successful scan does not mean anything got installed.
The instance profile and the Maintenance Window task role are separate identities. I kept AmazonSSMManagedInstanceCore on the instance. If the console or API asks for a task role, give it its own least-privilege service role. I didn’t reuse the instance profile for that.
16. Checking the scheduled run
After the next window, the History tab showed a successful run.
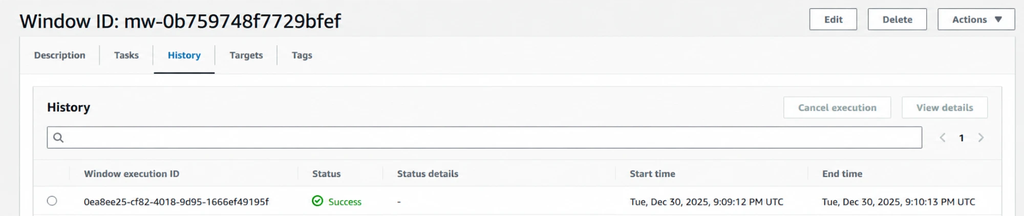
Successful scheduled Maintenance Window execution
I opened the details and checked the target count, command status, compliance result, and logs. For install runs I’d also test the app after any reboot. I’d alert on failed, timed out, or non-compliant nodes.
Result
The Ubuntu instance now runs on a repeatable patch workflow. SSM Agent and the EC2 role make it manageable. The custom baseline decides what gets approved. The patch group tag picks the policy. The Maintenance Window runs AWS-RunPatchBaseline on schedule.
Before scaling this up, I’d add separate dev, staging, and production patch groups. I’d stagger rollouts and add failure alarms. I’d check backup and rollback steps and report compliance in one place. And I’d make sure an automated install never patches the whole fleet at once.