Migrating a Linux Web Server to AWS with AWS MGN
I wanted to do a full server migration, not just draw a diagram or half-configure a demo. I took a working Linux web server and replicated it into AWS with Application Migration Service (AWS MGN). Then I tested the AWS copy, did the cutover, and cleaned up.
This is a plain lift-and-shift. I didn’t rebuild the app or change its architecture. I just wanted to prove the same workload could run on a new EC2 instance after MGN copied it.
AWS Application Migration Service
What I built
The setup had:
- A Linux web server running outside the target AWS environment
- A dedicated VPC and public subnet for the migrated workload
- An internet gateway, route table, and security group
- An AWS MGN replication settings template
- The AWS Replication Agent installed on the source server
- A test launch before the final cutover
- A final cutover instance running the replicated application
I replicated over the public internet. For a production migration I’d look at private options too. That could be a VPN, Direct Connect, or VPC peering depending on the environment.
1. Checking the source server first
Before touching AWS, I opened the website and made sure it worked. That gave me a baseline for later. If the app is already broken, a perfect replication just gives you a broken server in AWS.
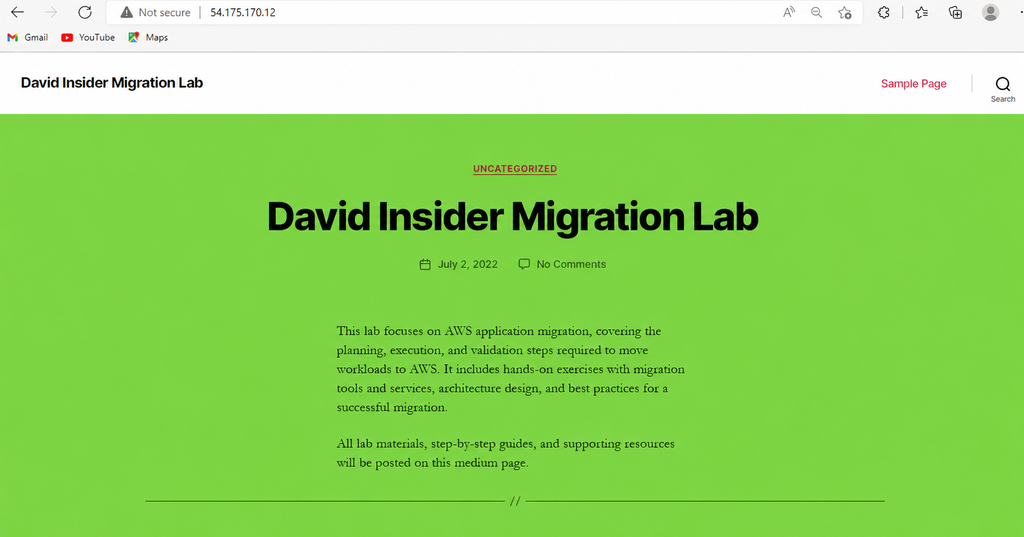
The original web application before migration
I noted the pages and behavior I wanted to retest after the move.
2. Creating temporary replication credentials
The agent installer needs permission to register the server with AWS MGN. I created an IAM user with programmatic access and gave it the permissions the install needs.
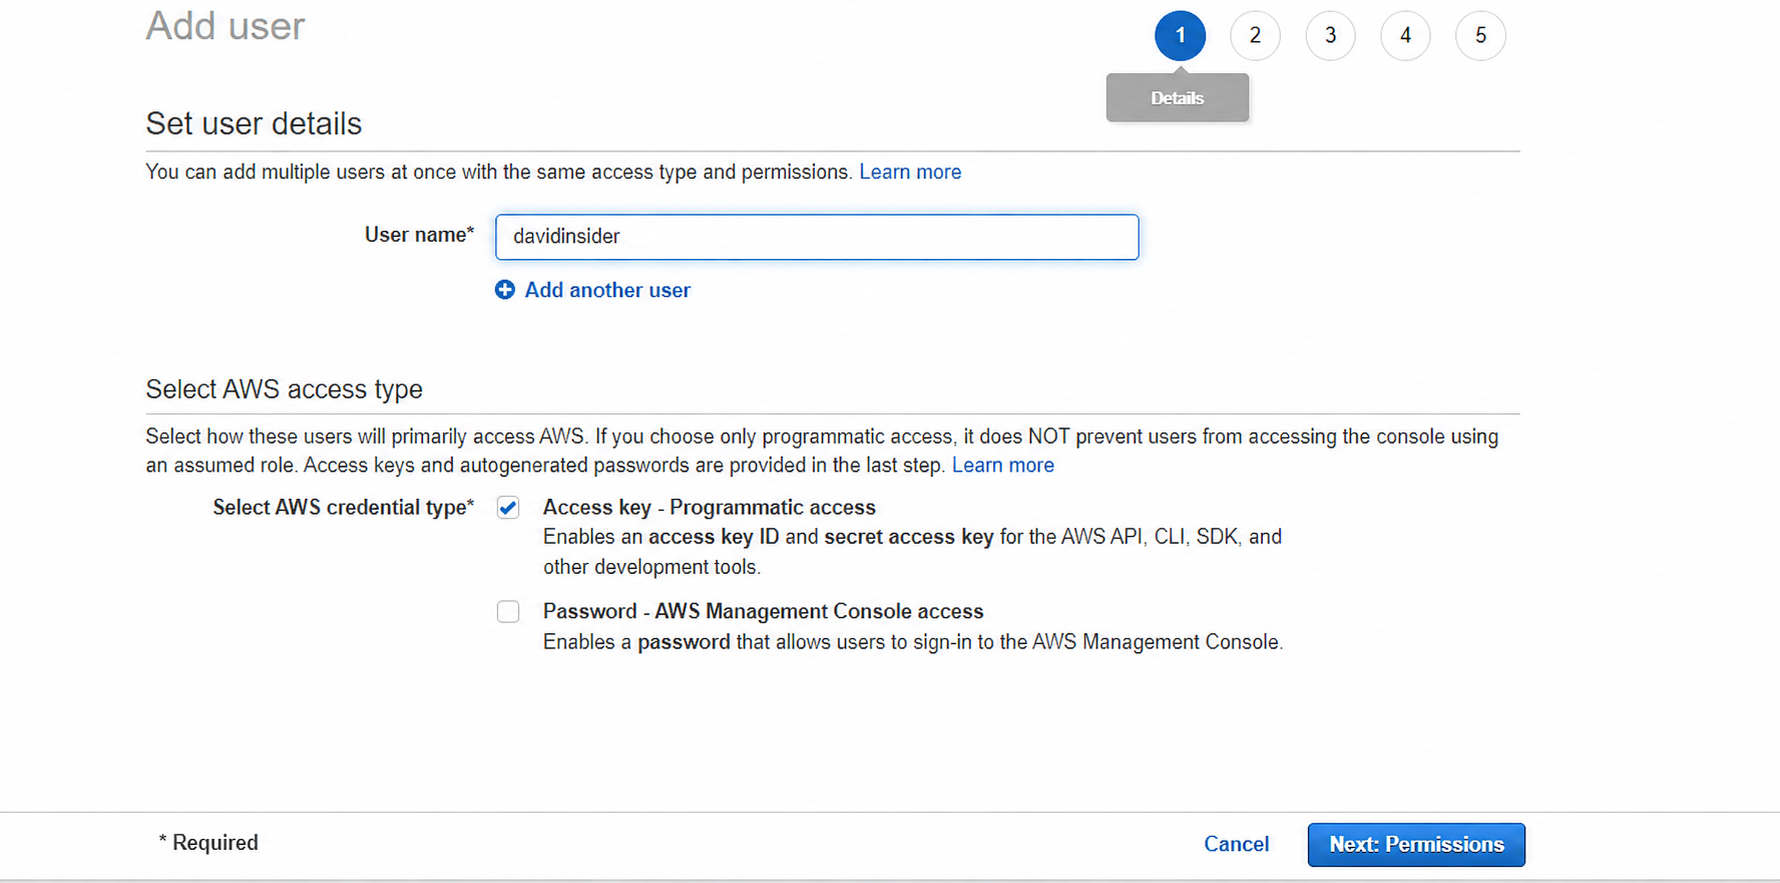
Creating the IAM user used by the replication agent
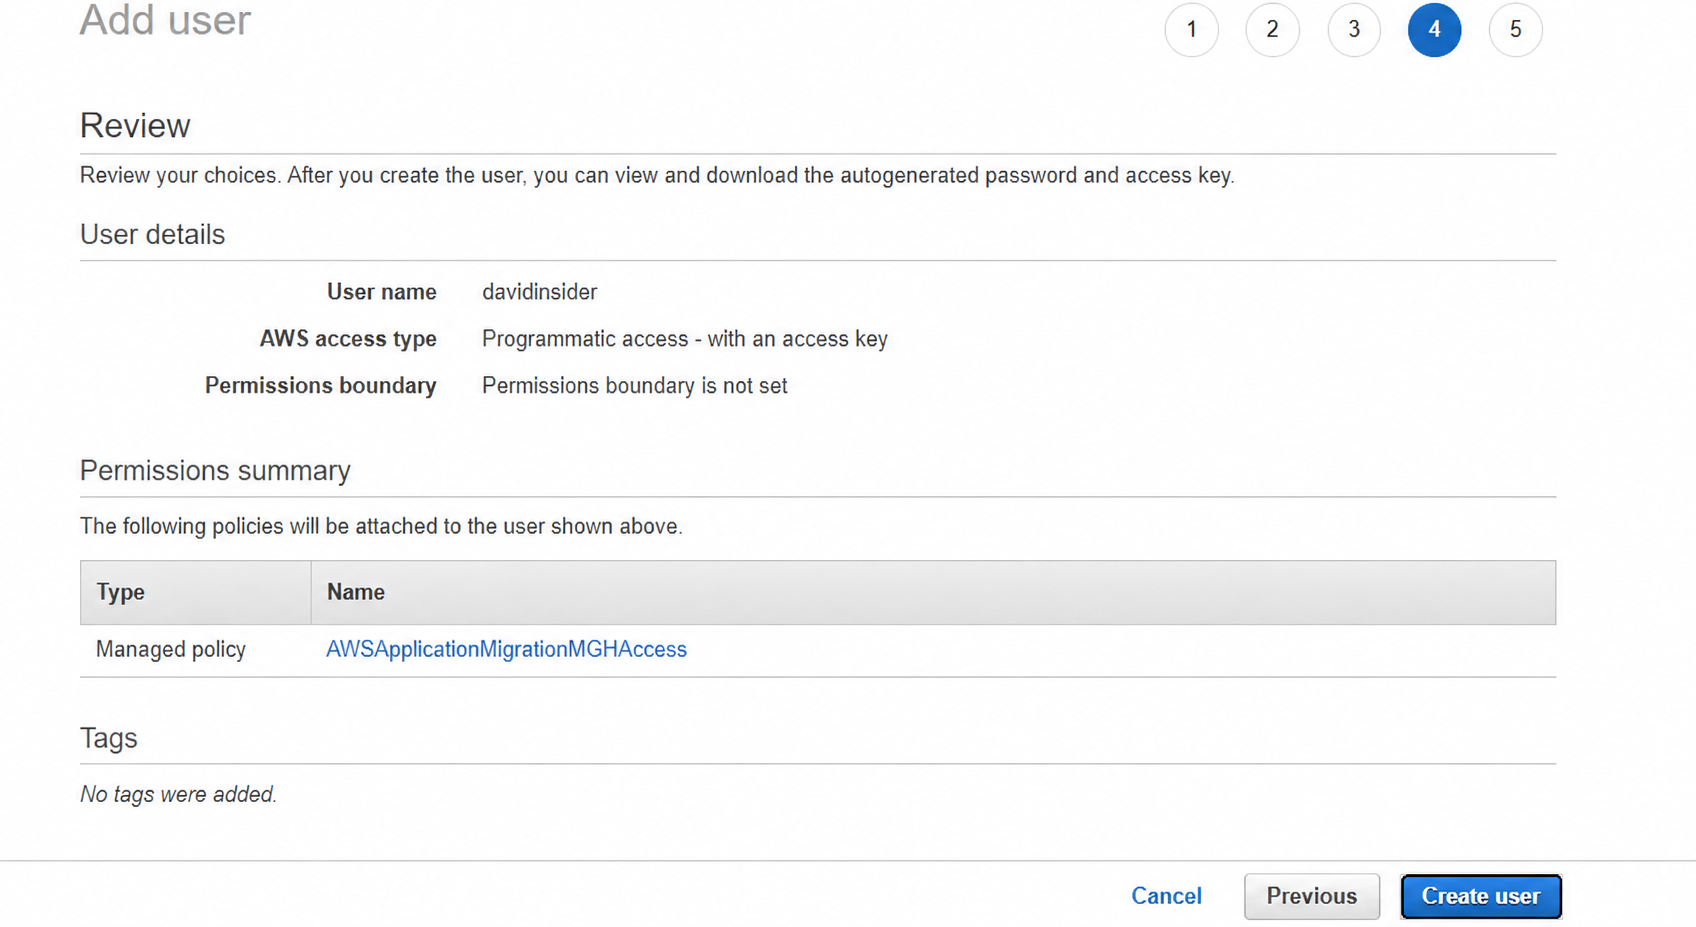
Reviewing the IAM user configuration
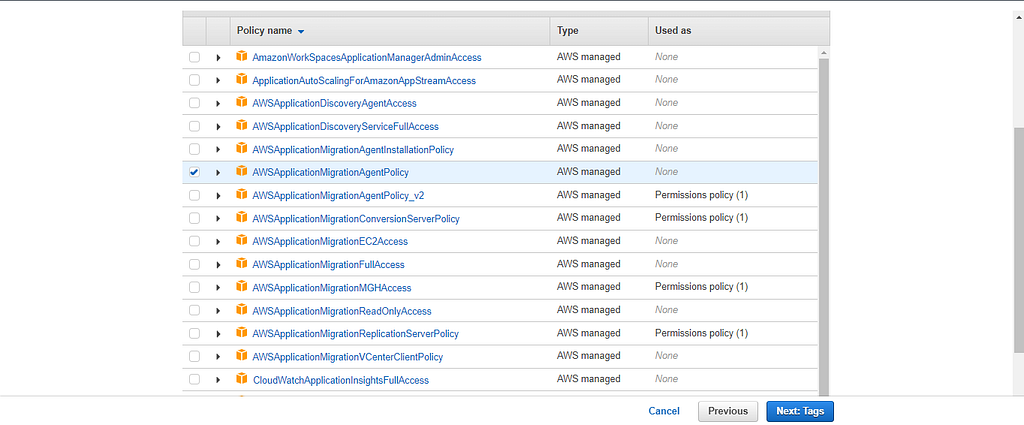
Selecting the required AWS permissions
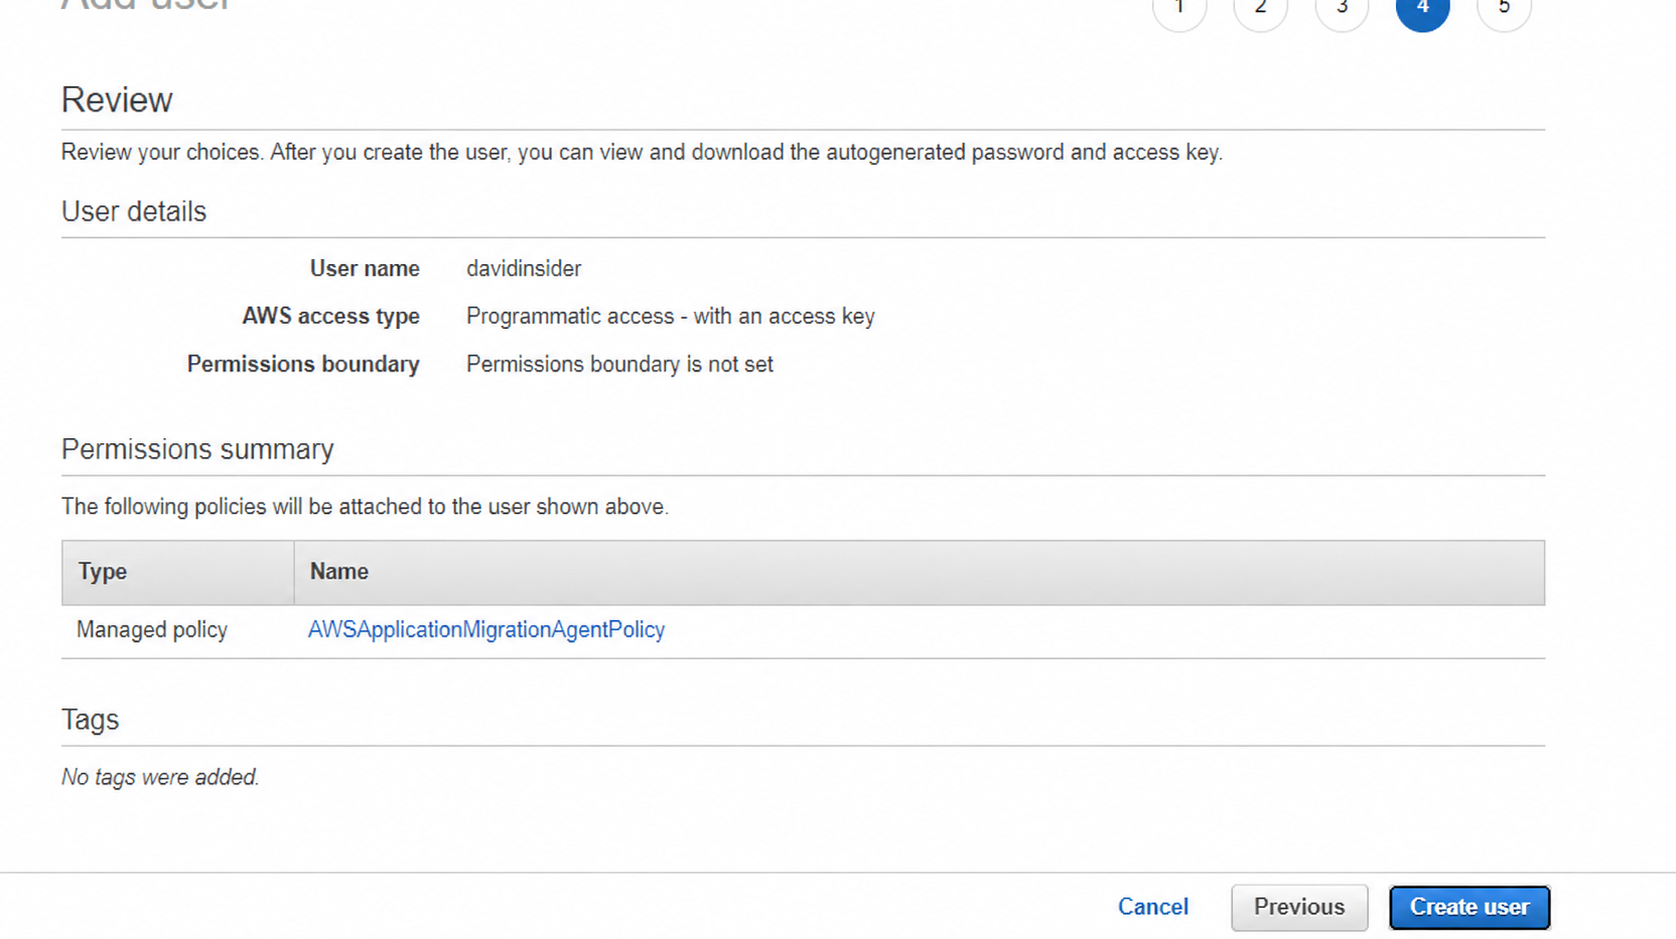
Final IAM user review
I treated these as temporary. I stored them safely, used them only for the agent, and deleted them when I was done. For a real migration, check the current MGN docs for the minimum permissions. Don’t hand out broad access.
Never place an access key or secret key in source control, screenshots, shell history, or a public article.
3. Building the target VPC
I made a separate VPC for the migration. That kept the networking simple to follow and easy to clean up. I used the N. Virginia Region (us-east-1). The same steps work in any Region that supports MGN.
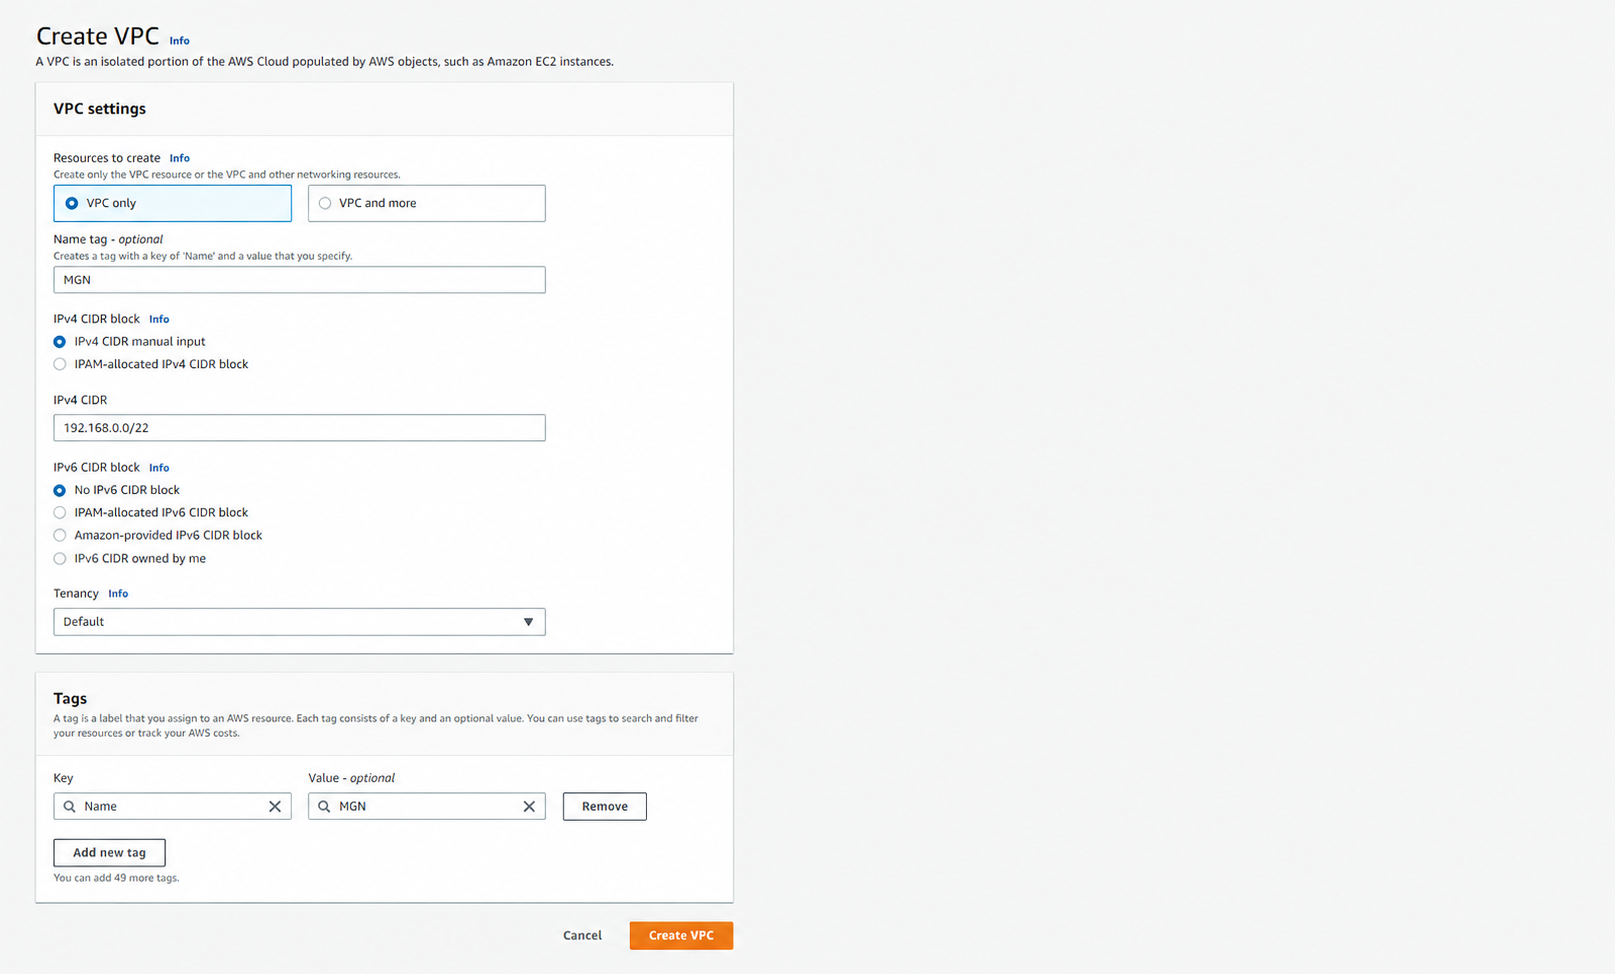
Creating the VPC for the migrated workload
Then I checked its CIDR range and the main route table AWS created.
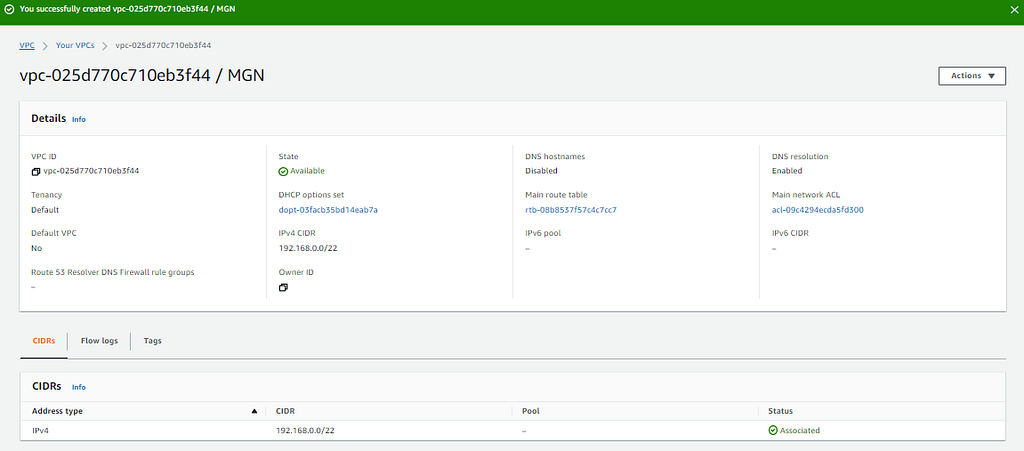
Reviewing the new VPC
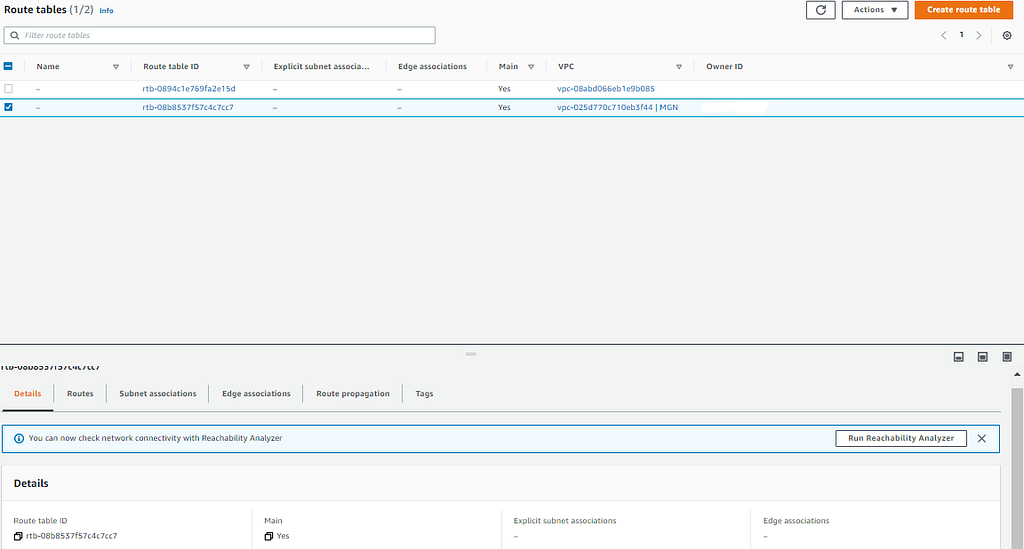
The VPC route table before adding internet access
4. Adding a public subnet and internet route
The migrated server needed outbound access and a public address for testing. So I created a subnet in the VPC and made it public.
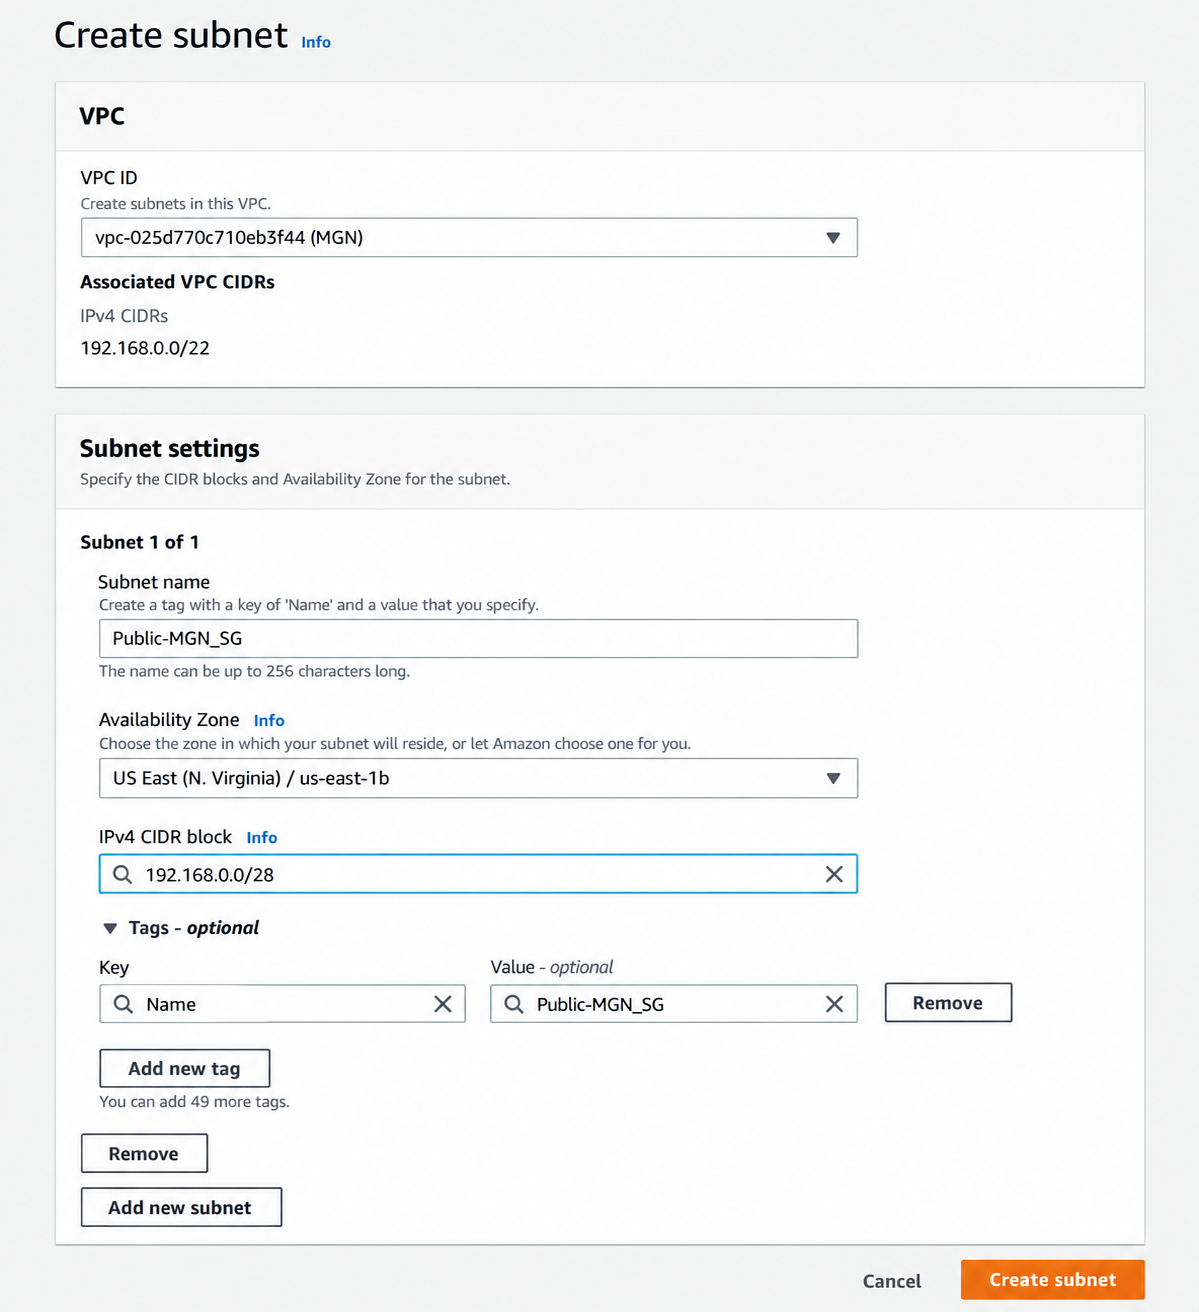
Creating the subnet and choosing its CIDR range
Next I created an internet gateway and attached it to the VPC.
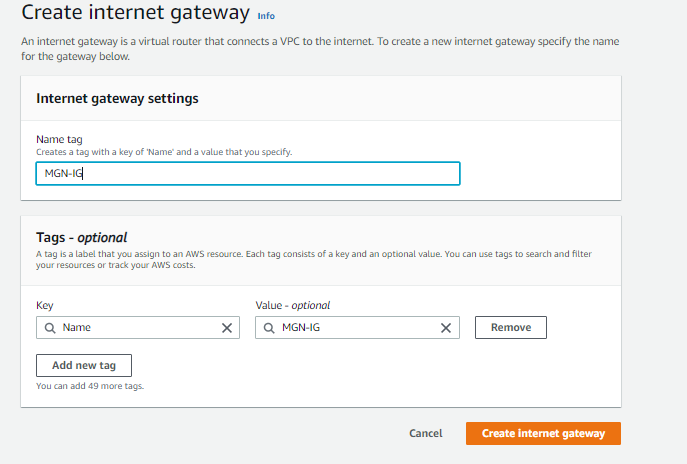
Creating the internet gateway
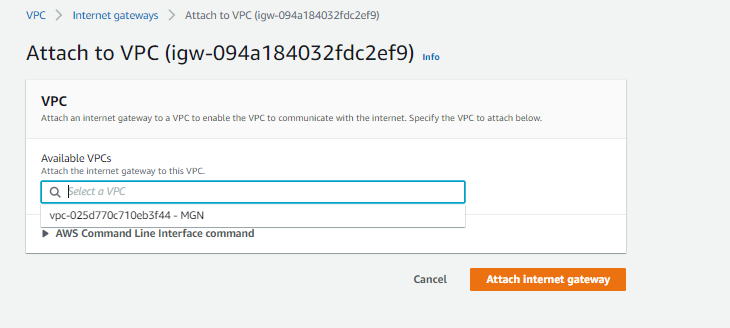
Attaching the internet gateway to the VPC
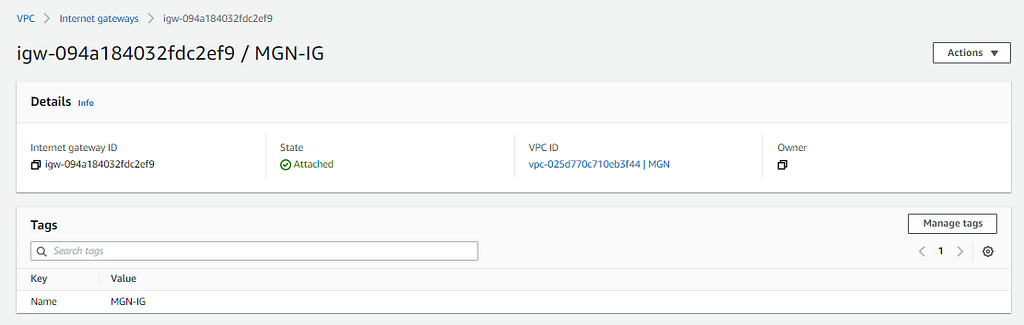
The attached internet gateway
Last, I added a default route to the subnet’s route table:
Destination: 0.0.0.0/0
Target:      Internet Gateway
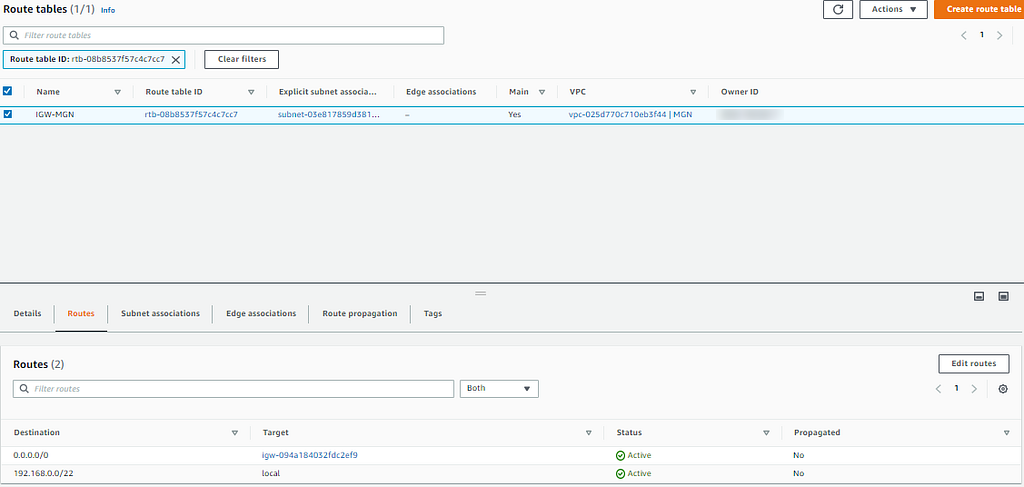
Adding the default route through the internet gateway
5. Locking it down with a security group
I created a security group for the web server. HTTP and HTTPS were open so I could test the site. Admin access was limited to one trusted public IP.
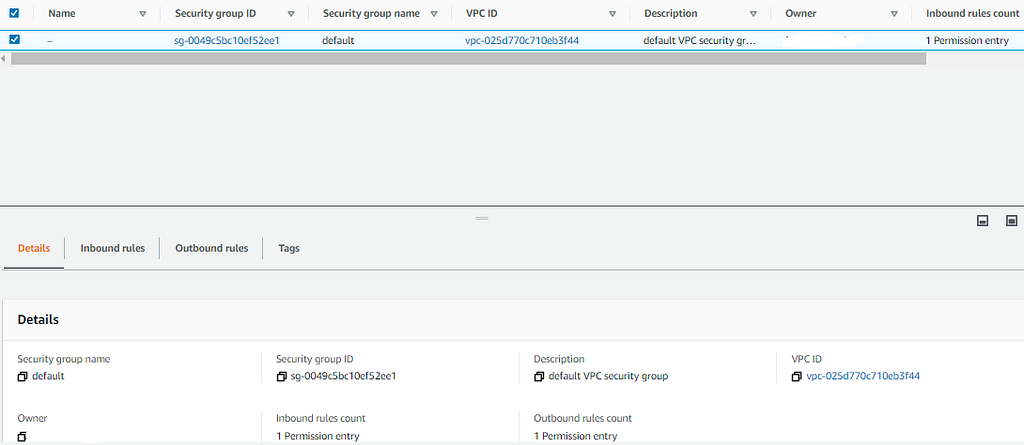
Selecting the security group in the new VPC
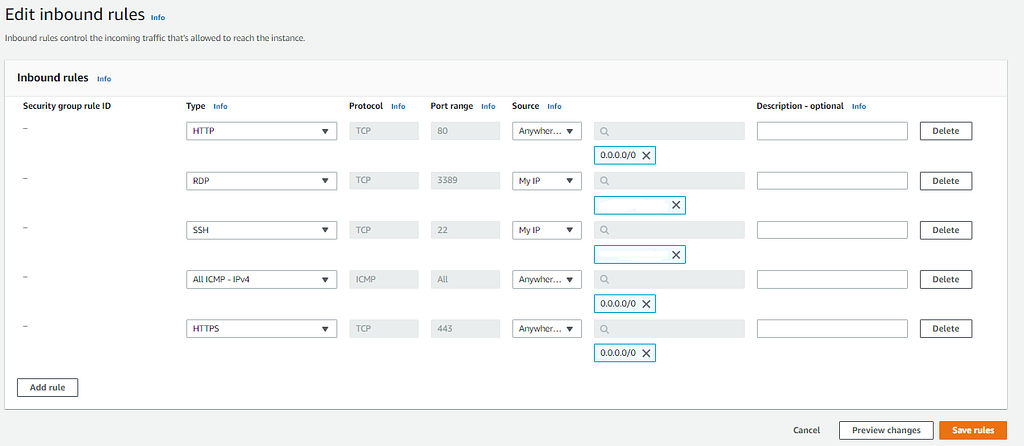
Editing the inbound rules
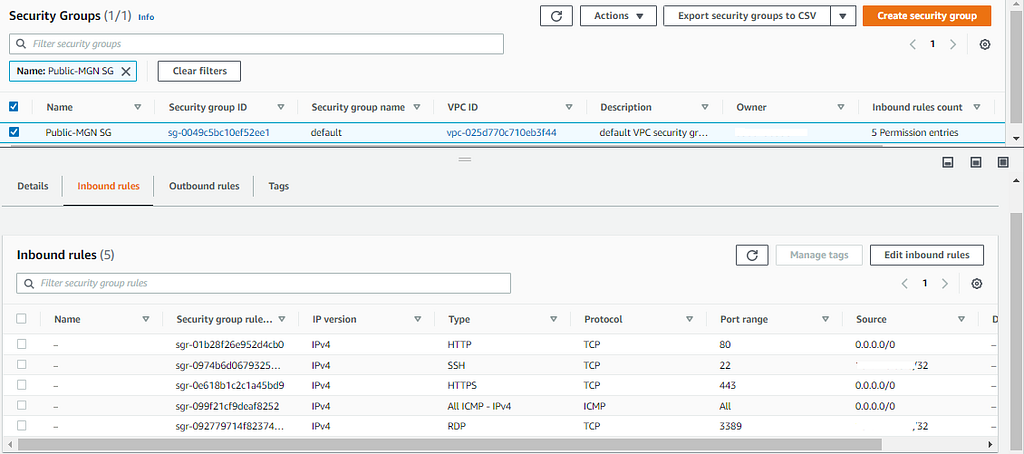
The completed Public-MGN SG security group
My rules looked like this:
HTTP   TCP 80     0.0.0.0/0
HTTPS  TCP 443    0.0.0.0/0
SSH    TCP 22     Trusted public IP /32
I also had RDP and ICMP open at first, as the screenshot shows. A Linux server doesn’t need them. Leave out anything the workload doesn’t use.
6. Setting up AWS MGN
With the network ready, I opened Application Migration Service in the same Region as the VPC.
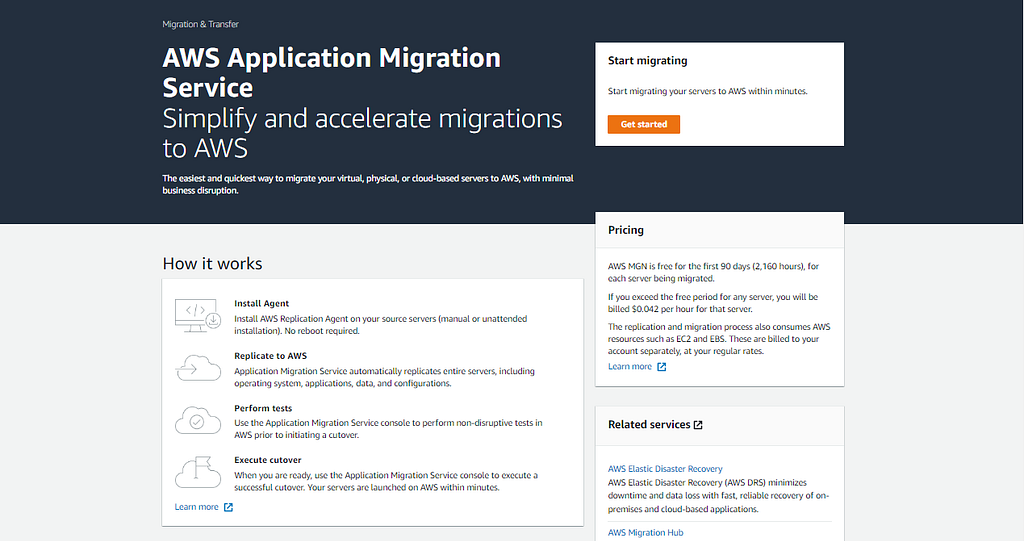
Opening AWS Application Migration Service
MGN uses a replication settings template. It decides where the staging resources run and how they’re set up.
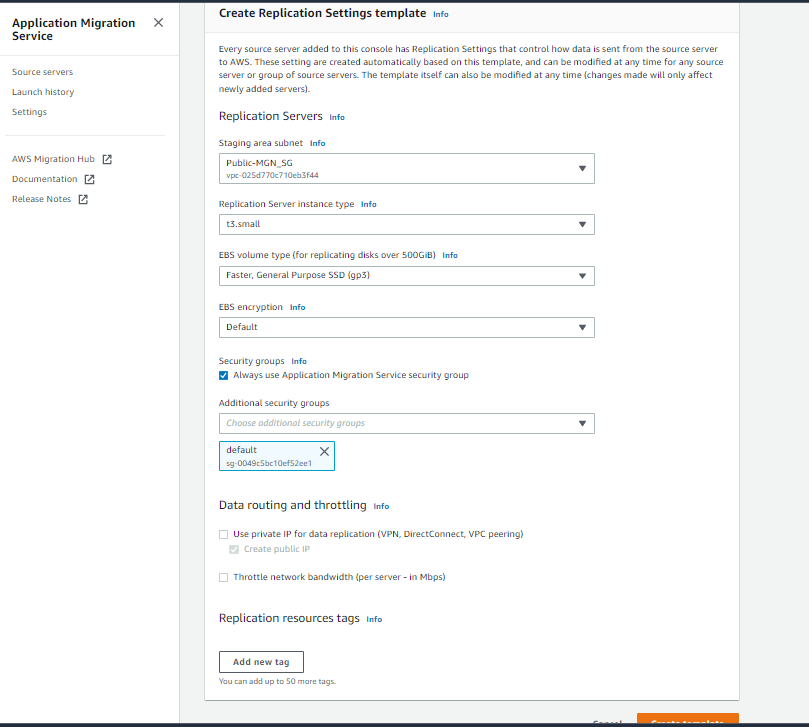
Creating the replication settings template
I picked the subnet and security settings and kept the staging resources small. Then I reviewed the template before adding the server.
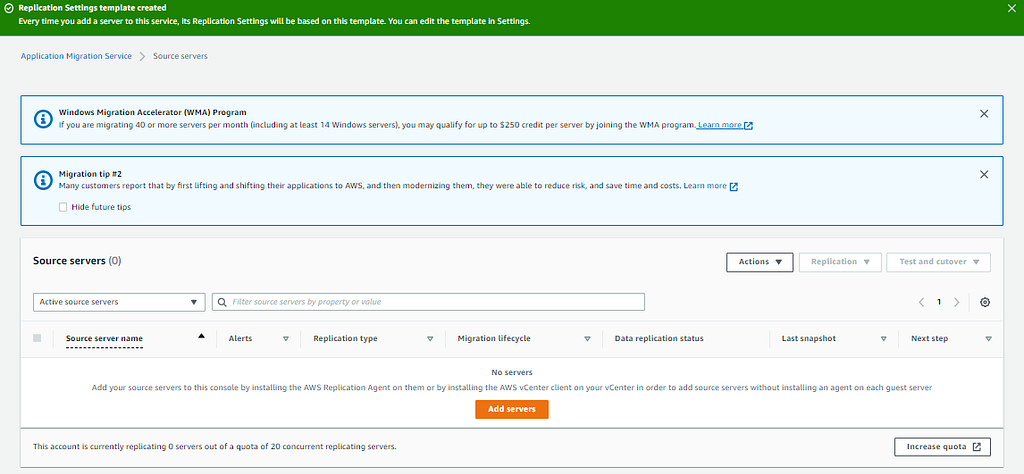
The replication settings template is created
7. Installing the replication agent
From Add servers I picked Linux and copied the install command MGN generated.
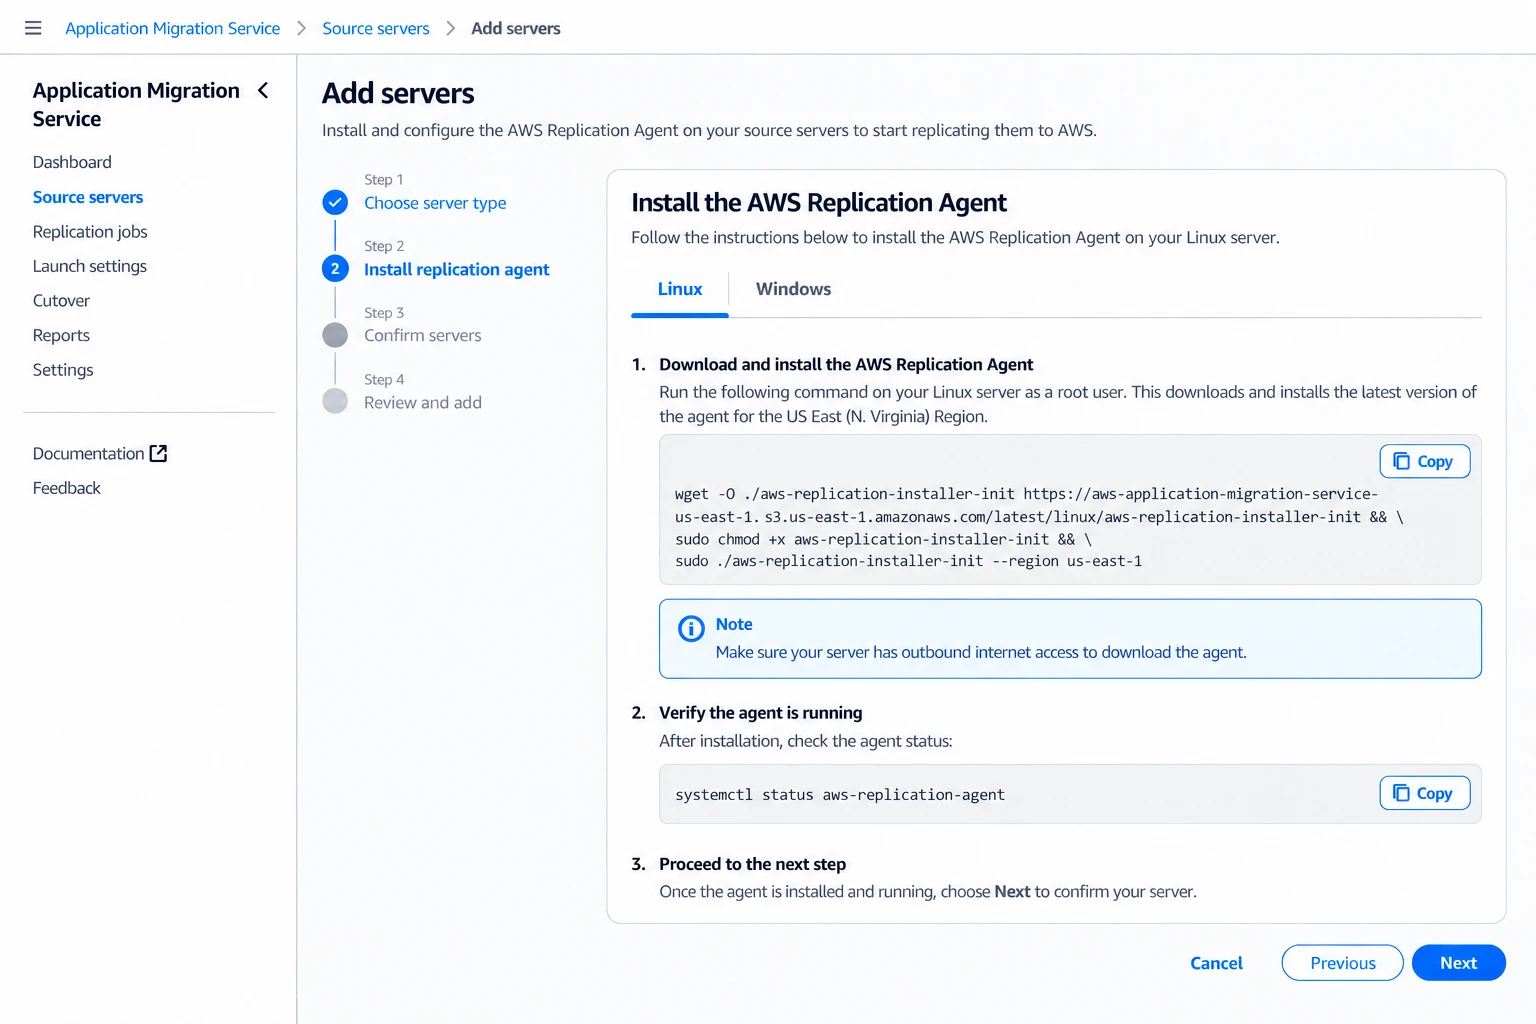
Generating the Linux replication-agent installation command
On the source server, I downloaded the installer:
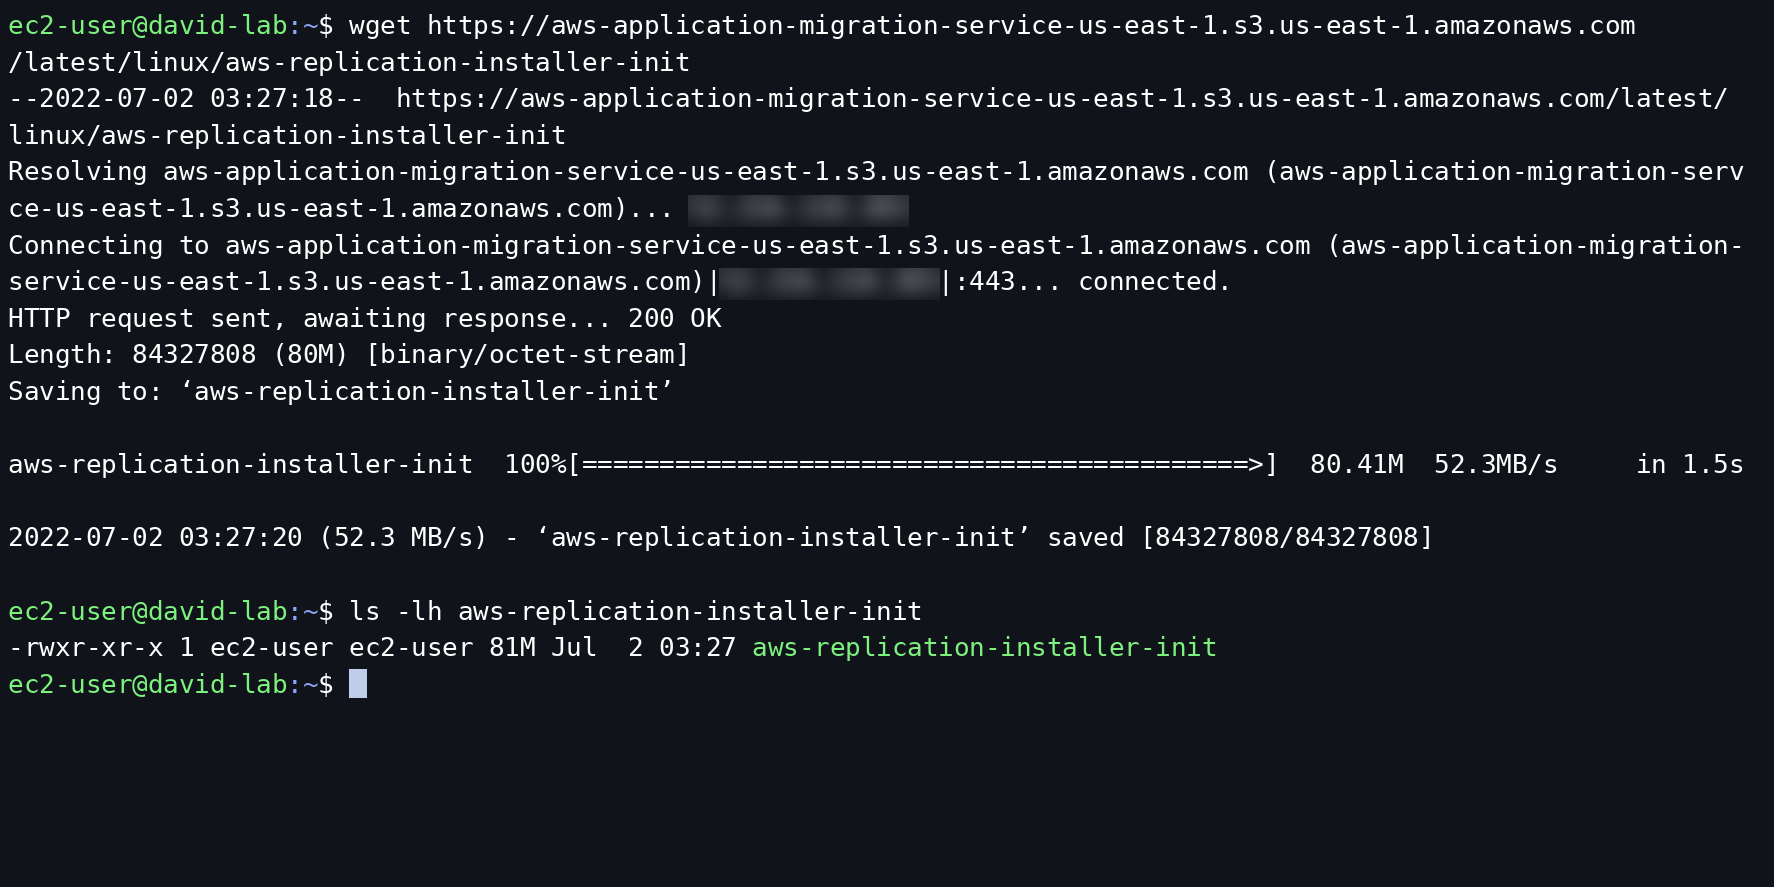
Downloading the AWS Replication Agent installer
I ran it with the right Region and entered the temporary credentials when asked.
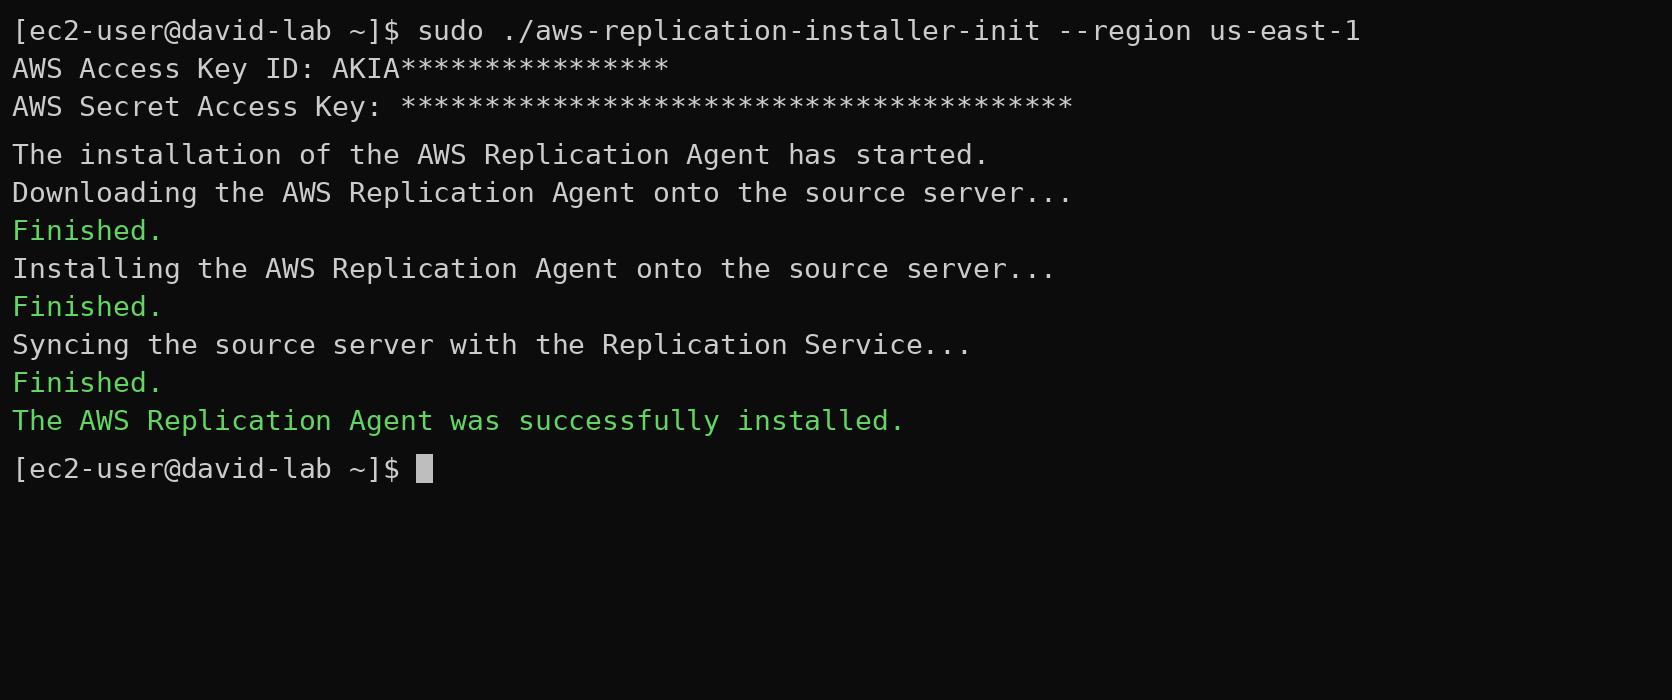
Running the replication-agent installer
The installer registered the server with MGN and started the initial synchronization.

Replication Agent installation completed
8. Waiting for healthy replication
Back in MGN, the Linux server appeared in the source-server list.
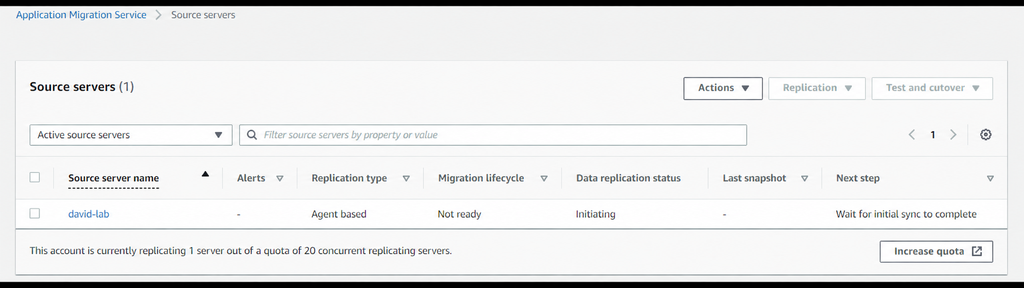
The registered Linux server in AWS MGN
I opened the server details and watched the lifecycle and replication status. A new server isn’t ready to test right away. MGN still has to copy the disks and set up staging.
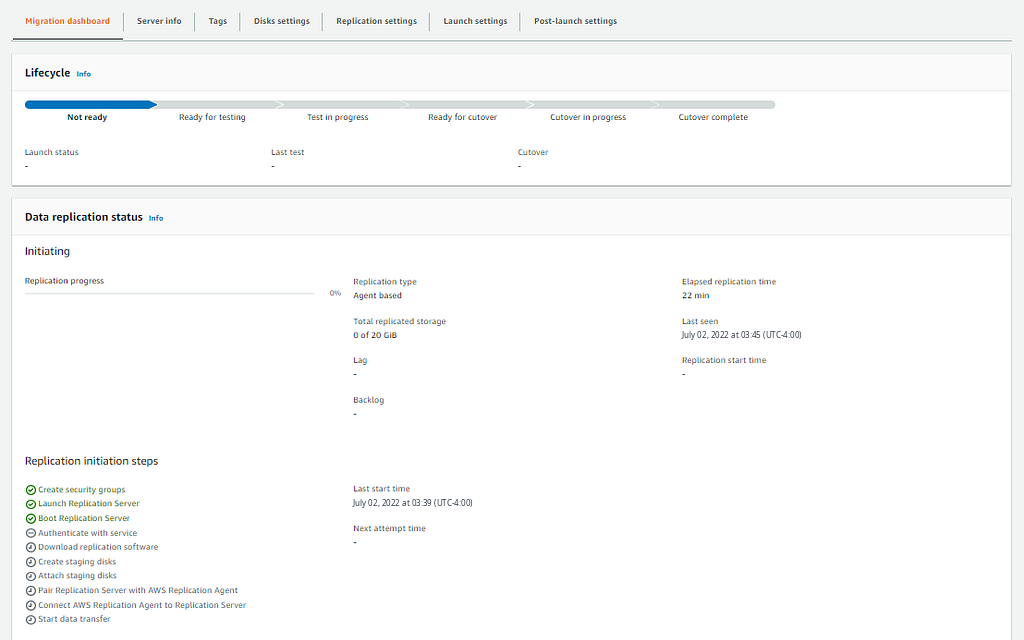
The migration lifecycle immediately after registration

Initial replication still in progress
I waited until replication became healthy before touching the test-launch controls.
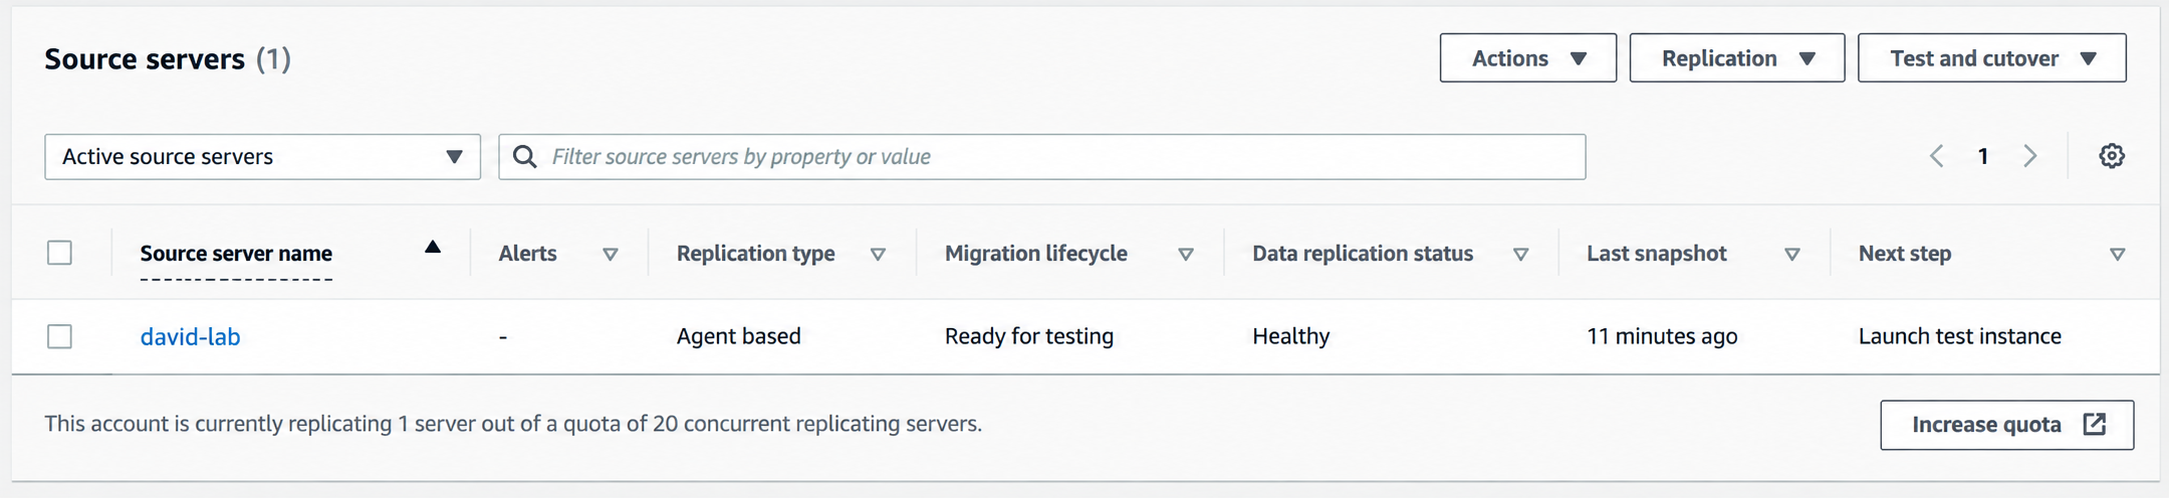
The server is ready for testing
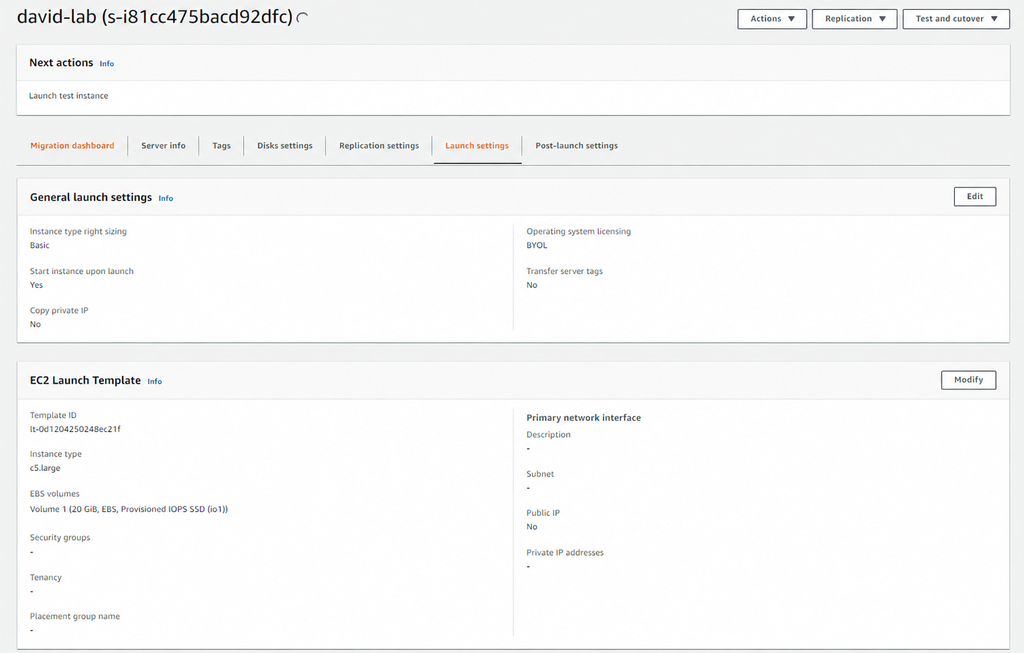
Reviewing the source server and launch settings
9. Setting up how the EC2 instance launches
Replication settings control how the data gets to AWS. Launch settings control the EC2 instance built from it. MGN uses the default version of an EC2 launch template. So I reviewed that template before launching anything.
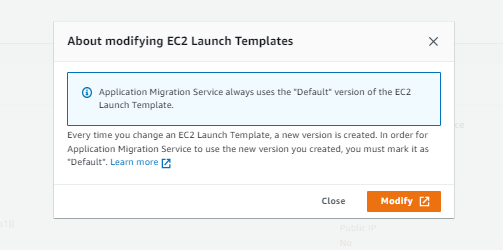
MGN’s explanation of EC2 launch-template versions
I edited the template to use the public subnet. I set it to assign a public IP and attach my security group.
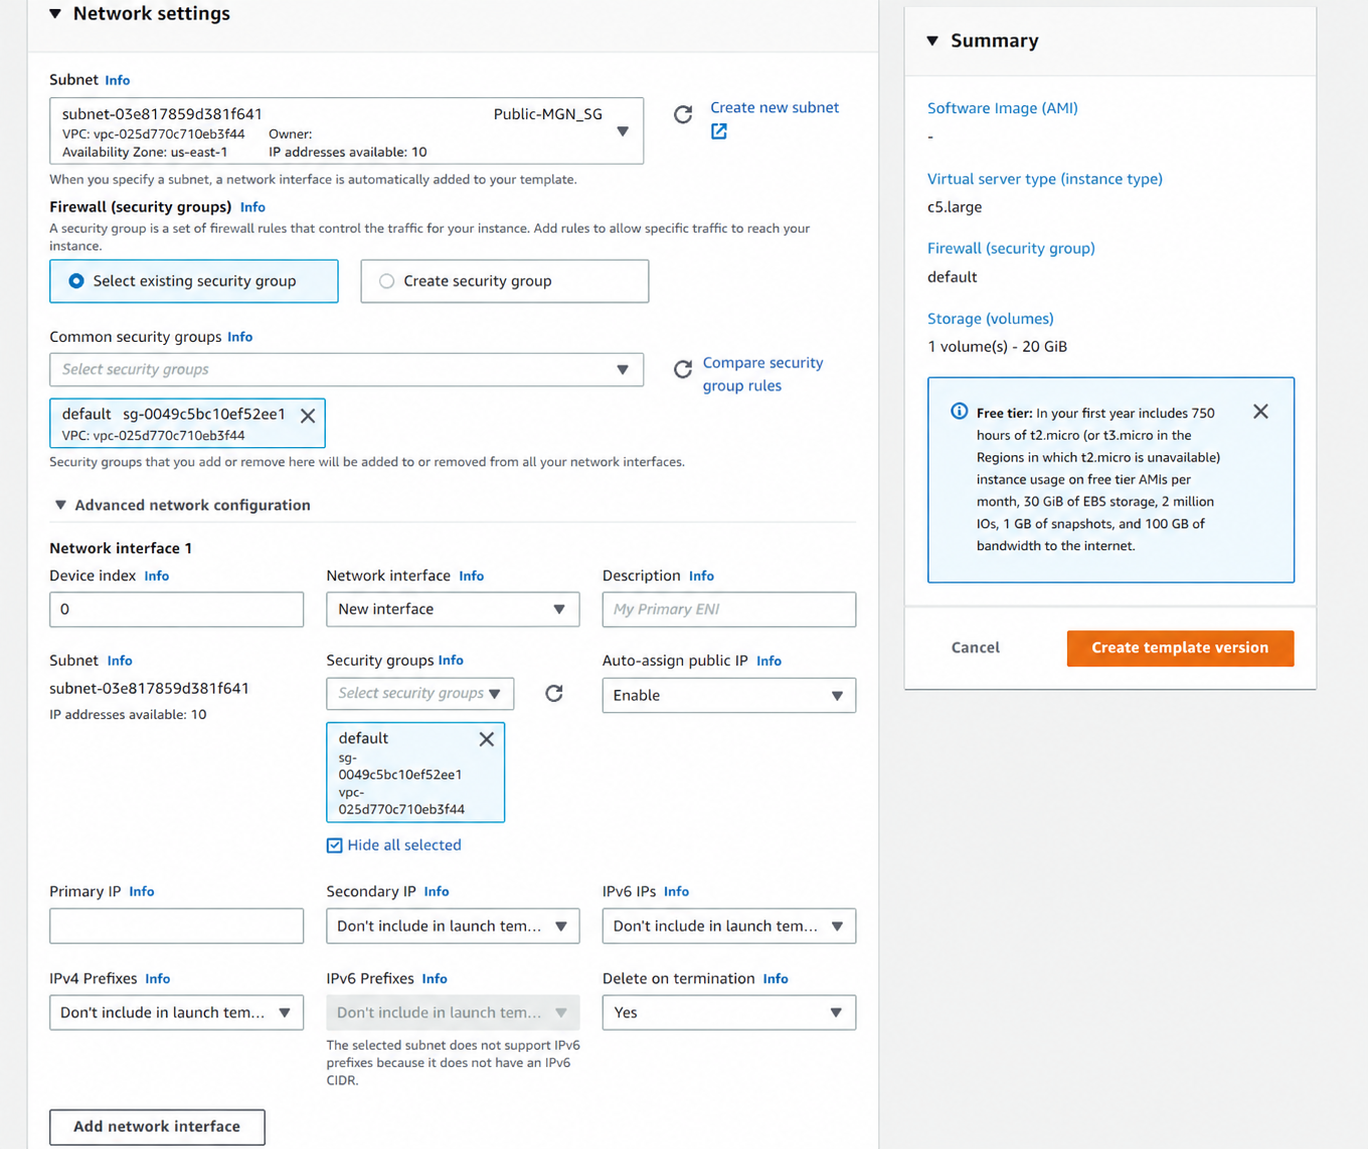
Configuring the subnet and security group
Saving the changes created a new launch-template version.
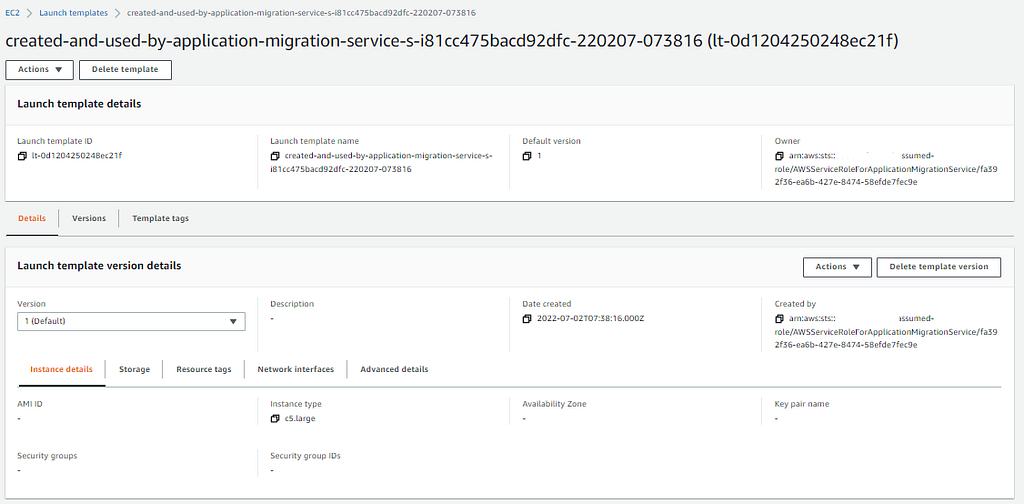
The default EC2 launch template MGN created
I made that version the default. This part matters. If the new version isn’t the default, MGN keeps using the old settings.
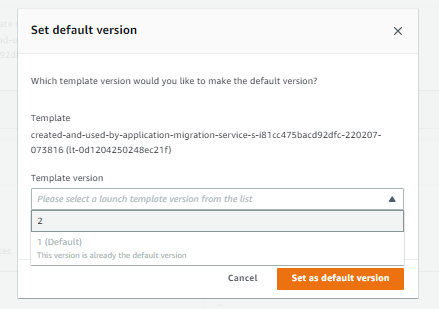
Setting the new launch-template version as default
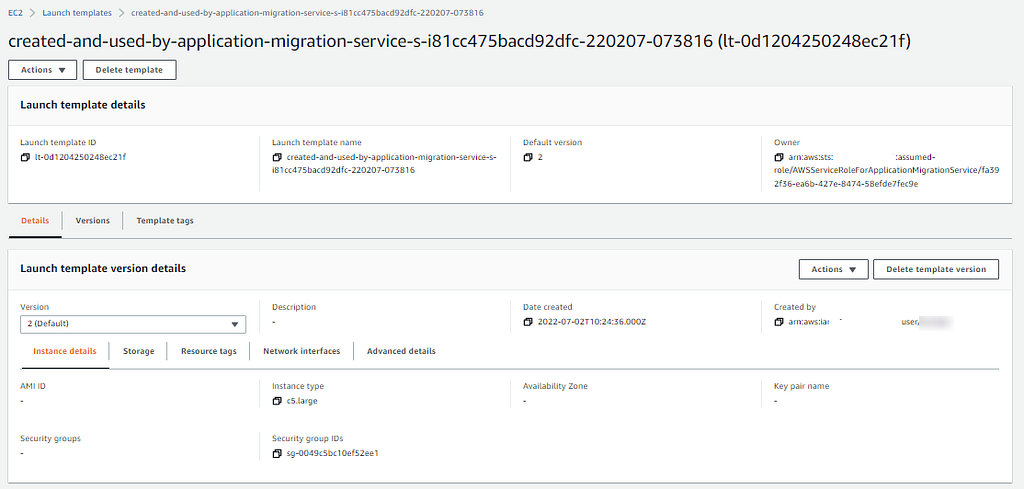
Confirming the default launch-template version
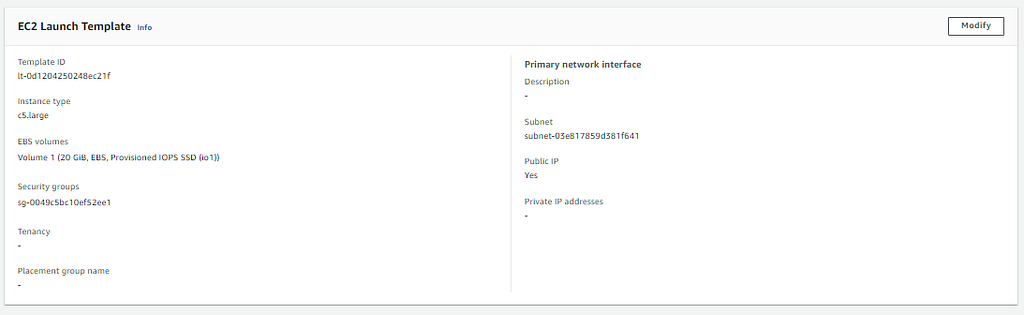
Reviewing the effective EC2 launch configuration
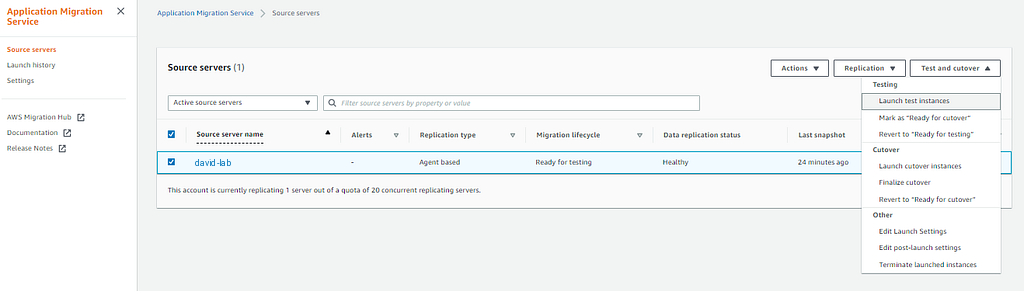
Returning to the MGN source server
If you pick an instance type by hand, check whether MGN right-sizing is on. If it is, MGN can override your choice.
10. Launching a test instance
I didn’t go straight to cutover. First I launched a test instance.
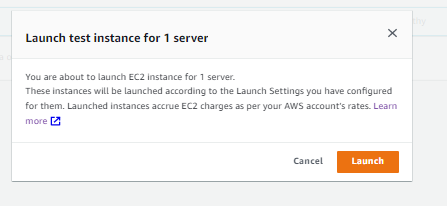
Confirming the test-instance launch
AWS warned the instance would cost money. I confirmed and MGN created a launch job.

The test launch has started
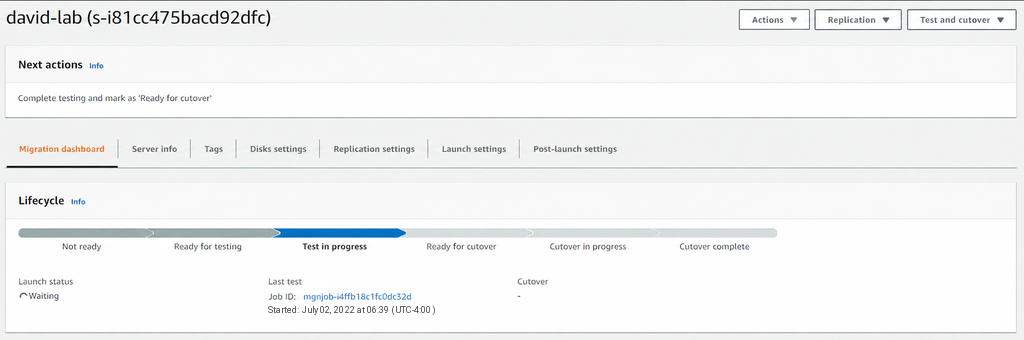
Following the test launch from the source-server page
I followed the job in Launch History instead of refreshing the EC2 console.
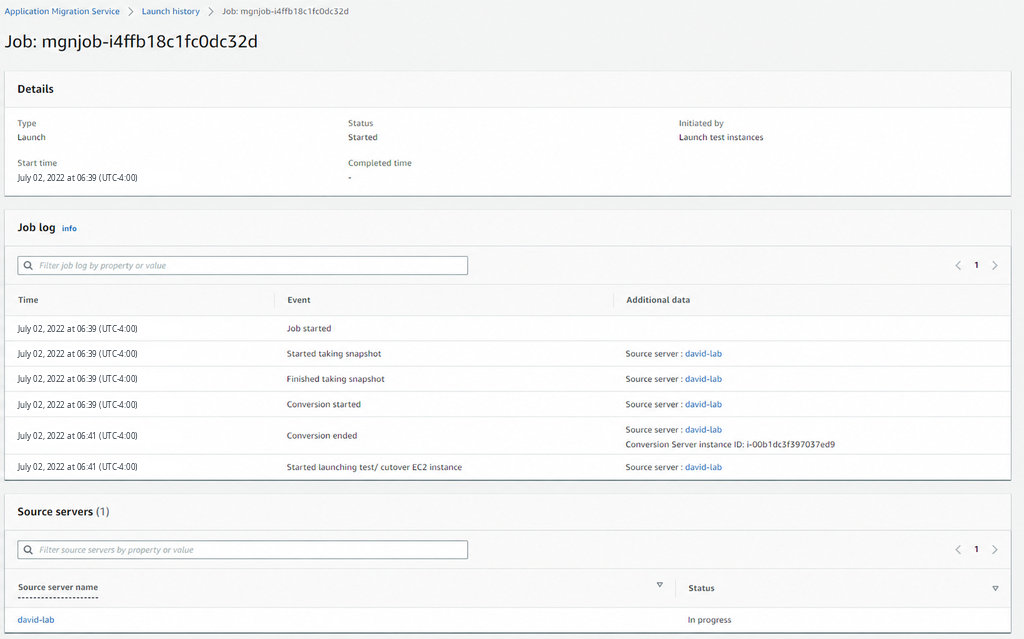
The MGN launch-job log
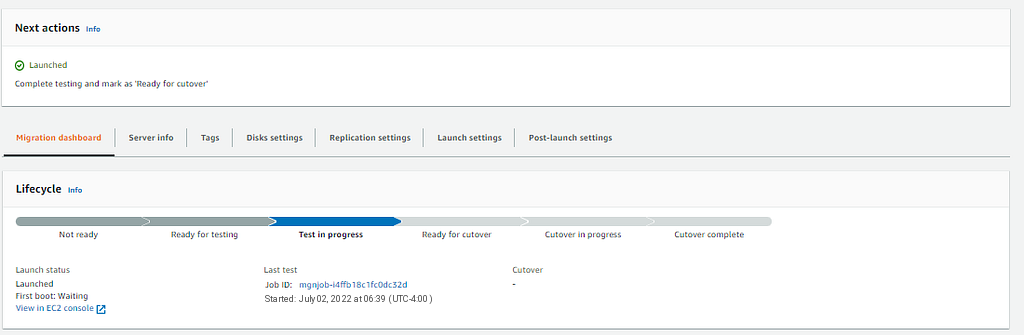
The completed test launch
The new instance and the MGN replication resources showed up in EC2 too.

MGN resources and the test instance in EC2
11. Testing the migrated app
I opened the test instance’s public address. Then I compared the site to the pages I checked at the start.
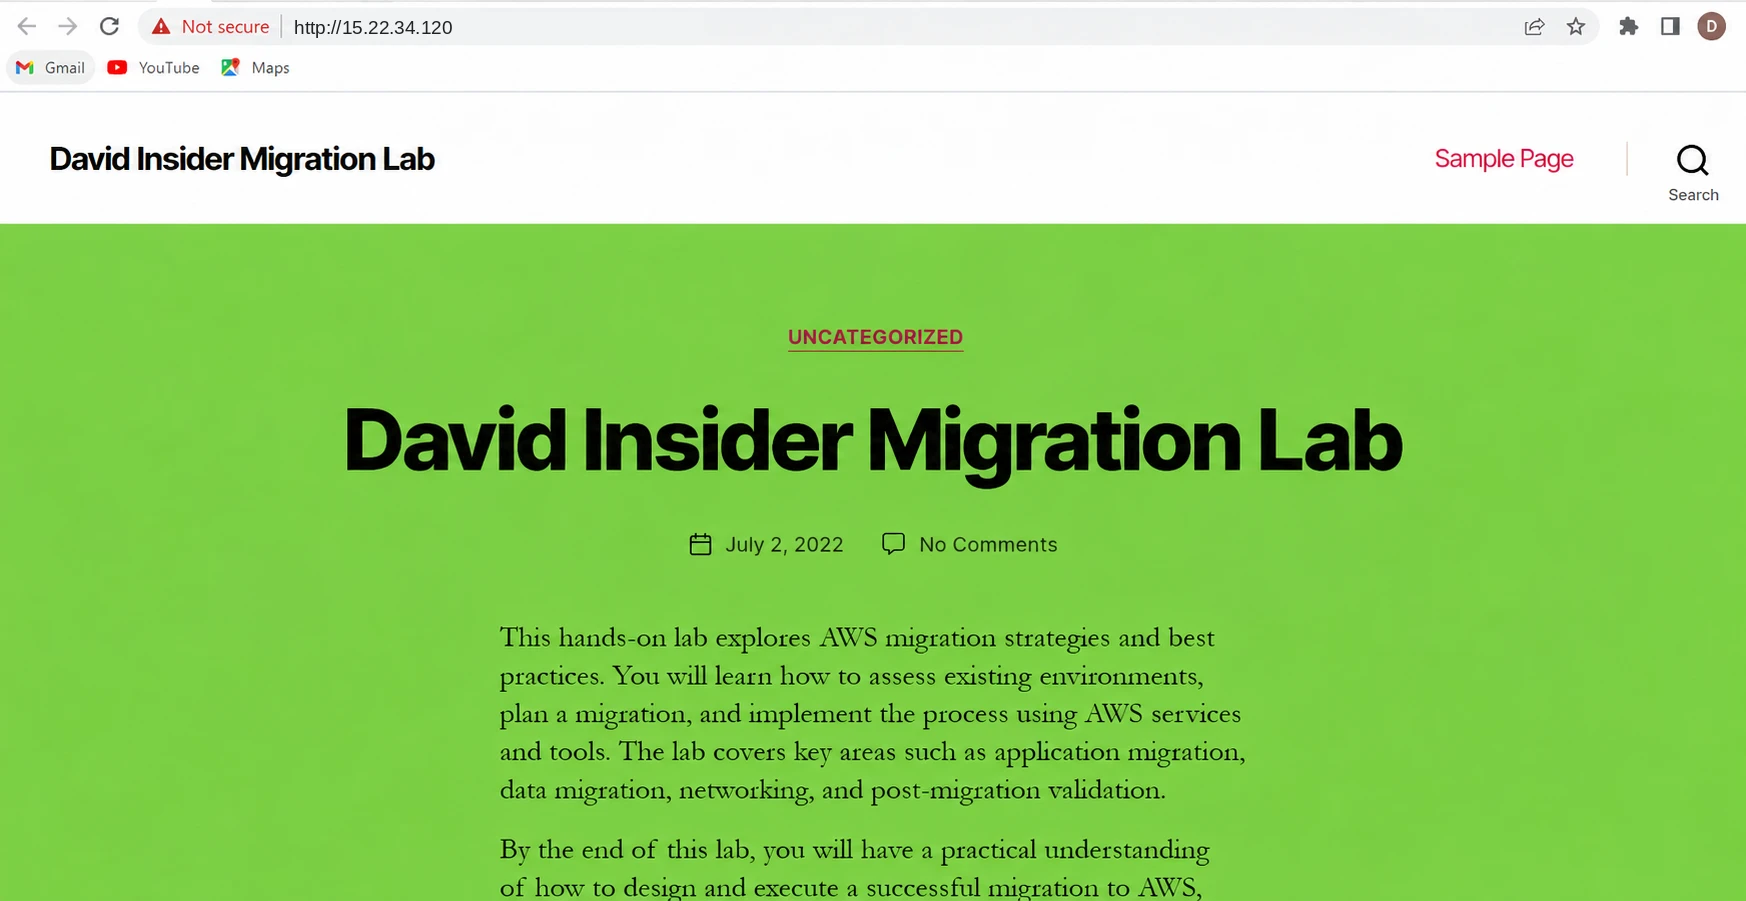
The replicated website running from the AWS test instance
I didn’t just trust the MGN status screen. I made sure the pages loaded, the service was running, and the app behaved right. For a production app I’d also test logins, database access, scheduled jobs, integrations, monitoring, and logs here.
Once it passed, I marked the server Ready for cutover.
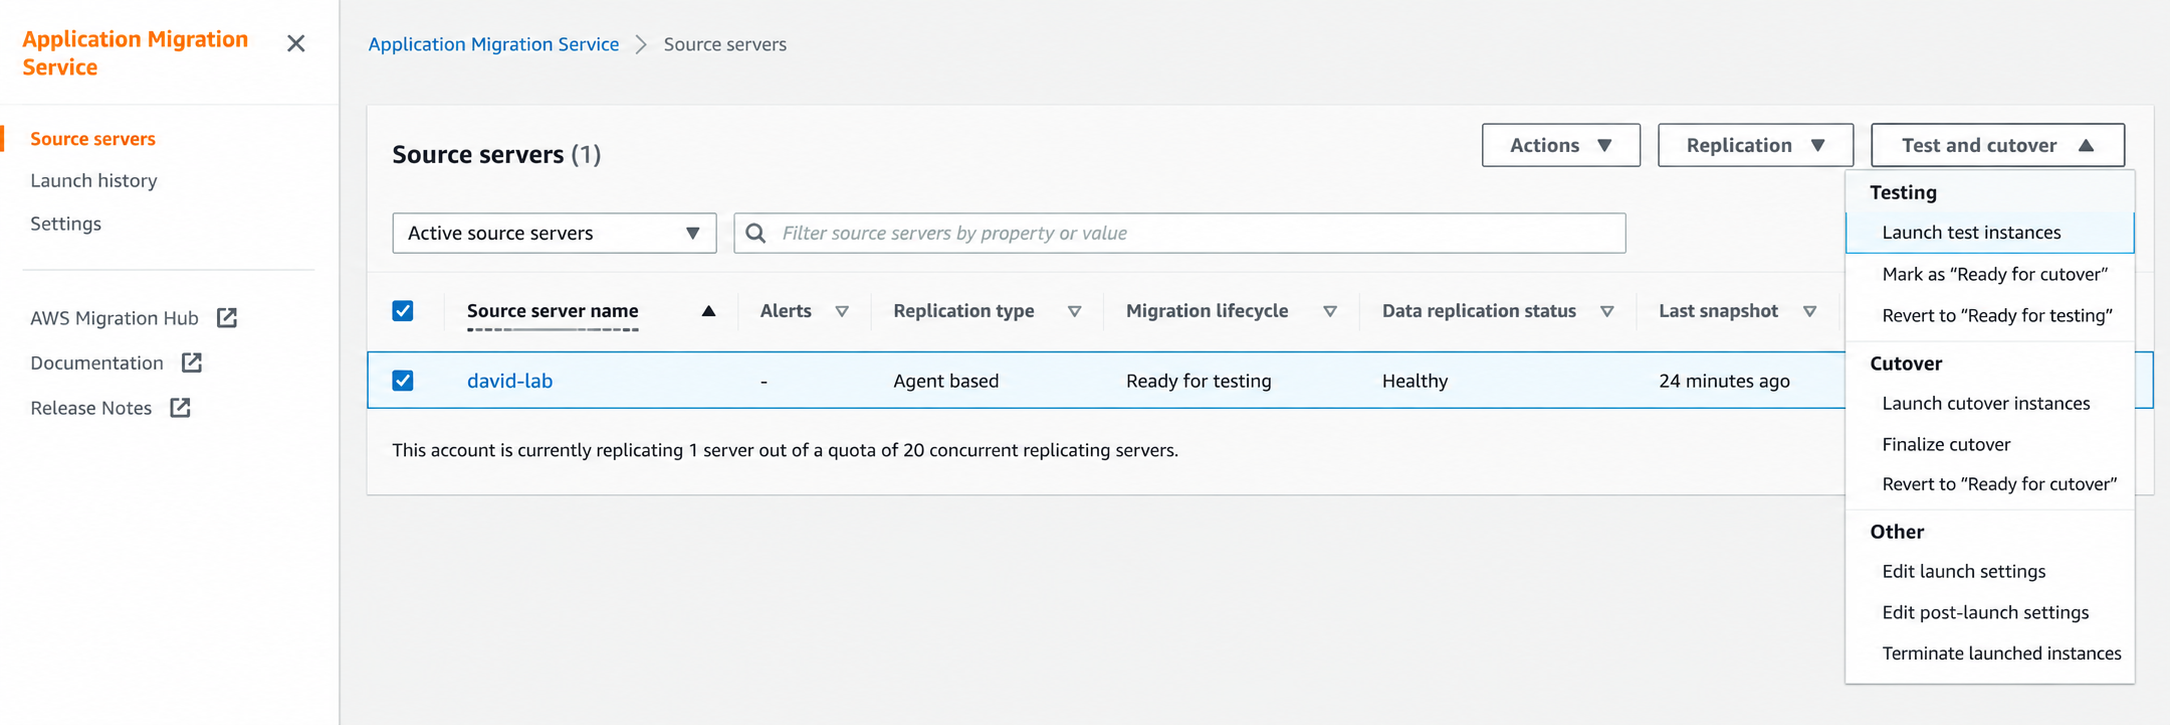
Choosing the ready-for-cutover action
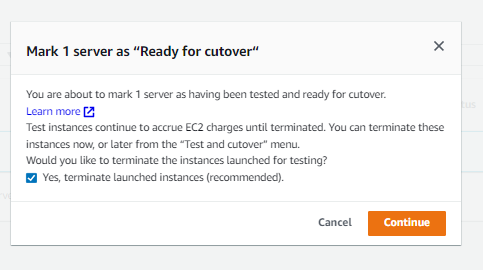
Confirming that testing is complete
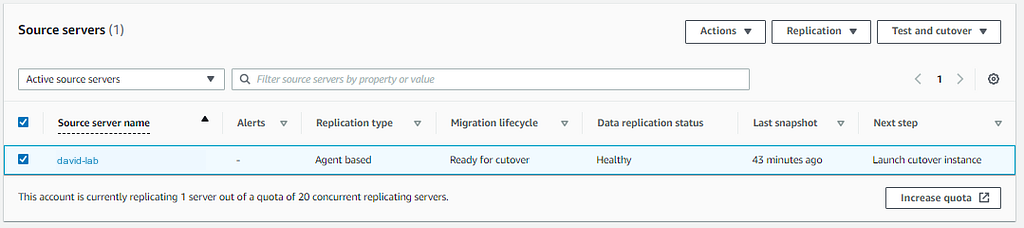
The server is ready for the final cutover
12. Launching the cutover instance
With good test results and healthy replication, I launched the cutover instance.
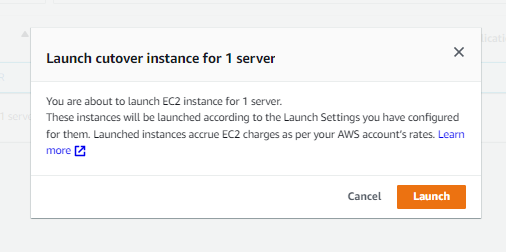
Confirming the cutover-instance launch
MGN created a new launch job and moved the server into the cutover lifecycle.
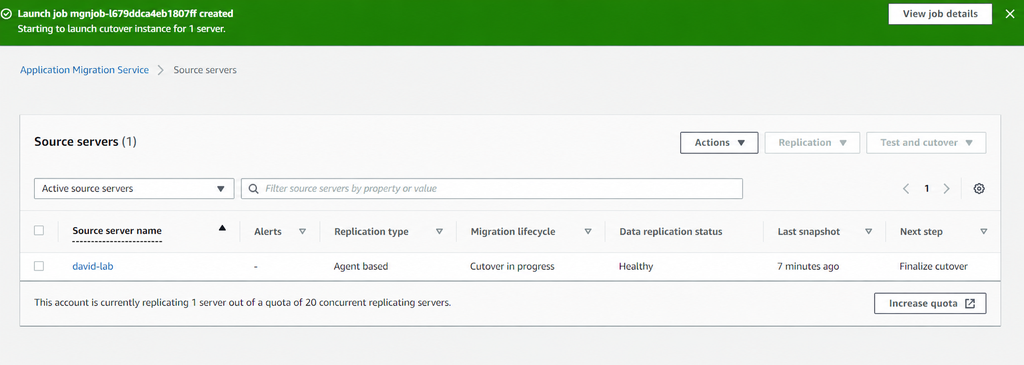
The cutover launch job has started
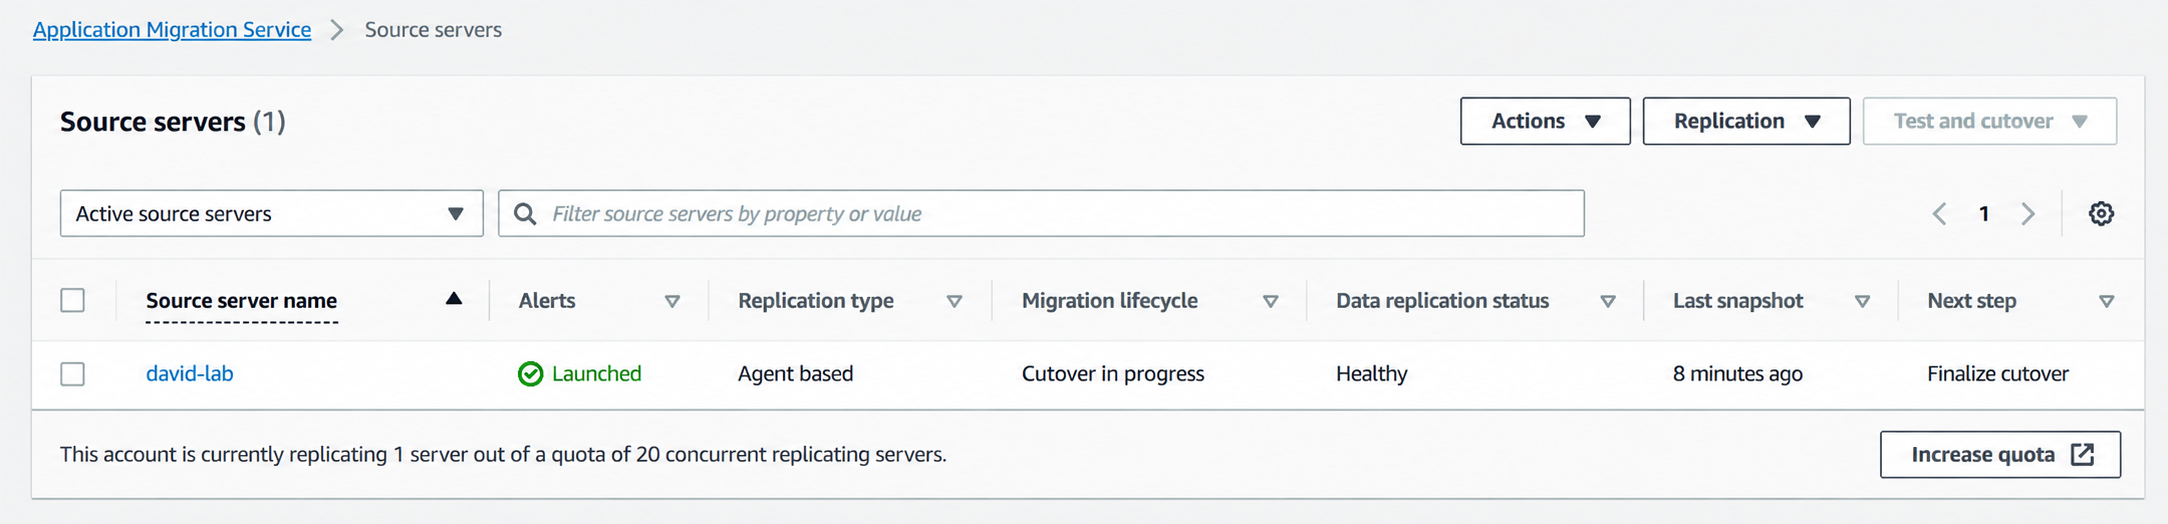
Cutover in progress
When it finished, I checked the new instance and loaded the site again. It matched the test instance, so I moved on.
13. Finalizing the migration
After checking the cutover instance, I finalized the cutover in MGN.
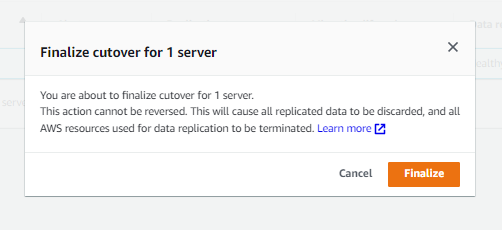
Final cutover confirmation
You can’t undo this. MGN throws away the replicated data and terminates the replication resources. So I only finalized after all my app checks passed.
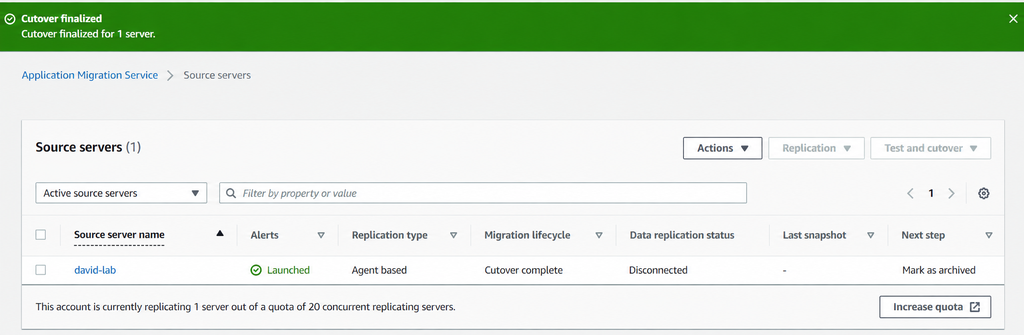
Cutover finalized successfully
14. Archiving the source server
The migrated instance keeps running after finalization. But the old server record stays in MGN. I selected it and chose Mark as archived.
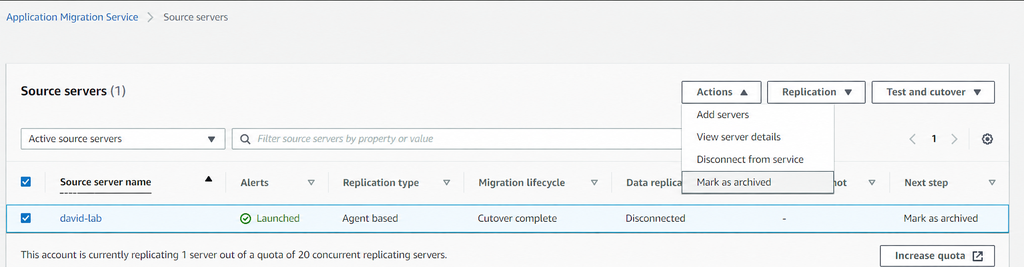
Selecting Mark as archived
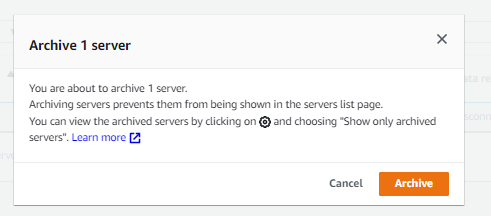
Confirming the archive action
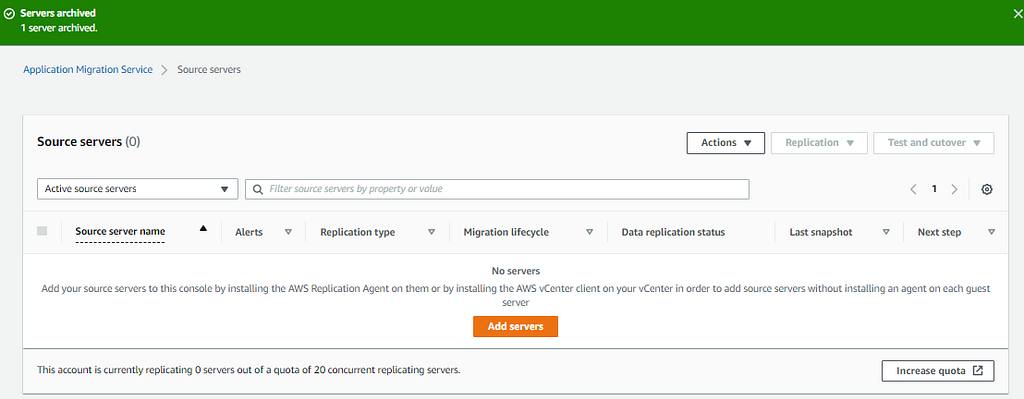
The completed server is now archived
What I learned
Replication was only one piece. Most of the work was getting the network, security rules, launch template, and testing right.
The test launch was the most important safety step. It let me catch launch template or app problems before calling the AWS instance the real thing. I also learned not to trust a green status alone. You still have to test the app like a user would.
Afterward I deleted the temporary IAM credentials. I also checked for anything still costing money. That meant test instances, replication resources, unused volumes, snapshots, and public IPs.
In the end I had the Linux web server running on EC2 with the app intact. The MGN lifecycle was complete. And I had a repeatable process I can build a bigger migration plan on.