AWS bills rarely blow up because of one bad architecture choice. They drift. Temporary resources become permanent. Non-production environments never shut down. Nobody owns the untagged stuff. Multiple accounts have no central view.
I built a framework around four habits to fix that:
1. Resource attribution with tags
2. Cost visibility and budget alerts
3. Preventive controls with Service Control Policies
4. Continuous optimization with Trusted Advisor and Compute Optimizer
The scenario I designed this for is a US SaaS company. Its monthly AWS bill went from $18,500 to $26,000 with no launch and no traffic spike. The cause was forgotten EC2 capacity, an RDS instance left over from a retired workload, unattached Elastic IPs, and almost no ownership tags.
Note: AWS console labels, feature availability, support plan requirements, pricing, and regional behavior change over time. Check them against your own account.
1. Why cost governance matters
Cloud infrastructure does exactly what you told it to do. The problem is that nobody remembers to remove or resize what’s no longer needed.
Cost drift usually comes from:
demo resources left running
staging environments operating 24/7
untagged resources with no accountable owner
separate accounts without consolidated visibility
oversized instances that are never revisited
resources deployed into the wrong region
So the model needs both visibility and enforcement.
Each of the four pillars answers one question:
Who owns this resource?
How much is it costing?
What should users be prevented from doing?
What should we optimize next?
Pillar 1: Tagging and Resource Attribution
Tags come first. They tie spend to an owner, environment, project, or cost center.
I made these tags mandatory:
Environment
Team
CostCenter
The goal is to go from this:
AWS bill
→ one large number
to this:
AWS bill
→ environment
→ team
→ cost centre
→ accountable owner
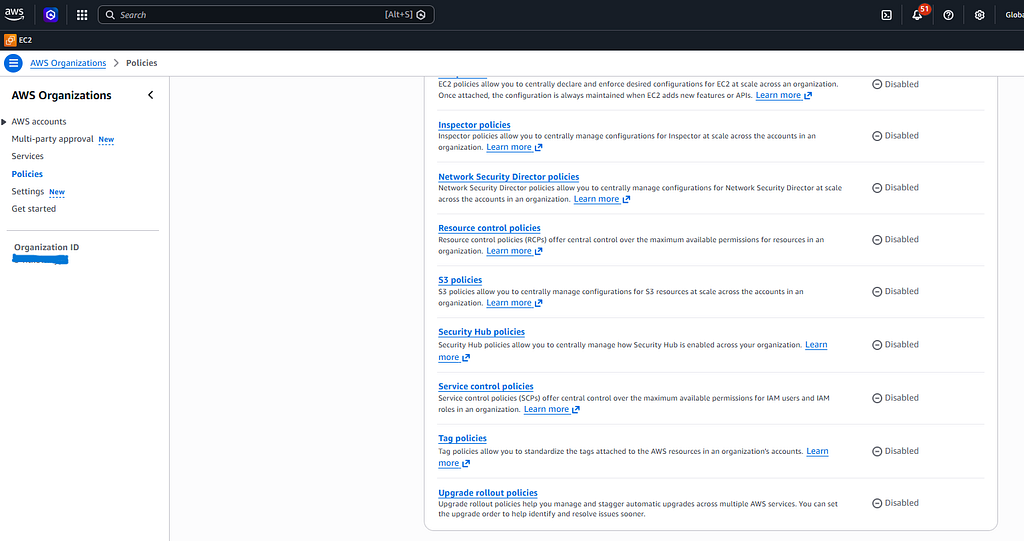
2. Turning on Tag Policies
I signed in to the AWS Organizations management account and went to:
AWS Organizations
→ Policies
→ Tag Policies
AWS Organizations policy area used to begin tag-policy setup
Tag Policies were off, so I enabled them.
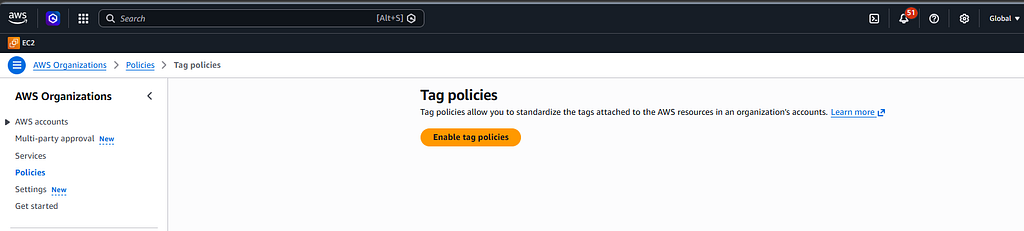
Tag Policies enabled in AWS Organizations
Then I created a policy with a name like:
<organization>-mandatory-tags
3. Writing the mandatory tag policy
The policy sets the approved tag keys. For some tags it also sets the approved values.
{
  "tags": {
    "Environment": {
      "tag_key": { "@@assign": "Environment" },
      "tag_value": {
        "@@assign": [
          "production",
          "staging",
          "development",
          "sandbox"
        ]
      },
      "enforced_for": {
        "@@assign": [
          "ec2:instance",
          "rds:db",
          "s3:bucket",
          "lambda:function"
        ]
      }
    },
    "Team": {
      "tag_key": { "@@assign": "Team" },
      "tag_value": {
        "@@assign": [
          "engineering",
          "data",
          "devops",
          "marketing",
          "product"
        ]
      },
      "enforced_for": {
        "@@assign": [
          "ec2:instance",
          "rds:db",
          "lambda:function"
        ]
      }
    },
    "CostCenter": {
      "tag_key": { "@@assign": "CostCenter" },
      "enforced_for": {
        "@@assign": [
          "ec2:instance",
          "rds:db",
          "s3:bucket"
        ]
      }
    }
  }
}
Environment is enforced on:
EC2 instances
RDS databases
S3 buckets
Lambda functions
Team is enforced on:
EC2
RDS
Lambda
CostCenter is enforced on:
EC2
RDS
S3
Then I attached the policy to the organization root or to one OU.
The root gives the widest coverage. An OU lets you roll it out slowly.
4. Finding missing tags with AWS Config
A tag standard isn’t enough on its own. I also needed a way to find resources that ignore it. That’s where AWS Config comes in.
I went to:
AWS Config
→ Rules
→ Add rule
and searched for:
required-tags
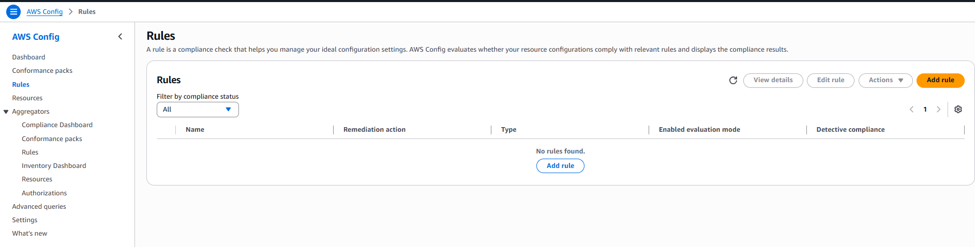
AWS Config required-tags rule selection
I set the rule to require:
Environment
Team
CostCenter
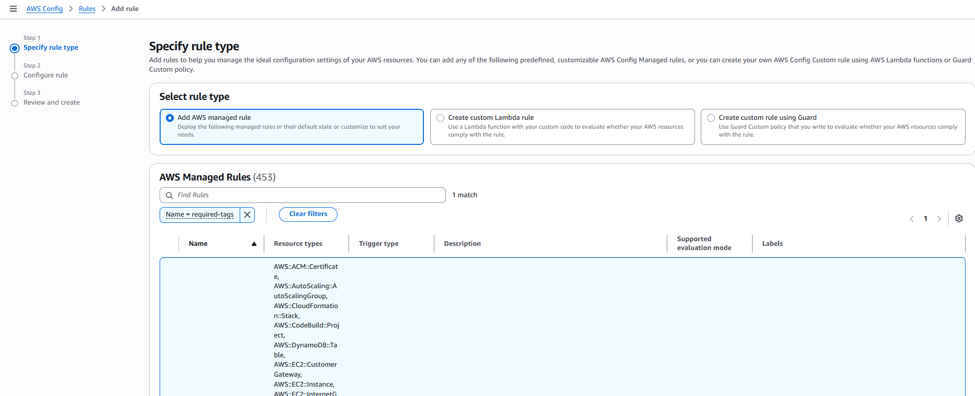
AWS Config rule configuration for required tag keys
Then I set the scope and resource coverage.
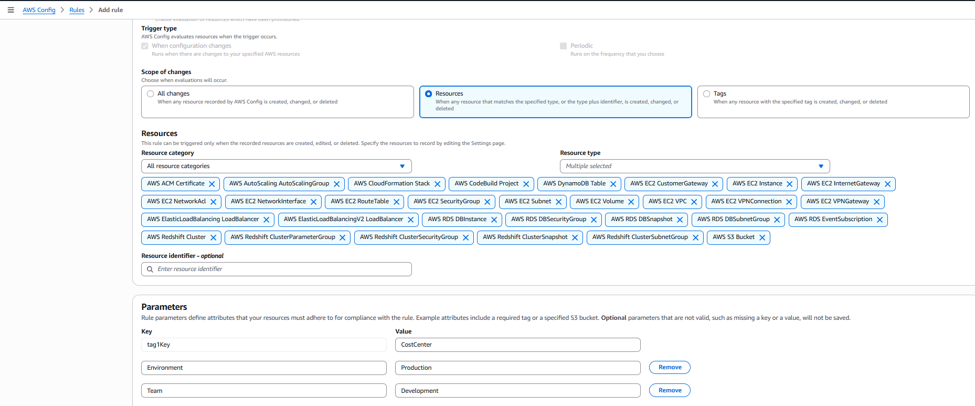
AWS Config scope and resource-type settings
Anything missing a required key now shows as non-compliant.
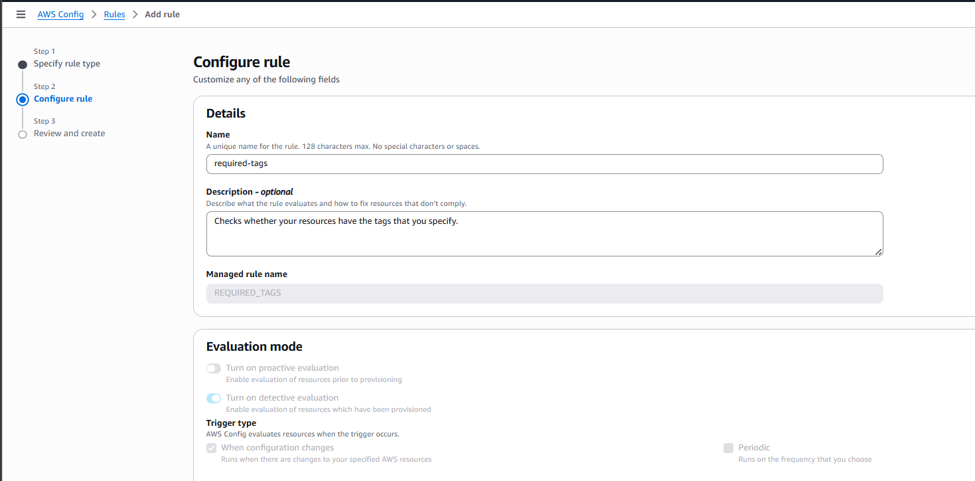
AWS Config rule name and details for required-tags
That splits the work cleanly:
Tag Policy
→ defines the tagging standard

AWS Config
→ detects resources that do not meet it
5. Doing it with the CLI
I also set it up from the command line.
First I saved the JSON policy as:
tag-policy.json
Then I created it:
aws organizations create-policy --content file://tag-policy.json --description "Company mandatory tags" --name company-mandatory-tags --type TAG_POLICY
And attached it to the root:
aws organizations attach-policy --policy-id p-xxxxxxxxxx --target-id r-xxxx
Swap in your own policy ID and root ID.
Pillar 2: Cost Visibility and Budget Alerts
Tags pay off once you group cost data by them.
I used three tools:
Cost Explorer
Cost Anomaly Detection
AWS Budgets
Each one gives a different view:
historical allocation
unexpected-spend detection
planned-spend thresholds
6. Turning on Cost Explorer
I went to:
Billing & Cost Management
→ Cost Explorer
and enabled it.
The first data can take a while to show up after you turn it on.
Once it was ready, I picked the last three months and grouped by one of my tags:
Group by
→ Tag
→ Application Name
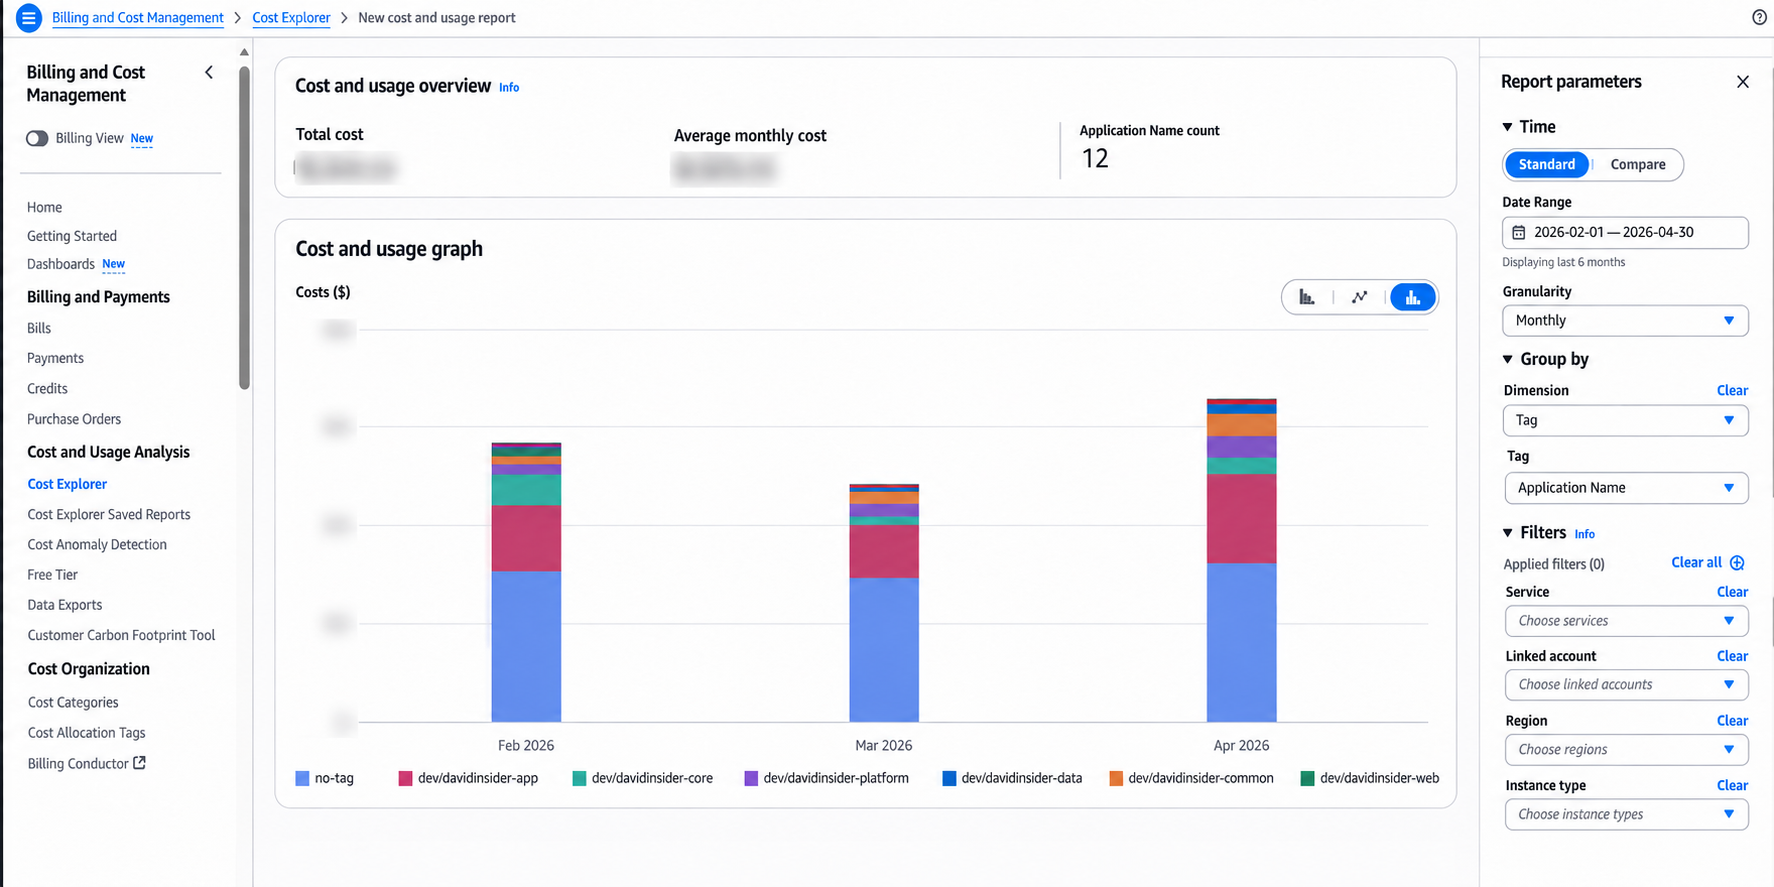
Cost Explorer grouped by a cost-allocation tag
The chart shows spend by tag value.
The no-tag bucket is useful too. It shows exactly what isn’t covered by the framework yet.
7. Catching spikes with Cost Anomaly Detection
Cost Explorer explains past spend.
Anomaly Detection flags spend that suddenly breaks from the normal pattern.
I went to:
Billing & Cost Management
→ Cost Anomaly Detection
and created a monitor with:
Monitor type:
AWS Services
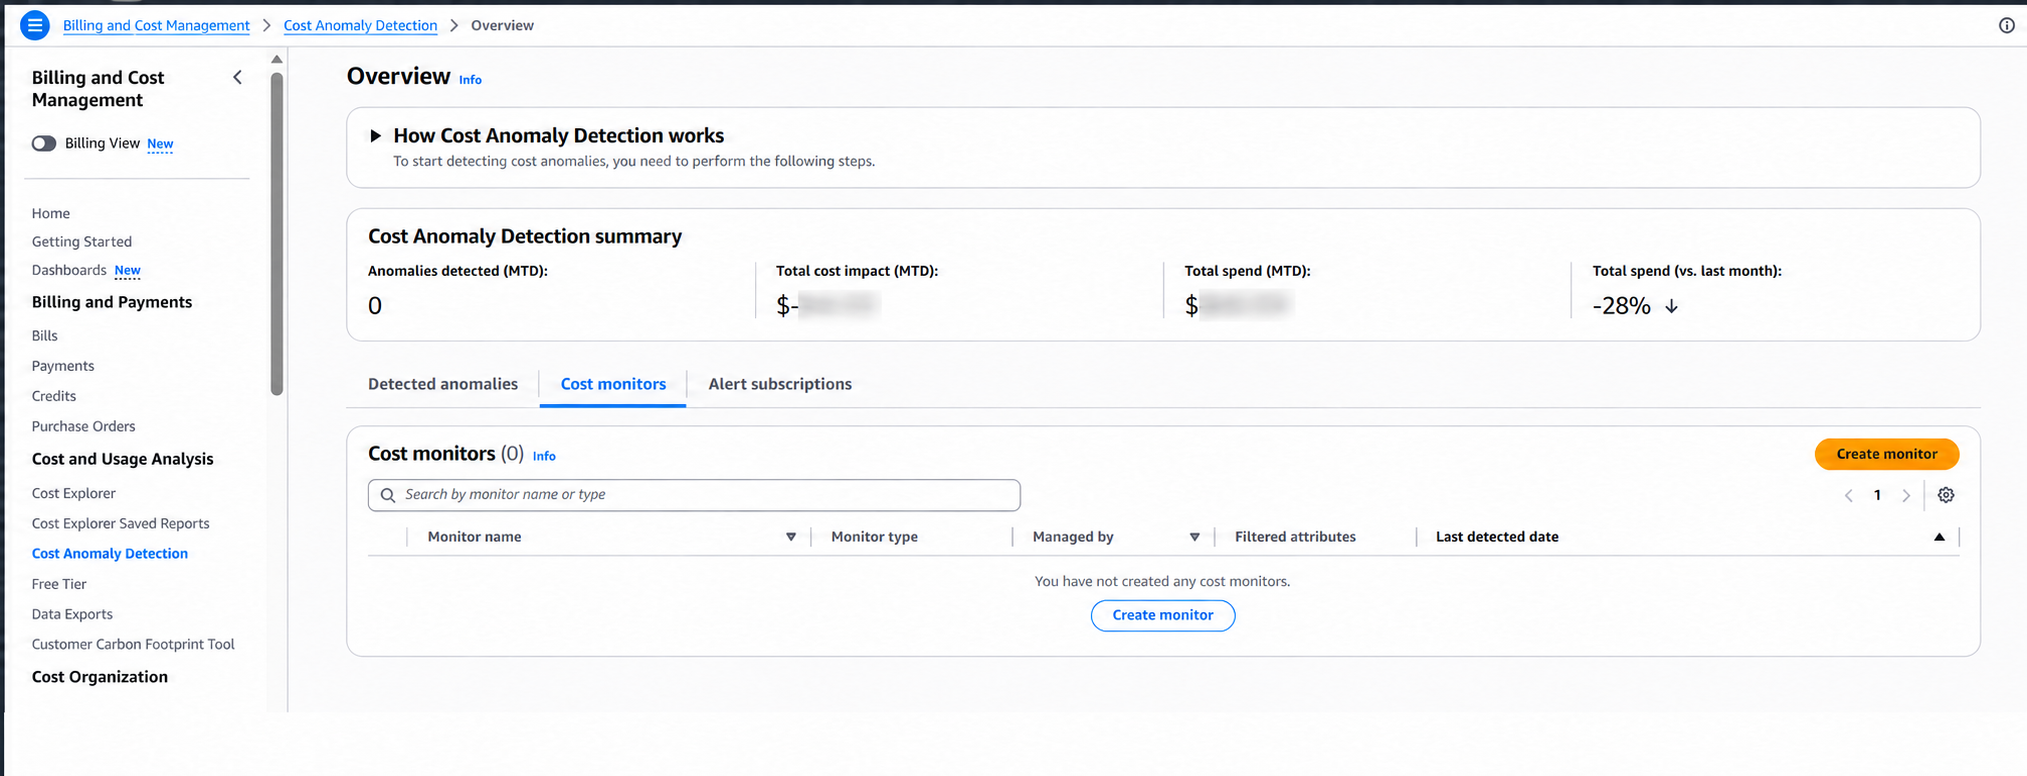
Cost Anomaly Detection overview before creating a monitor
Then I created an alert subscription.
I set an alert threshold and added the cloud team’s email as a subscriber.
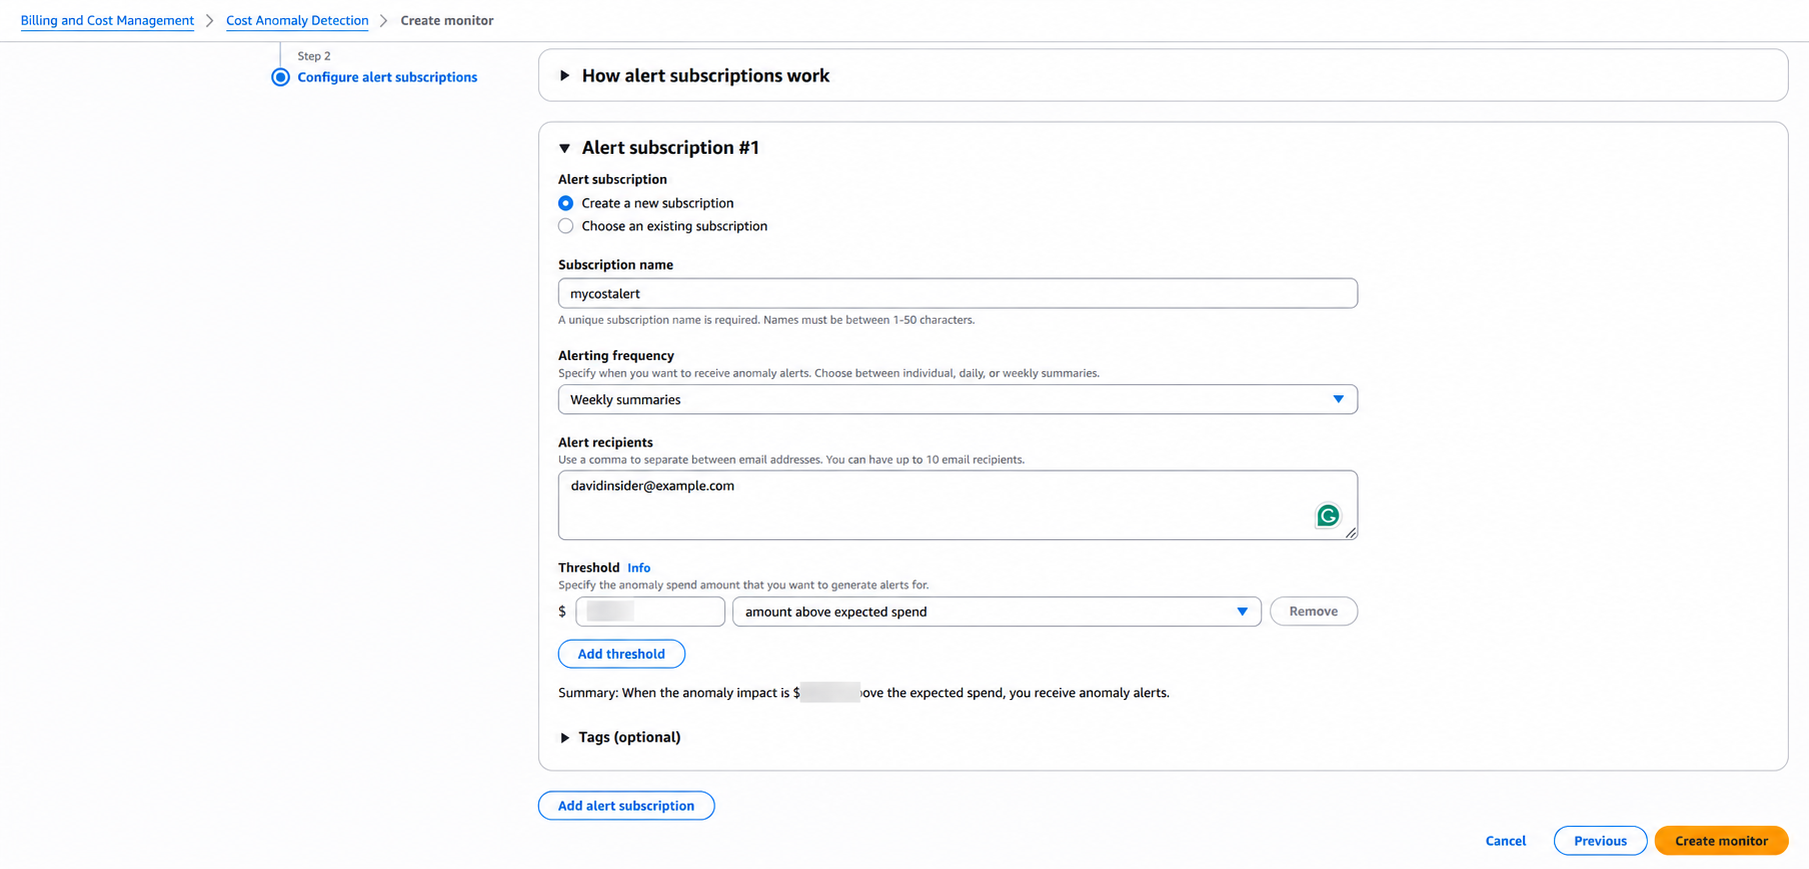
Cost anomaly alert threshold and subscriber settings
This catches things like:
a looping Lambda function
an EC2 fleet left running
unexpected scaling
unexpected service usage
before the extra cost piles up for the rest of the month.
8. A budget for each team or app
Next I went to:
Billing & Cost Management
→ Budgets
→ Create budget
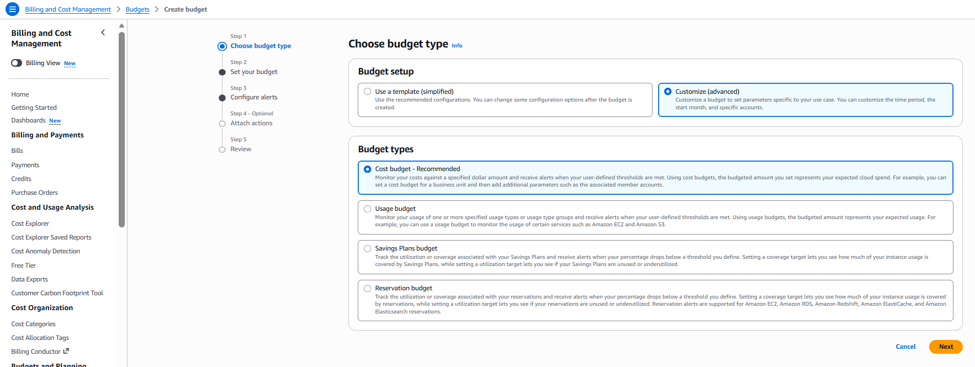
AWS Budgets create-budget workflow
I picked a cost budget.
My settings were:
Name:
Monthly-Budget

Period:
Monthly

Type:
Recurring

Method:
Fixed / Planned
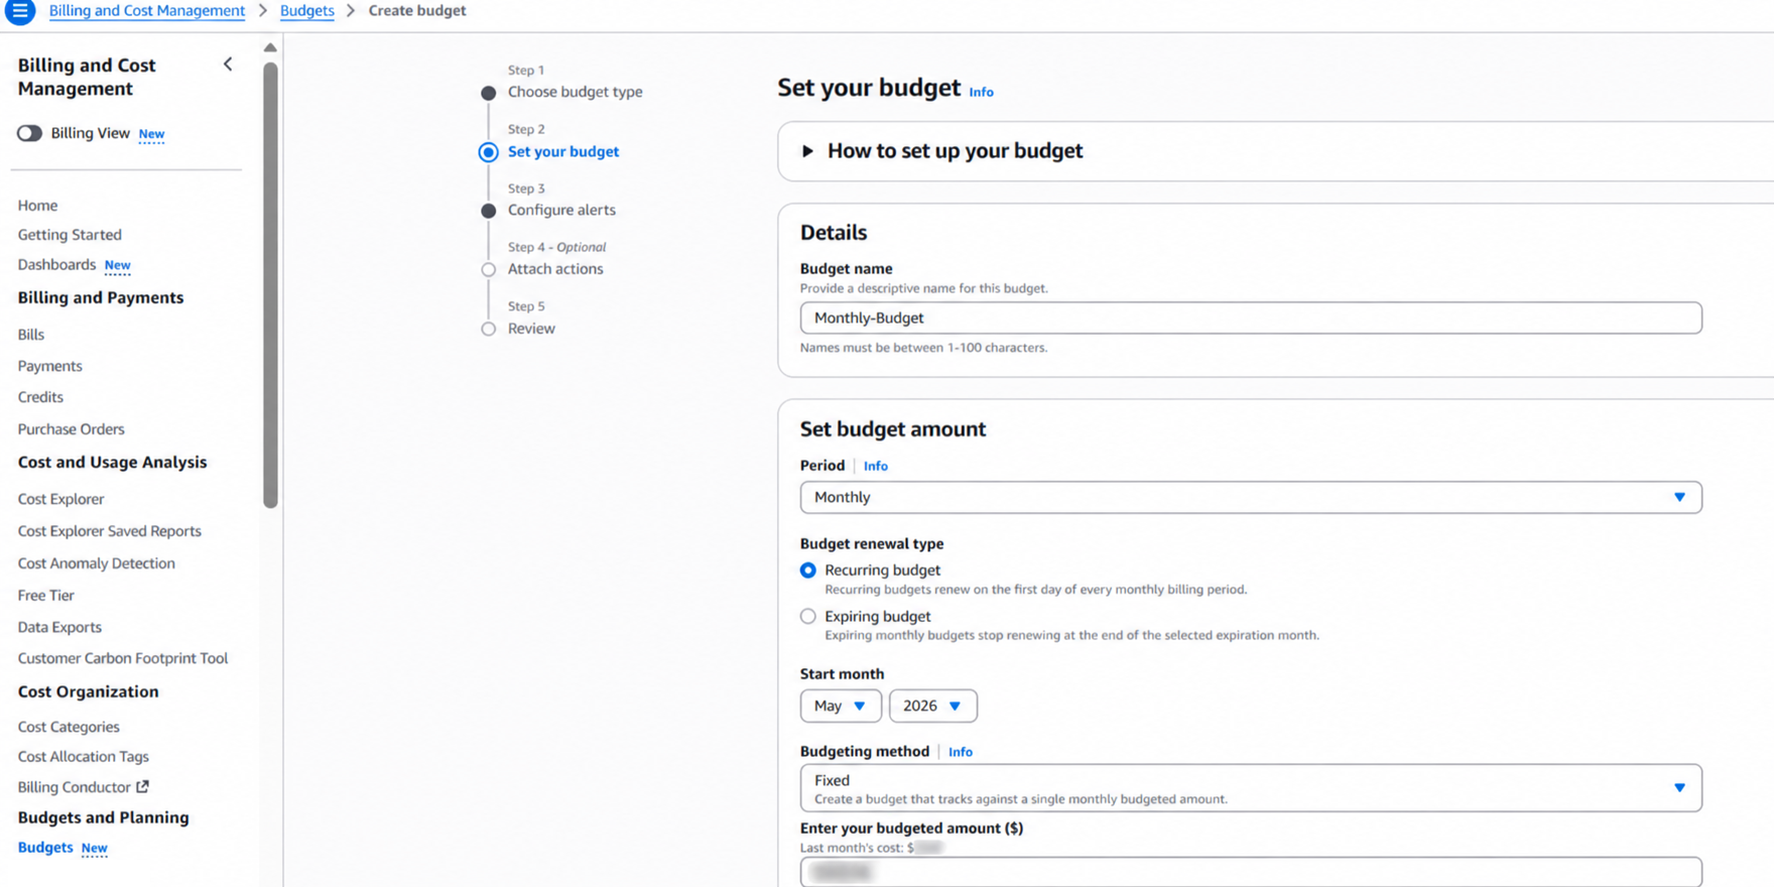
Monthly cost-budget details and amount
The scope is what matters.
I filtered the budget by a tag that identifies the app or team.
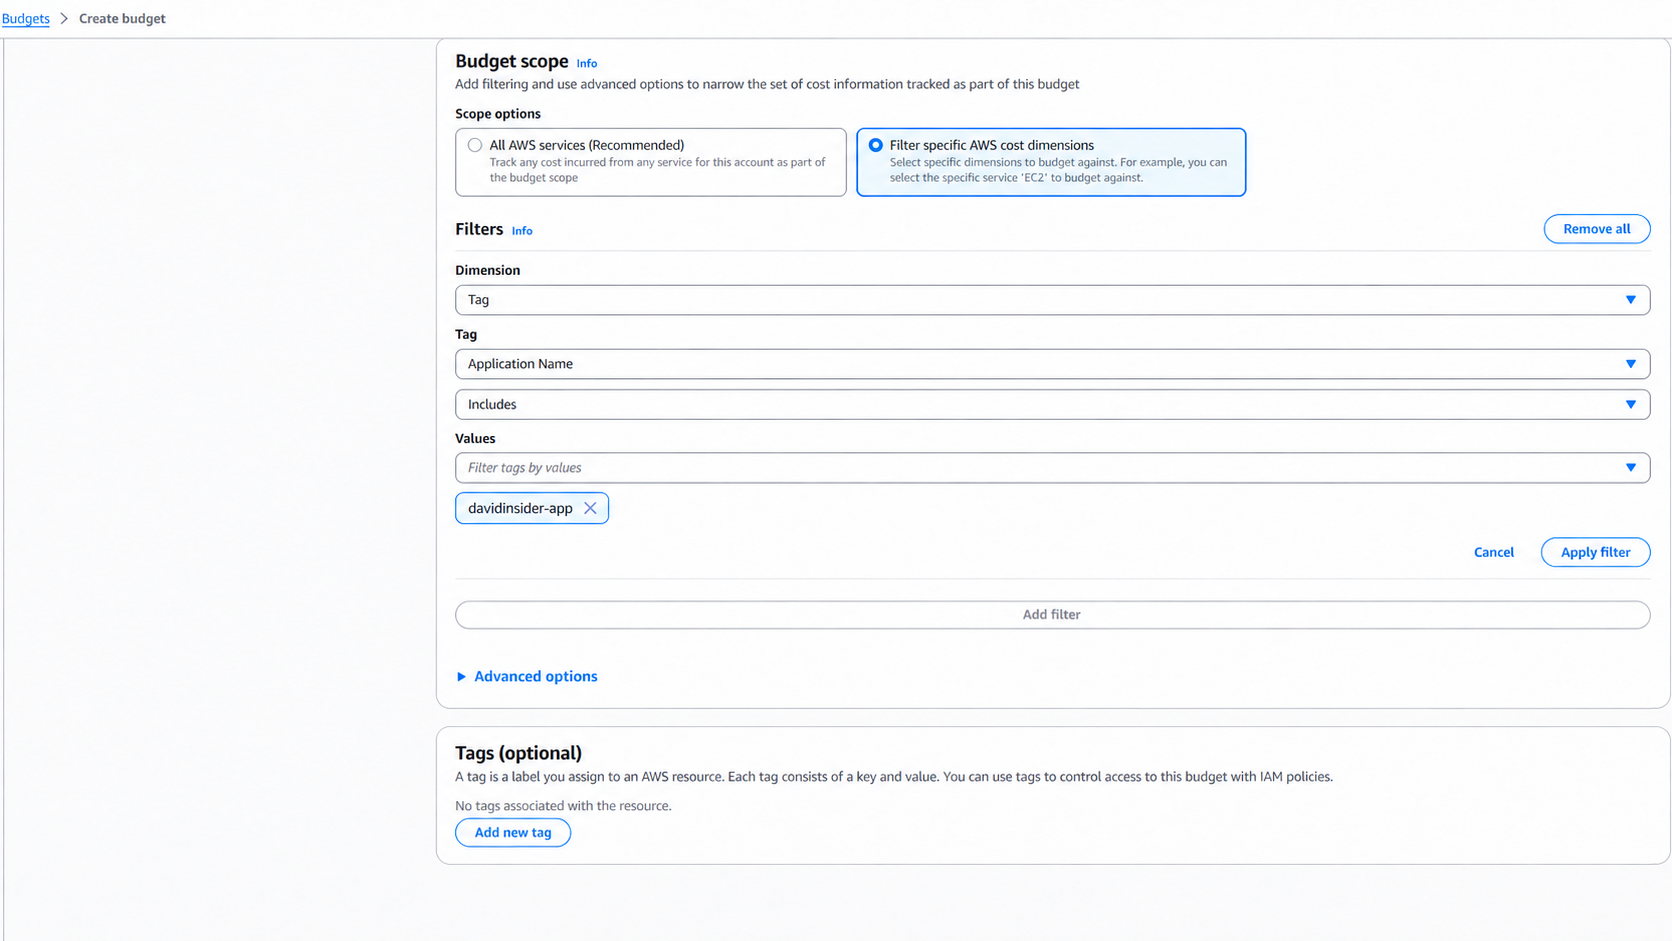
Budget filtering by tag or cost dimension
That moves you from:
one organization-wide budget
to:
team/application-specific accountability
9. Warning and breach alerts
I added two actual-spend alerts:
80%
100%
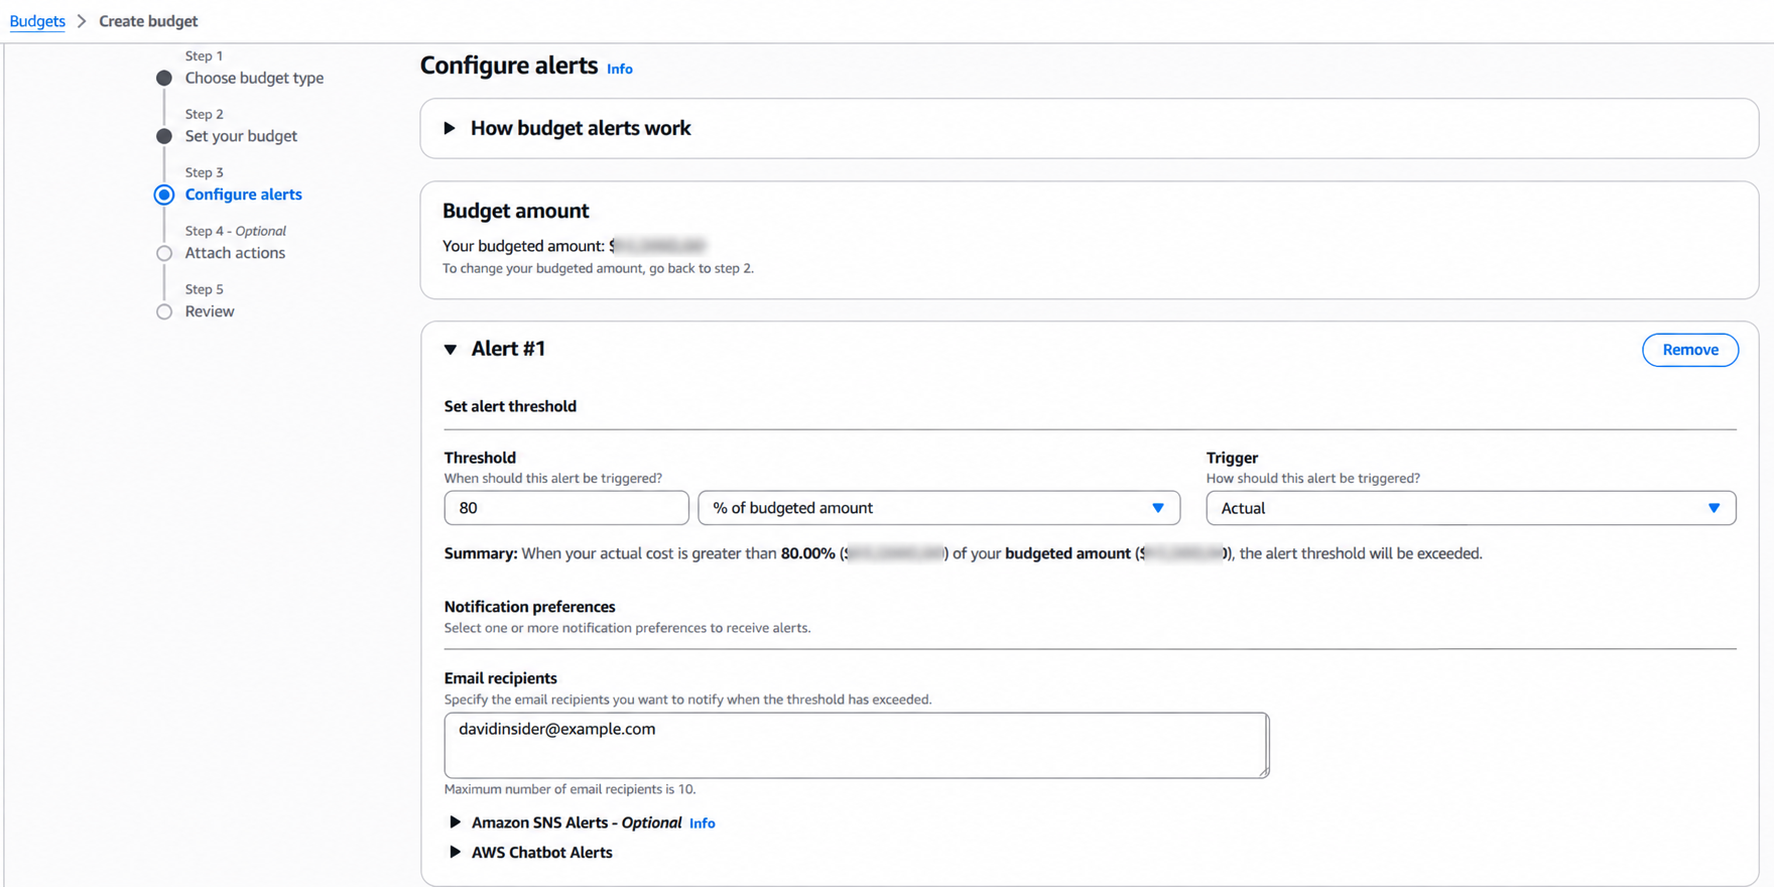
AWS Budget notification threshold configuration
I added email subscribers. You can use an SNS topic ARN instead if another automated process needs the alert.
Then I reviewed it and created the budget.
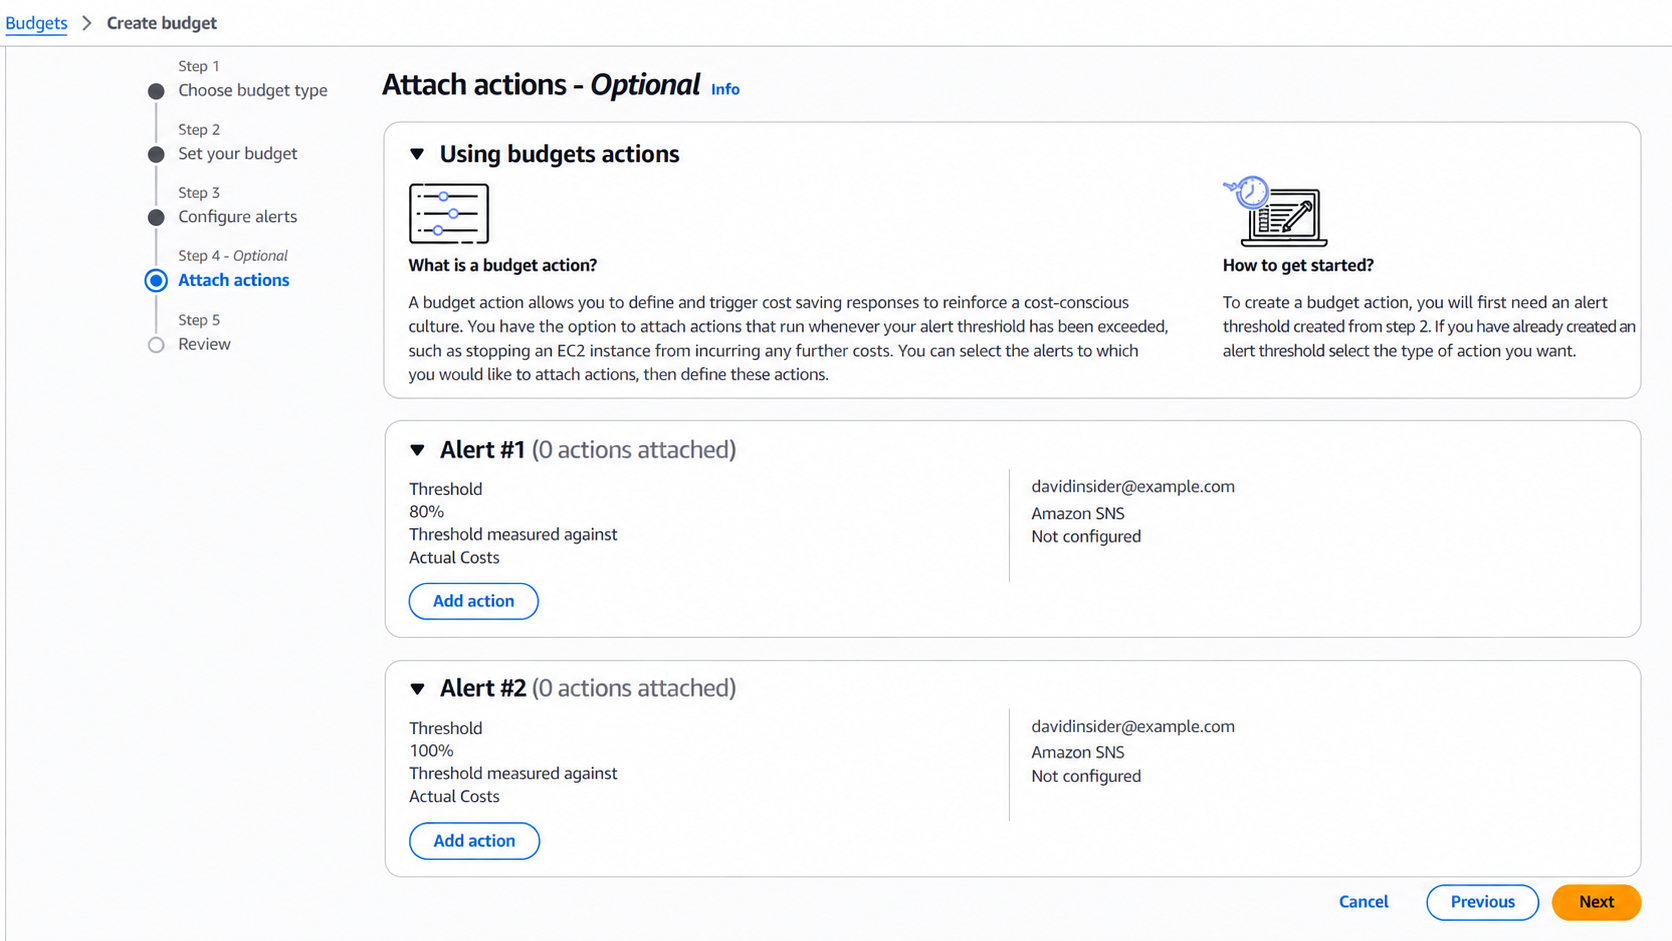
Attach actions step showing the 80% and 100% budget alerts
I repeated this for every team or app that needs its own limit.
10. The same budget from the CLI
Here is the CLI version:
aws budgets create-budget \
  --account-id 123456789012 \
  --budget '{
    "BudgetName": "Monthly-Budget",
    "BudgetLimit": {
      "Amount": "5000",
      "Unit": "USD"
    },
    "CostFilters": {
      "TagKeyValue": [
        "user:Application Name$davidinsider-app"
      ]
    },
    "TimeUnit": "MONTHLY",
    "BudgetType": "COST"
  }' \
  --notifications-with-subscribers '[{
    "Notification": {
      "NotificationType": "ACTUAL",
      "ComparisonOperator": "GREATER_THAN",
      "Threshold": 80
    },
    "Subscribers": [{
      "SubscriptionType": "EMAIL",
      "Address": "davidinsider@example.com"
    }]
  }]'
Change these for your environment:
account ID
budget amount
tag key/value
email address
Pillar 3: Preventive Guardrails with Service Control Policies
The first two pillars show what’s happening.
SCPs stop certain actions from happening at all.
They work at the organization level. They still apply even when an IAM user or role has broad access.
I used them for:
restricting unapproved AWS regions
blocking selected expensive EC2 families
preventing known high-cost operations
11. Turning on SCPs
SCPs need AWS Organizations.
I went to:
AWS Organizations
→ Policies
→ Service Control Policies
SCPs were off, so I enabled them.

Service Control Policies enabled in AWS Organizations
Now they sit at the organization layer instead of inside one account’s IAM setup.
12. Limiting workloads to approved regions
This policy keeps workloads in US East (N. Virginia) and US West (Oregon):
{
  "Version": "2012-10-17",
  "Statement": [{
    "Sid": "DenyNonApprovedRegions",
    "Effect": "Deny",
    "Action": "*",
    "Resource": "*",
    "Condition": {
      "StringNotEquals": {
        "aws:RequestedRegion": [
          "us-east-1",
          "us-west-2"
        ]
      }
    }
  }]
}
The approved regions are:
us-east-1
us-west-2
Requests to any other region get denied.
This is powerful and it can break things.
Before attaching it, list every workload outside those regions. Also check how global or regionless AWS APIs behave with this policy.
If you attach a region deny while live resources still need managing somewhere else, you can lock yourself out of them.
13. Blocking expensive EC2 families
I also wrote an SCP that blocks expensive GPU and memory-heavy instance families:
{
  "Version": "2012-10-17",
  "Statement": [{
    "Sid": "DenyExpensiveInstanceTypes",
    "Effect": "Deny",
    "Action": "ec2:RunInstances",
    "Resource": "arn:aws:ec2:*:*:instance/*",
    "Condition": {
      "StringLike": {
        "ec2:InstanceType": [
          "p4d.*",
          "p3.*",
          "x1e.*",
          "u-*"
        ]
      }
    }
  }]
}
It blocks:
p4d.*
p3.*
x1e.*
u-*
for:
ec2:RunInstances
The point isn’t to ban these forever. It’s to make someone go through an approval path before launching one.
14. Attaching and testing the SCP
After creating the SCP, I went back to the org tree.
I picked the target account or OU and attached the policy.
Then I tested it by trying something blocked:
launch an EC2 instance
in a denied region
or
with a blocked instance family
It failed with an explicit deny from the SCP. That’s what I wanted.
Test policies in a safe account or OU before rolling them out wide.
Pillar 4: Continuous Optimization
Governance doesn’t end once tags, budgets, and SCPs are in place.
The last pillar makes optimization a regular habit.
I used:
AWS Trusted Advisor
AWS Compute Optimizer
to find resources that are idle, oversized, or wasteful.
15. Reviewing Trusted Advisor
I went to:
Trusted Advisor
→ Cost Optimization
The full set of cost checks depends on your AWS Support plan.
The checks I focused on (exact names differ a bit in the console):
Low Utilization Amazon EC2 Instances
Idle Load Balancers
Underutilized EBS Volumes
Unassociated Elastic IP Addresses
Idle RDS DB Instances
I opened each one and looked at the affected resources and the estimated monthly savings.
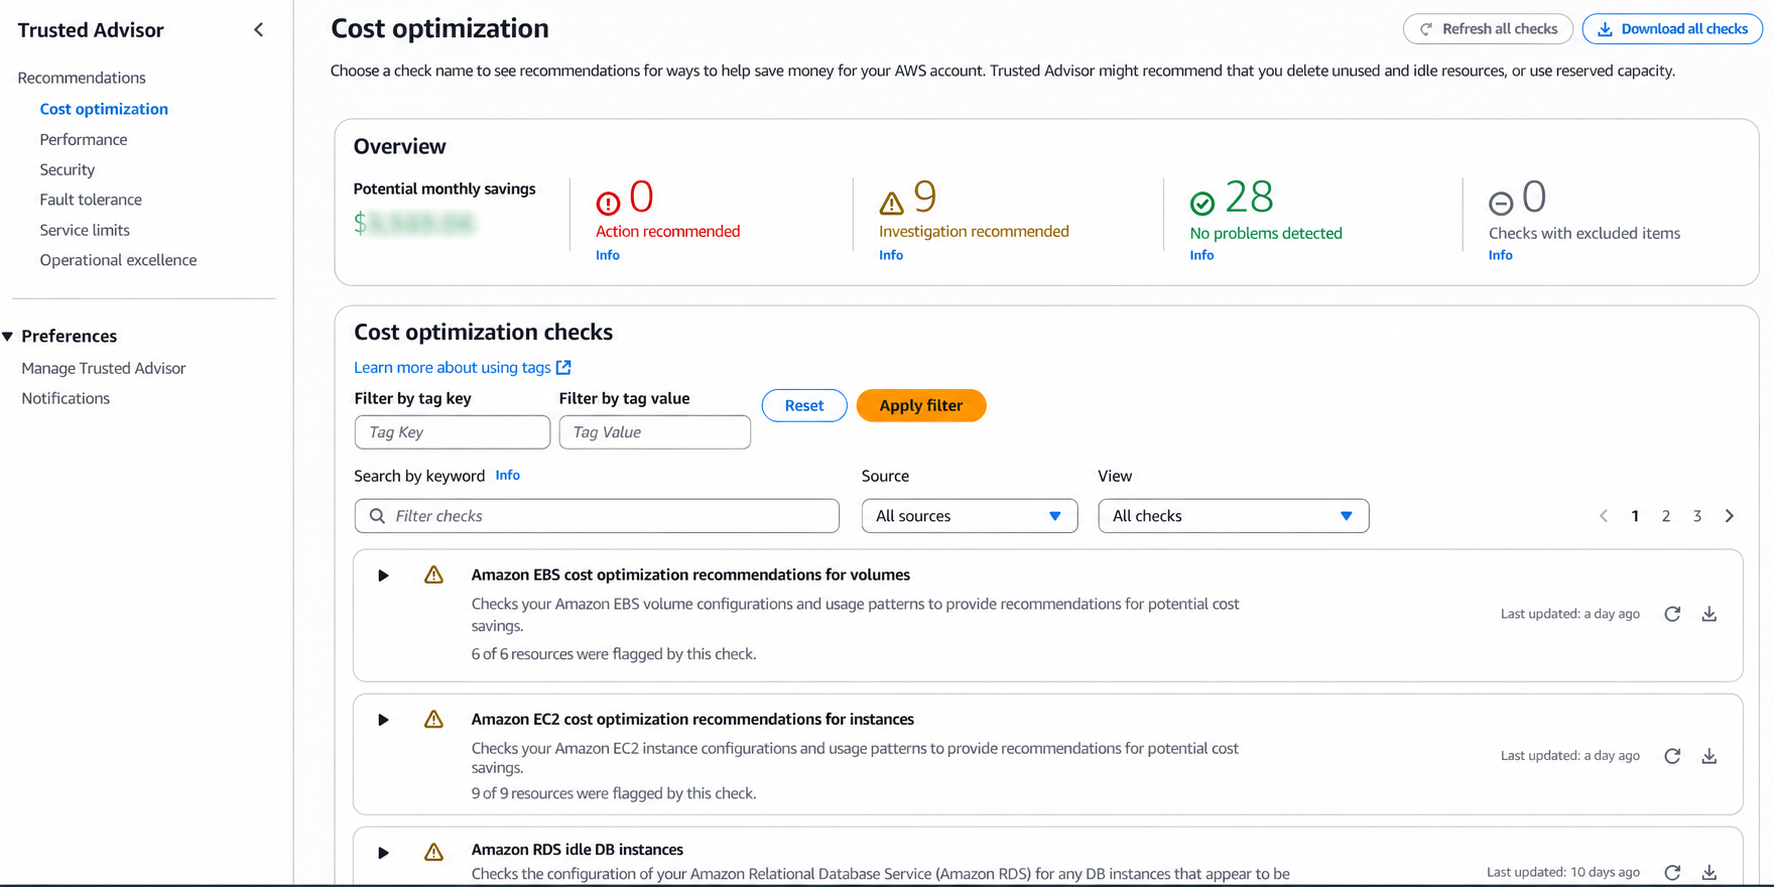
Trusted Advisor Cost Optimization findings
You can export the findings for a monthly review.
I used the Team tag from Pillar 1 to find who should confirm whether a resource can be:
stopped
resized
terminated
Anything left open goes on the normal engineering backlog with its expected savings attached.
16. Opting in to Compute Optimizer
For better rightsizing advice I opened:
AWS Compute Optimizer
You can opt in for:
one account
or
organization-wide coverage
Full recommendations only show up after it collects some usage history.
Then I opened:
EC2 instances
and filtered for:
Finding:
Over-provisioned
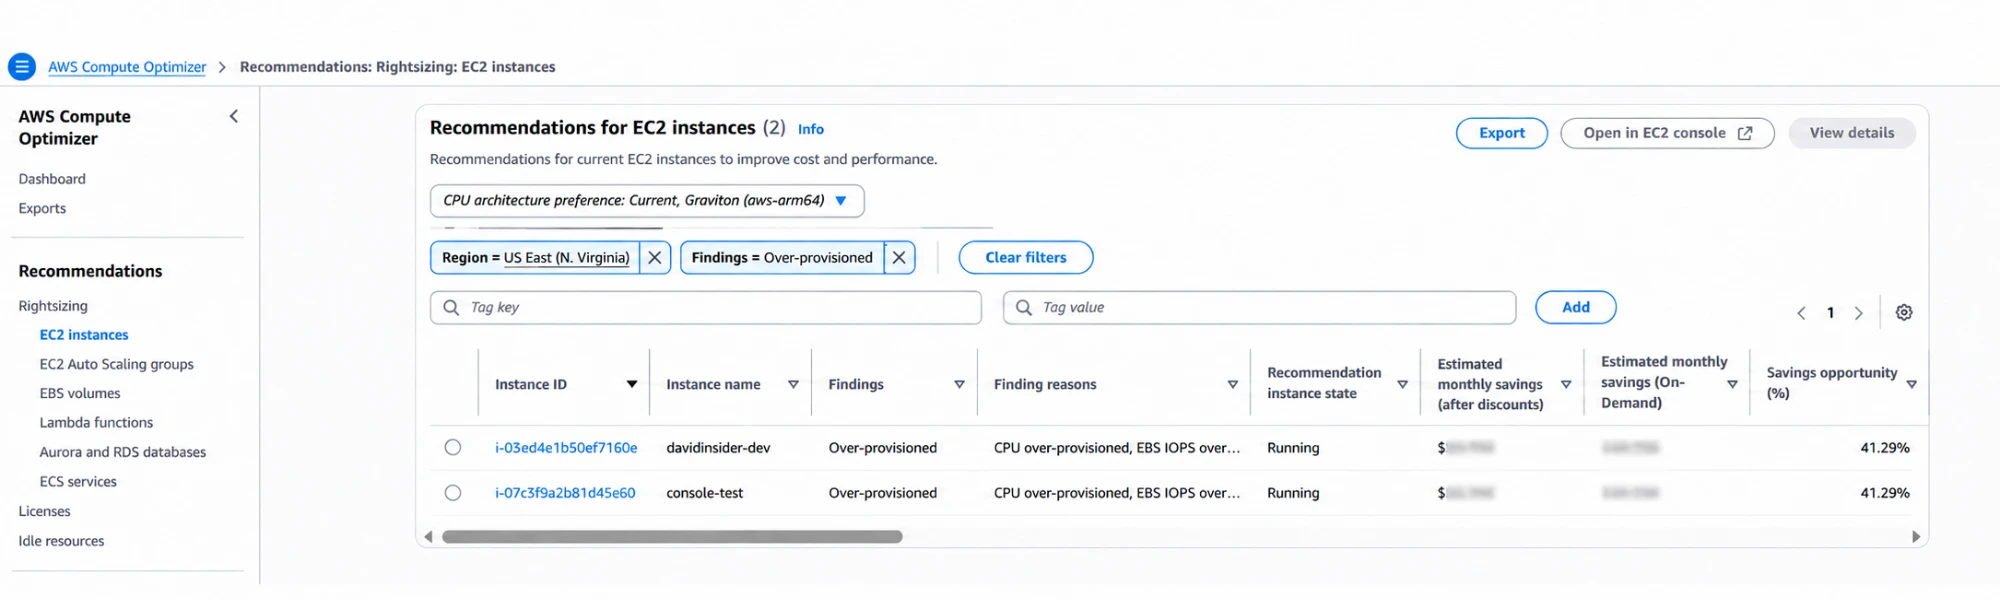
AWS Compute Optimizer EC2 recommendations
For each instance it shows things like:
current instance type
recommended instance type
projected utilization
estimated savings
Check with the app owner before changing anything in production.
17. Making it a recurring backlog
Don’t leave Trusted Advisor and Compute Optimizer as dashboards someone checks once in a while.
I set up a schedule instead:
monthly:
Trusted Advisor cost findings

quarterly:
Compute Optimizer backlog

continuously:
budget alerts
anomaly alerts
Config compliance
That way optimization is just part of normal operations.
18. The example scenario results
Back to the SaaS scenario from the start. The target outcome looks like this:
Before:
AED 96,000 per month

After:
AED 71,500 per month

Time:
90 days
Before governance:
no reliable tagging
one unexplained Cost Explorer number
month-end discovery of overspend
forgotten European resources
no consistent cleanup process
infrequent rightsizing
After governance:
resources attributed by tags
per-team spend visible
80% budget alerts
SCP restrictions on unapproved regions
monthly Trusted Advisor review
quarterly Compute Optimizer review
These are example numbers. They aren’t a guaranteed savings figure.
19. Where to start
Don’t try to build all of this in one day.
Start with visibility:
1. Enable Cost Explorer.
2. Group spend by a team/application tag.
3. Measure how much spend appears as untagged.
4. Configure one budget for the highest-spend area.
5. Review the top Trusted Advisor findings.
6. Define the mandatory tag taxonomy.
That gives you enough data to decide where stricter controls should go next.
20. The full model
Here is how it all fits:
AWS Organizations
      |
      +--> Tag Policies
      |       |
      |       +--> Environment
      |       +--> Team
      |       +--> CostCenter
      |
      +--> Service Control Policies
              |
              +--> approved regions
              +--> instance-family restrictions

AWS Config
      |
      +--> required-tags compliance

Billing & Cost Management
      |
      +--> Cost Explorer
      +--> Cost Anomaly Detection
      +--> AWS Budgets

Optimization
      |
      +--> Trusted Advisor
      +--> Compute Optimizer
Each layer solves a different problem.
Tags show ownership.
Config finds non-compliance.
Cost Explorer explains past spend.
Budgets set hard limits.
Anomaly Detection catches strange behavior.
SCPs stop known expensive mistakes.
Trusted Advisor and Compute Optimizer show what to fix next.
21. What I learned
Tagging is a requirement, not decoration. If you can’t tie a resource to an owner or cost center, nobody is accountable for it.
Scope visibility to teams and apps. One org-wide monthly number shows up too late and tells you nothing useful.
Aim guardrails at known mistakes. If you never want unreviewed GPU instances or certain regions, write that rule down in a policy. Don’t rely on memory.
Optimization needs an owner and a schedule. Recommendations only save money when someone acts on them.
Test controls before rolling them out. Tag enforcement, budget scopes, and SCP denies can all backfire if you push them straight to production.
Wrapping up
Cost governance works best when you combine attribution, visibility, prevention, and regular optimization.
A tag standard alone doesn’t stop waste.
Budgets alone don’t show who owns the spend.
SCPs can block behavior, but they can’t show where money is already going.
Optimizer recommendations alone don’t create accountability.
Together they give you a repeatable routine:
Tag everything.
Measure by owner.
Alert before overspend.
Block known bad patterns.
Review optimization opportunities continuously.
That’s the shift from reacting to the bill after the month closes to controlling cost every day.